A reliable starter is essential for getting your Kia Optima on the road every day. When this component begins to fail, even a well maintained vehicle can suddenly refuse to start. Many owners immediately assume the battery is dead, but the real problem is often the starter motor. Understanding the warning signs can save you from unnecessary repairs, expensive towing fees, and the frustration of being stranded at the worst possible moment.
This complete Kia Optima starter replacement guide explains everything you need to know before replacing the starter motor. Whether you drive an older Kia Optima or a newer model, learning how the starting system works will help you diagnose problems with greater confidence. Instead of replacing parts based on guesswork, you can identify the actual cause of the no start condition and choose the most effective repair solution.
You will learn how to recognize common starter failure symptoms, locate the starter motor, estimate replacement costs, prepare the right tools, and complete the installation safely. This guide also explains the differences between OEM and aftermarket starters, helping you make an informed decision based on your budget and long term reliability expectations.
If you enjoy working on your own vehicle, replacing the starter can be a rewarding DIY project that reduces labor expenses. However, success depends on proper diagnosis, careful preparation, and following the correct installation procedure. By the end of this guide, you will have the knowledge needed to determine whether your Kia Optima requires a new starter and how to replace it correctly while avoiding the most common mistakes.
Contents
- What Does the Starter Do in a Kia Optima?
- Common Symptoms of a Bad Kia Optima Starter
- Kia Optima Starter Replacement Cost
- Kia Optima Starter Location
- Tools and Parts Needed for Kia Optima Starter Replacement
- Safety Steps Before Replacing the Starter
- How to Replace a Kia Optima Starter Step by Step
- DIY vs Professional Kia Optima Starter Replacement
- Common Mistakes to Avoid During Kia Optima Starter Replacement
- Kia Optima Starter Replacement FAQs
- Conclusion
What Does the Starter Do in a Kia Optima?
The starter motor is a vital part of your Kia Optima’s starting system. Its job is simple. It converts electrical energy from the battery into mechanical power that turns the engine. Once the engine starts running, the starter automatically disengages.
The starting process begins when you turn the ignition key or press the start button. The battery sends power to the starter relay. The relay activates the starter solenoid. The solenoid then pushes the starter gear toward the flywheel. At the same time, it delivers high current to the starter motor. The motor rotates the crankshaft until the engine begins to run on its own.
Several components must work together for a successful start. These include the battery, ignition switch, starter relay, starter solenoid, starter motor, and flywheel. If one component fails, the engine may crank slowly or fail to start completely.
Many Kia Optima owners assume the starter is faulty when the engine will not start. However, this is not always true. A weak battery can produce the same symptoms. Corroded battery terminals can also interrupt the electrical flow. Loose cables and a defective starter relay may create similar problems. Testing the entire starting system helps prevent unnecessary repairs.
Like any mechanical part, the starter wears out over time. Heat, vibration, moisture, and repeated use gradually reduce its performance. The internal brushes wear down. Bearings become less efficient. The solenoid may also stop engaging consistently. As a result, starting problems become more frequent.
Understanding how the starting system works makes troubleshooting much easier. It also helps you identify the real cause of the problem. Proper diagnosis can save both time and money. Most importantly, it increases the chances of completing a successful Kia Optima starter replacement on the first attempt.
Common Symptoms of a Bad Kia Optima Starter
A failing starter usually gives several warning signs before it stops working completely. Recognizing these symptoms early can help you avoid unexpected breakdowns and reduce repair costs. One of the most common signs is a clicking sound when you turn the ignition key or press the start button. The starter solenoid may engage, but the starter motor does not have enough power to crank the engine. Although a weak battery can produce similar symptoms, a worn starter is often the root cause when the battery is in good condition.
Another common symptom is an engine that refuses to crank even though the dashboard lights, radio, and other electrical accessories continue to work normally. This often indicates that electrical power is reaching the vehicle, but the starter motor cannot rotate the engine. Some Kia Optima owners also experience intermittent starting problems. The vehicle may start without difficulty one day and fail the next. This pattern usually points to worn internal brushes, a failing solenoid, or damaged electrical contacts inside the starter assembly.
Unusual noises can also indicate that a Kia Optima starter replacement is necessary. A grinding sound during startup may occur when the starter gear does not mesh correctly with the flywheel. Ignoring this problem can damage both components and increase repair expenses. In some cases, an overheating starter produces a burning smell or even light smoke because excessive electrical resistance generates heat inside the motor.
As the starter continues to wear out, the engine may crank more slowly with each attempt. Eventually, the starter will no longer engage, leaving the vehicle unable to start. Before replacing the starter, inspect the battery, battery terminals, cables, relay, and wiring connections. A complete diagnosis helps identify the actual fault and ensures that replacing the starter is the correct solution.
Kia Optima Starter Replacement Cost
The cost of a Kia Optima starter replacement depends on several factors, including the model year, engine type, labor rates, and the quality of the replacement part. In most cases, owners can expect to pay between $350 and $600 for a professional replacement. This estimate usually includes both labor and parts. Vehicles with limited access to the starter may require additional labor, which increases the total repair cost. Prices also vary depending on your location and the repair shop you choose.
If you decide to replace the starter yourself, the overall expense can be much lower. Most aftermarket starter motors cost between $80 and $250, while genuine OEM starters often range from $200 to $450. Choosing an OEM part generally provides better fitment, higher reliability, and longer service life. However, many high quality aftermarket brands also deliver dependable performance at a more affordable price. Comparing warranty coverage and customer reviews can help you select the right replacement.
Labor is often the largest part of the repair bill. A professional technician typically needs one to three hours to complete the installation, depending on the engine layout and the accessibility of the starter motor. Some Kia Optima models require the removal of nearby components before the starter can be accessed. This extra work naturally increases labor charges.
Before purchasing a new starter, it is important to confirm that the starter is actually causing the problem. A weak battery, corroded battery terminals, damaged cables, or a faulty starter relay can produce similar symptoms. Performing a proper diagnosis first helps avoid unnecessary expenses and ensures that your Kia Optima starter replacement solves the starting problem the first time.
Kia Optima Starter Location
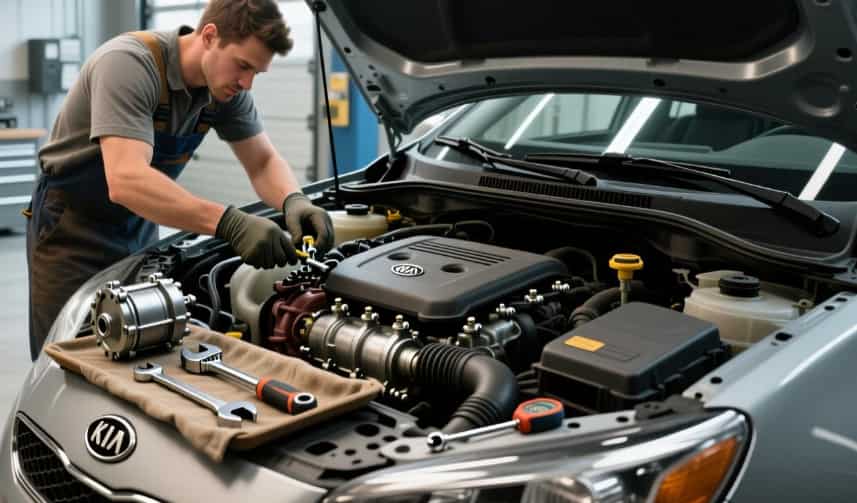
Finding the starter motor is one of the first steps before beginning a Kia Optima starter replacement. The exact location depends on the model year and engine configuration. However, the starter is typically mounted near the transmission bell housing, where it connects directly to the engine flywheel. This position allows the starter gear to engage the flywheel and rotate the crankshaft during engine startup.
On most Kia Optima models, the starter is installed on the lower side of the engine. It is often easier to access from underneath the vehicle after it has been safely lifted and supported. Some models provide enough working space to remove the starter without taking off additional components. Others may require the removal of the engine splash shield, air intake assembly, or nearby brackets to create enough clearance. Checking the service manual for your specific model year can save time and prevent unnecessary disassembly.
The starter is easy to identify once you know what to look for. It is a compact cylindrical motor with an attached solenoid and two or more electrical connections. A large positive battery cable connects directly to the starter, while a smaller control wire activates the solenoid when the ignition system sends a starting signal. Before disconnecting any wiring, always remove the negative battery cable to eliminate the risk of electrical short circuits.
Accessing the starter may seem straightforward, but limited space can make the job more challenging. Good lighting, the correct tools, and careful planning will make the replacement process much easier. Taking a few minutes to locate the starter and inspect the surrounding components before removing any bolts can also help prevent installation mistakes and reduce the overall repair time.
Tools and Parts Needed for Kia Optima Starter Replacement
Preparing the right tools and replacement parts before you begin will make the job faster and safer. It also reduces the chance of damaging surrounding components or stopping the repair halfway because a required tool is missing. Although the exact equipment may vary by model year and engine type, most Kia Optima starter replacement jobs can be completed with common hand tools and basic safety equipment.
A quality replacement starter is the most important part of the repair. Before installation, compare the new starter with the original unit. Check the mounting points, electrical terminals, gear size, and connector locations to confirm they match perfectly. Choosing a high quality OEM starter or a trusted aftermarket brand can improve reliability and reduce the risk of future starting problems.
A standard socket set, ratchet, extension bars, and combination wrenches are required to remove the mounting bolts and electrical connections. A torque wrench is also recommended because it allows you to tighten the mounting bolts according to the manufacturer’s specifications. Proper torque helps prevent loose fasteners while protecting the threads from damage. Penetrating oil can be useful if the bolts have become rusty or difficult to remove after years of service.
Safety should always be a priority during any automotive repair. Wear protective gloves to improve grip and protect your hands from sharp edges. Safety glasses help prevent dirt and debris from entering your eyes while working underneath the vehicle. If access to the starter requires lifting the car, use a hydraulic floor jack together with high quality jack stands. Never rely on the jack alone to support the vehicle.
Keeping a flashlight or work light nearby will improve visibility in tight spaces around the engine and transmission. A magnetic parts tray is also helpful for storing bolts and small hardware during removal. Spending a few minutes preparing the correct tools before starting the repair will make the entire Kia Optima starter replacement process more efficient and much less stressful.
Safety Steps Before Replacing the Starter
Safety should always come first when performing a Kia Optima starter replacement. The starter is connected directly to the vehicle’s electrical system and is mounted close to several important engine and transmission components. Taking a few simple precautions before beginning the repair can prevent injuries, protect your vehicle, and make the installation process much smoother.
Start by parking the vehicle on a flat and stable surface. Shift the transmission into Park if the vehicle has an automatic transmission. Apply the parking brake firmly to prevent any movement while you are working. If the engine has been running, allow it to cool completely before touching any nearby components. The exhaust system and engine block can remain extremely hot for a long time after the engine is turned off.
Disconnect the negative battery cable before removing any electrical connections. This is one of the most important safety steps because it eliminates the risk of electrical short circuits and accidental sparks. Once the battery is disconnected, keep the cable away from the battery terminal until the installation is complete.
If the starter is located underneath the vehicle, raise the car with a hydraulic floor jack and support it securely with jack stands. Make sure the stands are placed on solid lifting points recommended by the manufacturer. Never work beneath a vehicle that is supported only by a jack. A stable work area provides better access and greatly reduces the risk of accidents.
Before removing the starter, inspect the surrounding area carefully. Identify the electrical connectors, mounting bolts, and nearby hoses or wiring harnesses. Taking a quick photo with your phone can help you remember the original routing during reassembly. Organizing the bolts and electrical connectors as they are removed also makes installation easier. Careful preparation reduces mistakes and helps ensure that your Kia Optima starter replacement is completed safely and correctly.
How to Replace a Kia Optima Starter Step by Step
Replacing the starter on your Kia Optima becomes much easier when you prepare the right tools and follow each step carefully. Although engine layouts vary between model years, most vehicles follow a similar replacement procedure. Careful preparation helps you avoid mistakes and ensures the new starter performs as expected.
First, confirm that the starter causes the problem. Test the battery with a multimeter and inspect the battery terminals for corrosion. Next, check the starter relay, battery cables, and ground connections. A weak battery or damaged cable can create the same symptoms as a failed starter. A proper diagnosis saves both time and money.
After confirming the fault, disconnect the negative battery cable. This simple step protects the electrical system and prevents accidental short circuits. If you need access from below, raise the vehicle with a hydraulic floor jack and support it with jack stands. Always check that the vehicle sits securely before working underneath it.
Locate the starter near the transmission bell housing. Inspect the surrounding area and identify every electrical connector and mounting bolt. Some Kia Optima models require you to remove the splash shield, air intake components, or small brackets before you can reach the starter. Keep every bolt and fastener in a safe place to simplify reassembly.
Disconnect the electrical connections from the starter solenoid. Remove the signal wire first and then disconnect the main battery cable. Hold each connector carefully while loosening the retaining nuts. Avoid pulling on the wires because this can damage the terminals or wiring harness.
Support the starter with one hand while removing the mounting bolts. Lower the old starter carefully and keep it away from nearby hoses, sensors, and wiring. Compare the replacement starter with the original unit before installation. Check the mounting holes, electrical terminals, drive gear, and overall dimensions. Everything should match perfectly.
Position the new starter against the engine and install each mounting bolt by hand. Tighten the bolts evenly with a torque wrench that matches the manufacturer’s specifications. This step keeps the starter aligned with the flywheel and helps prevent premature wear.
Reconnect every electrical connector in its original position. Tighten each connection securely and inspect the wiring one more time. Make sure no cable touches moving engine parts or hot exhaust components. Reinstall every bracket, shield, or intake component that you removed earlier.
Reconnect the negative battery cable after completing the installation. Start the engine several times and listen carefully during each attempt. The engine should crank smoothly and start without hesitation. Finally, take the vehicle for a short test drive and perform another starting test after the engine reaches normal operating temperature. This final inspection confirms that your Kia Optima starter replacement was successful and that the new starter operates correctly.
DIY vs Professional Kia Optima Starter Replacement
Many Kia Optima owners wonder whether they should replace the starter themselves or hire a professional mechanic. The right choice depends on your mechanical experience, available tools, and the amount of time you can dedicate to the repair. Both options offer clear advantages, but understanding the differences helps you make the best decision for your situation.
A DIY Kia Optima starter replacement can save a significant amount of money because you eliminate labor costs. Most vehicle owners only need to purchase the replacement starter and a few basic tools. If you already own a socket set, torque wrench, and hydraulic floor jack, your total expense may remain well below the cost of a professional repair. Completing the work yourself also gives you a better understanding of your vehicle and allows you to inspect nearby components during the repair.
However, replacing a starter requires patience and careful attention to detail. Limited working space around the transmission can make bolt removal difficult on some Kia Optima models. You must also diagnose the starting problem correctly before replacing any parts. Installing a new starter will not solve the issue if the battery, relay, or electrical wiring actually caused the failure.
A professional mechanic offers experience, specialized equipment, and faster service. Most repair shops can diagnose the problem accurately and complete the installation within a few hours. Many shops also provide a warranty for both parts and labor, giving you additional peace of mind if another issue appears after the repair.
If you have basic mechanical skills and enjoy working on your vehicle, a DIY repair can be a practical and cost effective solution. On the other hand, professional service remains the better choice if you lack the necessary tools, feel uncertain about electrical diagnosis, or encounter limited access to the starter. Choosing the option that matches your skill level will help ensure a successful Kia Optima starter replacement.
Common Mistakes to Avoid During Kia Optima Starter Replacement
Many starter replacement problems occur because vehicle owners rush through the repair or skip important inspection steps. Taking a little extra time before and during the installation can prevent expensive mistakes and improve the reliability of the new starter. A careful approach also reduces the risk of replacing parts that still work properly.
One of the most common mistakes is replacing the starter without testing the battery first. A weak battery often produces the same symptoms as a failing starter. Low battery voltage, loose battery terminals, or corroded cables can prevent the engine from cranking normally. Always inspect the entire starting system before purchasing a replacement starter.
Another frequent mistake involves buying the wrong replacement part. Kia Optima models use different starters depending on the model year and engine type. Always compare the part number, mounting holes, electrical terminals, and drive gear before installation. Choosing the correct starter helps ensure proper fitment and reliable performance.
Many DIY mechanics forget to disconnect the negative battery cable before removing the starter. This simple oversight can create electrical short circuits or damage sensitive electronic components. Disconnecting the battery only takes a few minutes, but it greatly improves safety throughout the repair.
Incorrect bolt installation can also create long term problems. Some people tighten the mounting bolts too much, while others leave them too loose. Always start the bolts by hand and tighten them with a torque wrench according to the manufacturer’s specifications. Proper bolt torque keeps the starter aligned with the flywheel and helps prevent premature wear.
Many people overlook the electrical connections after installing the new starter. Dirty terminals, loose nuts, or damaged wires can create intermittent starting problems even when the new starter works perfectly. Before starting the engine, inspect every connection carefully and verify that all cables remain secure. Performing these final checks will help your Kia Optima starter replacement deliver reliable performance for many years.
Kia Optima Starter Replacement FAQs
Many Kia Optima owners have similar questions before replacing a starter. The answers below address the most common concerns and can help you make better repair decisions.
Can I replace the starter on my Kia Optima myself?
Yes. Many owners can complete a Kia Optima starter replacement with basic mechanical knowledge and the proper tools. The job becomes much easier if you follow the service manual and verify that the starter has actually failed before removing any parts.
How long does a starter replacement take?
Most experienced technicians complete the repair in one to three hours. A first time DIY mechanic may need additional time to remove surrounding components, inspect the electrical connections, and install the new starter correctly. The total repair time also depends on the model year and engine configuration.
How can I tell if the starter is bad instead of the battery?
Start by testing the battery voltage with a multimeter. If the battery is fully charged but the engine still will not crank, inspect the starter, starter relay, battery cables, and ground connections. A complete diagnosis helps identify the actual cause and prevents unnecessary repairs.
Should I choose an OEM or aftermarket starter?
An OEM starter usually offers the best fit, consistent performance, and long term durability. A high quality aftermarket starter can also provide excellent reliability at a lower price. Compare warranty coverage, manufacturer reputation, and customer reviews before making your decision.
What should I inspect after installing the new starter?
Check every electrical connection and make sure each mounting bolt is fully tightened. Reconnect the negative battery cable and start the engine several times. Listen for unusual noises and confirm that the engine cranks smoothly. A short test drive and another restart after the engine reaches operating temperature can help verify a successful Kia Optima starter replacement.
Conclusion
A successful Kia Optima starter replacement begins with an accurate diagnosis and careful preparation. Although a failed starter often causes a no start condition, a weak battery, damaged cables, or a faulty starter relay can create similar symptoms. Testing the entire starting system before replacing any parts will save time, reduce repair costs, and prevent unnecessary work.
Replacing the starter is a practical DIY project for many vehicle owners who have the right tools and basic mechanical experience. Following the correct installation procedure, using a high quality replacement starter, and tightening every connection properly will improve reliability and help the new starter deliver consistent performance. Paying attention to small details during the repair often makes the difference between a temporary fix and a long lasting solution.
Whether you choose to complete the repair yourself or hire a professional mechanic, understanding the replacement process allows you to make informed decisions and avoid common mistakes. With the information in this guide, you can diagnose starting problems more confidently, select the correct replacement parts, and complete your Kia Optima starter replacement safely. Proper maintenance and regular inspections will also help extend the life of your starting system and keep your Kia Optima dependable for years to come.