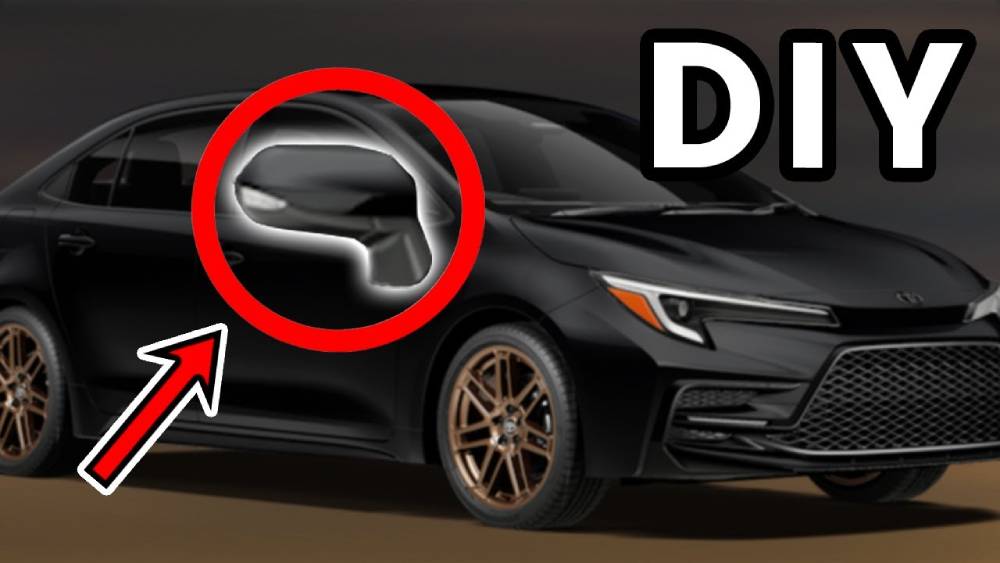
A damaged side mirror might seem like a minor inconvenience, but it can significantly impact your visibility, driving confidence, and overall safety on the road. Whether your Toyota Corolla’s side mirror was cracked in a parking lot accident, damaged by road debris, or simply stopped functioning properly, replacing it should be a priority. Fortunately, this is one of the most straightforward DIY repairs that many Corolla owners can successfully complete at home.
Many drivers assume that replacing a side mirror requires a trip to the dealership and an expensive repair bill. However, with the right replacement part, a few basic tools, and a little patience, you can often complete the job in less than an hour while saving a considerable amount of money on labor costs.
In this complete DIY guide, you will learn how to identify the correct replacement mirror for your Toyota Corolla, gather the necessary tools, safely remove the damaged mirror, and install a new one step by step. We will also cover common mistakes to avoid, estimated replacement costs, and helpful tips to ensure a smooth installation process.
By the end of this guide, you’ll have the knowledge and confidence needed to restore your Corolla’s visibility and get back on the road safely.
Contents
- Tools and Materials You’ll Need
- How to Identify the Correct Toyota Corolla Side Mirror
- Signs That Your Side Mirror Needs Replacement
- Step by Step Guide to Removing the Old Toyota Corolla Side Mirror
- Installing the New Toyota Corolla Side Mirror
- Common Mistakes to Avoid During Installation
- How Much Does Toyota Corolla Side Mirror Replacement Cost?
- Frequently Asked Questions
- Conclusion
Tools and Materials You’ll Need
Before starting the replacement process, gathering all necessary tools and materials will help you complete the job efficiently and avoid unnecessary interruptions. Most Toyota Corolla side mirror replacements require only basic hand tools that many vehicle owners already have at home.
Essential Tools
Prepare the following tools before beginning:
• Phillips screwdriver
• Flathead screwdriver
• Socket wrench set, typically 8mm, 10mm, or 12mm sockets depending on your Corolla model year
• Trim removal tool or plastic pry tool
• Needle nose pliers
• Safety gloves
• Flashlight for better visibility inside the door panel area
Using a plastic trim tool is highly recommended because it reduces the risk of scratching interior panels or breaking plastic clips during removal.
Replacement Parts
The most important component is the replacement side mirror. Make sure the new mirror matches your Corolla’s specifications, including:
• Model year compatibility
• Power adjustment features
• Heated mirror functionality
• Integrated turn signals
• Blind spot monitoring systems, if equipped
Purchasing the correct mirror before disassembly can save significant time and frustration later.
Safety Preparation
Park your vehicle on a flat surface and engage the parking brake. Turn off the ignition and remove the key. If your Corolla uses power mirrors, disconnecting the negative battery terminal is a smart precaution to prevent electrical issues while handling wiring connectors.
Taking a few extra minutes to prepare properly can make the entire repair process safer and much smoother.
How to Identify the Correct Toyota Corolla Side Mirror
One of the most common mistakes vehicle owners make is purchasing the wrong replacement mirror. Toyota Corolla side mirrors vary depending on the model year and trim level, so proper identification is essential before placing an order.
Check Your Corolla’s Model Year
Toyota has updated Corolla mirror designs multiple times over the years. A mirror designed for a 2010 Corolla may not fit a 2020 model. Start by confirming your vehicle’s exact year and trim level.
Popular Corolla generations include:
• 2003 to 2008 Corolla
• 2009 to 2013 Corolla
• 2014 to 2019 Corolla
• 2020 and newer Corolla models
The easiest way to verify your vehicle information is by checking the VIN plate or registration documents.
Determine Mirror Features
Not all side mirrors offer the same functionality. Before ordering a replacement, identify which features your current mirror includes.
Common options include:
• Manual adjustment
• Power adjustment
• Heated glass
• Integrated turn signals
• Blind spot monitoring sensors
• Power folding capability
A replacement mirror lacking the necessary features may fit physically but fail to function correctly.
OEM vs Aftermarket Mirrors
OEM mirrors are manufactured to meet Toyota’s original specifications. They generally provide excellent fitment, finish quality, and long term reliability.
Aftermarket mirrors are often less expensive and widely available. High quality aftermarket options can perform very well, but buyers should carefully review compatibility information and customer feedback before purchasing.
Selecting the correct mirror from the beginning will help ensure a smooth installation and factory-like appearance once the repair is complete.
Signs That Your Side Mirror Needs Replacement
In some situations, replacing the entire side mirror assembly is the most practical solution. Understanding the warning signs can help you determine whether repair or replacement is the better option.
Broken or Cracked Mirror Glass
A cracked mirror reduces visibility and may create distorted reflections that affect driving safety. While some vehicles allow glass-only replacement, extensive damage often makes complete mirror replacement the better choice.
Damaged Mirror Housing
The outer housing protects internal components from weather, vibration, and impact damage. Cracks, broken mounting points, or severe cosmetic damage can compromise the mirror’s stability and appearance.
Loose or Shaking Mirror Assembly
If the mirror vibrates excessively while driving or feels loose when touched, the internal mounting structure may be damaged. This issue can make it difficult to judge surrounding traffic accurately.
Malfunctioning Power Adjustment System
Power mirrors should respond smoothly to directional controls. If the mirror no longer moves properly or becomes stuck in one position, internal motors or wiring may have failed.
Non-Functioning Heated Mirrors or Turn Signals
Modern Corolla mirrors often contain additional electronic components. Heating elements, integrated turn signals, and blind spot monitoring systems can all fail over time. In many cases, replacing the entire assembly is more cost effective than attempting individual component repairs.
If your mirror exhibits one or more of these symptoms, replacement is often the safest and most reliable solution.
Step by Step Guide to Removing the Old Toyota Corolla Side Mirror
Once you have gathered the necessary tools and confirmed that you have the correct replacement mirror, it is time to remove the damaged unit. Working carefully during this stage will help prevent damage to the door panel, wiring, and mounting hardware.
Step 1: Remove the Interior Mirror Cover
Open the front door completely to gain easy access to the mirror mounting area. Locate the small triangular trim panel positioned on the inside corner of the door near the side mirror.
Using a plastic trim removal tool, gently pry the panel away from the door. Most Toyota Corolla models use retaining clips that release with light pressure. Avoid forcing the panel, as excessive pressure may crack the plastic or break the clips.
Place the trim panel in a safe location to avoid accidental damage.
Step 2: Disconnect the Electrical Connector
If your Corolla is equipped with power mirrors, heated mirrors, or integrated turn signals, you will find an electrical connector behind the trim panel.
Press the locking tab and carefully disconnect the wiring harness. Never pull directly on the wires, as this can damage the connector or create electrical issues later.
Inspect the connector for signs of corrosion, dirt, or damaged wiring. If any issues are present, address them before installing the new mirror.
Step 3: Remove the Mounting Bolts
Most Toyota Corolla side mirrors are secured using three mounting bolts located behind the interior trim panel.
Using the appropriate socket wrench, begin removing the bolts while supporting the mirror from the outside of the vehicle with your free hand. This prevents the mirror from falling once the final bolt is removed.
Keep all hardware organized, as some replacement mirrors may not include new mounting bolts.
Step 4: Remove the Damaged Mirror Assembly
After all mounting bolts have been removed, carefully pull the mirror assembly away from the door.
If wiring is routed through the mounting area, gently guide the connector through the opening without forcing it.
Inspect the mounting surface for debris, damaged seals, rust, or broken plastic components. Cleaning the area before installation will help ensure a secure fit and proper weather sealing.
At this point, the old mirror should be completely removed and the vehicle should be ready for installation of the replacement unit.
Installing the New Toyota Corolla Side Mirror
Installing the new mirror is generally easier than removing the damaged one. Taking your time during installation will help ensure proper alignment and long term reliability.
Step 1: Position the Replacement Mirror
Carefully align the new mirror with the mounting holes on the door.
If the mirror includes electrical features, route the wiring harness through the door opening before positioning the assembly against the mounting surface.
Ensure the mirror sits flush against the door and that any weather seals are correctly seated.
Step 2: Install and Tighten the Mounting Bolts
Insert the mounting bolts by hand to avoid cross threading.
Once all bolts are started, tighten them evenly using a socket wrench. Alternate between bolts rather than fully tightening one at a time. This helps distribute pressure evenly across the mounting surface.
The mirror should feel secure, but avoid excessive tightening. Over tightening can crack plastic mounting points or damage the door structure.
Step 3: Reconnect the Electrical Wiring
Reconnect the wiring harness until the locking tab clicks into place.
Double check that the connector is fully seated and that no wires are pinched or twisted.
Proper electrical connections are essential for power adjustment, heating functions, integrated turn signals, and blind spot monitoring systems.
Step 4: Reinstall the Interior Trim Panel
Align the trim panel clips with their mounting holes and press the panel firmly into position.
You should hear the clips engage as the panel seats correctly against the door.
Inspect the edges to ensure there are no gaps or loose sections.
Step 5: Test All Mirror Functions
Before considering the repair complete, test every available feature.
Verify the following:
• Power mirror adjustment
• Mirror heating function
• Integrated turn signal operation
• Blind spot monitoring indicators
• Folding mechanisms, if equipped
Testing now allows you to identify and correct any installation issues before reassembling additional components.
Common Mistakes to Avoid During Installation
Even though replacing a Toyota Corolla side mirror is a relatively simple repair, a few common mistakes can create unnecessary problems. Avoiding these errors will improve the quality of your repair and help ensure the new mirror performs properly for years to come.
Purchasing the Wrong Replacement Mirror
One of the most frequent mistakes involves ordering a mirror that does not match the vehicle’s year, trim level, or feature package.
Always verify compatibility before purchasing. A mirror that appears identical may have different mounting points, wiring connectors, or electronic functions.
Forgetting to Disconnect or Reconnect Wiring
Electrical connectors can easily be overlooked during installation.
Failure to reconnect the wiring harness properly may result in non functioning power adjustments, heated mirrors, turn signals, or blind spot monitoring systems.
Take a moment to verify all connections before reinstalling the trim panel.
Over Tightening Mounting Bolts
Many DIY installers assume tighter is better. In reality, excessive torque can crack plastic mounting brackets, damage threaded inserts, or deform the mirror housing.
Tighten bolts securely, but avoid applying unnecessary force.
Damaging Interior Trim Clips
Plastic clips become more fragile as vehicles age. Using metal tools or applying excessive pressure can break clips and leave trim panels loose or rattling.
Plastic trim removal tools provide a safer alternative and help preserve the vehicle’s interior components.
Skipping Functional Testing
Some owners reinstall all trim panels only to discover later that the mirror does not adjust correctly or that electronic features are not working.
Testing every function before completing the repair can save time and prevent the frustration of disassembling components a second time.
By avoiding these common mistakes, you can achieve a professional looking repair while maximizing the lifespan and performance of your new Toyota Corolla side mirror.
How Much Does Toyota Corolla Side Mirror Replacement Cost?
One of the main reasons many Toyota Corolla owners choose to replace a side mirror themselves is the potential cost savings. The total expense can vary depending on the model year, mirror features, and whether you choose an OEM or aftermarket replacement.
DIY Replacement Costs
A basic aftermarket side mirror for a Toyota Corolla typically costs between $40 and $150. Mirrors equipped with advanced features such as heating elements, integrated turn signals, blind spot monitoring, or power folding functions may cost significantly more.
If you already own the necessary tools, your only expense may be the replacement mirror itself. Even if you need to purchase a few tools, the total investment is usually lower than paying for professional labor.
Typical DIY costs include:
• Basic aftermarket mirror: $40 to $150
• OEM mirror assembly: $100 to $400+
• Trim removal tools: $10 to $20
• Socket set if needed: $20 to $50
For many Corolla owners, the complete DIY project can be completed for less than half the cost of a professional repair.
Professional Repair Costs
Repair shops typically charge both parts and labor. Labor rates vary depending on location and service provider, but side mirror replacement generally requires between thirty minutes and one hour of labor.
Average professional replacement costs include:
• Independent repair shop: $150 to $500
• Toyota dealership: $250 to $700 or more
Vehicles equipped with advanced driver assistance systems may require additional calibration procedures, which can further increase repair costs.
Potential Savings from DIY Installation
By completing the repair yourself, you may save anywhere from $100 to $400 or more depending on your vehicle configuration. In addition to saving money, many vehicle owners appreciate gaining valuable maintenance experience and confidence in handling future repairs.
Frequently Asked Questions
Can I Replace Only the Mirror Glass?
In many cases, yes. If only the glass is cracked and the housing remains undamaged, replacing the mirror glass alone may be possible. However, if the housing, mounting points, motors, or wiring are damaged, replacing the entire mirror assembly is often the better long term solution.
How Long Does It Take to Replace a Toyota Corolla Side Mirror?
For most DIY enthusiasts, the process takes between thirty minutes and one hour. First time installers may require additional time to carefully remove trim panels and reconnect wiring.
Do I Need Special Tools?
No specialized automotive equipment is typically required. A socket wrench, screwdriver set, and plastic trim removal tool are usually sufficient for most Toyota Corolla side mirror replacements.
Will an Aftermarket Mirror Fit My Toyota Corolla?
Many aftermarket mirrors fit and function very well when purchased from reputable manufacturers. The key is verifying compatibility with your vehicle’s exact year, trim level, and factory features before ordering.
Is Side Mirror Damage Covered by Insurance?
Insurance coverage depends on your policy and the cause of the damage. Comprehensive coverage may help pay for repairs resulting from vandalism, theft, or certain non collision incidents. Collision coverage may apply if the damage occurred during an accident. Contact your insurance provider for specific details regarding your policy.
Can I Drive with a Broken Side Mirror?
Driving with a damaged side mirror may be unsafe and could violate local vehicle regulations. Reduced visibility increases the risk of accidents when changing lanes, merging, or parking. Replacing the mirror as soon as possible is strongly recommended.
Conclusion
Replacing a Toyota Corolla side mirror may seem intimidating at first, but it is actually one of the most manageable DIY vehicle repairs for beginners and experienced car owners alike. With the correct replacement part, a few basic tools, and careful attention to detail, most drivers can complete the job in less than an hour.
Throughout this guide, we covered everything from identifying the correct replacement mirror and gathering the necessary tools to removing the damaged assembly and installing a new one. We also explored common mistakes to avoid and compared the costs of DIY installation versus professional repair.
The benefits of replacing your Toyota Corolla side mirror yourself go beyond saving money. You restore essential visibility, improve driving safety, maintain your vehicle’s appearance, and gain valuable hands on maintenance experience. Most importantly, you can complete the repair on your own schedule without the inconvenience of leaving your vehicle at a repair shop.
If your side mirror has been cracked, broken, or malfunctioning, there is no need to delay the repair. By following the steps outlined in this guide, you can confidently tackle the project and get your Toyota Corolla back to its optimal condition.
Have you recently replaced a Toyota Corolla side mirror yourself? Share your experience, tips, or questions in the comments below. Your insights may help other Corolla owners complete their repairs more successfully.