A leaking sunroof is usually caused by a clogged drain, a disconnected or damaged drain tube, a deteriorated seal, or incorrect sunroof glass alignment. Fixing the leak starts with identifying which of these problems is allowing water to enter the vehicle. Replacing the weatherstrip or applying sealant without diagnosing the source can leave the actual problem unresolved.
Most sunroof assemblies are designed to manage small amounts of water that pass around the glass. Water enters a surrounding tray or channel and flows through drain tubes toward outlets lower on the vehicle. Leaves, dirt, and other debris can block this drainage path, causing water to overflow into the headliner, A-pillars, or cabin. A disconnected drain tube can produce similar symptoms even when the drain opening itself is clear.
To fix a sunroof leak, locate where the water is entering, inspect the drainage system, clear any blockage, check the drain tubes and weatherstripping, verify the glass alignment, and perform a controlled water test after the repair. This guide explains that process step by step and also covers what to do when cleaning the drains does not stop the leak.
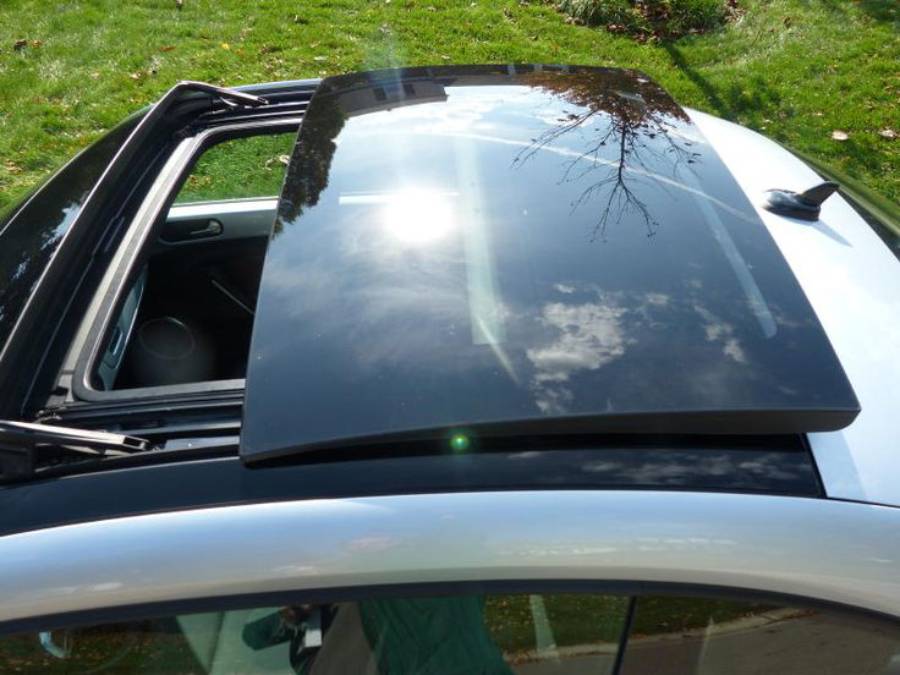
What Causes a Sunroof to Leak?
There are 4 main causes of a sunroof leak: clogged drains, disconnected or damaged drain tubes, deteriorated weatherstripping, and incorrect sunroof glass alignment. These problems affect either the drainage path that carries water away from the roof or the way the sunroof glass fits within the opening. Identifying the correct cause matters because cleaning a drain will not repair damaged weatherstripping, while replacing a seal will not solve a blocked drain tube.
Clogged sunroof drains are a common place to begin diagnosis because the drainage system is responsible for carrying water away from the sunroof tray. Leaves, dust, pollen, and other debris can collect around the drain openings and restrict water flow. When incoming water accumulates faster than it can drain, the tray can overflow and send water into the headliner or nearby pillars. Slow drainage or standing water around a drain opening therefore points toward a drainage restriction rather than automatically indicating a failed seal.
Disconnected or damaged drain tubes can also allow water into the cabin. Each drain opening directs water into a tube that carries it away from the roof area. A tube that separates from its connection can still accept water at the drain opening, but that water may then empty behind the headliner or interior trim instead of leaving the vehicle through the intended outlet. This explains why a drain opening may appear clear while the headliner or A-pillar still becomes wet.
Deteriorated weatherstripping can contribute to leakage when the rubber surrounding the sunroof becomes cracked, torn, hardened, deformed, or otherwise unable to make the intended contact around the glass. Visible physical damage provides stronger evidence of a weatherstrip problem than water inside the vehicle alone. The seal should therefore be inspected as part of the diagnosis rather than replaced solely because the sunroof is leaking.
Incorrect sunroof glass alignment can change how the glass contacts the surrounding weatherstripping and how water reaches the drainage channels. A glass panel that sits noticeably too high, too low, or unevenly relative to the roof may indicate an alignment or mechanism problem. Adjustment procedures vary between vehicle designs, so model-specific service information becomes important when correcting the glass position rather than simply cleaning the drainage system.
How Can You Find Where a Sunroof Is Leaking?
Find where a sunroof is leaking by tracing the water path from the sunroof tray to the drain holes, drain tubes, headliner, pillars, seals, and glass. The place where water becomes visible inside the vehicle is not necessarily where the leak begins. Water can enter near the roof, travel behind the headliner or interior trim, and appear several inches or more from the original problem.
Start by opening the sunroof and inspecting the tray and drainage channels around the opening. Remove loose leaves and debris so the drain holes are visible. Look for standing water, dirt concentrated around a drain opening, damaged weatherstripping, and sections of glass that appear uneven relative to the roof. Check the headliner and A-pillars for damp areas or water stains because their location can help identify which side of the drainage system requires closer inspection.
Test the drainage system with a small amount of clean water rather than immediately spraying the entire roof. Pour water into one section of the sunroof channel and observe whether it moves toward the corresponding drain opening. Then check whether the water exits through the expected drain outlet. Test each drainage path separately so you can identify which drain is functioning normally and which one is restricted or allowing water into the cabin.
How Can You Tell if a Sunroof Drain Is Clogged?
A sunroof drain is likely clogged when water drains slowly, remains in the sunroof tray, overflows into the headliner or pillar, or fails to reach its normal outlet. The blockage prevents the drainage system from removing water at the rate required to keep the tray from overflowing.
Perform a controlled water test on one drain at a time. Add a small amount of water near the drain opening and watch its movement. A functioning drain should accept the water and direct it through the drain tube. Water that pools around the opening or disappears unusually slowly indicates a restriction somewhere between the drain hole and outlet.
The location of moisture inside the cabin provides another diagnostic clue. For example, water appearing around an A-pillar while the nearby sunroof tray contains standing water can indicate restricted drainage on that side. However, water entering the pillar does not prove that the tube is clogged because a disconnected drain tube can create a similar symptom. The complete water path must be checked before selecting the repair.
How Can You Tell if a Sunroof Seal Is Damaged?
A damaged sunroof seal can be identified by physical defects such as cracks, tears, hardened rubber, deformation, missing sections, or uneven contact with the glass. Inspect the entire perimeter rather than focusing only on the area where water appears inside the cabin.
Clean dirt from the weatherstripping before evaluating its condition because debris can prevent consistent contact and make an intact seal appear defective. Examine the rubber for sections that no longer follow the shape of the glass or roof opening. Compare the glass position along the perimeter as well; an apparent sealing problem can originate from glass misalignment rather than damage to the weatherstrip itself.
Do not diagnose a failed seal from cabin moisture alone. A sunroof drainage problem can allow water into the same headliner and pillar areas associated with sealing problems. Confirm that the drains function correctly and inspect the physical condition of the weatherstripping before deciding that seal replacement is necessary.
What Tools Do You Need to Fix a Sunroof Leak?
The basic tools for fixing a sunroof leak include clean water, a small container, microfiber cloths, a soft brush, flexible nylon line, and trim removal tools when access to a drain tube is required. The exact tools depend on whether the problem is debris in the drainage channel, a clogged drain tube, a disconnected hose, damaged weatherstripping, or incorrect glass alignment.
Use a microfiber cloth and soft brush to remove dirt, leaves, and other debris from the sunroof tray without damaging the surrounding surfaces. A small container allows you to add water to individual drainage areas during diagnosis and testing. Testing one drain at a time makes it easier to determine whether water is flowing through the intended drainage path.
A flexible nylon line can help clear a restricted drain tube because it can travel through the drainage path without the sharp edges of rigid metal tools. Avoid forcing screwdrivers, stiff wire, or other sharp objects into a drain opening. These tools can damage the tube or its connections and turn a blockage into a larger leak.
Trim removal tools may be necessary when diagnosis indicates that a drain tube has disconnected behind the headliner or pillar trim. Removing interior trim creates additional risk of damaging clips, airbags, wiring, or the headliner, depending on the vehicle. Check the vehicle-specific service procedure before removing components that block access to the drainage system.
How Do You Fix a Sunroof Leak Step by Step?
To fix a sunroof leak, clean the drainage channels, clear blocked drain tubes, check the tube connections, inspect the weatherstripping, verify the glass alignment, and repair the component responsible for the leak. Complete these steps in diagnostic order instead of replacing the seal or applying sealant before confirming the cause.
Step 1: Clean the sunroof channels and drain holes. Open the sunroof and remove leaves, dirt, pollen, and other visible debris from the tray. Pay particular attention to material accumulated around the drain openings. Clean the entire channel rather than only the drain hole because remaining debris can move back toward the opening and restrict drainage again.
After cleaning, add a small amount of water near one drain opening. Watch whether the water moves freely into the drain rather than collecting in the tray. Repeat the test separately for the other drains. This establishes whether cleaning the openings solved the problem or whether a restriction remains deeper inside a drain tube.
Step 2: Unclog a restricted sunroof drain tube. Feed a flexible nylon line gently into the affected drain and advance it without excessive force. The objective is to loosen or move debris without puncturing the tube or separating it from a connector. Stop if the line reaches firm resistance rather than forcing it farther into an unknown obstruction.
Flush the drain with a controlled amount of clean water after loosening the blockage. Water should enter the drain without pooling and travel through the drainage path instead of appearing inside the cabin. A drain that remains slow after the first attempt requires further diagnosis because the restriction may be deeper in the tube or near its outlet.
Compressed air requires additional caution. High pressure can potentially separate a drain hose from its connection, creating a hidden leak behind interior trim. If compressed air is used for a particular vehicle, follow the pressure and procedure specified by the vehicle manufacturer rather than applying unrestricted shop air to the drain.
Step 3: Check the sunroof drain tube connections. Investigate the tube connection when water enters a drain opening normally but then appears behind the headliner, pillar, or other interior trim. This pattern indicates that the problem may occur after water enters the drainage system rather than at the drain opening itself.
Access to the drain tube varies by vehicle. Some connections can be reached with limited trim removal, while others require more extensive disassembly. Inspect the connection for a tube that has slipped off its fitting, become kinked, split, or otherwise lost its intended drainage path. Reconnect an intact tube according to the vehicle’s service procedure or replace the damaged component when physical deterioration is present.
Test the connection before reinstalling removed trim. Add a small amount of water to the corresponding sunroof drain and confirm that it reaches the intended outlet without moisture appearing behind the interior panels. Testing at this stage prevents unnecessary removal of the same trim if the first repair does not solve the problem.
Step 4: Inspect and repair the sunroof seal. Clean the weatherstripping first and inspect its full perimeter for cracks, tears, hardening, deformation, or missing material. Dirt trapped between the glass and weatherstrip should be removed before determining whether the seal itself has failed.
Replace physically damaged weatherstripping when it can no longer provide the intended contact around the sunroof assembly. Do not treat sealant as a universal repair for every sunroof leak. Applying sealant without identifying the water path can hide the symptom temporarily while leaving a clogged drain, disconnected tube, or alignment problem unresolved.
Step 5: Check the sunroof glass alignment. Compare the height and position of the glass around its perimeter with the surrounding roof and weatherstripping. A section that sits noticeably higher, lower, or unevenly can affect contact with the weatherstrip and change how water enters the drainage channels.
Correct glass alignment according to the procedure specified for the vehicle. Sunroof mechanisms, adjustment points, and acceptable glass positions differ between manufacturers and models, so there is no single adjustment procedure that applies to every car. Professional repair is appropriate when adjustment requires sunroof mechanism disassembly or specifications that are not available to the vehicle owner.
How Do You Test a Sunroof After Fixing the Leak?
Test a repaired sunroof with a controlled water test that confirms water enters the drainage channel, flows through the drain tubes, and exits the vehicle without reaching the headliner or interior trim. Test each drainage area separately before exposing the entire roof to a larger volume of water. This method makes it easier to identify the exact drainage path that still has a problem if the leak remains.
Dry the sunroof tray, headliner, pillars, and other previously wet areas before beginning the test. Existing moisture can make a successful repair appear unsuccessful because trapped water may continue dripping after the original leak has been fixed. Close or position the sunroof correctly and confirm that the glass sits normally within the roof opening.
Add a small amount of clean water to one section of the sunroof channel. Watch the water enter the nearby drain opening, then check whether it reaches the corresponding outlet. Water should move through the drainage path without accumulating in the tray. Repeat the process for each drain so one functioning drain does not hide a restriction elsewhere in the system.
Inspect the headliner, A-pillars, and other previously affected areas while performing the test. These surfaces should remain dry as water passes through the drainage system. If moisture appears, stop adding water and trace the affected drainage path before continuing. This limits additional water intrusion and provides a clearer indication of where the repair failed.
Complete a broader water test only after the individual drainage paths function correctly. Apply water gradually over the closed sunroof and inspect the cabin again. A successful repair should leave the interior dry while the drainage system directs incoming water toward its intended outlets.
What Should You Do if the Sunroof Still Leaks After Cleaning the Drains?
Check the drain tube connections, weatherstripping, glass alignment, and sunroof assembly if the sunroof still leaks after the drains have been cleaned and confirmed to flow properly. A clear drain eliminates one potential cause, but it does not rule out a disconnected tube or another defect elsewhere in the water-management system.
Start with the drain tube on the side where moisture appears. A disconnected or damaged tube can allow water to enter the drain normally and then release it behind the headliner or pillar trim. This creates an important diagnostic distinction: water that remains in the sunroof tray suggests restricted drainage, while water that enters a drain freely but appears inside the vehicle can point toward a problem farther along the drainage path.
Inspect the sunroof weatherstripping next. Look for cracks, tears, hardened sections, deformation, or areas where the rubber no longer contacts the glass as intended. Physical damage supports seal replacement, but an intact-looking seal combined with uneven glass position can indicate an alignment problem instead. Diagnose these conditions separately because replacing an undamaged seal does not correct misaligned glass.
Check the position of the sunroof glass relative to the surrounding roof when the drainage system and weatherstripping do not explain the leak. Uneven glass height or abnormal contact around one section of the opening can change how water reaches the seal and drainage channels. Use model-specific service information for adjustments because sunroof alignment procedures differ between vehicle designs.
Investigate the broader sunroof assembly or roof sealing points when the drains, tubes, weatherstripping, and glass alignment all pass inspection but water intrusion continues. Repeated leakage at this stage can require removal of interior components or specialized diagnosis to locate a hidden water path. Professional inspection is preferable to repeatedly applying sealant to areas that have not been confirmed as the source of the leak.
When Should You Have a Sunroof Leak Repaired Professionally?
Have a sunroof leak repaired professionally when the drainage system is clear but the leak continues, the drain tubes require extensive interior disassembly, the sunroof mechanism is damaged, or water has reached electrical components. These conditions require more than basic drain cleaning and can involve vehicle-specific adjustment procedures, hidden drainage connections, wiring, airbags, or delicate interior trim.
Professional diagnosis is appropriate when a drain tube cannot be reached without removing substantial sections of the headliner or pillar trim. Modern vehicles can contain side-curtain airbags, wiring harnesses, sensors, and mounting clips behind these panels. Incorrect removal can damage these components or create an additional repair unrelated to the original water leak.
A recurring leak after successful drain cleaning also requires deeper diagnosis. For example, water that flows freely through the drain but continues to appear behind an A-pillar can indicate a loose drain tube connection, a split hose, or another hidden water path. Repeatedly clearing an already functional drain will not correct these problems.
Sunroof glass or mechanism problems also justify professional repair when model-specific adjustment information is unavailable. The glass must sit in the position specified for that sunroof design, and adjustment methods vary between vehicles. Problems involving damaged tracks, cables, motors, frames, or the complete sunroof cassette can require partial disassembly of the roof mechanism.
Water reaching electrical components should be addressed promptly. Moisture can travel behind the headliner and pillars to wiring, connectors, switches, modules, or other electrical equipment. Fixing the original leak and drying the affected area are both necessary because stopping new water intrusion does not remove moisture already trapped inside the vehicle.
Read more: How Long Does a Dealership Have to Fix a Recall
How Much Does It Cost to Fix a Leaking Sunroof?
The cost to fix a leaking sunroof depends primarily on whether the repair involves drain cleaning, drain tube repair, weatherstrip replacement, glass adjustment, sunroof mechanism repair, or interior water-damage restoration. A simple drainage blockage generally requires less labor and fewer replacement parts than a damaged sunroof assembly or a drain tube hidden behind interior panels.
Drain cleaning is usually the least complex repair because the work focuses on removing debris from the tray, drain openings, or tubes. The cost can increase when a blockage cannot be reached from the sunroof opening and additional components must be removed to access the drainage path.
A disconnected or damaged drain tube can require more labor even when the replacement part itself is inexpensive. The final cost depends on where the failed connection is located and how much of the headliner, pillar trim, or surrounding interior must be removed and reinstalled to reach it.
Weatherstrip replacement and glass adjustment create another level of repair complexity. The required parts, adjustment procedures, and labor vary by sunroof design and vehicle model. A complete sunroof mechanism or cassette problem can be substantially more involved because the repair may require extensive interior disassembly and replacement of mechanical components.
Interior water damage adds a separate expense to the sunroof repair itself. A persistent leak can wet the headliner, carpet, insulation, trim, and electrical components. The total repair can therefore include both eliminating the source of the leak and restoring the areas damaged by previous water intrusion.
Exact prices should be checked for the vehicle model, location, required parts, and current labor rates before deciding between DIY and professional repair. A diagnosis that identifies the failed component first provides a more useful estimate than applying a single average price to every leaking sunroof.
How Can You Prevent a Sunroof From Leaking Again?
Prevent a sunroof from leaking again by keeping the drainage channels clean, checking the drain openings, testing water flow periodically, inspecting the weatherstripping, and addressing slow drainage before water reaches the cabin. Preventive maintenance focuses on keeping the sunroof’s water-management system functional rather than trying to make the roof opening completely watertight with additional sealant.
Clean the sunroof tray and channels whenever visible debris begins to accumulate. Leaves, pollen, dust, and dirt can move toward the drain openings as rainwater passes through the channel. Removing this material before it enters a drain tube reduces the chance of a restriction developing deeper in the drainage system. Vehicles regularly parked under trees or exposed to heavy organic debris may require more frequent inspection.
Check the drain openings while cleaning the sunroof channel. Each opening should remain free of visible debris and allow water to enter without pooling around it. A small, controlled amount of clean water can be used to confirm drainage. Water that begins moving more slowly than it did during previous tests provides an early indication of a developing restriction.
Inspect the sunroof weatherstripping for physical deterioration rather than waiting for water to appear inside the vehicle. Look for cracks, tears, hardened rubber, deformation, and sections that no longer sit correctly around the glass. Clean accumulated dirt from the contact surfaces so debris does not interfere with the intended fit between the glass and weatherstripping.
Monitor the position and operation of the sunroof glass as well. The panel should open and close normally and maintain its intended position when closed. A glass panel that begins sitting unevenly, making abnormal noises, or moving differently from normal can indicate a mechanical or alignment problem that should be investigated before it contributes to water intrusion.
Address slow drainage as soon as it appears. A partially restricted drain can still remove enough water during a small test but overflow during sustained or heavy rain. Early cleaning is less invasive than repairing water damage after moisture has reached the headliner, pillars, carpet, or electrical components.
Regular sunroof maintenance therefore has 3 priorities: keep the drainage path clear, maintain the condition and position of the sealing surfaces, and investigate changes in drainage or sunroof operation early. These checks reduce the likelihood that a minor accumulation of debris or component problem develops into repeated water intrusion.