Thinking about replacing your Toyota Camry radio because the current system feels outdated, the Bluetooth connection keeps failing, or you finally want Apple CarPlay and Android Auto? You are not alone. Many Toyota Camry owners upgrade their head unit expecting a dramatic improvement in sound quality and a more modern driving experience. However, one common mistake keeps happening: replacing the radio before evaluating the entire audio system.
The truth is that your radio is only the control center of a much larger setup. The final sound quality depends on several components including speakers, amplifiers, factory wiring, and compatibility between all connected devices. Many drivers spend hundreds or even thousands of dollars on a brand new touchscreen system only to realize later that the audio still lacks bass, vocals sound muddy, or important features such as the backup camera and steering wheel controls stop working correctly.
That is exactly why you need a complete Toyota Camry Audio Upgrade Checklist Before Replacing Your Radio. Instead of rushing into an upgrade and dealing with expensive surprises later, this checklist helps you identify what needs attention before purchasing any equipment. With the right planning from the beginning, you can save money, avoid installation headaches, and build a stronger foundation for a better Toyota Camry audio experience in the future.
Contents
- 1. Identify Your Toyota Camry Model Year and Factory Audio Package
- 2. Check Whether Your Current Problem Is Really the Radio
- 3. Decide What Features You Actually Need
- 4. Inspect Existing Speakers Before Upgrading Your Radio
- 5. Verify Amplifier Compatibility
- 6. Confirm Wiring Harness Requirements
- 7. Check Dashboard Space and Installation Kit Compatibility
- 8. Consider Backup Camera and Factory Features
- 9. Set a Realistic Budget for a Complete Audio Upgrade
- 10. Plan Future Audio Upgrades Before Buying a Radio
- Conclusion
1. Identify Your Toyota Camry Model Year and Factory Audio Package
Before purchasing a new radio, the first thing you should do is identify your Toyota Camry model year and factory audio configuration. This step sounds simple, but it is one of the most overlooked parts of a successful audio upgrade. Choosing a head unit without verifying your exact setup can create compatibility issues that lead to extra costs and installation frustration.
Toyota Camry audio systems vary significantly between generations and trim packages. A 2009 Camry may have a very different wiring configuration compared to a 2018 model. Even two Camrys from the same year can include different factory audio systems depending on options selected at purchase.
For example, standard audio packages usually have simpler installation requirements. Models equipped with JBL premium systems often include factory amplifiers that require special integration modules. Vehicles with built in navigation systems may use additional connections and unique dashboard layouts.
Owners of 2007 to 2011 Camry models often need different dash kits and harness adapters compared with owners of 2012 to 2017 versions. Newer 2018 and later models typically include more integrated electronics that communicate with vehicle systems through advanced modules.
Many owners discover compatibility problems only after beginning installation. Suddenly the steering wheel controls stop responding or factory features disappear.
A surprising fact is that two Toyota Camrys built in the same year can still use completely different wiring systems depending on trim level and factory equipment. Spending a few minutes checking your configuration now can save hours of frustration later.
2. Check Whether Your Current Problem Is Really the Radio
Many people immediately assume the radio is responsible when something goes wrong with the audio system. The screen freezes, Bluetooth disconnects, or one speaker suddenly stops working. Replacing the radio feels like the obvious solution, but sometimes the real issue is hiding elsewhere.
A blown fuse, damaged speaker, faulty amplifier, loose connection, or aging wiring can create symptoms that look exactly like a bad head unit. If your audio cuts out intermittently or only one side loses sound, the radio may not be the problem at all.
For example, if the touchscreen occasionally becomes unresponsive, software issues or power interruptions could be responsible. Bluetooth connection failures might come from outdated firmware rather than hardware failure. Distorted sound often points toward speaker damage instead of a defective radio.
This is one of the biggest pain points for vehicle owners. Some drivers spend several hundred dollars replacing a factory radio only to discover that a low cost fuse or minor wiring repair would have fixed the issue.
Before upgrading, test all speakers individually. Check fuse boxes. Inspect visible wiring if possible. If your Camry includes an amplifier, confirm that it still functions correctly.
Sometimes solving the real problem costs a fraction of a complete replacement.
3. Decide What Features You Actually Need
Modern replacement radios offer an impressive list of features. Touchscreens are larger than ever. Wireless connectivity is becoming standard. Navigation systems continue improving every year. Because of this, many buyers end up purchasing expensive units loaded with features they rarely use.
Before shopping, take time to define what matters most for your driving habits.
If your Toyota Camry is mainly used for daily commuting, wireless Apple CarPlay and Android Auto may be enough. Drivers who frequently travel long distances might value built in navigation and hands free voice controls. Families may prioritize backup camera integration and support for multiple devices.
Create a simple list of must have features and optional upgrades.
Common features to consider include:
Apple CarPlay
Android Auto
Wireless Bluetooth connectivity
Built in GPS navigation
Backup camera support
Steering wheel control compatibility
USB connectivity
Multiple camera inputs
Many owners become excited by large touchscreens and premium interfaces but later realize they use only a small portion of available functions.
An interesting fact is that many drivers use less than one third of the features included in their upgraded head unit after installation.
Buying technology you actually need often creates a better experience than paying extra for functions that remain untouched.
4. Inspect Existing Speakers Before Upgrading Your Radio
One of the biggest misconceptions in car audio upgrades is believing that a new radio automatically creates better sound. Many Toyota Camry owners install a modern touchscreen head unit expecting a dramatic transformation, only to realize the music still sounds flat, weak, or distorted.
The reason is simple. Your speakers are responsible for delivering the sound you actually hear. Even the most advanced head unit cannot compensate for aging or damaged speakers.
Before replacing your radio, inspect your current speaker condition carefully. Listen for crackling sounds, distorted vocals, rattling door panels, or weak bass response. Pay attention to whether sound quality changes at higher volume levels. If music becomes harsh or unclear as volume increases, worn speakers could be the real problem.
Speaker deterioration often happens gradually. Because drivers listen every day, many do not notice the decline until they compare their system with a newer vehicle.
Another common issue involves door vibration. Sometimes the speaker itself is not damaged. Instead, loose clips or worn insulation materials create unwanted noise that reduces audio quality.
This creates a frustrating situation for many owners. They invest in a new radio expecting premium sound while the old speakers continue limiting performance. The result is disappointment and additional expenses later.
If your speakers show obvious signs of wear, replacing them before or alongside your head unit may provide a much more noticeable upgrade.
5. Verify Amplifier Compatibility
Amplifier compatibility becomes extremely important when upgrading Toyota Camry audio systems, especially if your vehicle includes a factory JBL package.
Many Camry models equipped with JBL systems use dedicated amplifiers that work differently from standard audio setups. These factory amplifiers communicate with the original radio in specific ways. Installing an aftermarket head unit without proper integration can cause serious problems.
Common issues include no sound output, low volume levels, distorted audio, or complete system failure after installation.
Many owners discover this problem only after replacing their radio. Everything powers on correctly. The touchscreen works. Bluetooth connects successfully. Then music starts playing and the sound quality becomes terrible or disappears entirely.
This situation often requires additional interface modules designed specifically for factory amplified systems.
If your Camry includes a JBL package, verify compatibility before purchasing any replacement radio. Some aftermarket units include easier integration options while others require additional adapters and hardware.
Ignoring amplifier compatibility can turn a straightforward installation into a complicated and expensive project.
Spending a little time researching now prevents major headaches later.
6. Confirm Wiring Harness Requirements
Wiring compatibility can determine whether your Toyota Camry radio upgrade becomes a simple afternoon project or a stressful installation nightmare.
Many drivers assume a replacement radio can connect directly into factory wiring. In reality, most installations require additional harness adapters and integration accessories.
A wiring harness acts as the bridge between your factory vehicle wiring and the new head unit. Choosing the correct adapter protects your original wiring and allows easier installation without cutting factory cables.
Depending on your Camry model and trim package, you may also need steering wheel control interfaces, CAN bus modules, antenna adapters, or integration systems for factory amplifiers.
This becomes especially important for owners who want to preserve original vehicle functions. Features like steering wheel buttons, factory microphones, USB ports, and information displays may require additional components.
One of the most common installation mistakes happens when owners purchase a radio but forget supporting accessories. Installation day arrives and suddenly critical parts are missing.
The excitement of a new upgrade quickly turns into frustration and delays.
A complete compatibility checklist before ordering parts can save both time and money while ensuring a smoother installation process.
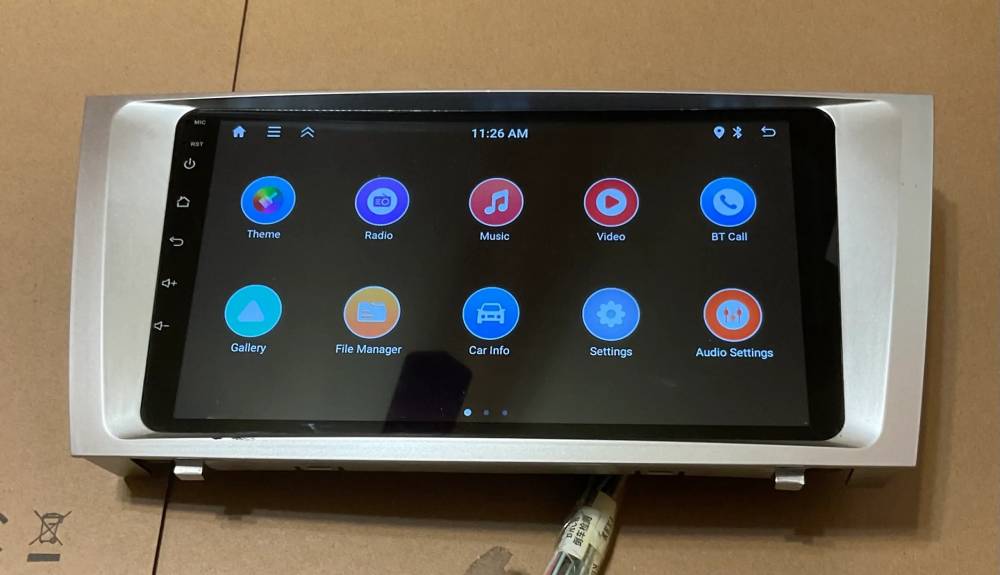
7. Check Dashboard Space and Installation Kit Compatibility
Not every radio fits every Toyota Camry dashboard, even if the screen size looks perfect online. One of the most common mistakes during a Toyota Camry audio upgrade is buying a head unit first and worrying about fitment later.
Before purchasing any replacement radio, inspect your dashboard dimensions and factory layout. Toyota Camry models across different years use different panel designs, trim structures, and installation spaces.
Some models support Double DIN head units easily, while others require special trim kits or dashboard conversion components. A radio that physically fits inside the opening may still leave gaps around the edges or interfere with surrounding controls.
This issue becomes more noticeable when upgrading to larger touchscreen displays. Many owners are attracted to floating screens and oversized displays because they look modern and premium. However, visual appeal alone does not guarantee compatibility.
Proper installation kits often include mounting brackets, trim panels, and hardware designed specifically for your Camry generation.
Skipping this step creates another painful situation many drivers experience. The radio arrives, installation begins, and suddenly the dashboard fitment looks awkward or unfinished.
A clean factory style appearance can make the difference between an upgrade that feels professionally installed and one that constantly looks out of place.
8. Consider Backup Camera and Factory Features
Modern Toyota Camry models include far more technology than basic audio controls. Your factory radio may already communicate with multiple systems throughout the vehicle.
Before replacing the head unit, make a complete list of features you want to keep.
Important factory functions often include backup cameras, steering wheel controls, factory microphones, USB ports, navigation systems, and vehicle information displays.
Many owners focus entirely on sound quality and touchscreen features while forgetting these existing functions. Then installation finishes and an unpleasant surprise appears. The backup camera no longer works or steering wheel buttons stop responding.
This issue becomes especially frustrating because many people use these features every day. Losing them can make the vehicle feel less convenient than before the upgrade.
Backup camera integration deserves special attention because connection requirements vary across model years and audio packages.
Some systems need additional adapters while others require interface modules to preserve factory functionality.
Think beyond music quality. A successful Toyota Camry audio upgrade should improve your driving experience rather than remove features you already depend on.
9. Set a Realistic Budget for a Complete Audio Upgrade
Budget planning is where many audio projects go off track. Drivers often set a budget based only on the cost of a new radio, then discover additional expenses throughout the process.
A basic upgrade may include only a replacement head unit and installation accessories. Mid level upgrades often add speakers and sound treatment materials. Premium systems can include amplifiers, subwoofers, digital signal processors, and custom tuning.
Here is a simple way to think about budget planning:
Basic upgrade
Radio and installation accessories
Mid level upgrade
Radio, speakers, and sound improvement materials
Premium upgrade
Complete system including amplifiers and bass enhancements
One major pain point appears when people upgrade in stages without planning ahead. They buy an entry level radio today, then later decide to add amplifiers or premium audio components only to discover compatibility limitations.
Unexpected expenses also come from wiring adapters, dash kits, installation labor, and integration modules.
Planning a realistic budget from the beginning creates a smoother upgrade path and prevents expensive surprises later.
10. Plan Future Audio Upgrades Before Buying a Radio
The most valuable step in this entire Toyota Camry audio upgrade checklist is thinking beyond today’s installation. Many owners purchase a radio based only on current needs without considering future upgrades. At first, the system feels like a major improvement. A larger touchscreen, better connectivity, and modern features create excitement. Then a few months later, new ideas begin to appear.
You may want deeper bass from a subwoofer. You might decide to add a dedicated amplifier for cleaner sound. Some drivers eventually install digital signal processors for more precise tuning and audio customization.
The problem is that not every radio supports future expansion.
Some entry level head units have limited preamp outputs, fewer audio settings, or restricted compatibility with external components. As your expectations grow, those limitations become obvious.
This creates another expensive pain point that many Toyota Camry owners experience. Instead of upgrading one component at a time, they end up replacing the radio all over again because the original unit cannot support additional equipment.
A surprising reality in the car audio world is that many users replace their head unit twice. The first purchase solves immediate problems, while the second one finally supports long term goals.
Before buying any radio, ask yourself a few important questions.
Will you eventually add a subwoofer?
Do you plan to install amplifiers later?
Do you want advanced sound tuning capabilities?
Will you expand the system over the next few years?
Thinking ahead now can save significant money and prevent unnecessary upgrades later.
Conclusion
Replacing your Toyota Camry radio may seem like a simple upgrade, but a successful audio project involves much more than choosing a touchscreen with attractive features. Your speakers, amplifier, wiring, factory equipment, dashboard layout, and long term plans all play important roles in the final result.
This Toyota Camry Audio Upgrade Checklist Before Replacing Your Radio is designed to help you avoid the most common mistakes that lead to wasted money and disappointing results. Taking time to inspect your current system, verify compatibility, and understand your goals creates a smarter path toward better sound and a smoother installation experience.
The difference between a frustrating upgrade and a satisfying one often comes down to preparation. Rushing into a purchase may create expensive surprises, while careful planning helps you build an audio system that truly fits your needs.
Before ordering your next head unit, spend a few extra minutes reviewing this checklist. Your future self and your wallet will probably thank you.
Have you upgraded your Toyota Camry audio system before? Share your experience, favorite setup, or biggest lesson learned in the comments. Your advice could help other Camry owners avoid common upgrade mistakes and build a better system from the start.