Using a Duralast jump starter involves connecting the device to your car battery, activating the jump-start function, and starting the engine without assistance from another vehicle. First, check that the jump starter has sufficient charge and is compatible with your vehicle’s battery. Connect the red clamp to the positive (+) battery terminal and the black clamp to the grounding point specified in your vehicle and jump starter manuals. Then, activate the device according to its model-specific instructions and attempt to start the engine.
Duralast jump starters provide portable starting power when a vehicle’s battery is too weak to crank the engine. Depending on the model, the device may include a built-in battery, LED charge indicators, reverse-polarity protection, and additional features such as USB charging ports or an air compressor. However, operating controls, connection requirements, and safety features vary between models.
Correct clamp placement, adequate battery charge, and proper operating procedures are essential for a successful jump-start. Incorrect connections or repeated starting attempts can damage equipment or create electrical hazards. This guide explains how to use a Duralast jump starter step by step, follow essential safety precautions, troubleshoot starting problems, recharge the device, and maintain it for future emergencies.
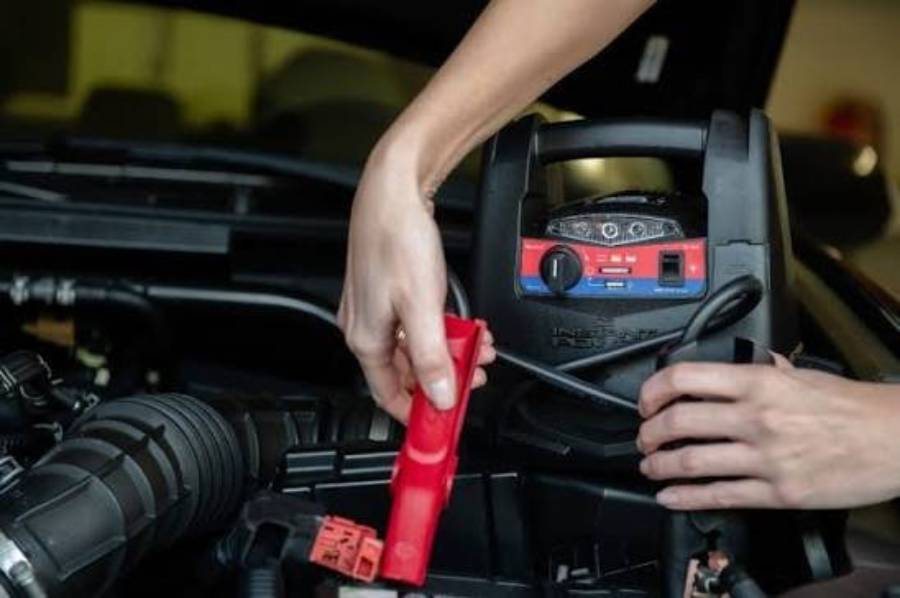
How Do You Use a Duralast Jump Starter Step by Step?
To use a Duralast jump starter, check the device’s charge, connect the jumper clamps to the correct battery terminals or grounding points, activate the jump-start function, start the engine, and disconnect the clamps safely. The procedure generally involves five steps, although button controls and connection requirements vary by model.
How Do You Prepare a Duralast Jump Starter Before Using It?
Prepare a Duralast jump starter by checking its battery charge, inspecting the jumper cables, and confirming compatibility with your vehicle’s electrical system. Most conventional passenger vehicles use a 12-volt battery, but the jump starter’s voltage and starting capacity must match the vehicle’s requirements. Check the device’s charge indicator and recharge it if necessary before attempting to start the engine.
Park the vehicle in a safe, well-ventilated location, engage the parking brake, and turn off the ignition. Switch off electrical accessories, including the headlights, radio, and air conditioning, to reduce unnecessary battery demand. Inspect the car battery for cracks, leaks, swelling, or freezing. Do not attempt to jump-start a visibly damaged or frozen battery.
How Do You Connect a Duralast Jump Starter to a Car Battery?
Connect the Duralast jump starter by identifying the positive (+) and negative (−) battery terminals and following the connection sequence specified in the vehicle and jump starter manuals. Correct polarity allows starting current to flow through the intended electrical circuit while reducing the risk of sparks and equipment damage.
- Locate the battery terminals. Identify the positive terminal marked (+) and the negative terminal marked (−). Some vehicles provide dedicated remote jump-starting terminals.
- Connect the red clamp. Attach the red positive clamp securely to the positive battery terminal or designated positive jump-starting point.
- Connect the black clamp. Attach the black negative clamp to the manufacturer-approved negative terminal or chassis/engine grounding point, as instructed by the applicable manuals.
- Check both connections. Ensure the clamps are firmly attached to clean metal contact points and that the cables remain clear of belts, fans, and other moving components.
Keep the red and black clamps from touching each other. If the jump starter displays a reverse-polarity warning, do not activate the starting function. Disconnect the clamps safely and verify the connections before proceeding.
How Do You Start Your Car and Disconnect the Jump Starter?
Start the car by activating the Duralast jump starter according to its operating instructions and turning the vehicle’s ignition key or pressing its start button. Some models automatically detect a connected battery, while others require a power or jump-start control to be activated.
Follow these steps to complete the process:
- Activate the jump starter. Confirm that the device indicates it is ready to deliver starting power. Follow the specific model’s instructions for any required activation button.
- Start the engine. Turn the ignition key or press the vehicle’s start button. Do not crank the engine longer than the jump starter manufacturer’s specified limit.
- Check the engine response. If the engine does not start, stop cranking and follow the required cooling interval before another attempt. Recheck the device’s charge and clamp connections.
- Deactivate the jump starter. Once the engine starts, turn off the jump-start function if required by the device’s instructions.
- Disconnect the clamps. Follow the manufacturer’s removal sequence, generally removing the black negative connection first and the red positive connection second.
After disconnecting the device, store the cables securely and keep them away from moving or hot engine components. Recharge the Duralast jump starter according to its manual so it is ready for the next emergency.
A successful jump-start does not necessarily mean the car battery is healthy. If the vehicle repeatedly fails to start after being switched off, the battery, alternator, or charging system may require testing.
What Safety Precautions Should You Follow When Using a Duralast Jump Starter?
Using a Duralast jump starter safely requires correct clamp polarity, compatible battery voltage, secure electrical connections, and proper handling of the vehicle battery. These precautions reduce the risk of electrical damage, sparks, overheating, and personal injury during the jump-starting process.
Verify battery compatibility before connecting the device. Most Duralast jump starters designed for passenger vehicles operate with 12-volt electrical systems. Connecting a 12V-only jump starter to an incompatible electrical system can damage the equipment. Check the voltage specifications in the jump starter manual and confirm that the vehicle uses a compatible battery system.
Keep the jumper clamps correctly positioned and separated. The red clamp connects to the positive terminal, while the black clamp connects to the manufacturer-approved negative connection or grounding point. Reversing these connections can trigger reverse-polarity protection or damage electrical components. Never allow the clamps to touch each other while the device is energized, and keep the cables away from moving engine parts.
Inspect the battery and surrounding environment before starting. Lead-acid batteries can release flammable hydrogen gas, particularly during charging. Sparks near the battery can ignite this gas. Avoid smoking, open flames, and other ignition sources. Do not jump-start a frozen, leaking, swollen, or visibly damaged battery. Use the device in a dry, well-ventilated area and follow the manufacturer’s temperature and operating restrictions.
Limit engine-cranking attempts to the manufacturer’s specifications. Repeated or prolonged cranking places a heavy electrical load on the jump starter and can cause its internal components to overheat. Allow the device to cool between attempts according to its manual. Stop using the jump starter if the cables become unusually hot, the casing is damaged, or the device displays a persistent fault warning.
Why Is My Duralast Jump Starter Not Starting My Car?
A Duralast jump starter may fail to start a car because of insufficient jump-starter charge, poor clamp connections, inadequate starting capacity, a severely discharged battery, or a vehicle starting-system problem. Identifying the cause requires checking the power source, electrical connections, and engine response in that order.
Why Does My Duralast Jump Starter Have Power but Won’t Start the Car?
A Duralast jump starter can display power while still lacking enough available energy to crank the engine. Its indicator lights or display may operate even when the internal battery cannot supply the high current required by the starter motor. Recharge the jump starter using its approved charging equipment and check the charge indicator before trying again.
Poor electrical contact is another common cause. Corrosion, loose clamps, or connections to unsuitable metal surfaces increase electrical resistance and restrict current flow. For example, a clamp attached to a heavily corroded battery terminal may not deliver sufficient starting current even when the jump starter is fully charged. Disconnect the device safely, inspect the contact points, and reconnect it according to the manufacturer’s instructions.
The jump starter must also provide adequate starting power for the vehicle. Larger engines and diesel engines can require greater cranking current than smaller gasoline engines. Check the Duralast model’s supported engine sizes and starting specifications rather than relying solely on its advertised peak amperage.
If the engine still does not crank with a compatible, properly connected, sufficiently charged jump starter, the problem may involve the starter motor, starter relay, battery cables, or another electrical component. A vehicle that cranks normally but does not start may have a separate ignition or fuel-delivery problem. These conditions require diagnosis beyond jump-starting.
What Do the Warning Lights and Beeping Sounds Mean?
Warning lights and beeping sounds on a Duralast jump starter indicate operating conditions or potential faults, but their exact meanings depend on the model. Common warning categories include reversed clamp polarity, inadequate battery charge, improper connections, and temperature-related protection.
A reverse-polarity warning indicates that the clamps may be connected to the wrong battery terminals. Stop the procedure, deactivate the jump starter if required, and disconnect the clamps according to the manual before correcting the connections. Never attempt to bypass a polarity warning.
A low-charge indicator means the jump starter may not have enough stored energy to start the vehicle. Recharge the device before another attempt. Some models also display connection warnings when the clamps do not establish proper electrical contact or when the vehicle battery voltage is too low for automatic detection.
Temperature warnings or automatic shutdowns can occur when the device becomes too hot during repeated starting attempts or operates outside its permitted temperature range. Stop using the jump starter and allow it to return to an acceptable operating temperature as directed by the manufacturer.
Because Duralast models use different displays, indicator colors, and audible alerts, consult the specific model’s instruction manual to identify each warning accurately. Do not assume that a flashing light or repeated beep has the same meaning across every Duralast jump starter.
Can You Use a Duralast Jump Starter on a Completely Dead Battery?
A Duralast jump starter can start a vehicle with a completely discharged battery if the device provides sufficient starting current and its operating system allows the jump-start function to activate. However, some models require a minimum battery voltage to detect a connection, while others include a manual override feature for batteries with extremely low voltage.
A completely discharged battery may have insufficient electrical energy to operate the starter motor, dashboard electronics, or headlights. A portable jump starter supplies external electrical power to crank the engine without relying on another vehicle. For example, a car with a discharged 12V battery may start when connected to a compatible, fully charged Duralast jump starter, provided the battery and starting system are otherwise functional.
Some Duralast jump starters use automatic battery-detection circuits that prevent power delivery until they recognize a valid electrical connection. If the vehicle battery voltage falls below the device’s detection threshold, the jump starter may not activate even when the clamps are connected correctly. Models equipped with a manual override or boost function may allow starting assistance under these conditions, but the feature must be used according to the specific model’s instructions.
Manual override mode requires additional caution because it may bypass certain automatic safety checks. Before using this function, verify the battery voltage, clamp polarity, and connection points. Never activate manual override on a frozen, leaking, swollen, or physically damaged battery. Do not use the function if the vehicle or jump starter manufacturer prohibits it.
A jump starter cannot repair a battery with damaged internal cells, a short circuit, or other serious defects. If the engine starts but the vehicle repeatedly fails to restart, test the battery and charging system. A fully discharged lead-acid battery may also require proper recharging and evaluation before it can reliably hold a charge again.
How Do You Charge a Duralast Jump Starter?
To charge a Duralast jump starter, connect the manufacturer-approved charging adapter or cable to the device’s designated charging input, plug it into a compatible power source, and allow the internal battery to reach full charge. The charging method depends on the model, as Duralast jump starters may use AC charging adapters, DC charging inputs, or USB charging connections.
Before charging, turn off the jump-start function and disconnect the device from the vehicle. Locate the charging input identified in the instruction manual and verify that the charger matches the required voltage and current specifications. Using an incompatible power supply can damage the internal battery or charging circuitry.
Once connected, monitor the battery-level display or charging indicators. Some models use illuminated battery segments, while others provide numerical charge percentages or status lights. A full battery display or the manufacturer-specified indicator confirms charging completion. Do not assume that every Duralast jump starter uses the same indicator colors.
Charge the device in a dry, ventilated location within the manufacturer’s recommended temperature range. Avoid covering the jump starter during charging, and disconnect the charging equipment when instructed by the manual.
How Long Does a Duralast Jump Starter Take to Charge?
The charging time of a Duralast jump starter depends on its internal battery capacity, charging input power, remaining battery level, and charging efficiency. There is no single charging duration that applies to every Duralast model.
A jump starter with a larger battery capacity generally requires more time to recharge when using the same charging power. For example, a 60Wh battery would theoretically require at least three hours to receive 60Wh from a 20W input. Actual charging takes longer because of energy losses and reduced charging current as the battery approaches full capacity.
The charging source also affects the process. A compatible higher-power charger may recharge a supported model faster than a lower-power USB connection. However, the device’s charging circuitry determines how much power it can accept, so using a more powerful adapter does not necessarily reduce charging time.
Check the instruction manual for your Duralast model’s specified charging duration and recommended power supply. Use the device’s full-charge indicator rather than relying exclusively on an estimated charging time.
How Often Should You Recharge a Duralast Jump Starter?
Recharge a Duralast jump starter after each use and check its battery level periodically during storage. The exact maintenance interval depends on the model, battery chemistry, storage temperature, and manufacturer’s recommendations.
Portable jump starters gradually lose stored energy even when they are not being used. This process, known as self-discharge, reduces the available power for emergency starting. Leaving the device partially discharged for an extended period may also affect battery performance, particularly when storage conditions fall outside the recommended temperature range.
Inspect the battery indicator regularly and recharge the jump starter when its charge falls below the level recommended in the manual. For example, checking the device before a long road trip helps identify insufficient charge before an emergency occurs. A jump starter that has remained unused for several months should be checked before relying on it.
Store the Duralast jump starter in a clean, dry location away from direct sunlight, excessive heat, and freezing conditions outside its rated storage limits. Secure the jumper clamps, protect the charging ports from moisture, and inspect the cables for damaged insulation or loose connections.
A properly maintained jump starter should be ready to deliver starting power when needed. If the device no longer holds a charge, shows abnormal swelling, or repeatedly shuts down despite proper charging, discontinue use and consult the manufacturer for service or replacement guidance.
Read more: How to Use a HALO Jump Starter: Step-by-Step Guide
Can a Duralast Jump Starter Damage Your Car Battery?
A Duralast jump starter can damage a car battery or vehicle electrical components if it is connected incorrectly, used with an incompatible electrical system, or operated against the manufacturer’s safety instructions. When used correctly with a compatible battery, a jump starter provides temporary starting power without normally damaging a healthy vehicle battery.
Reverse-polarity connections are a significant electrical hazard. Connecting the positive clamp to the negative terminal and the negative clamp to the positive terminal can create excessive current flow, damage electronic components, or generate sparks. Some Duralast models include reverse-polarity protection that prevents power delivery when the clamps are incorrectly connected. However, these protective features do not eliminate every risk associated with improper operation.
Voltage compatibility is equally important. A jump starter designed exclusively for 12V vehicle batteries should not be connected to a 24V electrical system unless the manufacturer explicitly supports that application. Incorrect voltage can damage the jump starter and potentially affect the vehicle’s electrical system.
Battery condition also determines whether jump-starting is appropriate. A severely discharged but otherwise functional battery may accept starting assistance, while a battery with internal damage, leakage, or a short circuit presents additional hazards. For example, attempting to jump-start a frozen lead-acid battery can create a risk of battery rupture or explosion.
To protect your car battery, verify voltage compatibility, inspect the battery, follow the specified clamp connection sequence, and observe the jump starter’s operating limits. If the vehicle repeatedly requires jump-starting, have the battery and charging system tested rather than relying on the portable device as a permanent solution.
What Is the Difference Between a Duralast Jump Starter and Jumper Cables?
The main difference between a Duralast jump starter and traditional jumper cables is the source of electrical power. A Duralast portable jump starter contains its own rechargeable power source, while jumper cables typically transfer starting current from another vehicle’s battery or an appropriate external power source.
A Duralast jump starter allows drivers to start a vehicle without assistance from another car. After connecting the clamps and activating the device according to its instructions, the jump starter supplies the current needed to crank the engine. This makes it useful in parking lots, remote locations, or roadside emergencies where another vehicle is unavailable.
Traditional jumper cables require a suitable donor vehicle or external starting power source. The cables connect the discharged vehicle’s electrical system to the donor system, allowing the disabled vehicle to receive starting assistance. Both vehicles must have compatible electrical systems, and the connection procedure must follow their manufacturers’ instructions to prevent electrical damage.
Portability and maintenance also distinguish these tools. A Duralast jump starter provides independent starting power but requires periodic recharging and proper battery storage. Jumper cables do not contain an internal battery and therefore do not require charging, although they depend on an available external power source.
Both methods can help start a vehicle with a discharged battery, but neither repairs a defective battery, starter motor, or charging system. A Duralast jump starter is generally more convenient for drivers who want an independent emergency starting solution, while jumper cables remain useful when a compatible donor vehicle is available.