Using a Schumacher battery charger involves connecting the charger to your car battery, selecting the correct charging settings, starting the charging cycle, and disconnecting the clamps after charging is complete. The exact procedure depends on the Schumacher charger model, battery voltage, and battery type. Most automatic Schumacher chargers manage the charging process after the correct connections and settings are established.
Before charging, identify whether your vehicle uses a 6V or 12V battery and confirm that your charger supports its chemistry, such as flooded lead-acid or AGM. Keep the charger unplugged while connecting the clamps, and follow the manufacturer’s instructions for the correct positive and negative connections. Once connected, select the appropriate charging mode, plug the charger into a suitable electrical outlet, and check its indicators to confirm that charging has started.
Schumacher battery chargers offer different functions depending on the model, including automatic charging, battery maintenance, boost charging, and engine starting. Understanding these functions helps prevent incorrect settings, charging interruptions, and potential battery damage.
This guide explains how to connect, configure, operate, and disconnect a Schumacher battery charger safely. It also covers charging times, display indicators, common charging problems, and differences between Schumacher models.
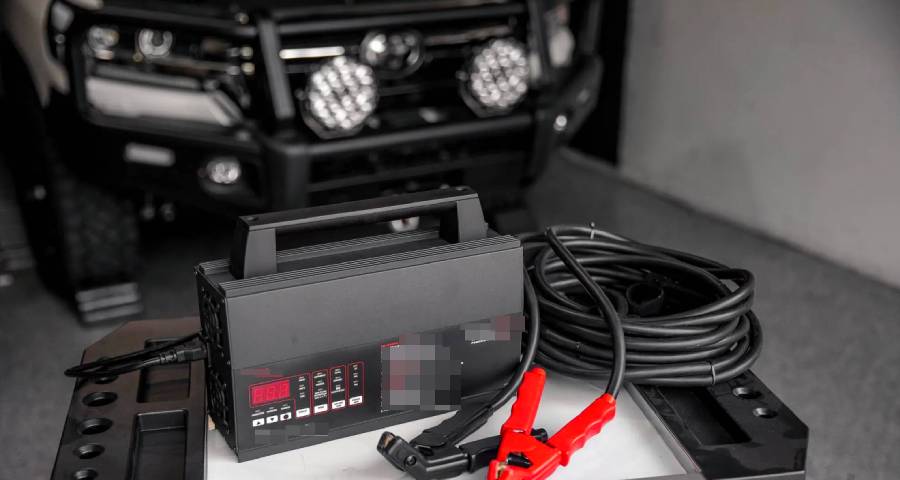
What Should You Check Before Using a Schumacher Battery Charger?
Before using a Schumacher battery charger, check five factors: battery voltage, battery chemistry, charger compatibility, battery condition, and charging environment. These checks help prevent incorrect charging settings, electrical hazards, and damage to the battery or charging equipment.
Start by identifying the battery voltage, typically 12V for passenger cars and 6V for certain older vehicles. Check the battery label and the Schumacher charger’s specifications to confirm compatibility. Never select a charging voltage that differs from the battery’s rated voltage.
Next, identify the battery chemistry. Common automotive batteries include flooded lead-acid, AGM (Absorbent Glass Mat), and GEL batteries. Some Schumacher chargers support multiple battery types, while others have specific limitations. Lithium batteries require a charger explicitly approved for their chemistry and battery management system. Select only the battery types supported by your charger’s model.
Inspect the battery for cracks, leaks, swelling, or other visible damage. Do not attempt to charge a damaged or frozen battery. Check that the terminals are clean and that the clamps can establish secure electrical contact.
Finally, place the charger in a dry, well-ventilated location away from flames, sparks, and excessive heat. Lead-acid batteries can release flammable hydrogen gas during charging. Wear eye protection, keep the charger away from battery gases, and follow the safety instructions in the Schumacher owner’s manual.
How Do You Connect a Schumacher Battery Charger to a Car Battery?
Connect a Schumacher battery charger by attaching the positive clamp to the battery’s positive terminal and securing the negative connection according to the battery’s location and the vehicle’s grounding system. Keep the charger disconnected from the electrical outlet until both connections are complete.
Most modern passenger vehicles use a negative-ground electrical system. However, the correct negative connection point depends on whether the battery remains installed in the vehicle or has been removed. Check the vehicle manual and charger instructions before connecting the clamps.
How Do You Connect the Charger to a Battery Inside the Vehicle?
To connect a Schumacher battery charger to a battery installed in a negative-ground vehicle, follow these five steps:
- Turn off the vehicle’s ignition and all electrical accessories. Keep the charger unplugged from AC power.
- Locate the battery’s positive (+) and negative (−) terminals and identify the vehicle’s recommended charging connection points.
- Attach the red positive (+) charger clamp to the battery’s positive terminal or designated positive charging point.
- Attach the black negative (−) clamp to a suitable heavy-gauge metal engine or chassis ground away from the battery, following the charger and vehicle manuals. Do not attach it to fuel lines, sheet-metal body parts, or moving components.
- Verify that both clamps are secure, correctly positioned, and separated from moving engine parts before connecting the charger to AC power.
For vehicles with a positive-ground electrical system, the connection procedure differs. Follow the specific positive-ground instructions in the Schumacher manual rather than applying the negative-ground procedure.
How Do You Connect the Charger to a Battery Outside the Vehicle?
To connect a Schumacher battery charger to a battery removed from the vehicle, use the manufacturer’s recommended off-vehicle connection procedure. Schumacher instructions for conventional lead-acid chargers commonly require an insulated battery cable to keep the final connection away from the battery.
Follow these steps for a compatible negative-ground battery:
- Place the battery on a stable, well-ventilated surface and keep the charger disconnected from AC power.
- Attach an insulated battery cable of the gauge and length specified in the charger’s manual to the negative (−) battery terminal.
- Connect the red positive (+) charger clamp directly to the battery’s positive (+) terminal.
- Position yourself and the free end of the negative battery cable as far from the battery as practical. Connect the black negative (−) charger clamp to that free cable end.
- Confirm that all connections are secure before plugging in the charger and beginning the charging process.
Do not place the charger directly above the battery or allow its clamps to touch each other. When charging is complete, disconnect AC power before removing the clamps in the sequence specified by the manufacturer.
These connection procedures apply to conventional Schumacher chargers and compatible batteries. Always check the instructions for your specific model, particularly when charging lithium batteries or vehicles equipped with designated charging terminals.
How Do You Set a Schumacher Battery Charger for Your Car Battery?
Set a Schumacher battery charger by selecting the correct battery type, charging voltage, and charging rate according to your battery specifications. The available settings depend on the charger model. Some Schumacher chargers require manual selection, while fully automatic models control certain charging parameters without user input.
Before adjusting the settings, check the battery label for its voltage, chemistry, and capacity. A typical passenger car uses a 12V lead-acid battery, but the correct charging mode depends on whether the battery is flooded, AGM, or another supported type. Selecting incompatible settings can reduce charging efficiency, damage the battery, or trigger a charger fault.
Schumacher chargers also differ in their control layouts. Some models have physical switches, while others use push buttons and digital displays. Follow the labels on your charger and its owner’s manual rather than assuming that all Schumacher models operate identically.
How Do You Select the Correct Battery Type and Charging Rate?
Select the battery type that matches your battery’s chemistry and choose a charging rate permitted by both the battery manufacturer and the Schumacher charger. Battery chemistry determines the charging voltage profile, while charging amperage influences how quickly the battery receives energy.
For example, a 12V AGM battery requires a charging profile compatible with AGM technology. If your Schumacher charger provides a dedicated AGM setting, select it according to the manufacturer’s instructions. A conventional flooded lead-acid battery generally uses the standard or flooded battery setting when that option is available.
Charging rates are measured in amperes (A). A charger operating at 2A delivers a lower charging current than one operating at 10A, although the actual current changes throughout the charging cycle. Lower rates are useful for compatible small batteries and maintenance applications, while higher rates can shorten the bulk-charging stage for larger automotive batteries.
For a 60Ah car battery, a compatible 10A charging setting provides a higher initial charging current than a 2A setting. However, the battery will not necessarily charge six times faster because automatic chargers reduce current as the battery approaches full charge.
Some automatic Schumacher chargers select the charging current based on the battery’s condition and their programmed charging algorithm. Do not attempt to override automatic settings or use a higher charging rate than the battery manufacturer allows.
What Is the Difference Between Charge, Boost, and Engine Start Modes?
Charge, Boost, and Engine Start are three different functions found on selected Schumacher battery charger models. Each serves a different purpose and operates under different electrical conditions.
Charge mode restores energy to a discharged battery through a controlled charging cycle. Automatic chargers monitor battery conditions and adjust charging output as the battery approaches full charge. This is the appropriate function for routine battery recharging.
Boost mode supplies a higher charging current for a limited period to help a compatible weak battery recover enough energy for starting. Boost is not a substitute for completing a normal charging cycle. The available current and permitted operating time depend on the charger model.
Engine Start mode provides high-current assistance during engine cranking on Schumacher models equipped with this function. It is intended for short starting attempts rather than continuous battery charging. Follow the model’s specified cranking duration and mandatory cooling intervals to prevent overheating.
Not every Schumacher battery charger includes Boost or Engine Start functions. If your charger provides only automatic charging and maintenance, use those functions as instructed instead of attempting to operate it as an engine starter.
How Do You Start Charging a Car Battery With a Schumacher Charger?
Start charging a car battery with a Schumacher charger by confirming the clamp connections, connecting the charger to a suitable AC outlet, selecting the required charging settings, and activating the charging cycle if the model requires it. Automatic models may begin charging after detecting a compatible battery, while other models require a button press or mode selection.
Follow these five steps to begin the charging process:
- Verify the battery connections. Confirm that the positive and negative clamps are attached to their correct connection points and that both connections are secure.
- Connect the charger to AC power. Plug the charger into a properly grounded electrical outlet that meets the voltage and power requirements stated in its manual.
- Select the charging settings. Choose the correct battery type, voltage, and charging rate if your Schumacher model provides these controls.
- Start the charging cycle. Press the appropriate Start or Charge button if required. Fully automatic models may initiate charging without an additional command.
- Confirm that charging has started. Check the charger’s display, charging indicator, or current reading to verify that the device has entered an active charging state.
During charging, the charger transfers electrical energy to the battery while controlling current and voltage according to its design. In a typical automatic lead-acid charging process, the charger supplies substantial current during the bulk stage and gradually reduces current as the battery approaches its target charging voltage.
A Schumacher charger with a digital display may show battery voltage, charging percentage, or charging current. These readings provide information about charging progress, but their availability and interpretation vary by model.
Monitor the charger and battery for abnormal conditions, including excessive heating, unusual odors, leaking electrolyte, or repeated fault warnings. Stop charging and disconnect AC power if these conditions occur. Do not continue charging a visibly damaged battery.
If the charger does not begin charging, check the displayed status and consult the model-specific troubleshooting instructions. Incorrect battery settings, poor clamp contact, low battery voltage, or a defective battery can prevent the charger from starting.
Allow the charger to complete its programmed charging cycle rather than repeatedly disconnecting and restarting it. Once the battery reaches the required charging state, a compatible automatic Schumacher charger may indicate completion or transition into maintenance mode.
How Do You Know When a Schumacher Battery Charger Is Finished Charging?
A Schumacher battery charger indicates that charging is complete through a charged-status light, a digital display message, or an automatic transition to maintenance mode. The exact indication depends on the charger model, but automatic Schumacher chargers generally monitor battery conditions and adjust their output as the battery approaches full charge.
On models equipped with a digital display, a full-charge indication may appear as a 100% reading, a completion message, or a dedicated charged LED. However, a displayed percentage is an estimate based on the charger’s monitoring system rather than a direct measurement of the battery’s actual capacity. Check the owner’s manual to identify the specific completion signal for your charger.
Many automatic Schumacher battery chargers use a multistage charging process. During the bulk stage, the charger delivers current to restore most of the battery’s charge. During the absorption stage, it regulates voltage while charging current decreases. Once the battery meets the charger’s completion criteria, supported models transition to a maintenance or float mode.
Maintenance mode keeps a compatible battery charged without continuously applying the full charging current. The charger monitors battery conditions and supplies additional energy when necessary. This function is useful for vehicles stored for extended periods, provided the charger and battery are approved for long-term maintenance.
A charger indicating full charge does not necessarily mean the battery is healthy. An aging battery may reach the charger’s completion threshold but still have insufficient capacity to start the vehicle reliably. If the battery repeatedly loses charge or struggles to crank the engine, a battery load or conductance test can help identify deterioration.
Do not assume charging is complete simply because the charging current decreases or the display shows a particular voltage. Use the model’s designated completion indicator and follow its instructions before disconnecting the charger.
How Do You Safely Disconnect a Schumacher Battery Charger?
Disconnect a Schumacher battery charger by stopping the charging process, unplugging it from AC power, and removing the charging clamps in the order specified by the manufacturer. Disconnecting the power supply before handling the clamps reduces the risk of electrical arcing near the battery.
For a conventional negative-ground vehicle with the battery installed, follow these four steps:
- Stop the charging cycle. Turn off the charger using its power or charging controls if the model provides them.
- Disconnect AC power. Unplug the charger from the electrical outlet before touching either battery clamp.
- Remove the negative connection. Disconnect the black negative (−) clamp from the vehicle’s designated chassis or engine ground.
- Remove the positive connection. Disconnect the red positive (+) clamp from the battery’s positive terminal or designated charging point.
Keep the clamps separated during removal and prevent them from contacting metal surfaces that could create an unintended electrical connection.
For a battery charged outside the vehicle using an insulated negative battery cable, disconnect AC power first. Remove the black clamp from the free end of the negative cable, followed by the red clamp from the positive battery terminal. Finally, remove the temporary negative cable from the battery.
The removal procedure differs for positive-ground vehicles and certain model-specific charging arrangements. Always follow the connection and disconnection sequence in the applicable Schumacher owner’s manual.
After disconnecting the charger, inspect the battery terminals for corrosion, loose connections, or visible damage. If the battery was removed from the vehicle, reinstall it according to the vehicle manufacturer’s instructions.
A fully charged automotive battery should be capable of supplying the electrical energy required for normal vehicle operation, provided it remains in good condition. If the vehicle still fails to start, inspect the battery connections and consider testing the battery, starter, and charging system rather than immediately repeating the charging cycle.
How Long Does a Schumacher Battery Charger Take to Charge a Car Battery?
A Schumacher battery charger can take approximately 3–24 hours to charge a typical car battery, depending on battery capacity, remaining charge, charging amperage, and battery condition. A higher charging current generally reduces charging time, but the charger’s automatic charging stages and the battery’s ability to accept current determine the actual duration.
Battery capacity is measured in amp-hours (Ah), while charging current is measured in amperes (A). A 60Ah car battery discharged to 50% has approximately 30Ah of capacity to replenish. At a constant 10A, the theoretical charging time is 3 hours. However, the actual process takes longer because charging current decreases as the battery approaches full charge.
The following table shows approximate charging times for a 60Ah lead-acid car battery starting at 50% state of charge.
| Charging Rate | Estimated Charging Time |
|---|---|
| 2A | 18–24 hours |
| 6A | 6–8 hours |
| 10A | 4–5 hours |
| 15A | 3–4 hours |
These estimates assume a healthy battery, compatible charging settings, and suitable operating temperatures. They are illustrative calculations rather than guaranteed charging times for a specific Schumacher model.
Battery condition also affects charging duration. An older battery with increased internal resistance may accept current less efficiently than a healthy battery. Cold temperatures can slow charging, while excessively high temperatures can trigger protective charging adjustments.
Automatic Schumacher chargers regulate their output throughout the charging cycle. Consequently, a charger rated at 10A does not necessarily deliver 10A continuously. The current typically decreases during the later charging stages to protect the battery from excessive charging voltage.
For the most accurate estimate, check the battery’s amp-hour rating, identify its approximate state of charge, and consult the charging-time guidance in your Schumacher owner’s manual. Allow the charger to indicate completion rather than disconnecting it solely because the estimated charging time has elapsed.
What Do the Lights and Display Symbols on a Schumacher Battery Charger Mean?
The lights and display symbols on a Schumacher battery charger indicate charging activity, battery status, charging completion, or detected faults. Their exact meanings depend on the charger model, so the owner’s manual is the authoritative reference for interpreting individual indicators.
Many automatic Schumacher chargers use LED lights or digital displays to communicate their operating status. A charging indicator generally shows that the charger has entered an active charging cycle, while a charged indicator identifies a completed charging process. Models with maintenance functions may also display a separate maintenance status.
The following table summarizes common charger indications and their general meanings.
| Indicator or Display | General Meaning |
|---|---|
| Charging LED | The charger is actively charging the battery |
| Charged LED | The charger has reached its programmed charging completion criteria |
| Maintaining indicator | The charger is operating in battery maintenance mode |
| Battery percentage | An estimated battery charging status |
| Voltage reading | The battery voltage measured by the charger |
| Flashing warning light | A model-specific warning, fault, or operating condition |
| Error code | A detected condition requiring interpretation using the model manual |
These descriptions are not universal definitions for every Schumacher charger. A flashing LED can indicate different conditions depending on its color, blinking pattern, and associated symbol.
On chargers equipped with a digital display, voltage readings help users monitor electrical conditions during charging. For example, a healthy 12V lead-acid battery at rest may measure approximately 12.6–12.8V when fully charged. During charging, the measured voltage can rise above 14V depending on battery chemistry, temperature, and the charger’s charging stage.
A voltage reading alone does not confirm that a battery is fully charged or capable of starting a vehicle. Charging voltage differs from resting voltage, and a weak battery may display an apparently normal voltage while lacking sufficient usable capacity.
Some Schumacher models display fault codes when they detect reverse polarity, an unsuccessful charging cycle, or battery-related problems. The meaning of each code varies by model. Record the exact code and consult the corresponding troubleshooting table before attempting corrective action.
If the charger displays an unfamiliar warning, stop the charging process when instructed by the manual and check the battery connections, selected settings, and battery condition. Avoid repeatedly restarting the charger without identifying the cause of the warning.
Why Is Your Schumacher Battery Charger Not Charging the Battery?
A Schumacher battery charger may fail to charge a battery because of poor clamp connections, incorrect charging settings, insufficient battery voltage, battery damage, or an internal charger fault. Automatic Schumacher chargers use battery detection and safety systems that can prevent charging when operating conditions fall outside their programmed limits.
Start by checking whether the charger receives power from the electrical outlet. If the display remains off, verify that the outlet works and inspect the power cord for visible damage. Do not operate a charger with a damaged cord, plug, or housing.
Next, disconnect the charger from AC power before inspecting the battery connections. Confirm that the red clamp is attached to the correct positive connection point and that the black clamp is connected according to the vehicle’s grounding arrangement. Corroded terminals, loose clamps, and poor metal contact can interrupt charging or prevent the charger from detecting the battery.
Incorrect charging settings can also prevent operation. For example, selecting an incompatible battery type or voltage may cause the charger to reject the charging cycle. Check the battery label and select the appropriate settings supported by your Schumacher model.
If the charger powers on but repeatedly displays a warning, identify the exact indicator or error code in the owner’s manual. Do not bypass the charger’s safety features or repeatedly restart a failed charging cycle without identifying the underlying problem.
Why Does a Schumacher Battery Charger Not Recognize a Battery?
A Schumacher battery charger may not recognize a battery when its voltage falls below the charger’s detection threshold or the clamps cannot establish a reliable electrical connection. Automatic chargers measure battery conditions before initiating charging, and some models will not begin a charging cycle when the detected voltage is too low.
For example, a severely discharged 12V lead-acid battery may have a terminal voltage below the minimum required for automatic battery detection. The charger may interpret this condition as a disconnected battery, an incompatible battery, or a battery fault.
Check the clamp connections, battery voltage, and selected charging mode before attempting another charging cycle. A digital multimeter can help determine whether the battery voltage is unusually low, although voltage alone cannot establish overall battery health.
Some Schumacher models include specific recovery or manual charging functions for certain deeply discharged batteries. Use these functions only when the model’s instructions explicitly permit them and the battery is safe to charge. Never bypass safety protections or connect another battery to force automatic detection.
If the battery remains undetected despite correct connections and compatible settings, have it tested before attempting further charging.
What Does a Bad Battery Warning Mean on a Schumacher Charger?
A Bad Battery warning means the Schumacher charger has detected a battery condition that prevents it from completing its programmed charging process or meeting its battery evaluation criteria. The warning does not always prove that the battery is permanently defective, but it indicates that further inspection is necessary.
Common causes include excessive battery sulfation, an internal cell fault, an inability to retain charge, or failure to reach the expected charging voltage within the charger’s programmed limits. A weak battery may initially accept charging current but fail to maintain the voltage required for successful charging.
For example, a deteriorated lead-acid battery with a damaged cell may repeatedly trigger a charging failure even when the clamps and settings are correct. Continuing to charge such a battery can create additional safety risks without restoring usable capacity.
When a Bad Battery warning appears, stop charging according to the manual and disconnect the charger safely. Inspect the battery for visible damage, then arrange a battery load or conductance test if its condition remains uncertain.
Replace the battery if testing confirms that it cannot safely hold sufficient charge or deliver the current required by the vehicle. Do not assume that extending charging time will restore a battery with an internal failure.
Read more: How to Use a Duralast Jump Starter: Step-by-Step Guide
Can You Leave a Schumacher Battery Charger Connected Overnight?
You can leave certain automatic Schumacher battery chargers connected overnight when the model supports the intended charging or maintenance operation, the battery is compatible, and the manufacturer’s instructions permit it. However, not every Schumacher charger is designed for unattended or extended operation.
Automatic Schumacher chargers monitor battery conditions and regulate charging output according to their programmed charging stages. Models equipped with a maintenance function can reduce or interrupt charging current after the battery reaches the required charge level. This helps limit overcharging during approved maintenance operation.
For example, a compatible automatic Schumacher charger may finish charging a 12V lead-acid battery during the night and transition into maintenance mode. The charger then monitors battery conditions and supplies additional energy when required by its maintenance algorithm.
Manual chargers and models without automatic charge termination require different precautions. Leaving a manual charger operating beyond the necessary charging period can increase the risk of overcharging, electrolyte loss, excessive heating, and battery damage.
Before leaving a charger connected for an extended period, verify that its manual permits the intended use. Place the battery in a well-ventilated environment, keep the charger away from flammable materials, and ensure that the battery is not damaged or frozen.
Long-term battery maintenance is different from ordinary battery charging. A Schumacher model specifically designed for maintenance can help keep a compatible vehicle battery charged during storage. However, its permitted connection duration, supported battery types, and operating requirements must be confirmed in the model’s instructions.
Do not leave the charger operating overnight when the battery shows abnormal heating, leaking electrolyte, unusual odors, or repeated fault warnings. Stop the charging process and investigate these conditions before using the equipment again.
How Does Using a Schumacher Battery Charger Differ Between Models?
Schumacher battery chargers differ in charging capacity, supported battery types, control systems, and additional functions such as battery maintenance, boost charging, and engine starting. Although the basic charging procedure is similar across many models, the available settings and operating instructions are not identical.
For example, the Schumacher SC1281 is a battery charger and engine starter with automatic charging functions, while the Schumacher SC1359 is a compact automatic battery charger and maintainer designed for compatible batteries. These models serve different charging needs and use different controls. A procedure that requires selecting a charging rate or activating an engine start function on one model may not apply to another.
The most important differences involve battery voltage compatibility, charging amperage, battery chemistry selection, and automatic charging features. Some Schumacher chargers support both 6V and 12V batteries, while others are designed for specific voltages. Certain models also provide dedicated AGM settings, digital battery status displays, or maintenance functions.
Using the correct model-specific instructions prevents incompatible charging settings and helps users interpret charging indicators accurately. Before operating any Schumacher charger, identify its model number and confirm the supported functions in the corresponding owner’s manual.
How Do You Find the Correct Schumacher Battery Charger Manual?
Find the correct Schumacher battery charger manual by identifying the model number on the charger and searching for that model through Schumacher Electric’s official support resources. The model number is typically printed on the product label or housing.
Follow these three steps:
- Locate the model number. Check the charger’s identification label for a model designation, such as SC1281 or SC1359.
- Visit the official Schumacher website. Open Schumacher Electric and look for the product’s support information or instruction manual.
- Match the manual to your charger. Confirm that the model number and product configuration correspond to your equipment before following the instructions.
The owner’s manual provides essential information about clamp connections, supported battery types, charging modes, operating limits, and troubleshooting procedures.
If your charger is an older or discontinued model, check Schumacher’s available support documentation or contact the manufacturer for the appropriate instructions. Avoid relying on manuals for visually similar chargers because their electrical specifications and operating controls may differ.
Which Charging Features Vary Between Schumacher Models?
Five charging features commonly vary between Schumacher battery charger models: supported voltage, charging amperage, battery chemistry compatibility, control interface, and additional operating modes. These differences determine how the charger should be configured and which batteries it can safely charge.
Supported voltage determines whether the charger can operate with 6V batteries, 12V batteries, or other voltages explicitly listed in its specifications. Always match the charger’s supported voltage to the battery.
Charging amperage determines the charger’s available current output. A charger rated for 2A charging serves different charging requirements than a model offering 10A or higher charging rates. The actual current delivered depends on the charger’s charging algorithm and battery condition.
Battery chemistry compatibility determines which battery types the charger can charge safely. Flooded lead-acid, AGM, GEL, and lithium batteries have different charging requirements. A charger must explicitly support the battery chemistry being charged.
Control interfaces range from switches and indicator lights to push-button controls and digital displays. Automatic models may manage charging parameters internally, while other chargers require the user to select specific settings.
Additional operating modes include battery maintenance, boost charging, and engine starting. These functions are available only on models designed to provide them and must be operated within the manufacturer’s specified limits.
For safe operation, use the instructions and specifications for your exact Schumacher charger model rather than assuming that every Schumacher battery charger supports the same settings or functions.