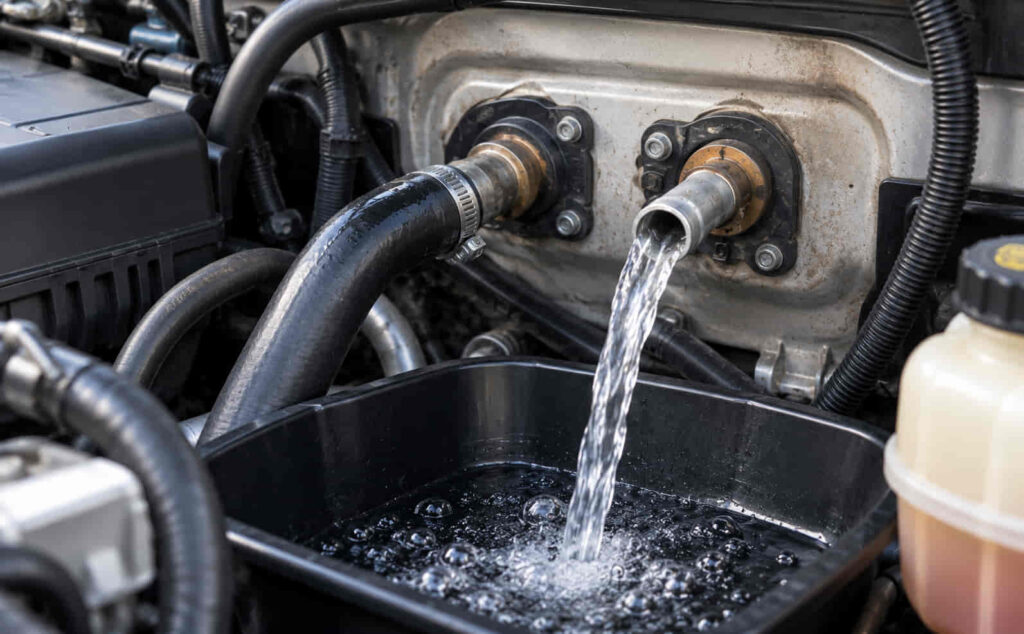
A heater core can be tested without removing it by checking coolant circulation, comparing the temperature of the inlet and outlet heater hoses, looking for signs of restricted flow, and pressure-testing the cooling system when a leak is suspected. These tests help determine whether the heater core is transferring heat normally, becoming clogged or restricted, or losing coolant through a leak.
A lack of cabin heat does not automatically mean the heater core is bad. The heater core depends on hot engine coolant flowing through its internal passages and transferring heat to air moving through the HVAC system. Low coolant, trapped air, insufficient coolant circulation, thermostat problems, or an HVAC temperature-control fault can produce similar symptoms. Testing should therefore establish what is happening at the heater core before replacement is considered.
An effective heater core diagnosis follows the coolant path through the component. The engine must first reach its normal operating condition and the cooling system must contain sufficient coolant. The inlet and outlet temperatures can then provide evidence about coolant flow and heat transfer. If restriction or leakage remains suspected, additional flow or pressure testing can narrow the fault further. This guide explains how to perform these heater core tests, interpret the results, and distinguish a failed heater core from other cooling-system or HVAC problems.
How Can You Test a Heater Core?
You can test a heater core by checking whether hot coolant reaches it, comparing the inlet and outlet hose temperatures, evaluating coolant flow, and checking for leaks when the results indicate a problem. The purpose of the test is to determine whether coolant can enter the heater core, circulate through its internal passages, transfer heat, and return to the cooling system without leaking. Each part of this sequence provides diagnostic information about the heater core’s condition.
Start the diagnosis with the cooling system assembled and the engine operating under the conditions required to produce cabin heat. Once the engine reaches normal operating temperature, hot coolant should be available to circulate through the heater circuit. The heater core inlet and outlet hoses provide accessible points for evaluating what happens before and after coolant passes through the core. Measuring these hoses is more useful than judging cabin temperature alone because cabin heat also depends on airflow and HVAC temperature-control components.
The inlet hose should indicate that heated coolant is reaching the heater core. The outlet hose provides information about what happens after coolant travels through the core. A significant abnormal difference between the two can indicate restricted coolant flow, but the temperature relationship must be interpreted together with engine temperature, coolant level, vehicle design, and operating conditions. One hose temperature by itself does not prove that the heater core has failed.
The diagnostic direction changes when both heater hoses become hot but the cabin still receives little or no warm air. In that situation, hot coolant is reaching the heater circuit, so the next investigation may need to include airflow through the HVAC case and temperature-control components such as the blend door. Conversely, a hot inlet combined with evidence of poor flow through the outlet places greater attention on a restricted heater core or another condition preventing coolant circulation through that circuit.
Leak testing addresses a different heater core failure mode. A heater core can allow coolant to flow and transfer heat while still leaking. Unexplained coolant loss, coolant odor inside the vehicle, dampness near the HVAC housing, or other evidence of coolant entering the passenger compartment can justify a cooling-system pressure test. Pressure testing helps reproduce leakage without relying only on whether the heater is producing warm air.
A complete heater core test therefore evaluates both performance and integrity. Temperature and flow observations determine whether the core is receiving and circulating hot coolant, while leak and pressure testing determine whether it can contain coolant properly. This combination provides stronger evidence than replacing the heater core based only on a no-heat complaint.
What Tools Do You Need to Test a Heater Core?
The primary tool for testing heater core temperature is an infrared or contact thermometer, while a cooling-system pressure tester is used when the diagnosis includes a suspected leak. Basic inspection also requires adequate lighting and appropriate hand protection because the test involves components located near a hot engine and pressurized cooling system.
A thermometer provides a repeatable way to compare the heater core inlet and outlet hoses. Touching the hoses by hand may reveal that one feels hotter than the other, but human temperature perception cannot provide a consistent measurement and exposes the person performing the test to hot engine components. Measuring both hoses at comparable locations and under the same operating conditions produces more useful diagnostic evidence.
An infrared thermometer allows hose surface temperature to be checked without direct contact, but the measurement technique matters. Surface material, reflectivity, distance, and measurement location can affect infrared readings. The useful diagnostic value comes from taking comparable measurements consistently rather than treating a single surface-temperature reading as the exact internal coolant temperature.
A contact thermometer can also be used when it can be attached or positioned safely and consistently on the hose surface. Regardless of the instrument, the objective remains the same: establish the temperature relationship between coolant entering and leaving the heater core. The measurement supports diagnosis only when the engine and cooling system are operating under comparable conditions.
A cooling-system pressure tester becomes relevant when leakage is suspected rather than when the only question is coolant temperature. The tester applies controlled pressure to the cooling system so leaks can be investigated without depending entirely on leakage that occurs during normal driving. The pressure used must follow the applicable vehicle or cooling-system specification; applying an arbitrary universal pressure can damage components or produce an invalid test.
The tools support the diagnosis, but they do not replace interpretation. A thermometer identifies a temperature relationship, and a pressure tester helps expose loss of cooling-system integrity. Determining whether the heater core is actually responsible requires connecting those results with coolant level, coolant circulation, visible leakage, cabin symptoms, and the applicable vehicle configuration.
Read more: ford f150 fuel tank size guide
What Should You Check Before Testing the Heater Core?
Before testing the heater core, check the coolant level, confirm that the engine can reach normal operating temperature, and identify any cooling-system condition that could prevent hot coolant from reaching the core. These checks are necessary because poor cabin heat does not prove that the heater core itself is restricted or damaged. The heater core can transfer heat only when the cooling system supplies it with sufficiently hot coolant at an adequate flow rate.
Check the coolant level only according to the vehicle manufacturer’s procedure and with the cooling system in a safe condition. Low coolant can reduce or interrupt circulation through the heater circuit because the heater core depends on a continuous supply of coolant from the engine cooling system. If the coolant level is low enough to introduce air into the circuit, the resulting loss of circulation can produce weak or intermittent cabin heat even when the heater core passages remain open.
Air trapped in the cooling system can create a similar diagnostic problem. An air pocket can interfere with coolant circulation through the heater core and cause inconsistent heater performance. This condition is especially relevant after cooling-system service, coolant replacement, hose removal, or another repair that allowed the system to drain. If trapped air is suspected, the cooling system should be filled and bled according to the applicable vehicle procedure before heater core temperature results are treated as evidence of a restriction.
The engine must also reach its intended operating condition before the heater core temperature test becomes meaningful. If the coolant remains too cool because the engine has not warmed up or because another cooling-system fault prevents normal warm-up, both heater hoses may remain cooler than expected. In that situation, the test does not establish that the heater core is clogged; it shows that the core is not receiving the hot coolant required for normal heat transfer.
Safety is part of the diagnostic procedure because the test involves hot coolant and potentially pressurized components. Do not remove a radiator cap, coolant reservoir pressure cap, or disconnect a heater hose from a hot, pressurized cooling system. Allow the system to cool and follow the vehicle manufacturer’s service procedure before opening the circuit. Heater hoses and nearby engine components can also become hot enough to cause burns even when the cooling system remains closed.
Completing these checks establishes a valid starting condition for heater core diagnosis. When coolant level is correct, trapped air has been addressed, and the engine reaches normal operating temperature, inlet and outlet hose measurements provide more meaningful evidence about coolant circulation through the heater core itself.
How Do You Test Heater Core Inlet and Outlet Temperatures?
Test heater core inlet and outlet temperatures by bringing the engine to normal operating temperature, operating the heating system under consistent conditions, identifying both heater hoses, and measuring each hose at comparable locations. The purpose is to compare the thermal condition of coolant entering the heater core with the condition after it has passed through the core.
The heater hoses normally connect the engine cooling circuit to the heater core through the firewall area. One carries heated coolant toward the core, while the other returns coolant after it has traveled through the heater core circuit. Correctly identifying these hoses is important because the test evaluates coolant behavior across the core rather than simply checking whether two hoses under the hood feel warm.
Use an infrared or suitable contact thermometer to measure both hoses under the same operating conditions. Take measurements at comparable points rather than measuring one hose near the engine and the other at a substantially different location. Consistency reduces the effect of surrounding heat sources, hose location, and measurement technique on the comparison. If an infrared thermometer is used, aim at similar hose surfaces and maintain a consistent measurement method because surface characteristics can influence the displayed temperature.
The temperature relationship provides evidence about coolant movement and heat transfer. Hot coolant should reach the inlet side when the engine and cooling system are operating correctly. Coolant then passes through the heater core, where thermal energy transfers through the core to air moving through the HVAC system. The coolant returning from the core can therefore differ in temperature because heat has been transferred during this process.
Do not diagnose a heater core from a universal inlet-to-outlet temperature difference alone. The measured difference can change with coolant temperature, blower airflow, engine speed, ambient conditions, HVAC settings, heater core design, and vehicle-specific coolant routing. A fixed temperature difference applied to every vehicle can therefore create a false diagnosis. The useful question is whether the measured relationship is consistent with coolant reaching and circulating through the heater core under the conditions being tested.
A hot inlet combined with an outlet that remains substantially cooler under comparable conditions can provide evidence of restricted coolant circulation through the heater core, particularly when the vehicle also has weak cabin heat. The temperature pattern should still be interpreted with the other diagnostic evidence because a circulation problem elsewhere in the heater circuit can influence the result.
If both hoses become hot while the passenger compartment still receives little or no heat, the result points the diagnosis in a different direction. Hot coolant reaching and leaving the heater core provides evidence that the coolant side of the heating system is functioning, so airflow through the core and HVAC temperature-control components require further investigation. The hose-temperature test therefore does more than identify a possible restriction; it helps determine which part of the heating system should be tested next.
What Do Heater Core Inlet and Outlet Temperature Results Mean?
Heater core inlet and outlet temperatures indicate whether hot coolant is reaching the core and whether coolant appears to be circulating through it normally. The most useful diagnosis comes from comparing both hoses under the same operating conditions rather than judging either temperature independently. The resulting pattern can direct the next test toward the heater core, the engine cooling system, or the HVAC air-control system.
A hot inlet hose combined with an outlet hose that remains substantially cooler can indicate restricted coolant flow through the heater core. Hot coolant is reaching the inlet, but reduced circulation through the internal passages limits the amount of heated coolant moving through the core. This pattern becomes stronger evidence of a restriction when it occurs together with weak cabin heat and the cooling system otherwise reaches normal operating temperature.
The temperature difference does not establish the exact cause of the restriction by itself. Deposits, degraded coolant contamination, internal debris, or another obstruction in the heater circuit can reduce flow. The test identifies abnormal thermal behavior across the heater core; additional diagnosis determines whether the restriction is inside the core or elsewhere in the coolant path.
If both heater core hoses remain relatively cool after the engine should be at normal operating temperature, do not immediately diagnose a clogged heater core. The result can indicate that sufficiently hot coolant is not reaching the heater circuit. Coolant level, trapped air, thermostat operation, coolant circulation, and vehicle-specific coolant-control components should be evaluated before the heater core is condemned.
If both heater hoses become hot but cabin air remains cold or insufficiently warm, the result provides a different diagnostic direction. Hot coolant reaching and leaving the heater core indicates that the coolant side of the system is capable of delivering heat to the core. The remaining problem may involve airflow across the heater core or HVAC temperature control, including a blend door that does not direct air through the heated core as intended.
Temperature results should therefore be interpreted as diagnostic patterns rather than pass-or-fail numbers. A hot inlet and abnormally cooler outlet directs attention toward restricted flow, two unexpectedly cool hoses direct attention upstream in the cooling system, and two hot hoses with inadequate cabin heat direct attention toward HVAC airflow or temperature control. This interpretation narrows the fault without treating one measurement as proof of heater core failure.
How Do You Test a Heater Core for a Clog or Restricted Flow?
Test a heater core for a clog by first looking for evidence of restricted coolant circulation across the core, then confirming the restriction with additional flow checks when necessary. A temperature imbalance between the inlet and outlet hoses is an effective initial indicator because an internal restriction changes how coolant moves through the heater core and therefore changes its heat-transfer behavior.
A heater core contains narrow passages that allow hot coolant to distribute thermal energy across a large heat-transfer surface. When deposits or contamination reduce the effective area of those passages, coolant cannot circulate through the core as freely. Reduced flow can leave the inlet side hot while the outlet side remains substantially cooler and can reduce the amount of heat available to the passenger compartment.
The restriction diagnosis becomes more convincing when several observations agree. The engine should reach normal operating temperature, coolant level should be correct, and hot coolant should reach the heater core inlet. If those conditions are present while the outlet indicates poor circulation and cabin heat remains weak, the heater core becomes a stronger location of interest than when the diagnosis is based only on cold air from the vents.
If temperature testing does not provide enough evidence, coolant flow through the heater core can be investigated more directly according to the vehicle’s service procedure. Any test requiring heater-hose disconnection must be performed only after the engine and cooling system have cooled and pressure has been safely released. Disconnecting a hose from a hot pressurized cooling system can release hot coolant and cause serious burns.
A direct flow check evaluates whether fluid can pass through the heater core rather than measuring heat transfer indirectly. Restricted passage through the core supports a clog diagnosis, while free passage reduces the likelihood of a severe internal blockage. The result still needs context because coolant flow during an external test does not reproduce every pressure, temperature, and circulation condition present while the engine is operating.
Restriction should also be distinguished from leakage. A clogged heater core has a coolant-flow problem, while a leaking heater core has an integrity problem that allows coolant to escape. A core can also develop both conditions if contamination and deterioration occur together. Temperature and flow testing primarily investigate restriction; coolant loss and pressure testing provide evidence for leakage.
Once testing provides sufficient evidence of an internal restriction, heater core flushing can be considered as a service response rather than used as a substitute for diagnosis. If the core passes coolant normally, repeatedly flushing it is unlikely to address a no-heat problem caused by an HVAC blend door, low coolant, trapped air, or another cooling-system fault. Testing first keeps the repair decision connected to the failure mode actually observed.
How Do You Test a Heater Core for Leaks?
Test a heater core for leaks by checking for coolant loss and cabin-side evidence of leakage, then using a cooling-system pressure test to determine whether the system loses coolant or pressure at the heater core. A leak test evaluates the heater core’s ability to contain coolant, which is different from a temperature or flow test used to diagnose an internal restriction.
Start by looking for evidence that coolant is escaping near the heater core or HVAC housing. A leaking heater core can allow coolant to enter the HVAC case or passenger compartment because the component is normally located inside or adjacent to the cabin-side HVAC assembly. A persistent coolant odor inside the vehicle, unexplained coolant loss, damp carpeting near the HVAC housing, or visible coolant residue can support further investigation of the heater core.
Windshield symptoms can provide additional evidence when coolant reaches the HVAC airflow path. Vapor or residue from leaking coolant may create an oily or persistent film on the inside of the windshield, particularly when air is moving through the HVAC system. This symptom should be considered together with coolant loss or other evidence rather than treated as proof by itself, because normal condensation and other contaminants can also affect windshield clarity.
Coolant level provides another diagnostic clue. A heater core leak is part of the engine cooling system, so coolant escaping from the core can gradually reduce the amount of coolant in the system. Repeated coolant loss without an obvious underhood leak justifies checking less visible locations, including the heater core and its hose connections. The location of the lost coolant still needs to be established before the core is identified as the failed component.
Inspect the heater hose connections as well as the heater core itself. Coolant leaking from a hose, clamp, fitting, control valve where equipped, or connection near the firewall can produce evidence close to the heater core without requiring the core itself to be damaged. Identifying the actual leak location prevents replacement of the heater core when an external connection is responsible.
When visual evidence does not establish the source, a cooling-system pressure test can make a small leak easier to identify. Applying controlled pressure reproduces a condition that encourages coolant to escape through an existing leak while the engine does not need to remain hot. If coolant appears at the heater core or in a location that can be traced back to the core during the test, the evidence for heater core leakage becomes substantially stronger.
The diagnosis should be based on leak location rather than pressure loss alone. The radiator, reservoir, hoses, water pump, thermostat housing, fittings, and other cooling-system components can also leak. A pressure drop establishes that the system may not be maintaining pressure; it does not establish which component is responsible until the source is located.
How Do You Pressure-Test a Heater Core?
Pressure-test a heater core by connecting an appropriate cooling-system pressure tester to a cold cooling system, applying pressure according to the vehicle manufacturer’s specification, and inspecting the heater core area for evidence of coolant leakage or pressure loss. The objective is to expose a leak under controlled conditions without assuming that every pressure drop originates at the heater core.
The engine should be cool before the pressure tester is installed. A hot cooling system can remain pressurized and can release hot coolant if the cap or another component is opened. Once the system has cooled sufficiently, the tester is connected at the pressure-cap location or with the adapter specified for the vehicle. The exact procedure depends on cooling-system design, so the service information for the vehicle takes priority over a universal testing method.
Apply only the pressure specified for the cooling system or the applicable test procedure. More pressure does not produce a better diagnosis. Excessive pressure can stress the heater core, radiator, hoses, seals, reservoir, or other components and can create damage that was not present before the test. For this reason, a single PSI value should not be applied to every vehicle.
After the system is pressurized, monitor the tester and inspect for coolant leakage. When the heater core is the suspected source, examine accessible areas around the HVAC housing, passenger-side floor area, heater hose connections, and any relevant HVAC drain location according to the vehicle design. Visible coolant that can be traced to the heater core provides more specific evidence than a gauge movement alone.
A falling pressure reading requires further investigation rather than an immediate heater core replacement. Pressure can decrease because of leakage at any point in the cooling system, and test equipment or an improperly sealed adapter can also affect the result. The leak source should therefore be located and confirmed before the heater core is identified as defective.
A heater core can also pass a flow-related test and fail a pressure test because the two procedures evaluate different attributes. Coolant may circulate through the core normally while a small opening allows coolant to escape. Conversely, a restricted heater core may maintain pressure because its problem is reduced internal flow rather than loss of system integrity. Combining temperature, flow, and pressure evidence separates these failure modes more accurately.
Pressure testing completes the primary heater core diagnostic sequence by evaluating physical integrity after coolant delivery, temperature behavior, and restriction have been considered. If the core receives hot coolant, shows acceptable circulation, and does not provide evidence of leakage under the applicable test conditions, the diagnosis should move toward other causes of poor cabin heat rather than treating heater core replacement as the default repair.
How Can You Tell If a Heater Core Is Clogged or Leaking?
A clogged heater core primarily produces evidence of restricted coolant flow and reduced heat transfer, while a leaking heater core produces evidence that coolant is escaping from the cooling system. Distinguishing these two failure modes requires connecting the symptoms with temperature, flow, coolant-loss, and pressure-test results rather than using a single symptom to diagnose the core.
A clogged or restricted heater core affects the movement of coolant through its internal passages. When hot coolant reaches the inlet but cannot circulate normally through the core, the outlet temperature can remain substantially lower under the same test conditions. Cabin heat may also become weak because less heated coolant is moving through the heat-transfer surface. When correct coolant level and normal engine warm-up have already been confirmed, this combination provides stronger evidence of an internal restriction.
A leaking heater core creates a different diagnostic pattern because the primary failure involves coolant containment rather than coolant passage. Unexplained coolant loss, coolant odor inside the vehicle, dampness near the HVAC housing, or coolant residue in the passenger compartment can direct attention toward leakage. A pressure test can strengthen the diagnosis when coolant is observed escaping from an area that can be traced to the heater core.
The distinction matters because poor cabin heat can occur with either condition for different reasons. A restriction reduces the amount of hot coolant circulating through the core, while a sufficiently severe leak can lower coolant level and interfere with normal cooling-system circulation. The same complaint—insufficient heat from the vents—can therefore originate from two different heater core failure mechanisms.
A heater core can also be both restricted and leaking. Internal contamination can reduce coolant flow while corrosion or physical deterioration compromises the core’s ability to contain coolant. In that situation, a temperature or flow test may reveal restricted circulation while a pressure test identifies loss of system integrity. One positive test result does not cancel evidence from the other failure mode.
The diagnosis should therefore describe the condition that testing actually supports. Evidence of poor coolant passage supports a restriction diagnosis, while confirmed coolant escape from the core supports a leak diagnosis. If neither condition is established, replacing the heater core solely because the cabin heater performs poorly skips the diagnostic evidence needed to identify the failed component.
Can You Test a Heater Core Without Removing It?
Yes, most initial heater core tests can be performed without removing the heater core from the vehicle. Inlet and outlet temperature measurements, heater-hose observations, cooling-system checks, and pressure testing can provide substantial diagnostic evidence while the core remains installed. Removal is therefore not the first step when the objective is simply to determine whether the heater core is functioning correctly.
Temperature testing is particularly useful because the heater hoses are commonly accessible from the engine compartment even though the heater core itself is located within the HVAC assembly. Measuring the hoses allows the technician to evaluate whether hot coolant reaches the core and whether the thermal behavior of the outlet is consistent with coolant circulation. The core does not need to be physically visible for this comparison.
A cooling-system pressure test can also investigate heater core leakage without removing the component. If controlled system pressure causes coolant to appear inside the passenger compartment, around the HVAC housing, or at another location that can be traced to the heater core, the test can provide evidence of leakage while the core remains installed. Heater hose connections should be inspected at the same time because an external connection can leak near the core and imitate a heater core failure.
Testing before removal is important because heater core access can require substantial disassembly on vehicles where the component is enclosed inside the HVAC housing behind the instrument panel. Removing components before establishing the failure adds labor without improving the initial diagnosis. Non-removal tests allow the decision to disassemble the HVAC system to be based on evidence rather than on the presence of a no-heat complaint alone.
Removal may become necessary when installed testing cannot isolate the fault, when the applicable service procedure requires direct access, or when testing has already established that the heater core requires replacement. A removed core can also be examined or tested more directly when needed, but that step follows the initial diagnosis rather than replacing it.
Testing a heater core without removing it therefore follows a practical diagnostic sequence: establish correct cooling-system conditions, evaluate inlet and outlet temperature behavior, investigate coolant flow when restriction is suspected, and pressure-test when leakage is suspected. If these tests show that coolant is reaching and circulating through a leak-free heater core, the diagnostic direction should move away from heater core replacement and toward other components responsible for cabin temperature control.
How Do You Know the Heater Core Is Not Causing the No-Heat Problem?
The heater core becomes less likely to be the cause of a no-heat problem when hot coolant reaches the core, coolant circulates through it without evidence of a significant restriction, and testing does not identify a leak. When these conditions are present, the diagnostic direction should move toward other parts of the cooling or HVAC system instead of treating heater core replacement as the next step.
Inlet and outlet temperature results provide an important distinction. If both heater hoses become hot under appropriate operating conditions, hot coolant is reaching the heater circuit and returning from it. When cabin air remains cold despite this thermal condition, the problem may be on the air side of the HVAC system. The heater core can contain thermal energy while the HVAC system fails to direct enough air through the core or route heated air into the passenger compartment.
The blend door and its actuator become relevant in this situation because they control how air is directed or temperature is regulated in many HVAC systems. A door that remains in the wrong position can prevent the cabin from receiving heated air even when the heater core itself is hot. This explains why replacing a heater core based only on cold vent temperature can fail to correct the original complaint.
Coolant-side conditions should also be reconsidered when both heater hoses remain cooler than expected. If the engine is not reaching normal operating temperature, coolant is low, air is trapped in the cooling system, or circulation is inadequate, the heater core may simply be receiving insufficient thermal energy. The diagnostic evidence then points upstream from the core rather than proving an internal heater core restriction.
Airflow provides another distinction. A heater core transfers heat to air passing across its fins, so adequate coolant temperature alone cannot produce normal cabin heating when airflow through the HVAC case is inadequate or incorrectly routed. Blower operation, airflow path, and temperature-control operation become more relevant once testing establishes that the heater core is receiving and circulating hot coolant.
The heater core should therefore be ruled in or out through combined evidence rather than one symptom. Normal coolant delivery, reasonable flow behavior, and no confirmed leakage reduce the evidence for heater core failure. At that point, continuing to test the HVAC controls or other cooling-system conditions is more diagnostic than replacing a core that has not demonstrated a specific failure.
Should You Flush or Replace a Heater Core After Testing It?
Flush a heater core when testing supports an internal flow restriction and the core remains structurally sound; replace it when testing confirms leakage or physical failure that flushing cannot repair. If testing does not establish either condition, further diagnosis should come before flushing or replacement.
A heater core flush addresses restricted coolant passage. The procedure attempts to remove deposits or contamination that interfere with coolant circulation through the narrow internal passages. When a hot inlet, abnormal outlet behavior, weak heater performance, and additional flow evidence consistently indicate restriction, flushing can address the mechanism responsible for the reduced heat transfer.
Flushing does not repair a leaking heater core. A leak means the core can no longer maintain coolant-system integrity because coolant is escaping through a damaged area. Moving cleaning fluid or coolant through the passages does not restore damaged metal, seals, joints, or other failed portions of the core. When testing confirms that the heater core itself is leaking, replacement addresses the physical failure more directly.
The condition of the heater core also matters when deciding whether flushing is appropriate. A severely deteriorated or contaminated core may not be a good candidate for repeated flushing even when restriction is present. The applicable vehicle service information, condition of the cooling system, type of contamination, and evidence of corrosion should be considered before applying a flushing procedure.
A successful restriction diagnosis should also lead to investigation of the cooling system that supplied the contamination. If deposits or degraded coolant restricted the heater core, restoring flow through the core without addressing the condition of the remaining coolant can leave the underlying contamination source unresolved. Heater core service should therefore remain connected to the condition of the complete cooling system.
Replacement should likewise follow confirmed evidence rather than function as a diagnostic test. Heater core replacement can require significant HVAC or instrument-panel disassembly on some vehicles, so replacing the component before verifying the failure can add substantial labor while leaving the original no-heat problem unchanged. Temperature, flow, and pressure testing are intended to establish that evidence before major disassembly begins.
The final repair decision follows the failure mode identified during testing. Restricted flow with an otherwise serviceable core supports evaluating a flush, confirmed heater core leakage supports replacement, and normal heater core test results support continuing diagnosis elsewhere. This sequence connects the repair directly to the measured condition instead of treating every loss of cabin heat as a failed heater core.