To clean leather car seats, vacuum loose dirt, apply a leather-safe cleaner with a microfiber cloth or soft-bristle brush, gently remove surface grime, wipe away cleaning residue, and allow the seats to air-dry. This process removes accumulated dust, body oils, and everyday dirt while reducing the risk of damaging the leather’s protective finish.
Most modern cars use coated leather upholstery, which has a protective surface layer designed to resist moisture, stains, and everyday wear. However, cleaning methods vary depending on the material. Genuine leather, perforated leather, and synthetic leather require compatible cleaning products and different levels of moisture control. Using harsh chemicals, abrasive brushes, or excessive water can cause discoloration, surface wear, or moisture buildup inside the seats.
Proper leather seat cleaning involves more than wiping visible stains. Dirt collects in seat seams, creases, and high-contact areas such as bolsters and cushions. Removing these contaminants regularly helps preserve the upholstery’s appearance and prevents abrasive particles from wearing down the surface.
This guide explains the tools needed to clean leather car seats, the step-by-step cleaning process, methods for removing common stains, and mistakes to avoid. It also covers cleaning frequency, leather conditioning, and practical ways to keep car seats clean for longer.
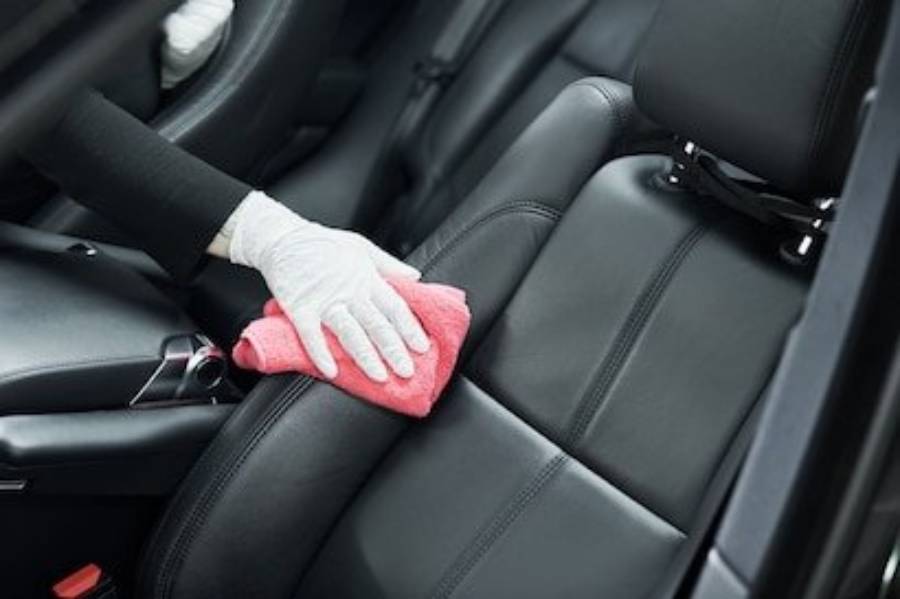
What Do You Need to Clean Leather Car Seats?
To clean leather car seats safely, you need five essential supplies: a vacuum cleaner, microfiber cloths, a soft-bristle brush, a leather-compatible cleaner, and a dry microfiber towel. Each tool serves a specific purpose in removing dirt, body oils, and cleaning residue without damaging the leather’s protective coating.
A vacuum cleaner with a soft upholstery attachment removes loose dust, crumbs, and abrasive particles from the seat surface. Dirt accumulates along stitching, between seat cushions, and inside creases. Removing these particles before wiping prevents them from rubbing against the leather and creating fine scratches.
Microfiber cloths and a soft-bristle detailing brush remove surface contaminants through gentle mechanical cleaning. Microfiber fibers capture dust and loosened grime without requiring excessive pressure. A soft-bristle brush helps dislodge dirt from textured leather, seat bolsters, and stitching, where a cloth alone may not reach effectively.
A leather-compatible automotive cleaner breaks down accumulated body oils, grease, and everyday grime. Choose a product approved for the seat’s specific leather finish and follow the manufacturer’s dilution and application instructions. Avoid bleach, ammonia-based household cleaners, and aggressive degreasers because they can damage protective coatings or alter the leather’s appearance.
Finally, a clean, dry microfiber towel removes residual moisture and cleaning solution after treatment. Keep separate cloths for applying cleaner and wiping away residue to prevent transferring collected dirt back onto the seats. Before using any cleaning product across the entire seat, test it on a small, inconspicuous area and check for discoloration or changes in texture.
How Do You Clean Leather Car Seats Step by Step?
Cleaning leather car seats involves three main stages: preparing the upholstery, removing dirt with a compatible cleaner, and drying the surface completely. The process works for most modern coated leather seats, although unfinished leather, damaged upholstery, and specialty finishes may require different care instructions.
How Do You Prepare Leather Car Seats for Cleaning?
To prepare leather car seats for cleaning, park the vehicle in a shaded area, inspect the upholstery, remove loose debris, and test the cleaning product on a hidden section. Proper preparation prevents abrasive particles from scratching the surface and helps identify leather finishes that require specialized treatment.
Start by parking in a shaded, well-ventilated location and allowing hot seats to cool. Direct sunlight heats leather surfaces and accelerates the evaporation of cleaning solutions, which can leave uneven residue or reduce the time available to remove dirt. Remove personal belongings, seat accessories, and loose items that obstruct access to the upholstery.
Inspect the leather for cracks, peeling coatings, worn bolsters, and exposed material. These areas require special attention because cleaning liquid can penetrate damaged surfaces. Check the vehicle owner’s manual for recommended cleaning products, particularly when working with premium leather finishes or ventilated seats.
Next, vacuum the entire seating surface using a soft upholstery attachment. Move the nozzle gently across the seat cushions, backrests, side bolsters, and headrests. Pay particular attention to seams and creases, where sand, crumbs, and other particles collect. Use a narrow crevice attachment carefully around stitching and between cushions, keeping hard plastic edges from scraping the leather.
Before applying cleaner, place a small amount on a concealed section of the seat. Follow the product’s instructions, allow the test area to dry, and inspect it for color transfer, staining, or changes in surface texture. Continue with the full cleaning process only when the product is compatible with the upholstery.
How Do You Apply Leather Cleaner and Remove Dirt?
To remove dirt from leather car seats, apply a leather-compatible cleaner to a microfiber cloth or soft-bristle brush, work gently over small sections, and wipe away loosened grime with a clean cloth. Controlled application prevents excess liquid from collecting in stitching, perforations, and seat padding.
Begin with a small section of the seat, such as one side bolster or part of the seat cushion. Apply the cleaner to your cloth or brush according to the product instructions rather than spraying directly onto the upholstery. This gives you greater control over the amount of liquid reaching the leather, especially around perforated surfaces and electrical seat components.
Use light, overlapping movements to distribute the cleaner across the surface. On smooth leather, a microfiber cloth is generally sufficient for removing light dust, body oils, and surface grime. For textured leather, use a soft-bristle detailing brush with minimal pressure to loosen dirt trapped in the grain. Avoid aggressive scrubbing because repeated friction can wear down the protective finish.
Focus on high-contact areas, including the driver’s seat cushion, outer bolsters, armrests, and backrest. These surfaces collect skin oils, perspiration residue, clothing dye, and dirt through repeated contact. For example, the outer driver’s seat bolster experiences frequent friction as occupants enter and exit the vehicle, making it particularly susceptible to accumulated grime and surface wear.
After loosening the dirt, wipe the treated section with a clean microfiber cloth. Fold the cloth to expose a fresh surface as it becomes dirty. Follow the cleaner manufacturer’s instructions for removing any remaining product residue. A second gentle application is preferable to increasing scrubbing pressure when visible dirt remains.
Clean the remaining seat sections using the same method. Work from the upper backrest toward the seat cushion to maintain an organized cleaning sequence and avoid repeatedly touching completed areas. Keep liquid away from seat controls, electrical connectors, and ventilation openings.
How Do You Dry Leather Car Seats After Cleaning?
To dry leather car seats after cleaning, remove excess moisture with a dry microfiber towel and allow the upholstery to air-dry in a shaded, ventilated environment. Proper drying prevents cleaning residue and trapped moisture from remaining on the seat surface.
Immediately after cleaning each section, wipe the leather with a fresh, dry microfiber towel. Use gentle pressure to absorb surface moisture, particularly around stitching, seat creases, and perforations. Inspect the upholstery for visible cleaner residue or damp areas and address them according to the cleaning product’s instructions.
Leave the vehicle in a ventilated location until the leather feels dry to the touch. Open the doors or windows when conditions are safe and practical to improve airflow. Drying time depends on the amount of cleaning solution used, ambient humidity, airflow, and seat construction. Avoid sitting on the seats while they remain damp because clothing contact can transfer dirt or create uneven marks.
Do not use hair dryers, heat guns, or other concentrated heat sources to accelerate drying. Excessive heat can damage leather finishes and accelerate deterioration of already worn upholstery. Prolonged exposure to direct sunlight can also heat the seat unevenly and contribute to fading over time.
Once the seats are dry, inspect the cushions, bolsters, and stitching for remaining dirt, discoloration, or cleaning residue. A properly cleaned coated leather seat should feel clean and dry without a sticky or greasy film. If residue remains, remove it using the product manufacturer’s recommended method rather than applying additional chemicals.
How Do You Clean Different Types of Leather Car Seats?
Cleaning different types of leather car seats requires matching the cleaning product and application method to the upholstery material and its protective finish. The four main categories are coated leather, aniline leather, perforated leather, and synthetic leather. Each responds differently to moisture, cleaning chemicals, and mechanical friction, so identifying the material before cleaning helps prevent surface damage.
Coated leather car seats are cleaned using a leather-compatible automotive cleaner, a soft microfiber cloth, and gentle wiping movements. Most modern automotive leather upholstery has a pigmented protective coating that helps resist dirt, moisture, and everyday wear. This finish allows surface contaminants to be removed without saturating the underlying leather. Apply a small amount of cleaner to a cloth, wipe the surface in overlapping movements, and remove residue according to the product instructions. Avoid abrasive brushes and aggressive chemicals because they can wear down or discolor the protective coating.
Aniline leather car seats require specialized cleaning products and minimal moisture because their surface has little or no protective pigment coating. Aniline leather retains a natural appearance and texture but absorbs liquids and stains more readily than coated leather. Use only products specifically approved for the material, and test them on an inconspicuous area before cleaning. Avoid general-purpose leather cleaners, excessive rubbing, and water-based spot treatments unless the manufacturer explicitly recommends them. For deeply embedded stains, professional leather cleaning is safer than repeated home treatment.
Perforated leather car seats should be cleaned with a lightly dampened microfiber cloth and a compatible cleaner applied in controlled amounts. The small holes in perforated upholstery allow air circulation in ventilated seats but also create openings through which excess liquid can enter the underlying foam and ventilation channels. Apply cleaner to the cloth rather than directly onto the seat, use minimal pressure, and avoid saturating the perforations. Remove remaining moisture immediately with a dry microfiber towel. Do not force cleaning solution into the holes with a brush or spray nozzle.
Synthetic leather car seats, including polyurethane-based upholstery, should be cleaned according to the vehicle manufacturer’s material-specific instructions. Unlike genuine leather, synthetic upholstery consists of a manufactured surface layer over a fabric backing and does not require traditional leather conditioning oils. A compatible synthetic upholstery cleaner or manufacturer-approved mild cleaning solution can remove surface dirt without affecting the finish. Avoid solvents, abrasive pads, and petroleum-based conditioners because unsuitable products can damage the synthetic coating.
Correctly identifying the upholstery material is essential because seats marketed as leather may combine genuine leather seating surfaces with synthetic side panels or bolsters. Check the owner’s manual or manufacturer specifications before applying a cleaning product across the entire seat.
How Do You Remove Stains From Leather Car Seats?
To remove stains from leather car seats, identify the contaminant, remove loose or excess material, and clean the affected area with a product compatible with the leather finish. Food residue, grease, body oils, and clothing dye require different cleaning approaches because they interact with leather coatings in different ways.
Fresh surface stains are generally easier to remove than contaminants that have penetrated the finish or caused permanent discoloration. Cleaning should begin with the least aggressive method, followed by specialized treatment only when necessary. Excessive scrubbing, repeated chemical applications, and prolonged exposure to cleaning solutions can damage the upholstery without removing the underlying stain.
How Do You Remove Food, Drink, and Grease Stains From Leather Car Seats?
To remove food, drink, and grease stains from leather car seats, blot fresh spills, remove solid residue, and clean the affected surface with a leather-compatible cleaner. The goal is to lift contaminants from the protective finish before they spread, dry, or penetrate damaged areas.
For food spills, first remove solid particles using a clean microfiber cloth or a soft tool that will not scratch the upholstery. Avoid pressing crumbs, sauces, or sticky residue into stitching and seat creases. Blot liquid spills immediately with an absorbent microfiber towel rather than rubbing them across the surface. Rubbing spreads the contaminant and increases the area requiring cleaning.
Apply a small amount of approved leather cleaner to a separate microfiber cloth and gently wipe the stained section. Work from the outer edge of the spill toward the center to limit spreading. Remove loosened residue with a clean cloth and repeat the process only when the leather finish remains unaffected.
For example, spilled coffee on a coated leather seat should be blotted promptly before the remaining surface residue is cleaned. Coffee that enters perforations, seams, or damaged leather may require professional treatment because liquid can reach materials beneath the protective surface.
Grease and body oil stains require particular attention because oily contaminants adhere to high-contact areas such as headrests, armrests, and seat bolsters. Use a leather cleaner specifically formulated to remove oils from automotive upholstery. Apply the product according to its instructions, gently work it over the affected area, and wipe away the dissolved grime with a clean microfiber towel.
Avoid household dishwashing detergents, concentrated degreasers, and solvent-based stain removers unless the upholstery manufacturer explicitly approves them. These products may remove visible grease but can also affect protective coatings or leave unwanted residue. Oil stains that have penetrated unfinished leather or damaged coatings may not be removable through routine surface cleaning.
How Do You Remove Dye Transfer and Stubborn Stains From Leather Car Seats?
To remove dye transfer from leather car seats, use a leather-compatible dye transfer cleaner and treat the affected area gently before the transferred color becomes more difficult to remove. Dye transfer occurs when pigments from clothing, bags, or other materials migrate onto the seat surface through repeated contact, friction, moisture, or heat.
Light-colored leather seats are particularly susceptible to visible dye transfer from dark denim jeans. Blue or gray marks commonly appear on seat cushions and outer bolsters because these areas experience frequent contact with clothing. On coated leather, transferred dye may initially remain near the surface, making early treatment more effective.
Begin by cleaning the affected area with a standard leather-compatible cleaner to remove dirt and body oils. If the discoloration remains, use a dye transfer remover specifically approved for the seat’s finish. Test the product on a concealed area, follow the manufacturer’s application instructions, and avoid leaving it on the surface longer than recommended.
Do not use bleach, acetone, rubbing alcohol, or abrasive cleaning pads to remove denim marks. These substances and tools can strip pigment, soften coatings, or create permanent differences in color and texture. Repeatedly scrubbing the same area can also produce a lighter patch that is more noticeable than the original stain.
Stubborn stains require a different approach when the contaminant has penetrated the leather finish or caused permanent discoloration. Examples include old ink marks, deeply absorbed oils, persistent dye transfer, and stains associated with damaged coatings. In these cases, additional cleaning may not restore the original appearance because the problem is no longer limited to removable surface dirt.
Inspect the affected area after one or two gentle cleaning attempts, allowing it to dry between treatments. Stop if the leather becomes sticky, loses color, develops an unusual sheen, or shows signs of coating deterioration. These changes indicate that further cleaning risks damaging the finish.
Professional automotive leather detailers can assess whether the affected surface needs specialized stain extraction, coating repair, or color restoration. For example, a dark denim stain that has migrated into a worn beige leather bolster may require refinishing rather than stronger cleaning chemicals.
Removing stains safely depends on recognizing the difference between surface contamination and permanent material damage. A suitable cleaner removes dirt from an intact finish, while damaged or discolored upholstery may require restoration rather than repeated cleaning.
What Should You Avoid When Cleaning Leather Car Seats?
When cleaning leather car seats, avoid six common mistakes: using harsh chemicals, scrubbing with abrasive tools, applying excessive water, using steam without manufacturer approval, applying unsuitable conditioners, and drying leather with excessive heat. These practices can damage protective coatings, alter the upholstery’s color, and accelerate surface deterioration.
1. Using harsh household cleaning chemicals. Bleach, ammonia-based cleaners, strong degreasers, and solvent-based products can damage automotive leather finishes. Most modern leather seats have a protective coating that helps resist moisture, dirt, and everyday wear. Aggressive chemicals can weaken this coating, causing discoloration, dull patches, or surface deterioration. Use an automotive leather cleaner approved for the specific upholstery material instead.
2. Scrubbing leather with abrasive brushes or pads. Stiff-bristle brushes, scouring pads, and abrasive sponges create excessive friction against the leather surface. Repeated scrubbing can wear away the protective finish, particularly on seat bolsters and other high-contact areas. Use a soft microfiber cloth or leather-safe detailing brush with light pressure. For stubborn dirt, repeat a gentle cleaning process rather than increasing scrubbing force.
3. Applying too much water or cleaning solution. Excess moisture can enter seat seams, perforations, and damaged leather surfaces. Liquid that reaches the underlying foam may remain trapped and contribute to odors or moisture-related damage. Perforated seats require additional care because their ventilation holes provide direct openings into the seat structure. Apply cleaning products to a cloth or brush in controlled amounts and remove excess moisture promptly.
4. Using steam cleaners without manufacturer approval. Steam introduces heat and moisture that may affect leather coatings, adhesives, and underlying seat components. Concentrated steam can also force moisture into stitching and perforations. Although certain professional detailing procedures use specialized equipment, steam cleaning is not a universal method for automotive leather. Follow the vehicle manufacturer’s recommendations before considering steam treatment.
5. Applying unsuitable oils or leather conditioners. Household oils, petroleum-based products, and heavy leather conditioners may leave greasy residue or create uneven surface finishes. Modern coated leather seats generally require different care from unfinished leather products such as saddles or leather boots. Use only conditioners or protectants approved for the seat material, and avoid products that leave a sticky or slippery surface.
6. Drying leather with excessive heat. Hair dryers, heat guns, and prolonged exposure to intense sunlight can accelerate deterioration of leather finishes and increase the risk of discoloration. Heat can also affect already damaged coatings and adhesives. Dry cleaned seats using a microfiber towel and natural airflow in a shaded, ventilated environment.
Avoiding these mistakes helps preserve the leather’s protective finish and reduces the likelihood of permanent damage. When the upholstery shows cracking, peeling, or significant discoloration, professional assessment is preferable to repeated cleaning with stronger products.
How Often Should You Clean Leather Car Seats?
Leather car seats should be cleaned whenever visible dirt, body oils, or spills accumulate, with routine surface cleaning generally performed every two to four weeks and more thorough cleaning approximately every three to six months. These are practical maintenance intervals rather than universal manufacturer requirements. The appropriate schedule depends on vehicle usage, upholstery condition, environmental exposure, and the type of leather.
For vehicles used daily, dust and body oils accumulate on frequently touched surfaces such as the driver’s seat cushion, outer bolsters, headrests, and armrests. A light cleaning every two to four weeks helps remove these contaminants before they become embedded in textured surfaces or seat creases. Use a soft microfiber cloth and a compatible cleaning product when necessary, rather than applying strong cleaners during every maintenance session.
Vehicles exposed to heavier use require more frequent attention. For example, cars regularly carrying children, pets, or multiple passengers accumulate additional crumbs, hair, dirt, and accidental spills. Ride-share vehicles also experience repeated contact with clothing and personal belongings, increasing the likelihood of surface grime and dye transfer. Inspect these seats weekly and remove contaminants as soon as they appear.
Deep cleaning every three to six months is a reasonable starting point for many regularly used vehicles, provided the leather remains in good condition. This involves vacuuming seams and creases, cleaning the entire seating surface, inspecting high-contact areas, and removing accumulated residue. However, deep cleaning should be based on actual soil levels rather than performed unnecessarily on already clean leather.
Spills require immediate attention regardless of the routine cleaning schedule. Coffee, soft drinks, food sauces, and oily substances can leave persistent marks when allowed to dry or penetrate damaged finishes. Prompt blotting and appropriate spot cleaning reduce the risk of staining without requiring a full interior cleaning session.
The best maintenance schedule balances cleanliness with minimal chemical and mechanical exposure. Regular inspections, gentle dust removal, and targeted cleaning help maintain leather upholstery while avoiding unnecessary wear from excessive scrubbing or repeated product applications.
Read more: A With Circle Around It in Car: What Does It Mean?
Should You Condition Leather Car Seats After Cleaning?
Leather car seats do not always need conditioning after cleaning because the appropriate treatment depends on the leather type, protective coating, and manufacturer’s care instructions. Most modern vehicles use coated leather upholstery, which has a protective finish that limits the absorption of traditional leather conditioners. These seats primarily benefit from regular cleaning and compatible surface protection rather than frequent applications of conditioning oils.
Leather cleaning and conditioning serve different purposes. Cleaning removes dirt, body oils, and surface contaminants, while conditioning is intended to maintain suitable leather properties when the material and finish require it. On unfinished or minimally protected leather, an approved conditioner may help maintain suppleness and reduce dryness. However, applying traditional conditioners to coated automotive leather does not necessarily improve the underlying material because the protective finish restricts product penetration.
For coated leather seats, use a conditioner or protectant only when recommended by the vehicle or upholstery manufacturer. Choose a product specifically formulated for automotive leather finishes and test it on an inconspicuous area before application. Apply a thin, even layer according to the product instructions, then remove any excess residue. Avoid heavy applications that leave the surface greasy, sticky, or unusually glossy.
Leather conditioners should not be used to repair cracks, peeling coatings, or permanent discoloration. These problems indicate physical deterioration that surface conditioning cannot reverse. For example, a driver’s seat bolster with a worn protective coating may require professional refinishing rather than additional conditioner. Similarly, synthetic leather seats generally do not require traditional leather conditioning products because their manufactured surface does not absorb oils in the same way as unfinished natural leather.
For long-term care, prioritize gentle cleaning, appropriate protection, and reduced exposure to excessive heat and sunlight. Conditioning should remain a material-specific maintenance step rather than an automatic requirement after every cleaning session.
How Do You Keep Leather Car Seats Clean for Longer?
To keep leather car seats clean for longer, follow five preventive maintenance practices: remove spills promptly, vacuum regularly, wipe high-contact surfaces, reduce prolonged sunlight exposure, and use compatible leather care products. These measures limit contaminant buildup, protect the upholstery’s surface finish, and reduce the need for aggressive deep cleaning.
1. Remove spills immediately. Food, coffee, soft drinks, and oily substances can leave stains when they remain on leather surfaces. Blot fresh liquid spills with a clean microfiber cloth and remove solid debris without rubbing it into the upholstery. Follow with a compatible leather cleaner when necessary. Immediate treatment is particularly important for perforated leather seats because liquids can enter the holes and reach the underlying padding.
2. Vacuum seat seams and creases regularly. Dust, sand, crumbs, and other abrasive particles accumulate between seat cushions and along stitching. These contaminants create friction when passengers sit down or move across the upholstery. Use a vacuum cleaner with a soft upholstery attachment to remove loose debris before it becomes trapped in the leather’s texture. Pay particular attention to the driver’s seat, where repeated entry and exit increase contact with dirt and clothing.
3. Wipe high-contact areas before grime accumulates. Seat bolsters, headrests, armrests, and cushions collect body oils, perspiration residue, and clothing contaminants through daily use. Wipe these surfaces with a clean microfiber cloth and use a manufacturer-approved cleaner when visible grime develops. For example, regularly removing body oil residue from the driver’s headrest helps prevent the buildup of greasy deposits that become harder to clean over time.
4. Reduce prolonged sunlight and heat exposure. Ultraviolet radiation and high cabin temperatures contribute to the deterioration of automotive interior materials, including leather finishes. Park in shaded areas when practical and use a windshield sunshade to reduce direct sunlight entering the cabin. Window treatments designed for automotive use may provide additional UV protection, subject to local regulations. Limiting excessive heat exposure helps preserve the appearance of leather upholstery and surrounding interior components.
5. Use leather care products compatible with the upholstery. Automotive leather cleaners and protectants should match the seat’s material and finish. Coated leather, aniline leather, perforated leather, and synthetic upholstery have different maintenance requirements. Avoid applying household oils, aggressive detergents, or unapproved protective coatings. A suitable leather protectant may help reduce surface soiling and dye transfer when the product is approved for the material and applied according to its instructions.
Preventive maintenance is most effective when combined with regular inspections of the upholstery. Check seat cushions, bolsters, seams, and perforations for accumulated dirt, surface wear, and early signs of coating damage. Addressing these conditions promptly reduces the need for intensive cleaning and helps maintain the leather’s appearance throughout normal vehicle use.