Replacing engine mounts involves supporting the engine, removing the fasteners that secure the damaged mount, taking the old mount out, positioning the replacement, and tightening the fasteners to the vehicle manufacturer’s specifications. The engine must be properly supported before a load-bearing engine mount is removed, because releasing the mount without support can allow the powertrain to shift and place stress on surrounding components.
The exact replacement procedure varies by vehicle. Engine mount location, available clearance, mounting brackets, bolt arrangement, and torque specifications differ between makes and models. Before starting, identify the failed mount, confirm that the replacement part matches the vehicle, and obtain the correct service information. Common tools include a socket set, breaker bar, torque wrench, floor jack, jack stands, and an appropriate method for supporting the engine.
This guide explains the engine mount replacement process from initial inspection through final testing. It covers how to identify a damaged mount, prepare the vehicle, support the engine, remove the old mount, install and torque the replacement, and check the repair before returning the vehicle to normal use.
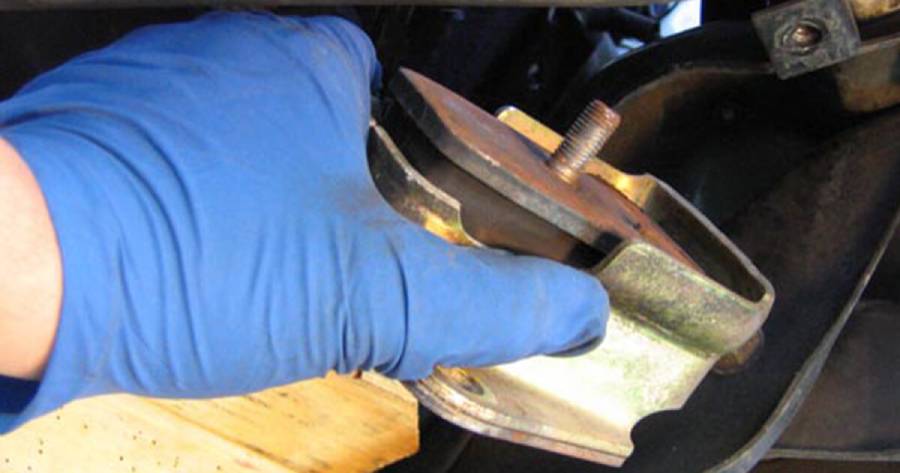
How Do You Know If an Engine Mount Needs to Be Replaced?
An engine mount needs to be replaced when physical damage or excessive engine movement confirms that the mount can no longer support the powertrain and isolate normal engine vibration. The most common warning signs are excessive vibration at idle, clunking during acceleration or gear changes, noticeable engine movement, cracked or separated rubber, and fluid leakage from a hydraulic mount. A symptom alone does not confirm mount failure because ignition, exhaust, transmission, and drivetrain problems can produce similar vibration or noise.
Excessive vibration occurs when the mount loses its ability to isolate engine movement from the vehicle body. Engine mounts typically use rubber or another vibration-isolating structure between the powertrain and vehicle structure. When this material cracks, separates, or collapses, more engine vibration reaches the chassis, steering wheel, seats, and cabin. The vibration may become particularly noticeable at idle or when an automatic transmission is shifted between Park, Drive, and Reverse because the direction and amount of load acting on the powertrain changes.
Clunking or knocking can indicate that a deteriorated mount is allowing more powertrain movement than intended. The engine naturally moves as torque changes during acceleration, deceleration, and gear changes, but the mounts limit this movement. A failed mount can allow the engine or transmission to shift far enough to produce a noticeable thump or clunk. Observe the powertrain for abnormal movement, but do not place your hands or tools near moving components while the engine is running.
Physical inspection provides stronger evidence than vibration alone. Look for cracked rubber, rubber that has separated from its metal housing, a collapsed mount, damaged mounting brackets, loose fasteners, or obvious deterioration. Hydraulic engine mounts also require inspection for fluid leakage because these mounts use fluid-filled chambers to control vibration. Compare the suspected mount with the other mounts when possible to identify abnormal position, deformation, or deterioration.
Confirm the source of the symptoms before buying replacement parts. Engine vibration can also result from an engine misfire, damaged transmission mount, exhaust system contacting the body, worn suspension or drivetrain components, or incorrect idle operation. Replacing an engine mount without confirming physical damage can leave the original vibration unchanged.
What Tools Do You Need to Replace Engine Mounts?
The tools needed to replace an engine mount typically include equipment for securing the vehicle, supporting the powertrain, removing the mount fasteners, and tightening the new mount correctly. The exact tools depend on the vehicle and mount location, so inspect the repair area and consult vehicle-specific service information before disassembly.
A typical engine mount replacement may require a floor jack, jack stands, wheel chocks, socket set, ratchet, socket extensions, breaker bar, and torque wrench. Penetrating oil may help with corroded fasteners, while suitable lighting makes it easier to inspect mounting points in a crowded engine bay. Some vehicles also require removal of covers, intake components, brackets, or other parts before the mount bolts become accessible.
A torque wrench serves a different purpose from a ratchet or breaker bar. Use the breaker bar or appropriate hand tool to loosen stubborn fasteners, while the torque wrench is used during final assembly to tighten specified fasteners to the manufacturer’s torque value. Engine mount bolts do not have one universal torque specification; the correct value depends on the vehicle, fastener, mounting position, and repair procedure.
Supporting equipment is particularly important because supporting the vehicle and supporting the engine are two different tasks. Jack stands support the vehicle; they should not be treated as a substitute for a proper engine-support method. Depending on the vehicle and repair procedure, the powertrain may be supported with an appropriate engine support bar or another manufacturer-approved method. A floor jack may be used in some procedures to support or reposition the powertrain, but its contact point and load-distribution method must be appropriate for that specific vehicle.
What Should You Do Before Replacing an Engine Mount?
Before replacing an engine mount, secure the vehicle, identify the failed mount, confirm the replacement part, locate the mounting fasteners, and obtain the correct repair and torque specifications. Completing these checks before loosening bolts reduces the risk of discovering an access, support, or parts problem after the engine is already partially unsupported.
Park the vehicle on a stable, level surface, engage the parking brake, and prevent unintended vehicle movement. Allow hot engine and exhaust components to cool before working around them. Use wheel chocks where appropriate, and support the vehicle with correctly positioned jack stands if under-vehicle access is required. Never rely solely on a hydraulic floor jack to hold a raised vehicle while working underneath it.
Identify exactly which mount is being replaced before beginning disassembly. Vehicles commonly use multiple mounting points to locate the engine and transmission within the chassis, and their designs and locations differ. Trace the suspected mount to its attachment points and determine which surrounding components restrict access. This inspection also helps identify wiring harnesses, hoses, pipes, exhaust components, and brackets that could be stretched or damaged when the powertrain is repositioned.
Compare the replacement mount with the existing component before removing the old mount. Check its overall shape, mounting-hole positions, bracket orientation, and applicable part information. A mount that appears similar can still have different dimensions or mounting geometry. Discovering an incompatible replacement after the old mount has been removed can leave the vehicle immobilized with the engine still requiring external support.
Finally, obtain the service information for the vehicle’s make, model, year, engine configuration, and specific mount position. The replacement sequence, required component removal, support points, bolt replacement requirements, and torque specifications are not identical across vehicles. Vehicle-specific information therefore takes precedence over a general engine mount replacement guide whenever the two procedures differ.
How Do You Support the Engine Before Removing an Engine Mount?
Support the engine before loosening or removing a load-bearing engine mount so the powertrain cannot drop, rotate, or shift unexpectedly. An engine mount carries part of the powertrain load while controlling engine movement relative to the chassis. Once that mount is disconnected, another support method must temporarily control the load that the mount was carrying.
The correct support method depends on the vehicle layout and the mount being replaced. An engine support bar can support the powertrain from above, while certain vehicle-specific procedures permit a floor jack to support or slightly reposition the powertrain from below. Determine the approved support method before loosening the mount because oil pans, transmission cases, subframes, and other components have different load-bearing capabilities across vehicle designs.
Position the support equipment before removing any mount fasteners, then apply only enough force to take the load off the mount. The objective is to support the engine rather than significantly raise it. Watch the mount and surrounding components as the support takes the load. Excessive movement can stretch wiring harnesses, coolant hoses, air-conditioning lines, exhaust connections, or components attached between the powertrain and vehicle body.
Keep the support in place throughout removal and installation. Do not work beneath an unsupported powertrain, and do not place your hands between the engine, mount, bracket, or chassis where unexpected movement could create a pinch point. If the required support point or procedure cannot be identified confidently from vehicle-specific repair information, the mount should not be removed until the correct procedure is available.
Can You Support the Engine With a Floor Jack?
A floor jack can support or reposition the engine during some engine mount replacement procedures, but only when the vehicle-specific procedure permits an appropriate support point. A floor jack concentrates force over a relatively small area, so placing it against a component that is not designed to carry that load can cause damage.
Where an approved procedure allows support from below, the jack should be positioned at the specified location and used primarily to take load off the mount or make the small positional adjustment required for removal. Some procedures use an appropriate load-distribution method between the jack and the specified contact area. A wood block is sometimes used for load distribution, but it does not make every oil pan or drivetrain component a safe lifting point. The correct contact point remains vehicle-specific.
Raise the jack gradually while observing the engine mount. Stop once the mount is unloaded or the required clearance has been achieved. Large movements are unnecessary for many replacements and increase the possibility of stressing hoses, wiring, exhaust connections, other mounts, and drivetrain components.
Use an engine support bar or another specified support method when the repair procedure does not permit support from below, when access prevents safe jack placement, or when components underneath the engine cannot safely carry the load. The support method should follow the vehicle’s service procedure rather than being selected solely for convenience.
How Do You Remove the Old Engine Mount?
Remove an old engine mount by supporting the engine, gaining access to the mount, unloading it, removing its fasteners, and carefully extracting it from the vehicle. The exact bolt sequence and required component removal vary by vehicle, so the manufacturer’s repair procedure should determine the final disassembly order.
Start by confirming that the engine is securely supported. Remove only the covers, brackets, intake components, or other parts necessary to access the mount and its fasteners. Keep track of removed hardware and component positions because brackets and fasteners that appear similar may have different lengths, orientations, or installation requirements.
Loosen the accessible mount fasteners according to the vehicle-specific procedure. Engine mounts may attach to the engine or transmission on one side and the body, frame, or subframe on the other. Do not assume that the same fastener sequence applies to every mount. Some configurations require certain bolts to be loosened before the engine is repositioned, while others require surrounding brackets to be removed first.
Adjust the supported engine only as much as necessary to remove the load from the mount and create clearance. A bolt that remains difficult to withdraw can indicate that the powertrain is still placing pressure on the mount. Instead of forcing the bolt out, make a small controlled adjustment to the supported engine and check whether the fastener becomes free. This approach reduces the risk of damaging bolt threads, brackets, or mounting holes.
Remove the mount once all required fasteners and brackets have been released. Depending on available clearance, the mount may need to be rotated or moved around adjacent components before it can leave the engine bay. Avoid pulling aggressively against hoses, wiring, or lines to create additional space.
Inspect the old mount after removal. Cracked or separated rubber, a collapsed isolator, damaged mounting points, or leakage from a hydraulic mount can help confirm the failure diagnosis. Also inspect the mounting brackets and surrounding area before installing the replacement. A damaged bracket, elongated bolt hole, loose hardware, or another deteriorated mount can affect the new mount even when the replacement part itself is correct.
How Do You Install a New Engine Mount?
Install a new engine mount by confirming the replacement part, positioning it in the correct orientation, aligning the mounting holes, installing the fasteners without forcing them, and tightening them according to the vehicle-specific procedure. Correct alignment is important because the mount must hold the powertrain in its intended position rather than being pulled into place by the mounting bolts.
Compare the new mount with the removed component before installation. Check the mounting-hole pattern, bracket position, dimensions, orientation, and relevant part identification. If the new mount uses an integrated bracket or locating feature, confirm that it faces the same direction as the original component. A mismatch should be resolved before installation rather than compensated for by modifying the mount or forcing the bolts into position.
Position the new mount between its mounting points and align the holes by making small, controlled adjustments to the supported engine. Install the appropriate fasteners by hand for the first several threads whenever access permits. A correctly aligned fastener should begin threading without excessive force. Resistance at the start of the threads can indicate misalignment and increases the risk of cross-threading.
Install the required fasteners loosely before final tightening when the vehicle-specific procedure calls for this sequence. Leaving the fasteners temporarily loose allows the mount and brackets to align as the engine is returned to its intended position. Do not use the mounting bolts to pull a severely misaligned engine or mount into place because this can place unintended stress on the mount, bracket, threads, or surrounding components.
Lower or reposition the supported powertrain as specified so the new mount assumes its normal installed position. Check that the mount is seated correctly and that no hoses, wiring, heat shields, or other components have become trapped between mounting surfaces. Complete the specified tightening sequence only after the mount and powertrain are correctly positioned.
What Torque Should Engine Mount Bolts Be Tightened To?
Engine mount bolts must be tightened to the torque specifications provided for the specific vehicle and mounting position; there is no universal engine mount bolt torque. The required value can change with bolt diameter, thread design, fastener grade, mounting material, bracket design, mount location, and manufacturer procedure.
Obtain the torque values from service information that matches the vehicle’s year, make, model, engine, and mount being replaced. Do not copy a torque specification from another vehicle simply because the engine mount or bolt appears similar. Different fasteners on the same engine mount assembly may also require different torque values.
Use a calibrated torque wrench for fasteners that have a specified final torque. Tighten them in the sequence required by the repair procedure and determine whether any fasteners are designated for replacement rather than reuse. Some vehicle procedures can also specify additional tightening requirements beyond a simple torque value, so the complete manufacturer procedure takes precedence over a generic replacement sequence.
After the mount is secured, remove the temporary engine support according to the repair procedure and observe whether the powertrain settles normally onto the mounts. A substantial change in alignment, a visibly distorted new mount, or unexpected contact with surrounding components should be investigated before the engine is started.
What Should You Check After Replacing an Engine Mount?
After replacing an engine mount, check the fasteners, mount position, surrounding components, engine movement, vibration, and abnormal noises before returning the vehicle to normal use. The purpose of this inspection is to confirm that the new mount is correctly installed and that no hoses, wiring, brackets, or other components were disturbed while the powertrain was supported and repositioned.
Start with a visual inspection before starting the engine. Verify that the mount sits correctly against its mounting surfaces and that the required fasteners have been tightened according to the vehicle-specific procedure. Check brackets for incorrect positioning and inspect the surrounding area for wiring harnesses, hoses, heat shields, or lines that may have shifted during the repair. Confirm that all tools and temporary support equipment have been removed as required.
Start the engine and observe its behavior at idle from a safe position. Some engine movement is normal because the mounts are designed to isolate vibration while allowing controlled powertrain movement. Excessive shaking, a new knocking sound, or visible contact between the engine, transmission, exhaust, and vehicle structure indicates that further inspection is required.
For vehicles with an automatic transmission, changes in vibration may become more noticeable when shifting between Park, Reverse, and Drive. Follow safe operating procedures and keep the vehicle secured while performing any stationary check. A significant clunk or excessive movement when drivetrain load changes can indicate another worn mount, incorrect mount installation, or an unrelated drivetrain problem.
Complete a controlled road test after the stationary inspection shows no problems. Pay attention to the symptoms that existed before replacement, particularly vibration, clunking during acceleration or deceleration, and abnormal movement during gear changes. The original symptoms should be reduced or eliminated if the failed engine mount was their primary cause.
Persistent vibration does not automatically mean the new engine mount is defective. Check the remaining engine and transmission mounts because more than one mount can be deteriorated. Other possible sources include an engine misfire, exhaust contact with the body or subframe, drivetrain vibration, incorrect installation, or a replacement mount that does not match the vehicle. Diagnose the remaining symptom instead of immediately replacing the newly installed mount.
Can You Replace Engine Mounts Yourself?
You can replace an engine mount yourself when you have the correct tools, a safe method for supporting the vehicle and powertrain, sufficient access to the mount, and vehicle-specific repair information. Engine mount replacement ranges from relatively accessible repairs to procedures requiring substantial disassembly, so DIY suitability depends more on the vehicle configuration than on the name of the repair.
The first requirement is the ability to support the powertrain correctly. Removing a load-bearing mount without a suitable support method creates a risk of unexpected engine or transmission movement. A DIY repair therefore requires more than a socket set. Appropriate lifting and supporting equipment, a torque wrench, the correct replacement part, and reliable service information are fundamental parts of the job.
Access is the second major factor. An engine mount positioned near the top or side of the engine bay may be reachable after removing a limited number of components. Another mount may be obstructed by brackets, intake components, exhaust parts, the subframe, or other assemblies. Greater disassembly increases labor time and creates additional installation steps that must be completed correctly.
Repair experience also matters because the job combines mechanical disassembly with load management and alignment. The person performing the repair needs to recognize when a bolt remains loaded, reposition the engine in controlled increments, start fasteners without cross-threading them, and apply the specified final torque. Forcing a misaligned bolt into place can damage threads or leave the powertrain incorrectly positioned.
Use a professional mechanic when the engine cannot be safely supported with the equipment available, the required support points cannot be identified, or the procedure requires removal of components beyond your experience. The same applies when fasteners are severely corroded, mounting brackets are damaged, or the repair requires specialized equipment. The decision to DIY should be based on whether the complete procedure can be performed safely and correctly, not simply on whether the mount itself can be reached.
How Long Does It Take to Replace an Engine Mount?
Engine mount replacement time depends primarily on mount location, component access, vehicle design, fastener condition, and the number of mounts being replaced. There is no single replacement time that accurately applies to every vehicle because reaching the mount can require more labor than removing and installing the mount itself.
An accessible mount generally requires fewer disassembly steps because its bolts and brackets can be reached directly or after removing a small number of components. A deeply positioned mount can require additional time to remove covers, intake components, brackets, or other assemblies before its fasteners become accessible. The same replacement part can therefore represent a substantially different amount of work on two vehicle designs.
Fastener condition can also change the repair time. A clean fastener that loosens normally allows the procedure to continue as planned, while a seized, corroded, rounded, or damaged bolt can require additional removal work. Engine alignment can add time as well because the powertrain may need several small positional adjustments before the old mount can be removed and the replacement bolts can be installed without force.
Replacing multiple mounts also changes the labor requirement, but the time does not always increase in direct proportion to the number of mounts. Some procedures share preparation or access steps, while other mounts are located in completely different areas and require separate disassembly. Use vehicle-specific labor information when an accurate repair-time estimate is required rather than applying a generic estimate to every engine mount replacement.
Should You Replace All Engine Mounts at the Same Time?
You do not need to replace every engine mount automatically when one mount fails. Replace additional mounts when inspection shows deterioration or when vehicle-specific repair guidance provides a reason to replace them together. The condition of each mount is more useful than a blanket rule requiring replacement of the entire set.
Engine and transmission mounts do not necessarily deteriorate at exactly the same rate. Their designs, locations, exposure to heat and fluids, and loads can differ. One mount may have torn rubber or hydraulic leakage while another remains structurally intact and continues to control powertrain movement correctly. In this situation, replacing a serviceable mount solely because another mount failed may not be necessary.
Inspect the remaining mounts while the vehicle is being repaired. Look for cracked or separated rubber, collapsed mounting material, hydraulic fluid leakage where applicable, damaged brackets, and abnormal powertrain position. The presence of multiple deteriorated mounts provides a stronger reason to replace more than one component during the same repair.
Labor overlap can also affect the decision. If accessing one mount already exposes another mount that is near the end of its serviceable condition, replacing both during the same repair may avoid repeating some disassembly later. This is a practical repair consideration rather than evidence that all engine mounts must always be replaced as a set.
Read more: Power Steering Pump Replacement
When Should You Have a Mechanic Replace an Engine Mount?
Have a mechanic replace an engine mount when the powertrain cannot be supported safely, the mount requires extensive disassembly, the fasteners or brackets are damaged, or the procedure exceeds the tools and repair experience available. These conditions increase the consequences of an installation error and make professional equipment or vehicle-specific experience more valuable.
Powertrain support is the clearest safety threshold. Do not remove the mount when you cannot identify an approved support method or maintain stable support throughout the repair. An engine or transmission that shifts unexpectedly can damage surrounding components and create dangerous pinch points.
Extensive access requirements are another reason to use professional service. Certain engine mount locations can require removal or repositioning of multiple components before the mount becomes accessible. The repair becomes more complex because each removed component introduces additional fasteners, connections, installation requirements, and opportunities for errors.
Damaged hardware can also turn a planned mount replacement into a more involved repair. A seized bolt, stripped thread, damaged mounting bracket, or distorted mounting point may require extraction, thread repair, bracket replacement, or additional diagnosis. Installing a new mount without correcting the damaged attachment point can prevent the mount from carrying and controlling the powertrain as intended.
Professional diagnosis is also appropriate when the engine mount has been replaced but the original vibration, clunking, or excessive movement remains. Another engine or transmission mount may be worn, but engine misfires, exhaust contact, and drivetrain faults can produce overlapping symptoms. Identifying the actual source prevents unnecessary replacement of additional mounts.