Few things are more frustrating than turning the key in your Jeep Grand Cherokee only to hear a single click, a series of rapid clicks, or worse, complete silence. When your SUV refuses to start, it’s easy to assume the battery is dead. However, in many cases, the real culprit is a worn or failed starter motor. Knowing how to identify the problem and perform a Jeep Grand Cherokee starter replacement can save you hundreds of dollars in repair costs while getting your vehicle back on the road much faster.
Whether you own an older WK model, a popular WK2, or the latest WL generation, replacing the starter is a repair that many experienced DIY enthusiasts can complete with the right tools, proper preparation, and a step-by-step guide. Although the starter’s location and accessibility vary between engine options and model years, the overall replacement process follows the same fundamental principles.
In this comprehensive guide, you’ll learn how the starter system works, how to recognize the warning signs of a failing starter, how to rule out other common no-start issues, and how to replace the starter safely and correctly. We’ll also cover starter locations by model year, recommended tools, torque considerations, replacement costs, OEM versus aftermarket options, and common mistakes to avoid. By the end of this guide, you’ll have the knowledge and confidence to determine whether replacing the starter yourself is the right choice or if professional service is the better option.
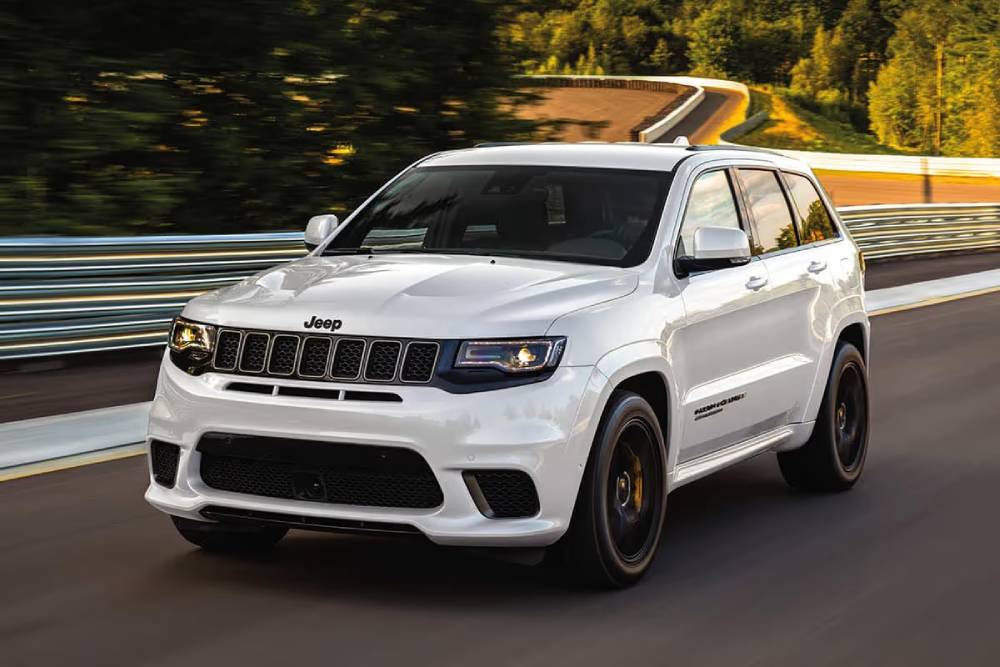
What Does the Starter Do on a Jeep Grand Cherokee?
The starter motor is responsible for turning the engine fast enough to begin the combustion process. When you press the start button or turn the ignition key, electrical power from the battery is sent through the starter relay to the starter solenoid. The solenoid then pushes the starter gear forward so it can engage with the engine’s flywheel or flexplate. At the same time, the starter motor spins and rotates the engine.
Once the engine starts running on its own, the starter gear disengages. The starter is only active for a few seconds during each start, but it must handle a large electrical load and produce enough torque to move internal engine components. Over time, heat, worn internal contacts, damaged bearings, electrical resistance, and repeated use can reduce its performance.
The starting system depends on several components working together:
Battery
The battery supplies the electrical current needed to operate the starter motor. A weak battery may cause slow cranking, rapid clicking, or a complete no start condition.
Starter Relay
The starter relay acts as an electrical switch. It allows a low current signal from the ignition system to control the much larger current required by the starter motor.
Starter Solenoid
The solenoid moves the starter gear into position and allows current to flow into the starter motor. A failing solenoid may produce a single clicking sound without turning the engine.
Flywheel or Flexplate
The starter gear engages with teeth on the flywheel or flexplate. If these teeth are damaged, you may hear grinding or experience intermittent engagement.
Ignition Switch and Control Module
Depending on the model year, the ignition switch, push button system, body control module, and powertrain control module may all play a role in authorizing the engine to start.
A failed starter can prevent the engine from cranking even when the battery, lights, radio, and dashboard electronics appear to work normally. This is why proper testing is important before beginning a Jeep Grand Cherokee starter replacement.
Symptoms of a Bad Starter on a Jeep Grand Cherokee
A failing starter does not always stop working without warning. In many cases, it produces symptoms for days or weeks before complete failure. Recognizing these signs early can help you avoid being stranded and prevent unnecessary replacement of other components.
A Single Click When You Try to Start
A single loud click often means the starter solenoid is receiving power, but the starter motor is not turning. This may be caused by worn internal contacts, a seized motor, a poor electrical connection, or low battery voltage.
Rapid Clicking
Rapid clicking is commonly associated with a weak battery, loose battery terminals, or excessive resistance in the starting circuit. Although the starter may not be the main problem, repeated low voltage operation can place additional stress on it.
The Engine Does Not Crank
If the dashboard lights come on but the engine does not turn, the starter may have failed. However, the same symptom can also result from a bad relay, neutral safety switch, ignition switch, or wiring issue.
Intermittent Starting
A Jeep that starts normally one day but refuses to crank the next may have worn starter brushes, internal electrical damage, a weak solenoid, or a loose cable connection. Intermittent problems are often difficult to diagnose because the vehicle may behave normally during testing.
Grinding Noise
A grinding noise may indicate that the starter gear is not engaging correctly with the flywheel or flexplate. This can happen when the starter is loose, incorrectly installed, worn, or internally damaged. Continuing to crank the engine can damage the gear teeth and increase repair costs.
Whirring Sound Without Engine Movement
If you hear the starter motor spinning but the engine does not rotate, the starter gear may not be engaging. This condition can result from a damaged drive mechanism, a faulty solenoid, or worn flywheel teeth.
Smoke or a Burning Smell
Smoke, melted insulation, or a burning electrical smell requires immediate attention. These symptoms may indicate a short circuit, overheated starter, stuck relay, damaged cable, or excessive cranking. Disconnect the battery if it is safe to do so and inspect the system before attempting another start.
Slow Cranking
Slow cranking may be caused by a weak battery, cold temperatures, corroded cables, high resistance, or a starter motor that is beginning to fail. Do not replace the starter until the battery and cable condition have been checked.
| Symptom | Possible Cause |
|---|---|
| Single click | Faulty solenoid, poor connection, failed starter motor |
| Rapid clicking | Weak battery, loose terminal, voltage drop |
| No crank | Failed starter, bad relay, wiring issue |
| Grinding | Damaged starter gear, loose starter, flywheel damage |
| Slow cranking | Weak battery, corrosion, worn starter |
| Whirring | Starter gear not engaging |
| Smoke or burning smell | Short circuit, overheating, stuck starter |
One important clue is whether the engine is cranking. If the engine turns normally but does not start, the problem is more likely related to fuel delivery, ignition, sensors, or engine management. A starter problem usually causes a no crank condition rather than a normal crank with no start.
Before Replacing the Starter: Rule Out Other Problems
Replacing a starter without confirming the diagnosis can waste time and money. Several common electrical and mechanical problems can imitate a failed starter. Before removing any parts, complete a few basic checks.
Test the Battery
A weak or discharged battery is one of the most common causes of starting trouble. Check the battery voltage with a digital multimeter. A fully charged battery should generally read about 12.6 volts with the engine off. Voltage that is significantly lower may indicate a discharged or failing battery.
A battery can also show acceptable voltage but still fail under load. A proper battery load test provides a more reliable assessment of its condition.
Inspect the Battery Terminals
Look for corrosion, looseness, damaged cable ends, or broken terminal clamps. White, blue, or green buildup can create resistance and prevent enough current from reaching the starter.
Clean the terminals and tighten the connections before testing the starting system again.
Check the Ground Connections
The starter depends on a strong electrical ground through the engine block and chassis. A loose, corroded, or damaged ground cable can cause clicking, slow cranking, or complete starter failure symptoms.
Inspect the battery ground cable, engine ground strap, and body ground connections.
Check the Starter Relay and Fuse
A failed starter relay can prevent power from reaching the solenoid. Locate the starter relay in the fuse box and inspect the related fuse. On some models, swapping the relay with another identical relay can help confirm whether it is faulty.
Always verify that the relays have matching part numbers and functions before swapping them.
Try Starting in Neutral
If the Jeep does not start in Park, move the selector to Neutral and try again while keeping your foot on the brake. If it starts in Neutral, the problem may involve the transmission range sensor, neutral safety switch, or shifter adjustment.
Listen for Starter Activity
Turn off the radio and climate control, then listen carefully while attempting to start the engine. A click suggests that the solenoid or relay may be operating. Complete silence may indicate a control circuit, relay, fuse, ignition, wiring, or security system problem.
Check for Security System Warnings
Some Jeep Grand Cherokee models may prevent starting if the immobilizer system does not recognize the key. Watch for a security light, key warning, or message in the instrument cluster.
Trying a spare key may help determine whether the problem is related to key recognition.
Perform a Voltage Drop Test
A voltage drop test can reveal resistance in the positive or negative starter cables. Excessive resistance may prevent the starter from receiving the current it needs, even when the battery is fully charged.
This test is especially useful when the starter works intermittently or cranks slowly.
Inspect the Alternator Only When Relevant
The alternator does not directly crank the engine, but a failing alternator can leave the battery discharged. If the battery repeatedly goes flat after being recharged, test the charging system before blaming the starter.
Confirm the Engine Is Not Locked
In rare cases, a seized engine or locked accessory can prevent the starter from turning. A technician may attempt to rotate the engine manually using the crankshaft pulley bolt. This check should be performed carefully and only with the correct procedure for the engine.
A complete diagnosis should answer three questions:
- Is the battery fully charged and capable of supplying current?
- Is power reaching the starter when the ignition is activated?
- Are the cables, grounds, relay, and control circuits working correctly?
If the battery is healthy, the wiring is secure, the relay works, and full voltage reaches the starter without engine rotation, starter replacement becomes much more likely.
Tools and Parts You’ll Need
Before beginning a Jeep Grand Cherokee starter replacement, gathering the right tools and replacement parts will make the job safer, faster, and far less frustrating. Since the starter is mounted underneath the vehicle on most models, proper lifting equipment and quality hand tools are essential.
Essential Tools
Most DIY mechanics already own many of the tools required for this repair.
You should prepare the following items before starting:
- Socket set with both metric and SAE sockets
- Ratchet handle
- Long extensions
- Universal joint adapter
- Torque wrench
- Combination wrench set
- Flathead screwdriver
- Trim removal tool if needed
- Floor jack
- Heavy duty jack stands
- Wheel chocks
- Flashlight or LED work light
- Safety glasses
- Mechanic gloves
Depending on your engine configuration, a swivel socket or flexible extension may help reach the upper starter mounting bolt more easily.
Recommended Replacement Parts
The quality of the replacement starter has a significant impact on long term reliability.
Your options typically include:
OEM Starter
An Original Equipment Manufacturer starter is built to the same specifications as the factory installed unit. It offers excellent fitment, dependable performance, and usually comes with a manufacturer warranty. Although it costs more than many aftermarket alternatives, it is often the preferred choice for owners planning to keep their Jeep for many years.
Aftermarket Starter
Aftermarket starters vary greatly in quality. Premium brands can provide performance comparable to OEM units at a lower price, while inexpensive budget models may have shorter service lives or inconsistent quality control.
When shopping for an aftermarket starter, choose products from reputable manufacturers with strong customer reviews and solid warranty coverage.
Additional Supplies
Having a few inexpensive supplies on hand can make the installation process much smoother.
Recommended items include:
- Battery terminal cleaner
- Dielectric grease
- Anti seize compound for mounting bolts when appropriate
- Shop towels
- Brake cleaner
- Small wire brush
- Zip ties for securing wiring if necessary
Before installing the new starter, compare it carefully with the old unit. Verify that the mounting holes, electrical terminals, gear size, connector orientation, and housing dimensions are identical. Even a slight difference may prevent proper installation or cause premature failure.
Jeep Grand Cherokee Starter Location
The location of the starter varies depending on the model year and engine installed in your Jeep Grand Cherokee. While the general function remains the same across all generations, accessibility can range from relatively simple to moderately challenging.
2005 to 2010 Jeep Grand Cherokee WK
On most WK models, the starter is mounted low on the passenger side of the engine where it bolts directly to the transmission bell housing.
For the 3.7L V6 and 4.7L V8 engines, the starter is generally accessible from underneath the vehicle after removing the skid plate if equipped.
The 5.7L HEMI engine provides slightly less working space due to the exhaust system, but the replacement procedure remains straightforward for experienced DIY mechanics.
2011 to 2021 Jeep Grand Cherokee WK2
The WK2 generation includes several different engine options, each with a slightly different starter location.
For the popular 3.6L Pentastar V6, the starter is positioned near the transmission bell housing beneath the engine. Access is usually gained from underneath after safely raising the vehicle.
On the 5.7L HEMI V8, the starter is also mounted near the transmission but may require removal of additional splash shields or heat shields for easier access.
Certain EcoDiesel models have tighter engine compartments, making starter replacement more time consuming due to surrounding components.
2022 and Newer Jeep Grand Cherokee WL
The latest WL generation continues using a bell housing mounted starter, although packaging has become more compact because of updated drivetrain designs and electronic systems.
Depending on the engine configuration, removing lower engine covers may be necessary before accessing the starter.
Always consult the appropriate factory service information for your exact model year and engine to confirm the starter location before beginning disassembly.
Tips for Locating the Starter
If you are unfamiliar with the engine bay, follow the large positive battery cable. It typically runs directly to the starter motor. Once underneath the vehicle, look where the engine and transmission meet. The starter is usually secured with two mounting bolts and connected by one large battery cable and one smaller control wire.
Taking a few minutes to identify the starter before removing any parts can prevent unnecessary disassembly and reduce installation time.
Step by Step Jeep Grand Cherokee Starter Replacement
Once you’ve confirmed that the starter has failed and gathered all necessary tools, you’re ready to begin the replacement process. Always work on a cool engine in a well lit area and follow proper safety procedures throughout the repair.
Step 1: Disconnect the Battery
Open the hood and disconnect the negative battery cable first. This is one of the most important safety steps because the starter receives direct battery power. Leaving the battery connected could result in electrical shorts, sparks, or personal injury.
After disconnecting the negative terminal, isolate the cable so it cannot accidentally contact the battery post.
Step 2: Raise and Secure the Vehicle
Park the Jeep on a level surface and engage the parking brake.
Place wheel chocks behind the rear wheels, then raise the front of the vehicle using a hydraulic floor jack. Support the vehicle securely with heavy duty jack stands positioned at the recommended lifting points.
Never rely solely on a hydraulic jack while working underneath the vehicle.
Step 3: Locate the Starter
Move underneath the vehicle with a work light and identify the starter mounted to the transmission bell housing.
Before disconnecting anything, inspect the wiring, electrical connectors, and surrounding components. Taking several photos with your phone can help ensure everything is reassembled correctly.
Step 4: Disconnect the Electrical Connections
Remove the protective rubber cover from the large battery cable terminal if equipped.
Using the correct socket or wrench, remove the retaining nut and disconnect the main battery cable.
Next, disconnect the smaller signal wire connected to the starter solenoid. Handle the connectors carefully to avoid damaging the wiring harness.
Step 5: Remove the Mounting Bolts
Support the starter with one hand while removing the mounting bolts.
Most Jeep Grand Cherokee starters are secured with two primary bolts, although access to the upper bolt may require a long extension and universal joint.
Keep track of the bolt locations if different lengths are used.
Step 6: Remove the Old Starter
Once all bolts and wiring have been removed, carefully lower the starter from the engine compartment.
Because the starter is heavier than it appears, maintain a firm grip to prevent it from falling onto nearby components or causing injury.
Compare the removed starter with the replacement unit before proceeding to installation. Verify that every mounting point and electrical connection matches perfectly.
Installing the New Starter and Final Testing
After confirming that the replacement starter matches the original unit, you can begin the installation process. Take your time during this stage because proper installation is critical for reliable starting performance.
Step 7: Position the New Starter
Carefully lift the new starter into position against the transmission bell housing. Align the mounting holes before inserting any bolts. Supporting the weight of the starter with one hand while threading the first bolt by hand will help prevent cross threading.
Install both mounting bolts finger tight before using a ratchet. This allows the starter to seat evenly against the mounting surface.
Step 8: Tighten the Mounting Bolts
Once the starter is properly aligned, tighten the mounting bolts evenly.
Always use a torque wrench whenever possible and follow the torque specifications provided for your specific engine and model year. Over tightening can damage the aluminum transmission housing, while under tightening may allow the starter to shift during operation.
After tightening the bolts, gently move the starter by hand to verify that it is securely mounted.
Step 9: Reconnect the Electrical Connections
Reconnect the small solenoid control wire first, followed by the main battery cable.
Ensure each connection is clean and free of corrosion before tightening the retaining nuts.
Loose electrical connections can cause voltage drop, intermittent starting problems, or excessive heat buildup.
If desired, apply a small amount of dielectric grease to exposed terminals to help reduce corrosion over time.
Step 10: Lower the Vehicle
Inspect the work area one final time to ensure that no tools, bolts, or wiring have been left behind.
Reinstall any heat shields, splash shields, or skid plates removed during disassembly.
Carefully lower the vehicle from the jack stands and remove the wheel chocks.
Step 11: Reconnect the Battery
Reconnect the negative battery cable and tighten the terminal securely.
Turn the ignition to the ON position for a few seconds before starting the engine. This allows the vehicle’s electronic systems to initialize.
Start the engine several times to verify that the new starter engages smoothly and consistently.
Step 12: Perform a Final Inspection
Allow the engine to idle while listening for any unusual noises near the starter.
Check underneath the vehicle for loose wiring, fluid leaks, or components that may have shifted during the repair.
Take the vehicle on a short test drive, then perform one final visual inspection after returning home.
A successful Jeep Grand Cherokee starter replacement should result in fast, smooth engine cranking with no clicking, grinding, or delayed engagement.
Torque Specifications
Using the correct torque values is essential for both safety and long term reliability. Properly tightened fasteners keep the starter securely mounted while preventing damage to surrounding components.
Because torque specifications vary by engine, model year, and drivetrain configuration, always consult the factory service manual for your exact vehicle before final tightening.
The table below provides commonly referenced torque ranges that may apply to many Jeep Grand Cherokee models. These values should be used only as a general reference.
| Component | Typical Torque Specification |
|---|---|
| Starter mounting bolts | 35 to 45 ft lb |
| Battery terminal clamp | 45 to 70 in lb |
| Main starter cable nut | 80 to 120 in lb |
| Engine splash shield fasteners | Hand tight to manufacturer specification |
Why Torque Matters
Many DIY mechanics rely on feel when tightening fasteners. While this approach may work for non critical components, it is not recommended for starter installation.
Over tightened bolts can strip threads in the transmission housing, crack aluminum mounting points, or damage electrical terminals.
Under tightened bolts may allow the starter to move during operation, creating gear misalignment, unusual noises, or premature failure.
Investing in a quality torque wrench is one of the best decisions any DIY mechanic can make. It improves repair quality and reduces the risk of expensive mistakes.
Jeep Grand Cherokee Starter Replacement Cost
One of the biggest reasons owners choose to replace the starter themselves is the potential savings on labor. Depending on your location, model year, and engine type, professional replacement costs can vary significantly.
The largest portion of the repair bill is usually labor, especially on models where access to the starter requires additional disassembly.
Average DIY Cost
If you perform the repair yourself, your primary expense will be the replacement starter.
| Item | Estimated Cost |
|---|---|
| Aftermarket starter | $120 to $250 |
| Premium aftermarket starter | $180 to $320 |
| OEM starter | $250 to $500 |
| Shop supplies | $10 to $30 |
For most DIY repairs, the total cost ranges from approximately $130 to $530, depending on the quality of the replacement part selected.
Independent Repair Shop Cost
Independent repair shops generally charge less than dealerships while still providing professional installation.
| Expense | Estimated Cost |
|---|---|
| Parts | $150 to $450 |
| Labor | $180 to $400 |
| Total | $330 to $850 |
Labor time typically ranges from 1.5 to 3.5 hours depending on engine configuration and accessibility.
Dealership Cost
Jeep dealerships typically install OEM components and follow factory repair procedures.
| Expense | Estimated Cost |
|---|---|
| OEM starter | $300 to $550 |
| Labor | $250 to $500 |
| Total | $550 to $1,050 |
Although dealership repairs are usually the most expensive option, they may provide additional warranty coverage and technicians with specialized experience working on Jeep vehicles.
Factors That Affect Replacement Cost
Several factors influence the final repair cost.
Engine size plays a major role because larger engines often provide less working space.
Model year also affects labor time due to differences in vehicle design.
Your geographic location can significantly impact labor rates.
Choosing an OEM starter instead of an aftermarket unit increases parts cost but may offer better durability and warranty protection.
Additional repairs, such as replacing damaged battery cables, corroded terminals, or a faulty starter relay, can further increase the total bill.
Is DIY Replacement Worth It?
For owners with moderate mechanical experience, replacing the starter can save several hundred dollars in labor costs.
However, if you do not have access to proper lifting equipment, a torque wrench, or experience working underneath vehicles, hiring a qualified technician may be the safer choice.
The most important step is confirming that the starter is actually the source of the problem before purchasing replacement parts. A careful diagnosis can prevent unnecessary expenses and ensure that the repair solves the no start condition the first time.
OEM vs. Aftermarket Starter
One of the most common questions Jeep owners ask before replacing a starter is whether they should purchase an Original Equipment Manufacturer starter or choose an aftermarket alternative. The answer depends on your budget, driving habits, and long term ownership plans.
An OEM starter is manufactured to meet Jeep’s original engineering specifications. It is designed to fit perfectly, deliver consistent performance, and provide long service life. Because it is built to the same standards as the factory installed component, installation is usually straightforward with minimal risk of compatibility issues.
Aftermarket starters are produced by third party manufacturers. Some companies build high quality replacement units that match or even exceed OEM performance, while others focus primarily on offering the lowest possible price. The quality difference between brands can be significant, making careful product selection extremely important.
The following comparison highlights the key differences.
| Feature | OEM Starter | Premium Aftermarket | Budget Aftermarket |
|---|---|---|---|
| Purchase Price | High | Moderate | Low |
| Fitment | Excellent | Very Good | Varies |
| Reliability | Excellent | Good to Excellent | Inconsistent |
| Warranty | Manufacturer Warranty | Brand Dependent | Limited |
| Expected Service Life | Long | Medium to Long | Often Shorter |
| Availability | Dealer and OEM Suppliers | Auto Parts Stores | Widely Available |
If your Jeep Grand Cherokee is your daily driver and reliability is your highest priority, investing in an OEM or premium aftermarket starter is usually the best decision.
If you are preparing an older vehicle for resale or simply need an affordable repair, a reputable aftermarket starter can provide excellent value while reducing overall repair costs.
Before making a purchase, verify the following information:
- Vehicle model year
- Engine size
- Drive configuration
- Part number compatibility
- Warranty coverage
- Customer reviews
- Return policy
Purchasing the correct starter the first time reduces installation delays and eliminates unnecessary returns.
Common Mistakes to Avoid During Starter Replacement
Replacing a starter is not an especially complicated repair, but several common mistakes can create additional problems or even damage your vehicle. Taking a few extra minutes to avoid these errors can save hours of troubleshooting later.
Forgetting to Disconnect the Battery
This is one of the most dangerous mistakes.
The starter receives direct battery power at all times. Accidentally touching a wrench between the starter terminal and ground can create a powerful electrical short capable of damaging components or causing personal injury.
Always disconnect the negative battery cable before working on the starting system.
Buying the Wrong Starter
Many Jeep Grand Cherokee model years offer multiple engine options.
Even vehicles produced during the same year may require different starters depending on engine size and drivetrain configuration.
Always verify the part number using your Vehicle Identification Number whenever possible.
Reusing Damaged Electrical Connections
Corroded battery cables, damaged terminals, or loose connectors can create voltage drop that prevents the new starter from operating correctly.
Inspect every electrical connection before installation and replace damaged cables if necessary.
Cross Threading Mounting Bolts
The transmission housing is typically made from aluminum.
Starting bolts with power tools instead of threading them by hand can easily damage the threads.
Always begin threading each bolt by hand before tightening with a ratchet.
Ignoring Torque Specifications
Over tightening electrical terminals may damage the studs or crack the starter housing.
Under tightening mounting bolts may allow the starter to shift during engine cranking.
Using a torque wrench provides the best protection against both problems.
Skipping Battery Testing
Many owners replace the starter only to discover that the battery was actually responsible for the no start condition.
Always test battery voltage and battery health before purchasing replacement parts.
Forgetting to Compare the Old and New Starter
Even if the replacement part is listed as compatible, compare both units side by side.
Check mounting holes, gear size, electrical terminals, connector positions, and overall dimensions.
Any noticeable difference should be investigated before installation.
Leaving Tools or Loose Parts Behind
Before reconnecting the battery, inspect the engine compartment and the area beneath the vehicle.
Verify that all sockets, extensions, bolts, shields, and wiring clips have been reinstalled correctly.
A careful final inspection helps prevent unnecessary problems after the repair is complete.
Frequently Asked Questions
How long does it take to replace a starter on a Jeep Grand Cherokee?
For an experienced technician, the repair usually takes between one and three hours depending on the engine and model year. First time DIY mechanics should allow several additional hours to complete the job safely.
Can I replace the starter myself?
Yes. Many Jeep Grand Cherokee owners successfully replace the starter at home using common hand tools, a floor jack, and jack stands. However, working underneath a vehicle requires proper safety procedures and mechanical confidence.
What are the symptoms of a bad starter?
Common symptoms include a single clicking sound, slow cranking, grinding noise, intermittent starting, smoke, or a complete no crank condition even though the dashboard lights operate normally.
Can a bad battery look like a bad starter?
Absolutely.
A weak battery can produce many of the same symptoms as a failed starter. Always test the battery before replacing the starter.
Why does my Jeep still not start after replacing the starter?
If the engine still does not crank, inspect the battery, starter relay, battery cables, ground connections, ignition switch, and wiring. If the engine cranks normally but does not start, the issue may involve fuel delivery, ignition components, sensors, or the engine management system.
Does a new starter require programming?
No.
A replacement starter does not require computer programming or calibration.
Can I drive with a bad starter?
Driving is possible only if the engine is already running. However, once the engine is turned off, the vehicle may not restart. Replacing a failing starter as soon as possible reduces the risk of becoming stranded.
Should I replace the battery at the same time?
Not necessarily.
Replace the battery only if testing confirms that it is weak or nearing the end of its service life.
How long does a starter usually last?
Most original starters last between 100,000 and 150,000 miles. Service life depends on driving conditions, maintenance, climate, and the number of engine starts throughout the vehicle’s lifetime.
Is replacing the starter worth doing yourself?
If you have the necessary tools and experience, replacing the starter yourself can save several hundred dollars in labor costs while giving you a better understanding of your vehicle.
Conclusion
A successful Jeep Grand Cherokee starter replacement begins with accurate diagnosis. While a failed starter is a common cause of a no start condition, problems involving the battery, starter relay, wiring, ignition switch, or charging system can produce similar symptoms. Taking the time to inspect and test these components before replacing the starter can prevent unnecessary repairs and reduce overall costs.
With the proper tools, quality replacement parts, and careful attention to each installation step, many owners can complete this repair in their own garage. Following recommended torque specifications, verifying electrical connections, and performing a thorough final inspection will help ensure reliable starting performance for years to come.
Whether you choose an OEM starter for maximum reliability or a premium aftermarket unit for better value, investing in a high quality replacement is one of the best ways to restore dependable engine starting.
If your Jeep Grand Cherokee still experiences starting problems after replacing the starter, continue diagnosing the battery, alternator, starter relay, ignition system, and engine control circuits. A systematic troubleshooting approach is the fastest way to identify the root cause and return your vehicle to dependable operation.
We hope this complete DIY guide has given you the confidence to tackle your next repair. If you have questions, tips, or personal experience with a Jeep Grand Cherokee starter replacement, feel free to share them in the comments. Your insights may help other Jeep owners solve their starting problems more quickly and avoid unnecessary repair expenses.