A RAM backup camera improves safety by providing a clear view of the area behind your vehicle whenever you shift into reverse. However, the system may occasionally stop working as expected. Common symptoms include a black screen, a frozen image, delayed camera activation, distorted video, or a “Camera Unavailable” message displayed on the Uconnect screen. Although these issues can appear serious, they are often caused by temporary software glitches, communication errors, or minor electrical interruptions rather than a failed camera.
Resetting the RAM backup camera is usually the first troubleshooting step because it restores communication between the camera module, the infotainment system, and the vehicle’s electronic control units. In many cases, a simple reset eliminates temporary faults without requiring expensive repairs or component replacement. Understanding when and how to perform the correct reset method can save both time and money while restoring normal camera operation.
This guide explains every practical method to reset a RAM backup camera, including soft resets, battery disconnect procedures, infotainment system reboots, and factory reset options available on compatible models. It also helps you identify the underlying cause of common backup camera problems, distinguish software issues from hardware failures, and determine when replacing the camera is the only effective solution. By following these troubleshooting steps in the correct order, you can diagnose the problem more accurately and restore your RAM backup camera with confidence.
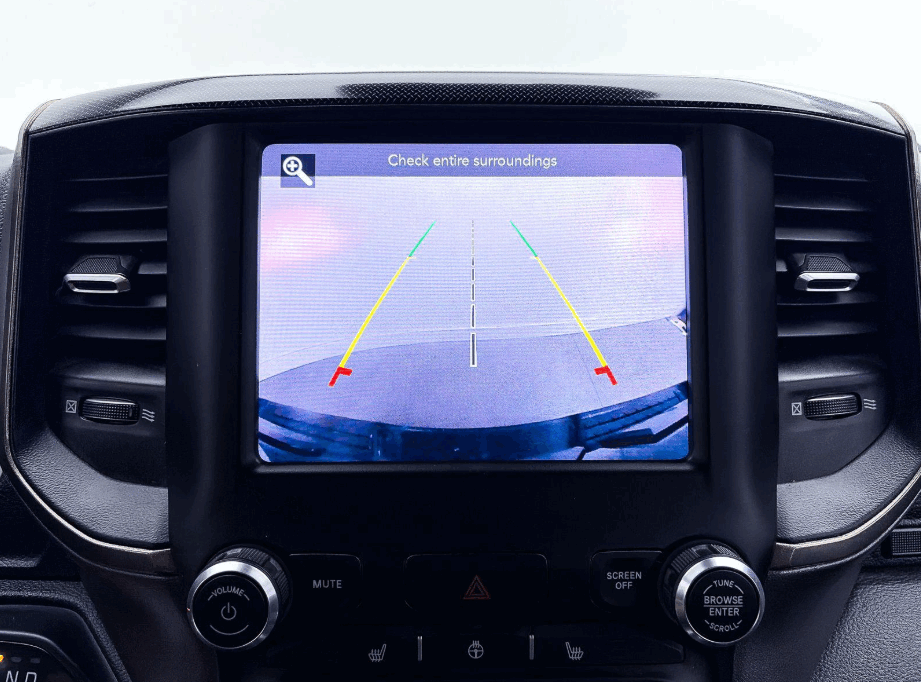
How Do You Reset a RAM Backup Camera?
Resetting a RAM backup camera restores communication between the camera, the Uconnect system, and the vehicle’s control modules. This process removes temporary software errors that interrupt the video signal. It is often the first solution for a black screen, a frozen image, delayed activation, or a “Camera Unavailable” warning. Many drivers fix these problems without replacing the camera because the issue often originates from a temporary software conflict instead of damaged hardware.
Start with a soft reset. Turn the ignition to the ON position without starting the engine. Wait until the Uconnect system finishes loading. Restart the infotainment system by using the reboot method that matches your RAM model. After the screen turns back on, shift the transmission into reverse. Check whether the camera displays a clear image. This procedure refreshes the connection between the infotainment system and the camera module while keeping your personal settings unchanged.
If the problem remains, disconnect the negative battery terminal. Leave it disconnected for about ten to fifteen minutes. This step removes residual electrical power from several control modules. Reconnect the battery and start the vehicle. Allow the Uconnect system to complete its startup before testing the camera again. Many intermittent camera problems disappear because the modules initialize with a clean electrical state.
Some newer RAM trucks include a factory reset option inside the Uconnect settings menu. This feature restores the infotainment system to its default configuration and rebuilds communication with connected modules. Remember that a factory reset also removes paired phones, navigation favorites, and customized settings. Use this method only after the soft reset and battery reset fail to solve the problem.
Test the backup camera several times after completing each reset. Shift into reverse under normal driving conditions and watch how quickly the image appears. Look for flickering, delays, or warning messages. If the same symptoms continue after every reset, the camera probably has a hardware or wiring problem. The next step is to inspect the fuse, wiring harness, electrical connectors, and camera module before replacing any parts.
Why Is Your RAM Backup Camera Not Working?
A RAM backup camera usually stops working because the system loses communication between the camera module and the Uconnect infotainment system. The problem may come from software, electrical components, or physical damage. Identifying the root cause before replacing parts saves both time and repair costs.
Software glitches rank among the most common causes of camera failure. A firmware update, an interrupted system restart, or a temporary communication error can prevent the infotainment system from recognizing the backup camera. As a result, the display may show a black screen, freeze on the last image, or display a warning message instead of the live camera feed.
Electrical problems also affect camera performance. A blown fuse, a loose connector, or a damaged wiring harness interrupts the video signal before it reaches the display. Tailgate wiring deserves special attention because the harness bends every time the tailgate opens or closes. Over time, repeated movement can wear the insulation or break internal wires.
The camera module itself can also fail. Moisture entering the housing, impact damage, or normal component wear may prevent the sensor from capturing video. In these cases, the screen often remains black even though the infotainment system continues to operate normally. Some drivers also notice blurry images, flickering video, or colored lines before the camera stops working completely.
Environmental conditions may create temporary camera problems as well. Dirt, road salt, snow, or heavy rain can cover the camera lens and reduce image quality. Cleaning the lens with a soft microfiber cloth often restores a clear picture within minutes. However, cleaning will not resolve issues caused by damaged electronics or faulty wiring.
Recent software updates may also trigger unexpected camera behavior. An incomplete update or a compatibility issue between the Uconnect software and the camera module can interrupt normal operation. Checking for the latest software version and installing official updates often resolves these conflicts without replacing any hardware.
Understanding the cause of the problem helps you choose the correct repair method. A software issue usually responds to a reset, while damaged wiring or a failed camera requires physical repair. Diagnosing the system before purchasing replacement parts reduces unnecessary expenses and increases the chance of fixing the problem on the first attempt.
How Can You Diagnose the Problem Before Replacing the Camera?
Diagnosing the backup camera before replacing any parts helps you avoid unnecessary repairs. Many camera failures look identical on the display, but they often have different causes. A systematic inspection allows you to identify whether the problem comes from the software, the electrical system, or the camera itself.
Start by observing how the camera behaves. If the screen works normally but suddenly turns black or freezes, the issue often points to a software problem. Restart the Uconnect system and test the camera several times. If the image returns after a reset but fails again later, the infotainment software may require an update.
Next, inspect the camera lens and housing. Dirt, mud, snow, or water spots can reduce image quality and create the impression of a hardware failure. Clean the lens with a soft microfiber cloth and check for cracks or moisture inside the camera. Water intrusion usually indicates permanent damage because it affects the internal sensor and electronic circuits.
Continue by examining the tailgate wiring harness. Open and close the tailgate while checking the wiring for cuts, loose connectors, or worn insulation. This area experiences constant movement, making it one of the most common failure points on RAM trucks. Even a partially damaged wire can interrupt the video signal and cause intermittent camera operation.
The camera fuse should also be inspected. Locate the correct fuse in the owner’s manual and check whether it has blown. Replace a damaged fuse with one that has the same amperage rating. Installing a higher-rated fuse can damage the electrical system and create additional problems.
A diagnostic scan provides valuable information when visual inspections do not reveal the cause. Connect an OBD-II scan tool that supports body control and infotainment modules. Check for Diagnostic Trouble Codes related to the backup camera, Uconnect system, or communication network. These codes often identify the affected module and shorten the troubleshooting process.
After completing each inspection, test the backup camera again under normal operating conditions. If the camera still fails after a successful reset, clean wiring, a good fuse, and no software errors, the camera module has likely reached the end of its service life. Replacing the module becomes the most effective solution at that stage.
Does the Reset Process Differ Between RAM Models?
The reset process remains similar across most RAM trucks, but the exact steps depend on the model year and the Uconnect system installed in the vehicle. RAM has updated its infotainment software several times over the years. As a result, newer models include additional reset options that older trucks do not support.
Owners of the RAM 1500 can usually perform a soft reset through the Uconnect system or by disconnecting the negative battery terminal. Most temporary camera issues disappear after one of these procedures because the system reloads the communication between the infotainment unit and the backup camera. Vehicles equipped with the latest Uconnect software may also include a factory reset option in the Settings menu.
The RAM 2500 follows nearly the same troubleshooting process. However, heavy-duty trucks often experience wiring problems near the tailgate because they operate in demanding environments. Frequent towing, vibration, and exposure to dirt or moisture can place additional stress on the wiring harness. Inspecting the electrical connections becomes just as important as performing the reset itself.
The RAM 3500 also uses similar reset methods, but commercial use may increase the risk of electrical faults. Trucks that carry heavy loads or tow trailers regularly place more strain on the vehicle’s electrical system. If the camera continues to fail after a successful reset, inspect the wiring harness, connectors, and camera module before replacing the infotainment system.
The biggest difference appears between Uconnect 4 and Uconnect 5. Uconnect 5 offers faster processing, improved software stability, and additional recovery options through the system settings. Older Uconnect 4 systems rely more heavily on manual restart procedures and battery resets. Although both systems support the same basic troubleshooting approach, the menu layout and available features differ.
Before attempting any reset, verify your truck’s model year and Uconnect version. Using the correct procedure reduces unnecessary troubleshooting and helps restore the backup camera more efficiently. Following the manufacturer-recommended reset method also lowers the risk of changing settings that are unrelated to the camera system.
When Should You Replace the RAM Backup Camera Instead of Resetting It?
Resetting the system cannot fix every backup camera problem. A reset only resolves temporary software or communication errors. If the camera continues to fail after multiple reset attempts, the issue usually involves a damaged component. Identifying these signs early helps you avoid repeating unnecessary troubleshooting steps.
A permanently black screen often indicates camera failure when the infotainment system continues to operate normally. If the radio, touchscreen, and other vehicle functions work without interruption, the camera module may no longer transmit a video signal. Testing the camera after every reset confirms whether the problem remains consistent or occurs only occasionally.
Visible physical damage also signals that replacement is the better option. Cracked lenses, broken housings, or impact damage can affect both image quality and internal electronics. Even a small crack allows moisture to enter the camera assembly. Once water reaches the internal circuit board, corrosion begins to develop and the camera gradually loses reliability.
Water intrusion creates several warning signs before complete failure occurs. The image may appear blurry, flicker during operation, or display colored lines across the screen. Condensation inside the camera lens also indicates that the weather seal has failed. Cleaning the lens will not solve these problems because the damage exists inside the camera module.
The cost of replacing a RAM backup camera depends on the model year, camera type, and labor rates. An original equipment camera usually costs more than an aftermarket replacement, but it offers better compatibility with the Uconnect system. Professional installation may also include camera calibration and system testing to confirm that every function operates correctly.
Some owners choose to replace the camera themselves. This approach works well for those with basic mechanical experience and the proper tools. However, vehicles equipped with advanced driver assistance features may require additional calibration after installation. If your RAM uses integrated safety systems, a qualified repair shop or dealership can complete the replacement more accurately and verify that every related feature works as intended.
Replacing the camera should become the final solution after you eliminate software errors, electrical faults, wiring damage, and fuse problems. Following this sequence reduces repair costs and prevents replacing parts that still function correctly. A structured diagnosis also increases the likelihood of restoring the backup camera on the first repair attempt.
How Can You Prevent Future RAM Backup Camera Problems?
Regular maintenance reduces the risk of backup camera failures and helps the system operate reliably for years. Most camera problems develop gradually because of dirt, moisture, worn wiring, or outdated software. Simple preventive maintenance keeps these issues from turning into expensive repairs.
Keep the camera lens clean throughout the year. Dust, mud, road salt, and water spots can reduce image quality and block your view while reversing. Wipe the lens with a clean microfiber cloth and a non-abrasive cleaner whenever you wash the truck. Avoid using sharp objects or rough materials because they can scratch the protective lens coating.
Inspect the tailgate wiring harness during routine maintenance. The wiring flexes every time you open or close the tailgate, making it one of the most vulnerable parts of the backup camera system. Look for cracked insulation, loose connectors, or signs of corrosion. Repairing minor wiring damage early helps prevent complete signal loss later.
Keep the Uconnect system updated with the latest software released for your vehicle. Manufacturers regularly publish updates that improve system stability, fix communication errors, and enhance compatibility with electronic modules. Installing official updates reduces the chance of software-related camera failures and improves overall infotainment performance.
Protect the camera and electrical connectors from excessive moisture whenever possible. After driving through heavy rain, snow, or muddy conditions, inspect the camera housing and surrounding connectors for water or debris. If you frequently drive off-road or tow trailers, perform these inspections more often because harsh environments accelerate wear on electrical components.
Pay attention to small warning signs before they become serious problems. A delayed camera image, occasional flickering, or an intermittent black screen often appears long before the system stops working completely. Addressing these symptoms early allows you to resolve minor issues before they require costly repairs or camera replacement.
Preventive maintenance takes only a few minutes but provides long-term benefits. A clean camera, healthy wiring, updated software, and regular inspections improve system reliability and reduce unexpected failures. Following these simple habits also extends the service life of your RAM backup camera and helps ensure safer reversing in everyday driving.
Frequently Asked Questions
Does disconnecting the battery reset a RAM backup camera?
Yes. Disconnecting the negative battery terminal for about ten to fifteen minutes resets several electronic control modules. This procedure often clears temporary software faults and restores communication between the backup camera and the Uconnect system. However, it will not repair damaged wiring or a failed camera module.
Why does my RAM backup camera show a black screen?
A black screen usually results from a software glitch, a blown fuse, damaged wiring, or a faulty camera module. Start with a system reset and inspect the fuse before checking the wiring and camera hardware. This approach helps identify the cause without replacing unnecessary parts.
Why is my backup camera image blurry?
A dirty lens is the most common reason for a blurry image. Clean the lens with a soft microfiber cloth and inspect it for scratches or moisture. If the image remains blurry after cleaning, the internal camera sensor may have failed.
Can I drive if my backup camera stops working?
Yes, you can still drive the vehicle, but you should not rely solely on mirrors when reversing. A functioning backup camera improves visibility and reduces blind spots. Repairing the system as soon as possible helps maintain safe driving conditions.
How long does it take to reset a RAM backup camera?
A soft reset usually takes only a few minutes. A battery reset normally requires ten to fifteen minutes, while a factory reset may take longer because the infotainment system must restore its default settings and restart completely.
Conclusion
Resetting a RAM backup camera is often the fastest way to resolve common problems such as a black screen, frozen image, delayed activation, or communication errors. In many cases, a soft reset, a battery disconnect, or a Uconnect restart restores normal operation without replacing any components. Beginning with these simple troubleshooting methods saves both time and repair costs.
If the problem continues after every reset, inspect the camera lens, fuse, wiring harness, and electrical connectors before purchasing a replacement camera. A structured diagnosis helps distinguish software issues from hardware failures and prevents unnecessary repairs. When physical damage or internal camera failure is confirmed, replacing the camera becomes the most reliable long-term solution.
Regular maintenance also plays an important role in preventing future problems. Keeping the camera clean, updating the Uconnect software, and inspecting the wiring periodically improve system reliability and extend the life of the backup camera. Following these best practices helps ensure that your RAM backup camera continues to provide a clear view and dependable performance whenever you shift into reverse.