A Honda Pioneer 1000 oil change is one of the most important maintenance tasks for protecting your engine and transmission. Many owners think the job is simple. However, one small mistake can lead to costly repairs. Using the wrong oil, installing a filter incorrectly, or overfilling the engine can reduce performance and shorten component life.
The Honda Pioneer 1000 relies on clean engine oil to lubricate moving parts, control heat, and support smooth clutch operation. Fresh oil also helps remove contaminants that build up during normal riding. If you often ride through mud, dust, water, or rough trails, regular oil changes become even more important.
This guide shows you how to complete a Honda Pioneer 1000 oil change from start to finish. You will learn how to choose the correct oil, replace the oil filter, check the oil capacity, and tighten every critical component to the proper torque specification. The guide also explains how to avoid common mistakes that many first time owners make.
Before you begin, verify the specifications for your exact model year. Honda updates maintenance information over time, and some capacities, part numbers, and torque values may vary. Checking the correct information first will help you complete the job safely and confidently.
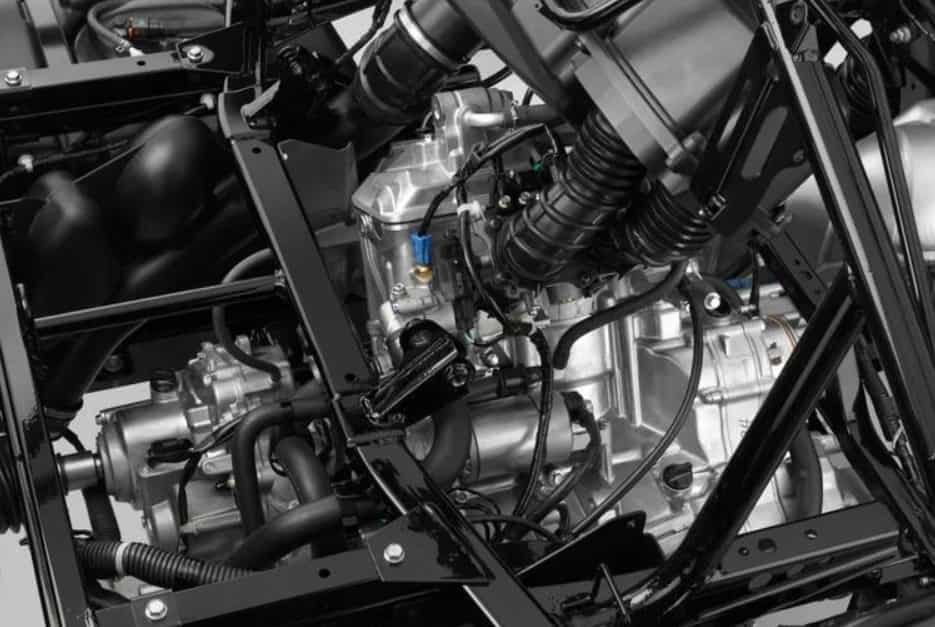
Quick Answer: Honda Pioneer 1000 Oil Change Specifications
If you need a quick answer, the table below highlights the most important information before you begin your Honda Pioneer 1000 oil change. Always verify these specifications for your exact model year because Honda may update service information over time.
| Specification | Information |
|---|---|
| Recommended Oil Viscosity | SAE 10W 30 |
| Oil Standard | API approved engine oil that meets Honda requirements with JASO MA compatibility when specified |
| Engine Oil Capacity | Approximately 6.08 US qt or 5.75 L with an engine oil filter replacement on many models |
| Engine and DCT Filter Capacity | Approximately 6.10 US qt or 5.80 L on many models |
| Oil Filters | Engine oil filter and DCT oil filter |
| Service Interval | Follow the official maintenance schedule for your model year |
| Oil Level Check | Check the level on a level surface after following the owner’s manual procedure |
Always confirm the correct oil capacity, filter part numbers, and torque specifications before starting the service. Small differences between model years can affect the maintenance process.
What Oil Does a Honda Pioneer 1000 Use?
Choosing the correct engine oil is just as important as replacing it on time. The right oil protects internal engine parts, supports smooth clutch operation, and helps the transmission perform as designed. Using an oil that does not meet Honda’s recommendations may reduce performance and increase wear over time.
Honda commonly recommends SAE 10W 30 engine oil for the Pioneer 1000. This viscosity provides reliable lubrication during cold starts while maintaining strong protection as the engine reaches operating temperature. It also performs well in a wide range of riding conditions, including trail riding, farm work, and recreational use.
Always select an oil that meets the specifications listed in your owner’s manual. Many owners choose genuine Honda engine oil because it matches the manufacturer’s requirements. High quality synthetic oils designed for powersports vehicles also provide excellent protection when they meet the same standards.
Avoid using automotive engine oils that contain friction modifiers if Honda does not approve them for your model. These additives can affect clutch performance and may lead to poor shifting or premature wear. Choosing the correct oil from the beginning helps keep your Honda Pioneer 1000 running smoothly for many years.
Honda Pioneer 1000 Oil Capacity
Knowing the correct oil capacity helps you avoid one of the most common maintenance mistakes. Many owners simply pour in the published amount and assume the job is complete. In reality, the final oil level may vary because a small amount of old oil often remains inside the engine.
Most Honda Pioneer 1000 models require about 6.08 US quarts or 5.75 liters of engine oil when you replace the engine oil filter. Models that also receive a new DCT oil filter may require about 6.10 US quarts or 5.80 liters. These values serve as general references for many model years. Always verify the specifications in the owner’s manual for your vehicle.
Instead of adding the full amount at once, pour in slightly less than the listed capacity. Start the engine and let it idle for a short time. This step allows the fresh oil to circulate through the engine and both filter housings. Next, shut the engine off and wait several minutes so the oil can return to the crankcase.
Check the oil level on a level surface by following the procedure in your owner’s manual. If the level falls below the recommended range, add a small amount of oil and check again. Repeat this process until the oil reaches the correct level.
Too much oil can create excessive crankcase pressure and cause foaming. Too little oil reduces lubrication and increases engine wear. Taking a few extra minutes to verify the oil level protects the engine and helps prevent unnecessary repairs.
Honda Pioneer 1000 Oil Filter Information
The Honda Pioneer 1000 uses more than one oil filter. Many first time owners overlook this detail and replace only the engine oil filter. Learning the purpose of each filter helps you perform a complete and accurate service.
The engine oil filter removes dirt, metal particles, and other contaminants from the engine oil. Clean oil circulates more efficiently and protects critical engine components from premature wear. Replacing the filter during every scheduled oil change helps maintain proper lubrication.
The DCT oil filter serves the dual clutch transmission system. Although it looks similar to the engine oil filter on some models, it performs a different function. Always identify each filter before removal because installing the wrong filter in the wrong location can create serious mechanical problems.
Inspect every filter housing before installing a new filter. Remove any old gasket material, dirt, or debris from the sealing surface. Apply a thin film of clean engine oil to each new sealing ring before installation. This simple step helps the seal seat correctly and reduces the chance of leaks.
Many owners prefer genuine Honda oil filters because they match the original design and specifications. High quality aftermarket filters can also perform well when they meet the correct standards and fit the vehicle properly. Regardless of the brand, always install the filter in the correct direction and tighten every fastener to the specified torque.
After replacing the filters, inspect the surrounding area carefully. A clean installation makes it easier to detect leaks during the final inspection. Taking your time during this step can prevent future maintenance issues and improve long term engine reliability.
Tools and Supplies You Need
Before you begin a Honda Pioneer 1000 oil change, take a few minutes to gather every tool and supply you need. Good preparation saves time and helps you avoid mistakes during the service. It also reduces the risk of dirt entering the engine while you search for missing equipment. Organizing everything in advance allows you to focus on each step and complete the job with greater confidence.
Most owners can perform this maintenance with common hand tools. A metric socket set, ratchet, and torque wrench are essential because they help remove and reinstall fasteners correctly. You will also need an oil drain pan that can hold the full oil capacity, a clean funnel for adding fresh oil, and several lint free shop towels for cleaning spills and wiping components. Wearing safety gloves and protective glasses is also a good idea because they help protect your hands and eyes from hot oil and debris.
Next, prepare the replacement parts and fluids before opening the engine. Use the engine oil recommended for your Honda Pioneer 1000 and purchase a new engine oil filter that matches your model year. If your maintenance schedule requires it, have a new DCT oil filter ready as well. A new drain plug sealing washer and any required sealing rings should also be available because replacing these inexpensive parts can help prevent future oil leaks.
Finally, park the vehicle on a clean and level surface before starting the service. Shift the transmission into Park and apply the parking brake. Allow the engine to cool for a short time if you have been riding recently. Cleaning the area around the oil fill cap, drain plug, and filter housings before disassembly helps keep dirt out of the engine and supports a clean, professional oil change from start to finish.
How to Change Honda Pioneer 1000 Oil Step by Step
Changing the oil in your Honda Pioneer 1000 is a straightforward job when you follow the correct sequence. Taking your time during each step will help protect the engine, improve lubrication, and reduce the chance of leaks after the service. Before you begin, park the vehicle on a level surface, shift the transmission into Park, and apply the parking brake. Start the engine and let it idle for several minutes so the oil reaches a warm temperature. Warm oil flows more easily and carries more contaminants out of the engine. Turn the engine off and remove the oil fill cap or dipstick to improve airflow while the oil drains.
Position a drain pan beneath the engine oil drain plug before loosening it with the correct socket. Remove the plug carefully and allow the oil to drain completely. While you wait, inspect the drain plug for damaged threads, excessive metal particles, or signs of abnormal engine wear. Clean the plug thoroughly and replace the sealing washer with a new one if recommended. Next, remove the engine oil filter and clean the filter housing with a lint free cloth. Compare the old filter with the new one to confirm the correct replacement. Apply a thin layer of fresh engine oil to the sealing ring before installing the new filter in the proper direction. If your maintenance schedule includes a DCT oil filter replacement, repeat the same careful inspection and installation process for that filter.
After reinstalling the drain plug and filter covers, tighten every fastener to the correct torque specification. Use a clean funnel to add fresh engine oil, but do not pour in the full capacity immediately. Start the engine and let it idle for a few minutes so the oil can circulate through the lubrication system. Shut the engine off and allow the oil to settle before checking the level according to the owner’s manual. Add small amounts of oil until the level reaches the recommended range. Finish the job by inspecting the drain plug and filter housings for leaks. A final visual inspection gives you confidence that your Honda Pioneer 1000 oil change is complete and ready for the next ride.
Honda Pioneer 1000 Torque Specs
Using the correct torque specifications is just as important as choosing the right engine oil. Many maintenance problems happen because fasteners are either too loose or too tight. A loose drain plug can allow oil to leak during operation, while excessive torque can damage the threads in the engine case. Repairing stripped threads often costs far more than the time required to tighten each fastener correctly with a torque wrench.
Always use a calibrated torque wrench when reinstalling the drain plug, engine oil filter cover, and DCT oil filter cover. Tighten each fastener gradually and evenly instead of applying full torque at once. This method helps the sealing surfaces remain flat and reduces the chance of leaks. Before tightening any component, inspect the threads for dirt, damage, or signs of wear. Clean the threads if necessary and replace damaged sealing washers or sealing rings before reassembly.
Torque specifications can vary between Honda Pioneer 1000 model years and trim levels. For that reason, you should always confirm the correct values in the official owner’s manual or service manual for your vehicle. Never rely on specifications from another Honda model because similar vehicles may use different components and tightening requirements. Following the correct torque specifications protects the engine, prevents oil leaks, and ensures every component remains secure throughout the next service interval.
How Often Should You Change the Oil in a Honda Pioneer 1000?
Changing the engine oil at the proper interval is one of the easiest ways to extend the life of your Honda Pioneer 1000. Fresh oil protects internal engine parts, reduces friction, and removes contaminants that build up during normal operation. Delaying routine maintenance allows dirt, moisture, and metal particles to remain in the lubrication system, which can increase wear over time.
Honda recommends following the maintenance schedule listed in the owner’s manual for your specific model year. Service intervals may depend on engine hours, mileage, calendar time, or a combination of these factors. The first limit you reach is usually the one that determines when the oil should be replaced. Owners who use their vehicles for heavy towing, farm work, deep mud, dusty trails, or frequent water crossings should inspect the oil more often and perform maintenance sooner if necessary.
Checking the oil condition between scheduled services is also a good habit. Clean oil usually has a smooth appearance and consistent color, while contaminated oil may become darker, thinner, or develop a burnt smell. If you notice unusual changes in the oil, investigate the cause before continuing to operate the vehicle. Regular inspections and timely oil changes will help your Honda Pioneer 1000 deliver reliable performance in every riding condition.
Common Honda Pioneer 1000 Oil Change Mistakes
Even experienced owners can make mistakes during a Honda Pioneer 1000 oil change. Most problems happen because people rush the job or skip important inspection steps. A few extra minutes spent checking each component can prevent expensive repairs and improve the long term reliability of the engine and transmission.
One of the most common mistakes is using the wrong engine oil. Choosing an oil that does not meet Honda’s specifications can affect lubrication, clutch performance, and overall engine protection. Another frequent error is installing the oil filter incorrectly. A filter placed in the wrong direction or fitted with a damaged sealing ring may restrict oil flow or create an oil leak shortly after the engine starts. Some owners also forget to replace the drain plug sealing washer, which increases the chance of leaks after the service is complete.
Overfilling the engine is another issue that many first time owners encounter. Adding too much oil can increase crankcase pressure and cause the oil to foam. On the other hand, running the engine with too little oil reduces lubrication and accelerates internal wear. Always add oil gradually and verify the final level according to the procedure in the owner’s manual. Using a torque wrench is equally important because overtightening the drain plug or filter cover can damage the threads, while insufficient torque may allow oil to escape during operation.
A final inspection should never be skipped. Start the engine, allow it to idle for a few minutes, and inspect the drain plug and filter housings carefully. Look for fresh oil around the sealing surfaces and confirm that the oil level remains within the recommended range. Completing these simple checks helps ensure your Honda Pioneer 1000 oil change is successful and prepares the vehicle for many more hours of dependable operation.
Signs Your Oil Change Was Not Done Correctly
A successful Honda Pioneer 1000 oil change should leave the engine running smoothly without warning signs or fluid leaks. If you notice unusual behavior after completing the service, stop riding and inspect the vehicle before a small issue becomes a major repair. Early detection can protect the engine and prevent unnecessary damage.
Start by checking the area around the drain plug and both oil filter housings. Fresh oil on the engine or the ground usually indicates a loose fastener, a damaged sealing washer, or an improperly installed sealing ring. You should also verify the oil level after the engine has cooled according to the procedure in the owner’s manual. An oil level that is too high or too low can affect engine performance and lubrication.
Pay attention to the way the engine sounds during the first few minutes of operation. Unusual knocking, ticking, or grinding noises should never be ignored. Watch the instrument panel for warning lights and confirm that the engine responds normally during acceleration. If your Honda Pioneer 1000 shifts differently than before the service, inspect the oil level again and confirm that every filter was installed correctly. Correcting these problems early will help restore normal operation and protect expensive engine components.
DIY vs Dealer Oil Change Cost
Many Honda Pioneer 1000 owners choose to perform routine maintenance at home because it saves money and provides a better understanding of the vehicle. A typical do it yourself oil change usually costs less than a dealership service because you only pay for the oil, filters, sealing washers, and other replacement parts. If you already own the required tools, each future oil change becomes even more affordable.
A dealership service usually includes labor, a general inspection, and genuine replacement parts. This option may suit owners who have limited mechanical experience or do not have a suitable workspace. Professional technicians also have access to factory service information and specialized equipment. However, labor charges can increase the total cost compared with completing the work yourself.
Regardless of which option you choose, regular maintenance is far less expensive than repairing an engine damaged by neglected oil changes. Keeping detailed service records and replacing the oil on schedule will help protect your investment and support the long term reliability of your Honda Pioneer 1000.
Frequently Asked Questions
Many owners have similar questions before performing their first Honda Pioneer 1000 oil change. The answers below address the topics that appear most often.
How much oil does a Honda Pioneer 1000 need?
Many models require approximately 6.08 US quarts or 5.75 liters when replacing the engine oil filter. Some models require a slightly different amount when the DCT oil filter is also replaced. Always verify the specification for your exact model year.
What type of oil should I use?
Honda commonly recommends SAE 10W 30 engine oil that meets the specifications listed in the owner’s manual. Choosing the correct oil helps protect the engine, transmission, and clutch system.
Should I replace the oil filter every time I change the oil?
Replacing the engine oil filter during every oil change is a good maintenance practice. Follow the official maintenance schedule for DCT oil filter replacement because the interval may differ.
Can I use full synthetic engine oil?
Yes, many full synthetic oils are suitable when they meet Honda’s required specifications. Always confirm compatibility before using a different product.
Why should I use a torque wrench?
A torque wrench helps you tighten every fastener to the correct specification. Proper torque reduces the risk of leaks, damaged threads, and loose components after the service.
Conclusion
Completing a Honda Pioneer 1000 oil change is one of the most valuable maintenance tasks you can perform. Fresh engine oil protects internal components, improves lubrication, and helps the engine deliver reliable performance in every riding condition. Following the correct procedure also reduces the risk of leaks, premature wear, and unexpected mechanical problems.
Success depends on more than simply draining and replacing the oil. You should always use the correct oil, install new filters properly, replace sealing washers when necessary, and tighten every fastener to the recommended torque specification. Checking the final oil level and inspecting the engine for leaks are equally important before returning the vehicle to service.
By following the steps in this guide, you can complete your next Honda Pioneer 1000 oil change with confidence while protecting your investment for years to come. If you have completed this service on your own machine, share your experience, maintenance tips, or favorite engine oil in the comments. Your advice may help other Honda Pioneer 1000 owners perform their next oil change more safely and efficiently.