An AC recharge restores cooling performance only when your Dodge Journey’s air conditioning system is low on refrigerant and free from significant leaks. If the system has a damaged compressor, a leaking hose, or a faulty condenser, adding more refrigerant will provide little or no long-term improvement. Identifying the root cause before recharging is the most important step to avoid unnecessary expense and potential damage to the AC system.
Dodge Journey models use different refrigerants depending on the model year, and each system is designed to operate within a specific refrigerant capacity and pressure range. Using the wrong refrigerant, overcharging the system, or connecting to the incorrect service port can reduce cooling efficiency and may damage AC components. For that reason, a proper recharge involves more than attaching a refrigerant can and pulling the trigger.
This guide explains how to determine whether your Dodge Journey actually needs an AC recharge, how to identify the correct refrigerant for your vehicle, where to locate the low-pressure service port, and how to recharge the system safely using the proper tools. You’ll also learn how to verify that the recharge was successful, recognize symptoms that point to compressor or refrigerant leak issues, estimate repair costs, and decide when professional AC service is the better solution than a DIY recharge.
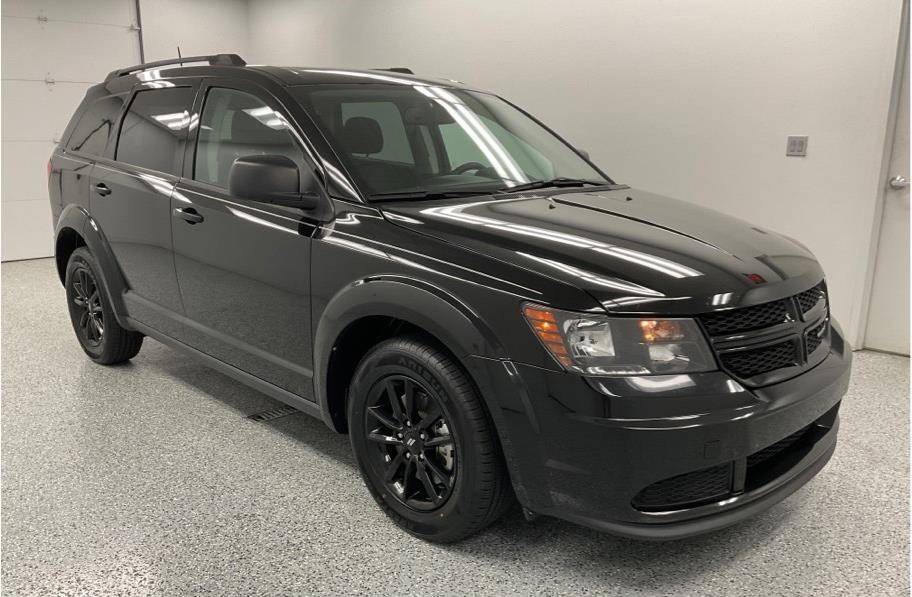
What Does an AC Recharge Do on a Dodge Journey?
An AC recharge restores the correct refrigerant level in a Dodge Journey’s air conditioning system, allowing the AC to cool efficiently when low refrigerant is the only problem. The refrigerant absorbs heat inside the evaporator and releases it through the condenser, creating the cold air that flows through the cabin vents. As refrigerant levels drop, the system loses its ability to transfer heat efficiently, causing the air from the vents to become noticeably warmer.
What happens when refrigerant becomes low?
Low refrigerant reduces cooling capacity because the AC system cannot circulate enough refrigerant to complete the heat exchange cycle. As system pressure falls below the manufacturer’s operating range, the compressor may begin cycling on and off more frequently to protect itself from damage. Drivers commonly notice longer cabin cooling times, reduced airflow temperature, and inconsistent cooling performance, particularly during hot weather or while idling in traffic.
Small refrigerant losses can occur naturally over several years through seals and hose connections. However, automotive AC systems are sealed systems and are not designed to consume refrigerant during normal operation. If the refrigerant level drops significantly within a short period, a leak is usually present and should be identified before adding more refrigerant.
Can an AC recharge fix warm air permanently?
An AC recharge provides a long-term solution only when low refrigerant is the sole cause of poor cooling performance. If the system has no leaks and all mechanical and electrical components operate correctly, restoring the refrigerant to the specified capacity can return vent temperatures to normal and maintain consistent cooling.
A recharge should not be viewed as routine maintenance performed every year. Unlike engine oil, refrigerant does not wear out or require scheduled replacement under normal conditions. If your Dodge Journey repeatedly loses cooling performance and requires frequent recharging, the system almost certainly has an underlying fault that should be repaired instead of repeatedly adding refrigerant.
When is an AC recharge not the correct repair?
An AC recharge will not solve cooling problems caused by mechanical failures, electrical faults, or refrigerant leaks. Adding refrigerant to a leaking system may improve cooling temporarily, but the refrigerant will eventually escape and the original symptoms will return.
Several common problems can produce warm air even when refrigerant levels are correct, including a failed AC compressor, a worn compressor clutch, a blocked condenser, damaged cooling fans, faulty pressure sensors, electrical relay failures, or HVAC blend door actuator problems. In these situations, pressure testing, leak detection, or electronic diagnosis is required before replacing components or adding refrigerant.
For this reason, checking system pressure and visually inspecting the AC system should always be completed before performing a recharge. A few minutes spent diagnosing the problem can prevent unnecessary refrigerant waste, reduce repair costs, and protect expensive AC components from damage.
How Can You Tell If Your Dodge Journey Needs an AC Recharge?
Several symptoms can indicate that your Dodge Journey is low on refrigerant, but pressure testing remains the most reliable way to confirm whether an AC recharge is necessary. Many cooling problems produce similar symptoms, making diagnosis more important than simply adding refrigerant.
What are the most common symptoms of low refrigerant?
There are six common signs that often indicate the AC system is low on refrigerant.
The first sign is warm or mildly cool air coming from the dashboard vents even when the temperature is set to the coldest setting. Cooling performance usually becomes worse during extremely hot weather because the system lacks sufficient refrigerant to remove heat efficiently.
The second sign is frequent compressor cycling. As refrigerant pressure drops below the designed operating range, the low-pressure switch may repeatedly engage and disengage the compressor to prevent internal damage.
The third sign is noticeably longer cooling times after starting the vehicle. Instead of producing cold air within a few minutes, the system may require much longer to reduce cabin temperature.
The fourth sign is reduced cooling performance while the vehicle is stationary. Although this symptom can also indicate condenser airflow problems, low refrigerant often contributes to poor cooling at idle.
The fifth sign is bubbling or hissing noises around AC lines or service ports. These sounds may indicate refrigerant escaping through a damaged seal or leaking connection.
The sixth sign is visible oily residue around AC hoses, fittings, or the condenser. Refrigerant carries compressor oil throughout the system, so leaking refrigerant often leaves behind oily deposits that help identify the leak location.
Which symptoms usually indicate another AC problem?
Some cooling issues resemble low refrigerant but are caused by different components. Correctly identifying these symptoms helps prevent unnecessary recharging.
If the compressor never engages, the problem may involve electrical circuits, pressure switches, relays, fuses, or the compressor clutch rather than refrigerant loss. If airflow from the vents is weak regardless of temperature, a clogged cabin air filter or failing blower motor is a more likely cause.
Cooling that changes unexpectedly between the driver and passenger sides may indicate a faulty blend door actuator inside the HVAC housing. Similarly, engine overheating combined with poor AC performance can point to cooling fan problems rather than insufficient refrigerant.
Recognizing these differences allows vehicle owners to focus diagnostic efforts on the correct component instead of assuming every AC problem requires additional refrigerant.
How can you confirm low refrigerant before adding more?
The most accurate way to confirm low refrigerant is by measuring system pressure with AC gauges and comparing the readings with manufacturer specifications under current ambient temperatures. Pressure readings provide a clearer picture of system health than vent temperature alone.
A visual inspection should accompany pressure testing. Check refrigerant lines, hose connections, the condenser, and service ports for oily residue or obvious physical damage. If a leak is suspected but cannot be located visually, adding UV dye or using an electronic leak detector can identify small refrigerant leaks that are otherwise difficult to find.
Completing these diagnostic steps before recharging reduces the risk of overcharging the system, prevents unnecessary refrigerant loss, and helps ensure that the recharge addresses the actual cause of reduced cooling performance instead of temporarily masking a larger mechanical problem.
Which Refrigerant Does a Dodge Journey Use?
The correct refrigerant for a Dodge Journey depends on the model year because Chrysler transitioned from R-134a to R-1234yf on newer vehicles. Before purchasing a recharge kit or adding refrigerant, always verify the refrigerant specification listed on the under-hood air conditioning label. Using the wrong refrigerant can reduce cooling performance, contaminate recovery equipment, and damage expensive AC components.
Which model years use R-134a?
Most Dodge Journey models manufactured before the industry’s transition to R-1234yf use R-134a refrigerant. R-134a became the automotive industry standard for many years because it provided reliable cooling performance while replacing the older R-12 refrigerant.
If your Dodge Journey is equipped with an R-134a system, use only refrigerant that meets the manufacturer’s specifications. Many DIY recharge kits are designed specifically for R-134a systems and include a low-pressure charging hose that fits only the correct service port. Although these kits simplify the recharge process, the refrigerant level should still be confirmed using pressure readings instead of relying solely on the gauge attached to the recharge can.
Which model years use R-1234yf?
Some later Dodge Journey models may use R-1234yf refrigerant to meet newer environmental regulations. R-1234yf has a much lower global warming potential than R-134a and requires different service equipment, fittings, and recovery procedures.
Because vehicle production changes may vary by market and model year, owners should never assume the refrigerant type based solely on the vehicle’s age. The refrigerant identification label located inside the engine compartment provides the most reliable information. If the label is missing or unreadable, consult the owner’s manual or a dealership before servicing the system.
Why should you never mix refrigerants?
Mixing R-134a and R-1234yf can damage the AC system and contaminate professional recovery equipment. Each refrigerant operates under different chemical properties and is designed for specific compressors, lubricants, seals, and servicing equipment. Mixing refrigerants reduces cooling efficiency and may lead to expensive repairs that could have been avoided by identifying the correct refrigerant before recharging.
Using the wrong refrigerant can also complicate future maintenance because repair shops must recover and dispose of contaminated refrigerant separately. Verifying the correct refrigerant takes only a few minutes and eliminates one of the most common mistakes made during DIY AC service.
How Much Refrigerant Does a Dodge Journey Require?
Every Dodge Journey air conditioning system is designed to operate with a specific refrigerant capacity. Adding too little refrigerant reduces cooling performance, while overcharging increases system pressure and places additional strain on the compressor. The correct capacity depends on the model year, engine configuration, and factory AC system installed in the vehicle.
Refrigerant capacity by engine and model year
Refrigerant capacity varies between Dodge Journey model years and engine options, making the factory specification the only reliable reference. Before beginning an AC recharge, locate the refrigerant capacity label under the hood or consult the factory service information for your exact vehicle.
Many DIY technicians make the mistake of adding refrigerant until the gauge enters the green zone. While this method may improve cooling temporarily, it does not guarantee that the system contains the correct refrigerant charge. Ambient temperature, compressor speed, and engine operating conditions all influence pressure readings, which means refrigerant quantity should always be verified against manufacturer specifications whenever possible.
Why does refrigerant capacity matter?
Maintaining the specified refrigerant capacity allows the AC system to operate within its designed pressure range and cooling efficiency. Undercharged systems cannot absorb enough heat from the cabin, causing higher vent temperatures and excessive compressor cycling. Overcharged systems create excessive pressure that reduces cooling performance and increases the risk of compressor damage.
Correct refrigerant capacity also improves compressor lubrication because compressor oil circulates with the refrigerant throughout the system. An incorrect charge can reduce oil circulation, increase internal wear, and shorten the service life of major AC components.
Where Is the Low-Pressure AC Service Port on a Dodge Journey?
The low-pressure service port is the only connection point used when recharging the Dodge Journey’s air conditioning system. It is located on the low-pressure refrigerant line between the evaporator and the compressor. The service port is protected by a plastic cap and is designed with a different fitting size than the high-pressure port to reduce the risk of accidental connection.
How do you identify the low-pressure port?
The low-pressure service port is usually installed on the larger-diameter aluminum refrigerant line because low-pressure refrigerant occupies greater volume as it returns to the compressor. Following the larger AC line from the firewall toward the compressor is often the easiest way to locate the correct service port.
Most recharge hoses supplied with consumer AC recharge kits are intentionally designed to fit only the low-pressure port. Even so, always inspect the port carefully before connecting any equipment. The protective cap may also include an “L” marking or other identification indicating that it is the low-pressure side of the system.
Why should you never recharge through the high-pressure port?
Connecting a recharge kit to the high-pressure service port is extremely dangerous because the pressure inside that section of the system can be several times higher than the low-pressure side. High-pressure refrigerant can damage charging equipment, release refrigerant violently, and create a serious risk of personal injury.
Automotive manufacturers use different connector sizes to help prevent accidental connections, but technicians should never rely solely on fitting size for identification. Confirming the correct service port before attaching gauges or recharge hoses is an essential safety step that protects both the vehicle and the person performing the repair.
What Tools Do You Need Before Recharging the AC?
Preparing the correct tools before recharging the AC improves safety, increases charging accuracy, and reduces the risk of damaging the Dodge Journey’s air conditioning system. While many DIY recharge kits simplify the process, using professional diagnostic equipment provides a much more reliable assessment of system condition than relying on a single low-side pressure gauge.
Which tools are essential?
There are seven essential tools for safely recharging a Dodge Journey AC system.
1. AC recharge kit
A recharge kit includes a charging hose, pressure gauge, and refrigerant can connection. Select a kit that matches the refrigerant specified for your vehicle, such as R-134a or R-1234yf. Using the wrong charging equipment can prevent proper connection or contaminate the AC system.
2. Refrigerant
Always purchase the refrigerant specified on the vehicle’s under-hood information label. Some products include compressor oil or UV dye, while others contain only refrigerant. If the system has not lost oil or developed a confirmed leak, adding unnecessary oil or sealant should be avoided.
3. Manifold gauge set
A manifold gauge set measures both low-side and high-side pressures, providing a much more accurate picture of system performance than a basic recharge gauge. Comparing pressure readings helps identify problems such as compressor failure, airflow restrictions, expansion valve issues, or refrigerant overcharge before additional refrigerant is introduced.
4. Digital thermometer
A vent thermometer measures the temperature of the air leaving the dashboard vents. Recording vent temperature before and after the recharge provides an objective way to determine whether cooling performance has improved.
5. Leak detection equipment
An electronic leak detector or UV dye kit helps locate refrigerant leaks before recharging the system. Detecting and repairing leaks first prevents refrigerant from escaping again shortly after the recharge is completed.
6. Flashlight
Many Dodge Journey AC components are located in tight areas of the engine compartment. A bright LED flashlight makes it easier to inspect refrigerant lines, identify oily residue, and locate the low-pressure service port.
7. Vehicle owner’s manual or factory service information
Factory specifications provide refrigerant type, refrigerant capacity, safety procedures, and component locations specific to your Dodge Journey model year and engine configuration. Verifying these specifications before beginning the repair helps avoid common servicing mistakes.
Which safety equipment should you use?
Proper safety equipment protects you from refrigerant exposure and accidental injuries during AC service. Refrigerant expands rapidly when released from the system and can cause frostbite if it contacts exposed skin. Safety glasses protect the eyes from refrigerant spray, while insulated gloves reduce the risk of cold burns when handling charging equipment.
Perform the recharge in a well-ventilated outdoor area whenever possible. Avoid smoking or working near open flames because refrigerants can decompose into hazardous gases when exposed to extreme heat. Before connecting any charging equipment, switch the engine off, inspect the charging hose for damage, and verify that all fittings are clean and secure.
How Do You Recharge the AC on a Dodge Journey?
Recharging the AC on a Dodge Journey requires more than simply adding refrigerant. The process begins with diagnosing the system, verifying refrigerant pressure, and confirming that no significant leaks or mechanical failures are present. Following each step carefully helps restore cooling performance while reducing the risk of overcharging the system.
Step 1 — Inspect the AC system
Inspect the entire air conditioning system before connecting any charging equipment. Begin by examining the compressor, condenser, refrigerant lines, hose fittings, and service ports for signs of physical damage or oily residue. Refrigerant carries compressor oil throughout the system, so oily deposits often indicate the location of a refrigerant leak.
Next, start the engine and turn the air conditioner to its maximum cooling setting with the blower motor on the highest speed. Observe whether the compressor clutch engages and whether the radiator cooling fans begin operating. A compressor that never engages may indicate an electrical fault, low system pressure, or a failed compressor rather than simply low refrigerant.
Step 2 — Measure system pressure
Measure system pressure before adding refrigerant to determine whether the AC system is actually undercharged. Connect the manifold gauges or recharge gauge to the low-pressure service port while following the equipment manufacturer’s instructions. Allow the system to stabilize for several minutes before recording the pressure reading.
Pressure readings should always be interpreted together with ambient temperature because refrigerant pressure naturally increases as outside temperatures rise. A low pressure reading alone does not automatically confirm that the system requires additional refrigerant. Restrictions, compressor wear, or expansion valve problems can also produce abnormal gauge readings.
Step 3 — Connect the recharge hose
Attach the recharge hose only to the low-pressure service port. Remove the protective cap, inspect the service fitting for dirt or damage, and press the connector firmly into place until it locks securely. Never force the connector onto the fitting because incorrect installation may damage the service port or cause refrigerant leakage.
Before opening the refrigerant can, verify that all hose connections remain tight and that the charging equipment is functioning correctly. Taking a few extra moments to confirm the setup reduces the chance of refrigerant loss during the recharge.
Step 4 — Add refrigerant correctly
Introduce refrigerant slowly while monitoring system pressure throughout the charging process. Keep the refrigerant can upright unless the charging equipment specifically instructs otherwise, and add refrigerant in small increments instead of emptying the entire can at once.
Allow the refrigerant to circulate through the system for a short period before checking the pressure again. This prevents inaccurate readings and reduces the risk of overcharging. Continue only until the pressure and refrigerant quantity reach the manufacturer’s recommended specifications. Adding more refrigerant than required will not make the air conditioner colder and may reduce cooling performance.
Step 5 — Monitor pressure and vent temperature
Evaluate system performance continuously while the recharge is in progress. Observe both low-side pressure and vent temperature to determine whether cooling efficiency is improving. As refrigerant reaches the correct level, vent temperature should gradually decrease while compressor operation becomes more stable.
Listen for unusual noises from the compressor and inspect the refrigerant lines for signs of frosting or excessive vibration. These symptoms may indicate airflow restrictions, expansion valve issues, or an incorrect refrigerant charge that requires further diagnosis.
Step 6 — Disconnect the equipment safely
Disconnect the charging equipment only after confirming that the AC system is operating normally. Close the refrigerant valve, remove the charging connector carefully from the low-pressure service port, and immediately reinstall the protective service cap to keep moisture and debris out of the system.
After completing the recharge, operate the air conditioner for another 10 to 15 minutes while monitoring vent temperature and compressor cycling. A final inspection of the refrigerant lines and service port helps confirm that no refrigerant is escaping after the equipment has been removed. If cooling performance declines again within a few days or weeks, inspect the system for leaks instead of performing another recharge.
How Can You Verify That the Recharge Was Successful?
A successful AC recharge restores stable cooling performance, normal system pressure, and consistent compressor operation. Verifying the results immediately after charging helps confirm that the refrigerant level is correct and that no additional mechanical or electrical problems are affecting the system.
What vent temperature should you expect?
Cold air from the dashboard vents is one of the clearest indicators that the recharge was successful. After operating the air conditioner at maximum cooling for 10 to 15 minutes, measure the vent temperature using a digital thermometer instead of relying on how the air feels by hand.
The exact vent temperature depends on ambient conditions, humidity, and engine speed. On a warm day, the discharged air should be noticeably colder than the outside temperature and should remain consistent rather than fluctuating between cold and warm. If the vent temperature changes continuously or never reaches an acceptable cooling level, the system may still have an underlying fault.
How should compressor cycling change?
The compressor should engage and disengage at regular intervals after the refrigerant reaches the correct charge. Before a recharge, an undercharged system often causes rapid compressor cycling because low refrigerant pressure repeatedly activates the low-pressure protection switch.
After the recharge, compressor engagement should become smoother and more predictable. The clutch should remain engaged long enough to maintain cooling instead of switching on and off every few seconds. Persistent short cycling after adding the correct amount of refrigerant may indicate pressure sensor problems, compressor wear, airflow restrictions, or remaining refrigerant leaks.
Which pressure readings indicate normal operation?
Stable pressure readings on both the low-pressure and high-pressure sides indicate that the AC system is operating correctly. Pressure values vary according to outside temperature, humidity, engine RPM, and condenser airflow, so they should always be interpreted using manufacturer specifications rather than a fixed universal number.
The low-pressure gauge should remain within the expected operating range without sudden fluctuations, while the high-pressure side should increase and stabilize as heat is removed from the refrigerant. Extremely high pressure may indicate an overcharged system or restricted condenser airflow, whereas unusually low pressure can suggest insufficient refrigerant or compressor performance issues.
After recording the final pressure readings, inspect the service port and hose connections one last time for signs of refrigerant leakage before closing the hood.
Why Is the AC Still Not Cold After a Recharge?
If the Dodge Journey’s AC still blows warm air after a recharge, low refrigerant was probably not the primary cause of the cooling problem. The air conditioning system depends on multiple mechanical, electrical, and airflow components working together. A failure in any of these components can prevent proper cooling even when the refrigerant charge is correct.
Could the system have a refrigerant leak?
A refrigerant leak is the most common reason an AC system loses cooling again shortly after being recharged. Refrigerant does not wear out or disappear during normal operation, so repeated loss of cooling usually indicates that refrigerant is escaping through a damaged hose, leaking O-ring, corroded condenser, evaporator, compressor seal, or service valve.
Small leaks may not produce visible signs immediately, making electronic leak detectors or UV dye inspection valuable diagnostic tools. Repairing the leak before recharging again prevents repeated refrigerant loss and reduces long-term repair costs.
Could the compressor be faulty?
A worn or damaged compressor cannot circulate refrigerant efficiently even when the system contains the correct refrigerant charge. Internal compressor wear, damaged valves, clutch failure, or insufficient compression can all reduce cooling performance.
Common symptoms of compressor problems include grinding noises, squealing sounds, metal debris inside the AC system, inconsistent cooling, and abnormal pressure readings on both sides of the system. In many cases, compressor replacement also requires flushing the refrigerant lines and replacing the receiver drier or accumulator to prevent contamination of the new component.
Could the condenser or cooling fan be causing the problem?
Restricted condenser airflow can significantly reduce cooling efficiency, especially when the vehicle is idling or moving slowly. The condenser must release heat effectively before refrigerant returns to the evaporator. If airflow is restricted, refrigerant remains too warm to provide efficient cabin cooling.
Bent condenser fins, accumulated dirt, road debris, damaged cooling fans, or failed fan motors can all reduce airflow across the condenser. Drivers often notice that the AC cools better while driving at highway speeds because natural airflow partially compensates for inadequate fan performance.
Cleaning the condenser carefully and verifying that both cooling fans operate correctly can restore cooling performance if airflow is the primary issue.
Could electrical components prevent cooling?
Several electrical faults can prevent the AC system from operating normally even when refrigerant pressure is correct. Faulty pressure switches, damaged wiring, blown fuses, defective relays, malfunctioning temperature sensors, and HVAC control module failures can interrupt compressor operation or prevent the climate control system from functioning properly.
Modern Dodge Journey models rely on multiple electronic control systems to manage compressor engagement and cabin temperature. If pressure readings appear normal but the compressor fails to operate consistently, electrical diagnosis using a scan tool may be required before replacing any components.
What Mistakes Should You Avoid During an AC Recharge?
Avoiding common servicing mistakes protects the AC system from unnecessary damage and improves the likelihood of a successful recharge. Many cooling problems become more expensive because incorrect charging procedures create additional mechanical issues.
Overcharging the system
Adding more refrigerant than the specified capacity reduces cooling efficiency instead of improving it. Excess refrigerant increases system pressure, places additional load on the compressor, and may trigger high-pressure protection systems. Severe overcharging can shorten compressor life and increase the risk of component failure.
Always add refrigerant gradually while monitoring system pressure instead of emptying an entire refrigerant can into the system.
Using the wrong refrigerant
Charging the system with the wrong refrigerant can contaminate the entire AC system and require costly repairs. R-134a and R-1234yf use different servicing equipment and are not interchangeable. Always confirm the refrigerant specification shown on the under-hood label before purchasing a recharge kit.
Ignoring refrigerant leaks
Recharging a leaking system only provides temporary cooling because the refrigerant will continue escaping through the damaged component. Every recharge should include a visual inspection for oily residue and, when necessary, electronic leak detection or UV dye testing. Repairing the leak first saves refrigerant, reduces environmental impact, and prevents repeated service costs.
Recharging without checking pressure
Adding refrigerant without measuring system pressure increases the risk of misdiagnosing the problem. Low cooling performance can result from compressor failure, airflow restrictions, electrical faults, or expansion valve problems rather than insufficient refrigerant. Pressure readings provide critical information that should always be collected before adding refrigerant.
Adding refrigerant into the wrong service port
Only the low-pressure service port should be used during an AC recharge. Connecting charging equipment to the high-pressure side exposes the equipment and technician to dangerously high refrigerant pressure. Before attaching the recharge hose, verify the correct service port by checking the fitting size, hose routing, and vehicle service information rather than relying on appearance alone.
Should You Recharge the AC Yourself or Hire a Professional?
A DIY AC recharge is appropriate only when the system is slightly low on refrigerant, shows no evidence of leaks, and all major AC components are operating normally. If the air conditioner gradually loses cooling performance over several years and pressure testing confirms a minor refrigerant loss, a recharge using the correct refrigerant and proper procedures can restore normal operation without requiring expensive repairs.
DIY servicing is most suitable for owners who have access to the proper tools, understand how to interpret pressure readings, and follow manufacturer specifications. Performing a recharge without diagnosing the system first increases the risk of overcharging, masking refrigerant leaks, or overlooking mechanical failures that require repair.
When is DIY recharge appropriate?
There are five situations where recharging the AC yourself is generally appropriate.
The first is when pressure testing confirms that the refrigerant level is slightly below specification without indicating abnormal system behavior.
The second is when the compressor engages normally, cooling fans operate correctly, and no unusual noises are present during AC operation.
The third is when the system shows no visible signs of refrigerant leakage, including oily residue around hoses, compressor fittings, condenser connections, or service ports.
The fourth is when the vehicle has maintained consistent cooling performance for several years before gradually losing efficiency, suggesting a slow refrigerant loss rather than a sudden component failure.
The fifth is when you have access to the correct refrigerant, appropriate charging equipment, and the factory refrigerant specifications for your specific Dodge Journey model year and engine.
When these conditions are met, a properly performed recharge can restore cooling performance while avoiding unnecessary repair costs.
When should professional repair be the better choice?
Professional diagnosis is the better option whenever the AC system shows signs of mechanical failure, electrical problems, or refrigerant leakage. Modern automotive air conditioning systems contain multiple electronic controls, pressure sensors, and specialized components that require professional diagnostic equipment beyond the capabilities of most consumer recharge kits.
Seek professional service if the compressor fails to engage, refrigerant pressure drops rapidly after recharging, cooling disappears within a few days, or visible refrigerant leaks are present. Grinding noises, compressor clutch failure, damaged condensers, contaminated refrigerant, and electrical faults also require repairs that cannot be resolved by simply adding refrigerant.
Professional repair becomes especially valuable when the system must be evacuated with a vacuum pump before recharging. Evacuating the system removes air and moisture that reduce cooling performance and contribute to internal corrosion. This procedure requires specialized recovery equipment that is generally unavailable in standard DIY recharge kits.
How Much Does It Cost to Recharge a Dodge Journey AC System?
The total cost of recharging a Dodge Journey AC system depends on whether you perform the work yourself or hire a professional technician. Additional repairs such as compressor replacement or leak repair can significantly increase the overall service cost.
DIY recharge cost
A basic DIY AC recharge is usually the most affordable option when no repairs are required. Most vehicle owners need to purchase refrigerant, a recharge hose, and a pressure gauge if these tools are not already available.
Typical DIY expenses include:
| Item | Estimated Cost |
|---|---|
| Refrigerant | $20–$60 |
| Recharge hose with gauge | $20–$50 |
| Basic AC recharge kit | $40–$100 |
| Digital thermometer (optional) | $10–$30 |
If manifold gauges or leak detection equipment must also be purchased, the initial investment becomes higher. However, these tools can be reused for future AC maintenance on multiple vehicles.
Professional service cost
Professional AC recharge services generally cost more because they include system diagnosis, refrigerant recovery, evacuation, and accurate recharging using dedicated equipment. Many repair facilities also inspect the system for leaks before adding refrigerant, reducing the chance of repeat failures.
Depending on location, labor rates, refrigerant type, and shop procedures, a professional AC recharge typically ranges from $150 to $350 when no major component replacement is required.
Vehicles equipped with R-1234yf refrigerant may cost more to service because the refrigerant itself is more expensive and requires specialized recovery equipment.
What additional repairs increase the total cost?
Several common AC repairs cost significantly more than a standard refrigerant recharge.
Replacing the AC compressor is usually one of the most expensive repairs because it often requires additional components such as the receiver drier or expansion valve to prevent contamination.
Repairing refrigerant leaks may involve replacing damaged hoses, O-rings, condensers, evaporators, or compressor shaft seals. Electrical problems involving pressure sensors, relays, control modules, or compressor clutch circuits also increase diagnostic time and repair costs.
Identifying these faults before repeatedly adding refrigerant often reduces total ownership costs by preventing unnecessary refrigerant purchases and avoiding secondary compressor damage.
What Maintenance Helps Keep the Dodge Journey AC System Working Longer?
Routine maintenance extends the service life of the Dodge Journey air conditioning system by reducing component wear, preventing refrigerant leaks, and maintaining efficient cooling performance. Preventive maintenance also minimizes the likelihood of expensive repairs caused by neglected system problems.
How often should the AC system be inspected?
Inspect the AC system at least once each year and before the beginning of hot weather. A yearly inspection should include checking refrigerant lines, compressor operation, condenser condition, cooling fan performance, and visible hose connections.
Even if the air conditioner appears to function normally, identifying small refrigerant leaks or damaged components early helps prevent more expensive repairs later. Seasonal inspections also provide an opportunity to measure vent temperature and compare cooling performance with previous years.
How can you reduce refrigerant leaks?
Keeping AC components clean and addressing minor problems early reduces the likelihood of refrigerant leaks. Dirt, road salt, moisture, and physical impacts gradually weaken condensers, hose connections, and aluminum refrigerant lines.
Regularly inspecting the condenser for damage, replacing worn sealing O-rings during repairs, and installing protective service port caps after maintenance all help maintain system integrity. If a leak is detected, repairing it promptly prevents compressor oil loss and protects internal components from premature wear.
Which maintenance habits improve AC performance?
Several simple maintenance practices help the Dodge Journey AC system maintain reliable cooling throughout its service life.
Operate the air conditioner for at least 10 to 15 minutes every few weeks, even during cooler seasons. Regular compressor operation circulates lubricant throughout the system, helping keep seals lubricated and reducing the chance of seal shrinkage.
Keep the condenser free from leaves, insects, and road debris that restrict airflow and reduce heat dissipation. Replace the cabin air filter according to the manufacturer’s maintenance schedule to maintain proper airflow through the HVAC system and improve overall cabin cooling efficiency.
Finally, avoid ignoring small changes in cooling performance. Addressing weak cooling, unusual compressor noises, or intermittent operation early often prevents larger repairs and extends the lifespan of expensive air conditioning components.