Rebuilding a Walbro carburetor involves disassembling the carburetor, cleaning its internal fuel passages, replacing worn diaphragms and gaskets, reassembling the components, and testing fuel delivery. A proper rebuild restores the carburetor’s ability to regulate the air-fuel mixture when its serviceable components are worn, damaged, or contaminated. The procedure requires a compatible rebuild kit, basic hand tools, and the correct service specifications for the carburetor model.
A Walbro carburetor may need rebuilding when an engine experiences hard starting, rough idling, hesitation during acceleration, repeated stalling, or fuel leakage. These symptoms can develop when fuel deposits restrict internal passages, diaphragms lose flexibility, or the inlet needle fails to seal correctly. However, similar problems can originate from clogged fuel filters, damaged fuel lines, or ignition faults, making diagnosis essential before disassembly.
This guide explains how to identify the correct Walbro rebuild kit, remove and clean internal components, replace diaphragms and metering parts, and reassemble the carburetor. It also covers post-rebuild adjustments, operational testing, and common troubleshooting procedures. Because Walbro carburetor models differ in component arrangement and adjustment specifications, each repair step must follow the requirements of the specific model.
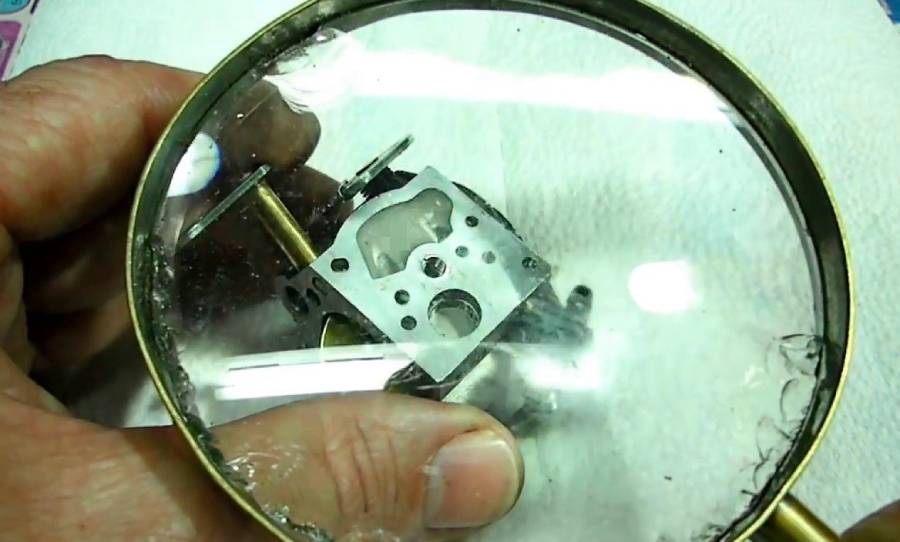
What Are the Steps to Rebuild a Walbro Carburetor?
Rebuilding a Walbro carburetor involves 7 main steps: identifying the carburetor model, preparing the rebuild kit, disassembling the carburetor, cleaning internal components, replacing worn parts, reassembling the carburetor, and testing its operation. Each step addresses a specific part of the fuel-metering system and helps restore reliable fuel delivery to the engine.
- Identify the carburetor model. Locate the model number stamped on the carburetor body, such as WT, WA, or WJ, followed by its identification number. Use this information to find the correct replacement parts and service specifications.
- Prepare the tools and rebuild kit. Gather suitable screwdrivers, carburetor cleaner, a clean work surface, and a rebuild kit containing the components required for the specific model.
- Disassemble the carburetor. Remove the carburetor from the engine, open the fuel pump and metering chambers, and carefully remove the diaphragms, gaskets, and serviceable metering components.
- Clean the internal components. Remove fuel deposits, dirt, and varnish from the carburetor body and accessible fuel passages using an appropriate cleaning solution.
- Replace worn components. Install new diaphragms, gaskets, and other damaged or worn parts included in the compatible rebuild kit.
- Reassemble the carburetor. Reinstall the internal components in their specified positions, secure the covers, and verify the metering lever setting where applicable.
- Test the rebuilt carburetor. Check for fuel leaks, reinstall the carburetor, and evaluate engine starting, idle stability, and throttle response.
The exact rebuilding procedure depends on the Walbro carburetor model. For example, diaphragm-type carburetors use flexible membranes to operate the fuel pump and regulate fuel delivery. Incorrect diaphragm placement or metering lever adjustment can prevent proper operation even when all replacement components are new.
How Do You Know if a Walbro Carburetor Needs Rebuilding?
A Walbro carburetor may need rebuilding when fuel-metering problems cause hard starting, unstable idling, engine stalling, poor acceleration, or fuel leakage. These symptoms can result from hardened diaphragms, clogged fuel passages, worn inlet needles, or damaged gaskets. However, engine performance problems alone do not confirm carburetor failure because other fuel-system and ignition components can produce similar symptoms.
Hard starting occurs when the carburetor cannot deliver the correct fuel mixture during engine startup. A stiff metering diaphragm may respond poorly to pressure changes, while restricted fuel passages can prevent sufficient fuel from reaching the engine. Rough idling and repeated stalling can develop when inconsistent fuel delivery disrupts combustion at low engine speeds. Poor acceleration may indicate restricted fuel flow or an incorrectly functioning metering system that cannot supply sufficient fuel as engine demand increases.
Fuel leakage provides another indication of carburetor problems. A worn inlet needle, contaminated needle seat, damaged gasket, or incorrect metering lever setting can allow fuel to escape or cause excessive fuel delivery. For example, an inlet needle that fails to seal may flood the engine, producing difficult starting and an excessively rich fuel mixture.
Before rebuilding the carburetor, inspect the fuel filter, fuel lines, fuel quality, intake connections, and ignition system. A cracked fuel line can introduce air into the fuel supply, while a clogged fuel filter can restrict fuel delivery and produce symptoms similar to a blocked carburetor passage. Rebuilding is appropriate when inspection identifies contaminated internal passages or worn serviceable components. A carburetor with severe corrosion, damaged castings, or excessive throttle-shaft wear may require replacement instead.
What Tools and Parts Do You Need to Rebuild a Walbro Carburetor?
Rebuilding a Walbro carburetor requires a compatible rebuild kit, precision screwdrivers, carburetor cleaner, and tools for inspecting and testing the fuel-metering system. The specific equipment depends on the carburetor model, but using correctly sized tools prevents damage to small screws, sealing surfaces, and internal components.
The essential tools include flathead and Phillips screwdrivers for removing covers and mounting screws, needle-nose pliers for handling small components, and a clean work surface for organizing disassembled parts. Carburetor cleaner removes fuel varnish and deposits from metal surfaces, while low-pressure compressed air helps clear accessible passages. A carburetor pressure tester and metering lever gauge are also useful for models requiring inlet needle leak testing and precise lever-height adjustment.
A Walbro carburetor rebuild kit generally contains replacement diaphragms, gaskets, and selected fuel-metering components. A diaphragm-and-gasket kit typically provides the flexible membranes and sealing materials needed for basic servicing. A more comprehensive repair kit may include an inlet needle, metering lever spring, fuel screen, and other model-specific components. Kit contents vary, so the parts list must be checked before beginning the repair.
The correct rebuild kit is determined by the complete carburetor identification number, not just its model family. For example, two carburetors belonging to the Walbro WT series may require different replacement components. Locate the identification marking on the carburetor body and compare it with Walbro’s applicable parts documentation or an authorized parts catalog. Matching the exact model prevents incorrect diaphragm dimensions, gasket alignment, and inlet needle compatibility.
How Do You Disassemble a Walbro Carburetor for Rebuilding?
Disassembling a Walbro carburetor involves removing it from the engine, opening the fuel pump and metering chambers, and carefully separating the diaphragms, gaskets, and serviceable internal components. The disassembly sequence must preserve the original component arrangement because incorrect installation can interfere with fuel pumping, metering, and sealing.
How Do You Remove a Walbro Carburetor From the Engine?
To remove a Walbro carburetor from the engine, shut down the engine, isolate the fuel supply, disconnect the fuel lines and throttle linkages, and remove the carburetor mounting fasteners. Perform the procedure only after the engine has cooled, in a well-ventilated area away from flames, sparks, and other ignition sources.
Start by disconnecting the spark plug lead to prevent accidental engine starting. Remove the air filter cover and air filter assembly to expose the carburetor. Before disconnecting the fuel lines, photograph their positions or label each connection. Diaphragm carburetors may have separate fuel inlet, return, or purge connections, depending on the model and engine configuration.
Next, disconnect the throttle linkage and choke linkage where applicable. Remove the mounting screws or nuts securing the carburetor to the intake assembly. Carefully separate the carburetor from its mounting surface without damaging the intake gasket, insulator, or surrounding fuel lines.
Inspect the mounting gasket and intake connections during removal. A damaged intake gasket or loose connection can introduce unmetered air into the engine, causing unstable idle or a lean fuel mixture even after the carburetor has been rebuilt.
How Do You Remove the Diaphragms and Metering Components?
To remove the diaphragms and metering components, open the carburetor covers, document the original gasket arrangement, and remove the serviceable parts without damaging the carburetor body. Walbro diaphragm carburetors generally contain a fuel pump section and a metering section, although their construction and component arrangement differ between models.
Begin by removing the screws securing the fuel pump cover. Lift the cover carefully and identify the position of the pump diaphragm and gasket before separating them. The stacking order varies by carburetor design, making the original arrangement and model-specific service diagram essential references during reassembly.
Next, remove the metering chamber cover and inspect the metering diaphragm and gasket. Note the position of the diaphragm’s central contact feature relative to the metering lever. Remove the diaphragm and gasket carefully, particularly when old fuel deposits have caused them to adhere to the sealing surfaces.
For carburetors with a serviceable inlet needle assembly, remove the metering lever retaining screw and lift out the lever, pivot pin, inlet needle, and spring as specified by the model’s service instructions. The spring is small and can easily be lost during removal. Record its position before separating the components.
Inspect the removed diaphragms for stiffness, cracking, deformation, or damaged sealing edges. Check the inlet needle tip for wear and examine the metering lever for bending or corrosion. These observations help determine which components require replacement.
Avoid removing factory-installed welch plugs, throttle plates, or pressed-in components unless the rebuild procedure specifically requires their removal. Unnecessary disassembly can damage calibrated passages or create sealing problems that are difficult to correct during reassembly.
How Do You Clean a Walbro Carburetor During a Rebuild?
Cleaning a Walbro carburetor during a rebuild involves removing fuel deposits, clearing internal passages, inspecting the fuel inlet screen, and checking the carburetor body for damage. Proper cleaning restores unobstructed fuel flow and prevents contaminants from interfering with the metering system. All diaphragms, gaskets, and other solvent-sensitive components must be removed before applying carburetor cleaner to the metal body.
Start by inspecting the carburetor body for varnish, dirt, corrosion, and fuel residue. Old gasoline can leave deposits inside fuel passages as volatile components evaporate, restricting fuel delivery to the engine. Apply a carburetor cleaner approved for the carburetor’s metal components and follow the product manufacturer’s instructions. Use a soft nylon brush to remove external deposits without scratching machined surfaces.
Clean accessible fuel passages with an appropriate solvent and carefully applied compressed air. Direct airflow away from your face, wear eye protection, and avoid excessive pressure that could damage internal check valves or dislodge small components. Never force steel wire, drill bits, or other hard objects through calibrated fuel passages because enlarging these openings changes fuel-metering characteristics.
Inspect the fuel inlet screen for trapped debris and fuel residue. A restricted screen limits fuel entering the metering chamber, which can cause hard starting, hesitation, or engine stalling. Replace a contaminated or damaged screen when the model’s service procedure permits replacement. Avoid pushing debris farther into the carburetor body during removal or cleaning.
Examine the carburetor’s sealing surfaces, threaded holes, and throttle shaft for physical damage. Deep scratches, corrosion around fuel passages, stripped threads, and excessive throttle-shaft movement can prevent reliable operation even after cleaning. A carburetor with damaged castings or severely worn nonserviceable components may require replacement rather than rebuilding.
Allow the cleaned components to dry completely before installing replacement parts. Confirm that accessible passages are clear and that no cleaning solvent remains trapped in areas where it could damage new diaphragms or gaskets.
How Do You Replace the Diaphragms and Gaskets in a Walbro Carburetor?
Replacing the diaphragms and gaskets in a Walbro carburetor involves installing a new fuel pump diaphragm, replacing the metering diaphragm and gasket, and servicing the inlet needle assembly when required. These components regulate fuel movement and maintain the pressure differences necessary for consistent fuel delivery. Incorrect installation can cause fuel starvation, flooding, or unstable engine operation.
How Do You Replace the Fuel Pump Diaphragm?
To replace the fuel pump diaphragm, remove the original diaphragm and gasket, clean the mating surfaces, and install the matching replacement components in the sequence specified for the carburetor model. The pump diaphragm uses pressure pulses from the engine to move fuel through the carburetor’s pump circuit.
Inspect the replacement diaphragm for tears, manufacturing defects, or distorted edges before installation. Align its holes with the corresponding passages and locating features on the carburetor body. The diaphragm must remain flat against its mating surface without folds or wrinkles that could interfere with pumping action.
Install the pump gasket and diaphragm in the correct order. On many Walbro diaphragm carburetors, the pump diaphragm sits against the carburetor body with the gasket positioned between the diaphragm and pump cover. However, this arrangement is not universal and must be verified against the exact model’s service diagram.
Reinstall the fuel pump cover and tighten its screws evenly according to the applicable service specifications. Excessive tightening can damage the cover or distort sealing components, while insufficient tightening can allow fuel or pressure leakage.
How Do You Replace the Metering Diaphragm and Gasket?
To replace the metering diaphragm and gasket, position the correct gasket against the metering chamber, install the new diaphragm in its specified orientation, and secure the chamber cover. The metering diaphragm responds to pressure changes and acts on the metering lever to control fuel entering the chamber through the inlet needle.
Begin by inspecting the metering chamber’s sealing surface for debris, scratches, and leftover gasket material. Place the replacement gasket and diaphragm in the arrangement required by the carburetor model. On many Walbro diaphragm carburetors, the metering gasket contacts the carburetor body and the diaphragm sits between the gasket and cover. Confirm this arrangement using the model-specific service information.
Check that the diaphragm’s central contact feature is correctly positioned over the metering lever. An incorrectly positioned diaphragm can prevent the lever from moving as intended, resulting in insufficient fuel delivery or excessive fuel entering the chamber.
Install the metering chamber cover without pinching or shifting the diaphragm. Tighten the cover screws evenly and inspect the perimeter to confirm that the gasket and diaphragm remain properly seated.
How Do You Replace the Inlet Needle and Metering Lever?
Replacing the inlet needle and metering lever involves removing the worn needle assembly, installing the correct replacement components, and setting the metering lever to the manufacturer’s specified height. The inlet needle controls fuel entering the metering chamber, while the lever transfers movement from the metering diaphragm to the needle.
Inspect the inlet needle for a damaged sealing tip, corrosion, or visible wear. A worn needle can fail to seal against its seat, allowing excessive fuel into the metering chamber. Examine the needle seat for contamination or damage before installing the replacement. A damaged nonreplaceable seat may make carburetor replacement necessary.
Install the correct metering spring, inlet needle, pivot pin, and lever according to the carburetor’s service diagram. Ensure that the spring remains seated in its designated position and that the lever moves freely without binding. Do not stretch, shorten, or substitute the spring because its calibrated force affects fuel-metering behavior.
Set the metering lever height using the specification and measuring method for the exact Walbro model. An excessively high lever can cause rich running or flooding, while a lever positioned too low can restrict fuel delivery and produce a lean mixture. Different Walbro carburetor families use different lever settings, so a universal adjustment measurement is not appropriate.
After installing the inlet needle assembly, perform the specified inlet needle sealing or pressure test with suitable equipment. The needle must seal correctly while allowing fuel to enter the metering chamber when the diaphragm operates the lever. Complete this verification before final reassembly to reduce the risk of fuel leaks and repeated disassembly.
How Do You Reassemble a Walbro Carburetor After Rebuilding It?
Reassembling a Walbro carburetor involves reinstalling the metering components, positioning the diaphragms and gaskets correctly, securing the chamber covers, and reconnecting the carburetor to the engine. Every component must match its original position and the manufacturer’s service specifications to maintain proper fuel delivery and prevent leakage.
Start by confirming that the carburetor body is clean, dry, and free from loose debris. Check that the inlet needle, metering lever, pivot pin, and spring are installed correctly. The metering lever must move freely and return to its resting position without sticking. Verify its height against the model-specific specification before closing the metering chamber.
Install the metering gasket, diaphragm, and cover in the correct sequence for the carburetor model. Align the mounting holes and sealing edges without stretching or folding the diaphragm. Repeat the procedure on the fuel pump side, ensuring that the pump diaphragm and gasket follow the specified stacking order. Incorrect positioning can prevent the pump from moving fuel or interfere with pressure regulation inside the metering chamber.
Secure the chamber covers using their original fasteners. Tighten the screws evenly to the manufacturer’s specified torque where available. Avoid overtightening because excessive force can distort covers, damage threads, or compress sealing components unevenly.
Before reinstalling the carburetor, inspect the assembled unit for misplaced gaskets, loose screws, and incorrectly positioned linkages. Perform the applicable pressure and leak tests using the manufacturer’s specified test pressure and procedure. A properly assembled carburetor should meet its specified sealing requirements without external fuel leakage.
Reinstall the carburetor onto the engine using serviceable intake gaskets and correctly positioned mounting components. Reconnect the throttle linkage, choke linkage, and fuel lines according to the photographs or labels recorded during disassembly. Confirm that the throttle moves freely through its intended range and returns correctly before starting the engine.
How Do You Adjust and Test a Walbro Carburetor After Rebuilding It?
Adjusting and testing a rebuilt Walbro carburetor involves verifying fuel-system integrity, setting the permitted carburetor adjustments, and checking engine starting, idle stability, and throttle response. Correct adjustment ensures that the rebuilt fuel-metering system delivers an appropriate air-fuel mixture across the engine’s operating range.
Before starting the engine, inspect the fuel lines, intake connections, and carburetor mounting points for correct installation. Restore the fuel supply and operate the primer or purge system according to the engine manufacturer’s instructions, where applicable. Check for fuel leakage before attempting to start the engine. Do not operate the engine if fuel escapes from the carburetor, fuel lines, or surrounding connections.
Start the engine according to the equipment manufacturer’s procedure and allow it to reach the recommended operating temperature before making final adjustments. Observe whether the engine starts consistently, maintains a stable idle, and responds smoothly to throttle input. Persistent hesitation, flooding, or stalling indicates that additional diagnosis is required.
How Do You Adjust the Idle and Fuel Mixture Screws?
To adjust the idle and fuel mixture screws on a Walbro carburetor, identify the available adjustment screws, establish the manufacturer’s specified initial settings, and make permitted adjustments while monitoring engine operation. The adjustment procedure depends on the carburetor model, engine application, and emissions-control configuration.
Adjustable Walbro carburetors may include three primary controls:
- Low-speed mixture screw (L): Regulates fuel mixture characteristics in the low-speed operating range and influences idle quality and initial acceleration.
- High-speed mixture screw (H): Regulates fuel mixture characteristics at higher engine speeds and affects performance under load.
- Idle-speed screw (T or LA): Controls the throttle’s idle position and influences engine idle speed.
Not every Walbro carburetor includes all three adjustments. Some models have fixed fuel-metering circuits, limited-range adjustment screws, or factory-controlled settings that require specialized service procedures.
Begin with the initial settings specified in the carburetor or engine service manual. Do not assume that a standard number of turns applies to every Walbro model. Where adjustment is permitted, make small changes to the low-speed mixture setting and evaluate idle stability and throttle response after each change.
Set the idle speed according to the engine manufacturer’s specification. On equipment with a centrifugal clutch, such as certain chainsaws and trimmers, the cutting attachment must remain stationary at idle. An attachment that continues moving indicates an unsafe idle condition requiring correction before operation.
High-speed mixture adjustment requires particular care because an excessively lean mixture can increase combustion temperature and damage the engine. Use the specified tachometer, operating conditions, and adjustment procedure when required. Do not exceed the manufacturer’s maximum engine speed or bypass emissions-related adjustment restrictions.
After completing the permitted adjustments, test the engine through its normal operating range. Verify consistent starting, stable idling, smooth acceleration, and appropriate performance under the conditions specified by the equipment manufacturer. Inspect the carburetor and fuel connections again for leaks after the test.
A successful Walbro carburetor rebuild is confirmed when the carburetor meets its applicable sealing specifications and the engine operates correctly without fuel leakage, persistent hesitation, flooding, or abnormal idle behavior.
Why Is a Walbro Carburetor Still Not Working After a Rebuild?
A Walbro carburetor may still malfunction after rebuilding because of incorrect diaphragm installation, improper metering lever height, blocked fuel passages, inlet needle leakage, or problems elsewhere in the engine’s fuel system. Replacing worn components does not guarantee proper operation when assembly errors or unresolved mechanical problems continue to affect fuel delivery.
Incorrect diaphragm and gasket positioning is a common cause of unsuccessful rebuilds. The fuel pump diaphragm must move in response to engine pressure pulses, while the metering diaphragm controls the inlet needle through the metering lever. Reversing a gasket and diaphragm or installing an incompatible replacement part can interfere with these functions, resulting in fuel starvation, flooding, or unstable engine operation.
An incorrectly adjusted metering lever can also disrupt fuel delivery. A lever positioned above the manufacturer’s specified height may allow excessive fuel into the metering chamber, causing rich running, flooding, or fuel leakage. A lever positioned too low may restrict fuel delivery, producing difficult starting, hesitation, or stalling during acceleration. Verify the lever height using the correct Walbro service specifications rather than making adjustments by visual estimation.
Fuel leakage after rebuilding commonly results from a damaged inlet needle, contaminated needle seat, incorrectly positioned gasket, or distorted chamber cover. Inspect the sealing surfaces and confirm that the inlet needle closes properly. Perform the applicable pressure test to identify sealing problems before operating the engine.
Engine stalling after rebuilding can indicate restricted fuel supply, an air leak, or an unresolved ignition problem. Inspect the fuel filter, fuel lines, tank vent, intake gaskets, and ignition components before disassembling the carburetor again. For example, a cracked fuel line can introduce air into the fuel supply and produce lean-running symptoms even when the rebuilt carburetor is functioning correctly.
Read more: Husqvarna 128LD Carburetor Adjustment: Step by Step
Is It Better to Rebuild or Replace a Walbro Carburetor?
Rebuilding a Walbro carburetor is generally preferable when its body and nonserviceable components remain in good condition, while replacement is more appropriate when structural damage, severe corrosion, or excessive wear prevents reliable repair. The decision depends on the carburetor’s physical condition, replacement-part availability, repair complexity, and total service cost.
A rebuild is suitable when the primary problems involve hardened diaphragms, damaged gaskets, a worn inlet needle, or removable fuel deposits. These components can be serviced using a compatible repair kit without replacing the complete carburetor. Rebuilding also preserves the original carburetor’s fit and configuration, provided its components remain within the manufacturer’s service limits.
Replacement becomes the better option when the carburetor body has cracks, damaged internal passages, severely corroded sealing surfaces, or excessive wear in nonserviceable areas. For example, substantial throttle-shaft bore wear can introduce unmetered air and prevent stable engine operation. Installing new diaphragms and gaskets will not correct this type of mechanical damage.
The following table summarizes the main differences between rebuilding and replacement.
| Factor | Rebuild | Replacement |
|---|---|---|
| Component condition | Serviceable body with worn replaceable parts | Damaged body or nonserviceable components |
| Parts required | Compatible rebuild kit | Complete matching carburetor |
| Repair complexity | Requires disassembly, cleaning, and testing | Requires removal, installation, and verification |
| Cost consideration | Often economical when repair parts are available | Preferable when repair costs approach replacement cost |
| Compatibility | Preserves the original carburetor configuration | Requires verification of the replacement model |
Before selecting either option, compare the cost of the correct rebuild kit, required tools, and repair labor with the price of a genuine or manufacturer-approved replacement carburetor. A low-cost replacement is not necessarily the better choice if its fuel-metering characteristics, mounting dimensions, or linkage configuration differ from the original unit.
How Can You Prevent a Walbro Carburetor From Needing Another Rebuild?
Preventing repeated Walbro carburetor rebuilds requires using suitable fuel, keeping the fuel system clean, maintaining filters and fuel lines, and following proper engine storage procedures. These practices reduce fuel deposits, diaphragm deterioration, and contamination that interfere with the carburetor’s fuel-metering system.
Use fresh fuel that meets the engine manufacturer’s specifications. Gasoline deteriorates during storage, and evaporating fuel can leave deposits that restrict small carburetor passages. Use the specified fuel grade and ethanol content, and prepare the correct gasoline-to-oil mixture for two-stroke engines. Avoid storing fuel longer than recommended by the fuel supplier or equipment manufacturer.
Inspect and replace fuel filters when required. A contaminated fuel filter restricts fuel flow and can cause symptoms similar to carburetor failure. Examine fuel lines for cracks, hardening, loose connections, and deterioration. Replace damaged lines before they introduce air leaks or allow contaminants into the fuel system.
Follow the manufacturer’s storage procedure when the engine will remain unused for an extended period. Depending on the equipment, this may involve draining the fuel system or using an approved fuel stabilizer. Follow the specific storage instructions because fuel-system designs and manufacturer recommendations differ. Leaving untreated gasoline in a carburetor for prolonged periods increases the risk of varnish formation and blocked passages.
Maintain the air filtration and intake system. A damaged or poorly fitted air filter can allow dirt to enter the engine’s intake system, while loose intake connections can cause unmetered air leaks. Inspect these components during routine maintenance and replace damaged seals or filters as necessary.
Regular fuel-system inspections help identify developing problems before they require another rebuild. Maintaining clean fuel, intact connections, and properly functioning filters reduces unnecessary carburetor disassembly and supports consistent engine starting, idling, and acceleration.