An AM1 Fuse protects an automotive electrical circuit from excessive current. The AM1 label identifies the fuse within a vehicle’s electrical system. Its exact function depends on the vehicle model, year, and electrical configuration. Therefore, one AM1 Fuse does not have the same specification in every vehicle.
A blown AM1 Fuse can interrupt the circuit it protects. The symptoms depend on the components connected to that circuit. In some vehicles, the AM1 Fuse supports systems related to starting or ignition. Other vehicles use it to protect different electrical circuits.
This guide explains what an AM1 Fuse does and where to find it. It also explains how to identify the correct amp rating. You will learn what happens when the fuse blows and why it may keep failing after replacement. The guide also covers fuse testing and the difference between an AM1 Fuse and an AM2 Fuse.
The key point is simple. Always identify the AM1 Fuse according to your specific vehicle. Check the correct fuse diagram and rating before replacing it. A fuse that blows repeatedly may also indicate another electrical problem that requires diagnosis.
What Is an AM1 Fuse?
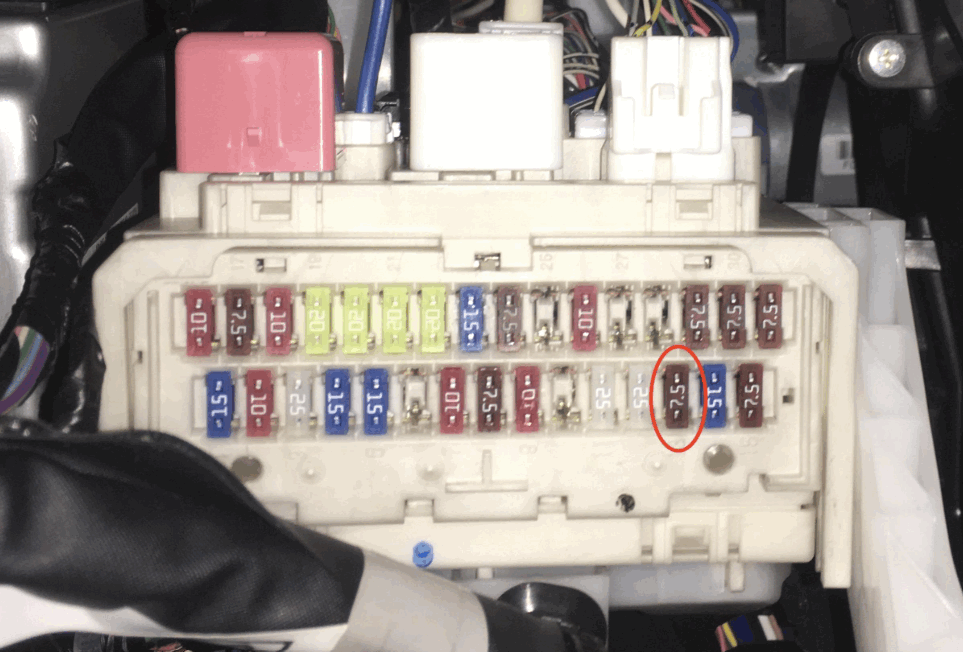
An AM1 Fuse is a fuse that protects a specific electrical circuit in a vehicle. The AM1 label identifies its position or function within the vehicle’s fuse system. The exact circuit depends on the vehicle model, year, and electrical design. Toyota owner manuals show that AM1 can protect different circuits in different vehicles.
The main purpose of the fuse is circuit protection. It interrupts electrical current when the current becomes excessive. This action helps protect wiring and connected electrical components from excessive electrical load. The AM1 Fuse therefore acts as a controlled protection point within the vehicle’s electrical system.
The AM1 label does not define one universal circuit. For example, one Toyota manual lists an AM1 Fuse rated at 40 A for the electronic ignition system. Another Toyota manual lists AM1 at 7.5 A for the power source. These examples show why you should not assume that every AM1 Fuse has the same rating or function.
The correct AM1 Fuse information comes from the vehicle’s fuse diagram, owner’s manual, or manufacturer documentation. These sources identify the fuse rating and the circuits it protects. Checking the vehicle specific information is essential before testing or replacing the fuse.
What Does an AM1 Fuse Do?
An AM1 Fuse protects the electrical circuit assigned to it by the vehicle manufacturer. It limits the effect of excessive current by opening the circuit when the electrical load exceeds the fuse’s designed protection level. The protected components then lose power, which can produce specific electrical symptoms.
The circuits connected to AM1 vary between vehicles. Toyota documentation provides examples that include ignition systems, power sources, gauges, turn signals, wipers, radio circuits, and other electrical functions. A 1996 Toyota Tacoma manual, for example, lists the AM1 Fuse as a 40 A fuse connected with several downstream circuits.
The AM1 Fuse can therefore affect important vehicle functions without performing those functions itself. The fuse does not operate the ignition, starter, radio, or wipers. Instead, it protects the electrical path that supplies power to the circuits assigned to it.
This distinction matters during troubleshooting. A blown AM1 Fuse does not automatically identify the failed component. It only confirms that the protected circuit has lost its fuse connection. The next step is to identify the vehicle specific AM1 circuit and determine why the fuse opened.
A correct diagnosis starts with the fuse diagram. It shows the AM1 Fuse rating and the circuits connected to it. You can then compare the listed circuits with the symptoms present in the vehicle.
Where Is the AM1 Fuse Located?
The AM1 Fuse is located in a vehicle fuse box or junction block, but its exact position depends on the vehicle. Some vehicles place the fuse in an engine compartment fuse box. Others place it in an interior fuse panel. The fuse diagram identifies the exact location for that vehicle.
Start by checking the fuse box cover. Many vehicles label each fuse by name, number, or circuit. Look for the AM1 marking and compare it with the diagram. If the cover does not provide enough information, check the vehicle owner’s manual for the fuse layout.
The vehicle model and year matter when locating the AM1 Fuse. Fuse boxes can change between model years and vehicle configurations. The same AM1 label can therefore appear in different locations. It can also protect different circuits.
How Do You Find the AM1 Fuse in a Fuse Diagram?
Find the fuse diagram for the exact vehicle model and year. Locate the AM1 label in the diagram and note its fuse box location. Then check the listed circuit and amp rating before removing the fuse.
Do not rely on the appearance or position of an AM1 Fuse from another vehicle. A similar fuse box layout does not confirm the same circuit assignment. Vehicle specific documentation provides the most reliable reference for identification.
What Amp Rating Does an AM1 Fuse Have?
The AM1 Fuse does not have one universal amp rating. The correct rating depends on the vehicle and the electrical circuit that the manufacturer designed the fuse to protect. Toyota documentation provides different AM1 ratings across vehicle applications.
For example, Toyota documentation lists a 40 A AM1 Fuse in one application. Another Toyota manual lists a 7.5 A AM1 Fuse. These different ratings show why you must verify the specification for your vehicle before buying or installing a replacement fuse.
The amp rating controls how much current the fuse can handle before it opens the circuit. A correctly rated fuse protects the wiring and electrical components according to the vehicle manufacturer’s design. Using a different rating changes that protection.
How Do You Find the Correct AM1 Fuse Rating?
Check the fuse box cover, owner’s manual, or manufacturer service information for the exact vehicle. Confirm the AM1 label and its listed amp rating. Then use a replacement fuse with the same rating and the correct fuse type.
Never select a higher amp rating simply because the original fuse keeps blowing. A repeated failure indicates that the circuit may have an electrical fault. Installing a higher rated fuse can allow excessive current to flow through wiring that the original fuse was designed to protect.
What Happens When an AM1 Fuse Blows?
A blown AM1 Fuse interrupts the electrical circuit it protects. The affected vehicle functions then lose power. The exact symptoms depend on the circuits connected to AM1 in that vehicle.
A blown fuse can cause electrical components to stop working. Depending on the vehicle, symptoms may involve starting functions, ignition related circuits, gauges, wipers, or other electrical equipment. The vehicle may also show more than one symptom when several components share the same protected circuit.
A blown AM1 Fuse does not always mean that the fuse itself caused the problem. The fuse may have opened because excessive current passed through the circuit. A short circuit, damaged wiring, or a failed electrical component can create this condition.
The first step is to identify the circuits protected by AM1. Check the vehicle specific fuse diagram and compare those circuits with the symptoms. This approach helps narrow the diagnosis instead of replacing the fuse without investigating the cause.
Can a Blown AM1 Fuse Prevent a Car From Starting?
A blown AM1 Fuse can prevent a vehicle from starting when AM1 protects a circuit required for the starting or ignition system. This result depends on the vehicle’s electrical design.
Some Toyota electrical systems connect AM1 with circuits that support ignition or other power supply functions. A failure in that circuit can therefore create a no start or electrical power symptom. Other vehicles may experience different symptoms because their AM1 circuit has a different assignment.
Do not diagnose a no start condition from the AM1 label alone. Check the fuse diagram and identify the components supplied through that fuse. Then test the fuse and the related circuit.
Why Does an AM1 Fuse Keep Blowing?
An AM1 Fuse that blows repeatedly usually indicates an electrical fault in the protected circuit. Replacing the fuse alone does not remove the underlying problem. The new fuse can open again when excessive current returns.
A short circuit is one possible cause. Damaged insulation can allow a wire to contact another conductor or a grounded part of the vehicle. A faulty electrical component can also draw more current than the circuit should carry. Wiring damage, connector problems, and component failures can therefore produce repeated fuse failures.
Start by confirming that the replacement fuse has the correct rating. Then inspect the protected circuit for visible wiring damage and damaged connectors. If the fault remains, use the vehicle’s wiring diagram and appropriate electrical testing methods to locate the source.
Never install a higher rated fuse to prevent repeated failures. The original fuse protects the circuit at a specific current level. Increasing the rating can allow excessive current to pass through wiring and components that were not designed for that load.
A repeated AM1 Fuse failure should therefore be treated as a circuit diagnosis problem, not simply a fuse replacement problem.
How Do You Test an AM1 Fuse?
You can test an AM1 Fuse with a visual inspection or a multimeter. A visual inspection can reveal a broken fuse element. A multimeter provides a more reliable way to check electrical continuity.
First, switch off the vehicle and locate the AM1 Fuse using the correct fuse diagram. Inspect the fuse for a broken element or visible damage. If the element appears intact, do not assume that the fuse works. Some fuse failures are not easy to identify visually.
A multimeter can check whether electrical continuity exists through the fuse. Set the meter to the appropriate continuity or resistance setting. Place one probe on each fuse terminal. A functioning fuse should allow electrical continuity. A blown fuse will show an open circuit.
The test result should match the vehicle’s fuse specification. If the fuse has failed, confirm its amp rating before installing a replacement. Do not replace it with a fuse that has a higher rating.
How Do You Test an AM1 Fuse With a Multimeter?
Remove the AM1 Fuse if the vehicle manufacturer’s procedure requires removal for testing. Touch one probe to each terminal and check the meter reading. Continuity indicates that the fuse element remains electrically connected. An open circuit indicates that the fuse has failed.
Testing the fuse is only the first diagnostic step. If a replacement fuse blows again, inspect the protected circuit for an underlying electrical fault.
How Do You Replace an AM1 Fuse?
Replace an AM1 Fuse with the same fuse type and amp rating specified for your vehicle. Start by identifying the correct AM1 Fuse through the fuse box diagram or vehicle documentation.
Switch off the vehicle before removing the fuse. Remove the failed fuse with the appropriate fuse puller or approved method. Inspect the fuse and confirm that it matches the AM1 position shown in the vehicle documentation.
Install the replacement fuse in the correct position. Make sure it has the same amp rating as the original specification. Do not increase the rating to prevent the fuse from blowing again.
After installation, check the electrical function associated with the AM1 circuit. If the system works normally, the fuse replacement may have resolved the immediate problem. However, a repeated failure requires further diagnosis.
What Should You Do If the New AM1 Fuse Blows Immediately?
Stop replacing the fuse and investigate the protected circuit. An immediate failure indicates that excessive current may still exist in the circuit.
Check the vehicle wiring diagram and identify the components connected to AM1. Inspect accessible wiring, connectors, and electrical components for damage. A short circuit or failed component can cause the replacement fuse to open again.
Do not use a higher rated fuse as a workaround. The correct fuse protects the electrical system at the current level specified by the vehicle manufacturer. A repeated failure requires diagnosis of the underlying electrical problem.
What Is the Difference Between an AM1 Fuse and an AM2 Fuse?
An AM1 Fuse and an AM2 Fuse are separate fuse designations within some vehicle electrical systems. They do not automatically protect the same circuits. Their functions depend on the vehicle’s electrical design and the manufacturer’s fuse configuration.
The two labels often appear together in vehicle fuse diagrams. This does not mean that AM1 and AM2 are interchangeable. Each fuse protects the circuit assigned to it. The fuse rating can also differ between the two positions.
The safest way to distinguish AM1 from AM2 is to check the fuse diagram for the specific vehicle. The diagram identifies each fuse position, rating, and protected circuit. This information is more reliable than using the fuse label alone.
AM1 and AM2 can also appear in diagnostic procedures for starting and ignition related electrical systems. A fault in either circuit can produce electrical symptoms, but the symptoms depend on the vehicle. Toyota service documentation shows separate AM1 and AM2 circuits in its electrical system diagrams.
Do not replace an AM1 Fuse with an AM2 Fuse simply because the two labels appear similar. Confirm the correct fuse position, fuse type, and amp rating before replacement. This prevents an incorrect fuse from being installed in the circuit.
How Can You Identify the Correct AM1 Fuse for Your Vehicle?
You can identify the correct AM1 Fuse by checking your vehicle’s fuse diagram and confirming its position, circuit, and amp rating. Start with the exact vehicle model and year because AM1 specifications vary between vehicle configurations.
Locate the fuse box and find the diagram provided on the cover or in the owner’s manual. Identify the AM1 position and check the listed amp rating. Then compare that information with the fuse installed in the vehicle.
If the AM1 Fuse has blown, inspect the fuse and test it when necessary. Replace it only with the specified fuse type and rating. If the replacement blows again, investigate the protected circuit instead of installing a higher rated fuse.
The AM1 Fuse is therefore best understood as a vehicle specific circuit protection component. Its label tells you which fuse position to investigate. The vehicle documentation tells you what that fuse protects and which replacement specification you need.
For an automotive electrical problem, follow the circuit rather than relying on the AM1 label alone. Identify the protected components, test the fuse, and investigate repeated failures. This approach provides a more accurate diagnosis and reduces the risk of causing further electrical damage.