Tailgate struts keep your tailgate open and support its weight every time you load or unload your vehicle. When these gas struts lose pressure, the tailgate becomes difficult to lift. In many cases, it may also fall unexpectedly and create a serious safety risk.
Most tailgate struts wear out after years of regular use. Heat, moisture, dirt, and constant pressure gradually reduce their lifting force. As a result, the tailgate may open slowly, refuse to stay fully raised, or require extra effort to lift. Replacing worn struts restores smooth operation and reduces stress on the hinges and mounting points.
Fortunately, you can replace tailgate struts with a few basic hand tools. Most vehicle owners finish the job in less than 30 minutes. The process does not require advanced mechanical experience, but it does require careful handling to keep the tailgate secure during installation.
This guide explains how to replace tailgate struts step by step. It also covers the tools you need, the signs of worn lift supports, common installation mistakes, and practical maintenance tips. By following these instructions, you can complete the replacement safely and restore reliable tailgate performance.
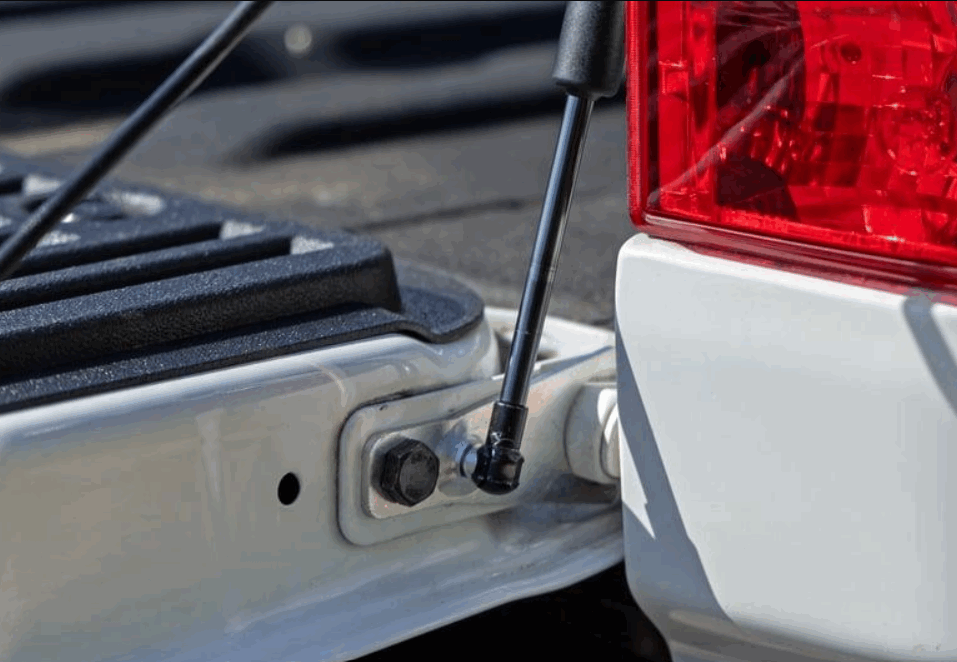
Why Do Tailgate Struts Need Replacement?
Tailgate struts lose lifting force as they age. Once the internal gas pressure drops, the struts can no longer support the tailgate correctly. The tailgate becomes heavier to lift and may close unexpectedly during normal use. Replacing worn struts restores smooth movement and improves everyday safety.
Daily use gradually wears out every pair of tailgate struts. Each time you open or close the tailgate, the internal seals experience pressure and friction. Over time, these seals weaken and allow gas to escape. Exposure to high temperatures, freezing weather, road salt, moisture, and dust also speeds up this process. As the pressure decreases, the struts deliver less lifting force and struggle to keep the tailgate fully open.
Several warning signs indicate that replacement has become necessary. The tailgate may slowly drift downward instead of staying fully raised. It may require extra effort to lift, even when the hinges remain in good condition. Some drivers also notice uneven movement because one strut loses pressure faster than the other. In more severe cases, the tailgate drops suddenly after reaching the open position. These symptoms show that the lift supports can no longer perform their intended function.
Ignoring worn tailgate struts creates more than an inconvenience. A falling tailgate can damage cargo, strike the user, or place excessive stress on the hinges and mounting brackets. The additional weight also increases wear on surrounding hardware and shortens the lifespan of related components. Replacing both tailgate struts as soon as these symptoms appear helps maintain proper lifting performance, reduces unnecessary strain, and prevents more expensive repairs in the future.
What Tools and Parts Do You Need to Replace Tailgate Struts?
Preparing the right tools and replacement parts makes the installation faster and safer. Most vehicles use a simple ball socket connection, so the job requires only a few common hand tools. Using the correct replacement struts also ensures proper lifting force and prevents premature wear.
A flathead screwdriver is the most important tool because it releases the retaining clips that lock each strut onto the ball studs. Some vehicles also require a small socket wrench or trim tool to remove mounting brackets. In addition, a sturdy support rod or a second person should hold the tailgate open throughout the replacement. Keeping the tailgate secure prevents unexpected movement and protects both the installer and the vehicle.
Choosing the correct tailgate struts is just as important as using the right tools. Every vehicle has specific lift supports that match its tailgate size, weight, and mounting design. Before purchasing new struts, verify the vehicle’s make, model, model year, and part number. Many manufacturers print the original part number directly on the existing strut, making it easier to find a compatible replacement.
Vehicle owners often choose between OEM and aftermarket tailgate struts. OEM parts provide the same specifications as the factory-installed components and usually deliver consistent performance. High-quality aftermarket struts can also perform well when they meet the original equipment specifications. However, low-quality replacements may produce incorrect lifting force, wear out quickly, or fail to support the tailgate properly. Selecting a reliable replacement from a trusted manufacturer improves durability, maintains smooth operation, and reduces the chance of another replacement in the near future.
How to Replace Tailgate Struts Step by Step
Replacing tailgate struts is a straightforward task when you follow the correct procedure. Working carefully reduces the risk of injury and prevents damage to the tailgate or the mounting hardware. Before you begin, park the vehicle on a level surface and open the tailgate completely.
Secure the tailgate before removing either strut. Use a support rod or ask another person to hold the tailgate in place throughout the installation. Never rely on a single worn strut to support the weight because it may fail without warning. A stable tailgate allows you to work safely and keeps the mounting points aligned.
Next, remove the old tailgate strut. Insert a flathead screwdriver beneath the retaining clip and lift it slightly. You do not need to remove the clip completely. Once the clip loosens, pull the strut away from the ball stud. Repeat the same process on the opposite end until the old strut comes free. Avoid forcing the connection because excessive pressure may damage the retaining clip or the mounting socket.
Install the new tailgate strut by aligning each socket with the corresponding ball stud. Press the socket firmly until it clicks into place. The retaining clip automatically locks the connection on most replacement struts, so no additional adjustment is necessary. Complete the installation on one side before replacing the second strut. This approach helps keep the tailgate stable during the entire process.
After installing both struts, remove the support rod and test the tailgate several times. The tailgate should open smoothly, remain fully raised, and close with controlled resistance. Inspect each mounting point for proper alignment and confirm that every retaining clip sits securely in place. If the tailgate operates normally, the replacement is complete and the new lift supports are ready for everyday use.
What Mistakes Should You Avoid When Replacing Tailgate Struts?
Many replacement problems result from simple installation mistakes rather than defective parts. Following the correct procedure helps the new tailgate struts perform properly and prevents unnecessary damage. Paying attention to a few critical details also improves safety throughout the installation.
One common mistake is removing both struts before supporting the tailgate. The tailgate becomes extremely heavy once both lift supports disconnect. Without proper support, it can fall suddenly and cause serious injuries or damage the vehicle. Always secure the tailgate with a support rod or ask another person to hold it before removing the first strut.
Another mistake involves installing the struts in the wrong orientation. Most manufacturers recommend positioning the cylinder above the piston rod when the tailgate is closed. This position keeps the internal seal lubricated and extends the service life of the gas strut. Installing the strut upside down may reduce its performance and shorten its lifespan.
Many vehicle owners also reuse damaged retaining clips or force the socket onto the ball stud. A bent clip may not lock the connection securely, while excessive force can crack the plastic socket. Inspect every clip and mounting point before installing the new struts. Replace any damaged hardware instead of trying to reuse it.
Choosing the wrong replacement part creates another common problem. Tailgate struts vary in length, mounting style, and lifting force. Even if two struts look similar, they may not support the same tailgate weight. Always confirm the part number and vehicle compatibility before installation. Replacing both tailgate struts at the same time also helps maintain balanced lifting force and ensures smooth, reliable operation for years to come.
How Can You Make New Tailgate Struts Last Longer?
Proper maintenance helps tailgate struts deliver reliable performance for many years. Although gas struts eventually wear out, good maintenance habits slow the aging process and reduce unnecessary stress on the internal seals. Regular inspections also help you identify small problems before they become expensive repairs.
Keep the piston rod clean to protect the internal sealing system. Dust, mud, road salt, and other contaminants can scratch the polished surface and damage the seal during normal operation. Wipe the rod with a soft cloth whenever it becomes dirty. Avoid applying grease or heavy lubricants because they attract debris and may shorten the service life of the strut.
Open and close the tailgate smoothly instead of using excessive force. Slamming the tailgate places unnecessary pressure on the gas struts and the mounting hardware. The extra impact also increases wear on the hinges and ball studs. A controlled movement reduces mechanical stress and helps every component operate as designed.
Avoid hanging heavy accessories from the tailgate whenever possible. Extra weight forces the lift supports to work harder during every opening cycle. Over time, this additional load accelerates gas pressure loss and reduces lifting performance. If you frequently carry heavy accessories, choose replacement struts that match the manufacturer’s recommended lifting capacity.
Inspect the tailgate system at regular intervals to maintain reliable operation. Check the struts for oil leaks, corrosion, bent rods, or loose mounting points. At the same time, inspect the hinges and ball studs for excessive wear. Replacing worn components early prevents additional damage and keeps the tailgate opening and closing safely. With routine maintenance and the correct replacement parts, quality tailgate struts can provide dependable performance for several years under normal driving conditions.
Conclusion
Replacing tailgate struts is a simple maintenance task that improves both safety and convenience. New lift supports restore smooth tailgate operation, reduce strain on the hinges, and prevent the tailgate from falling unexpectedly. Most vehicle owners can complete the replacement with basic tools and careful preparation.
Successful installation depends on three key factors. First, secure the tailgate before removing the old struts. Second, install replacement parts that match your vehicle’s specifications. Finally, inspect the entire tailgate system after installation to confirm that every connection is secure and the tailgate moves smoothly.
Regular maintenance also extends the lifespan of your new tailgate struts. Keeping the piston rod clean, avoiding excessive loads, and checking the mounting hardware periodically help maintain consistent lifting performance. By replacing worn tailgate struts at the right time and following the correct installation procedure, you can improve vehicle safety, protect surrounding components, and enjoy reliable tailgate operation for years to come.