Have you recently replaced a knock sensor on your GM vehicle only to find that the Check Engine Light is still illuminated or the engine doesn’t perform as expected? If so, you’re not alone. Many Chevrolet, GMC, Cadillac, and Buick owners assume that installing a new knock sensor immediately solves the problem. However, questions about whether a GM Knock Sensor Relearn is required often create confusion, especially because different GM engines and model years follow different diagnostic procedures.
One of the biggest misconceptions is that every GM vehicle requires a dedicated knock sensor relearn after sensor replacement. In reality, most GM vehicles do not have a specific “Knock Sensor Relearn” procedure. Instead, the Powertrain Control Module (PCM) continuously adapts to engine operating conditions and updates knock sensor data during normal driving. In some repair scenarios, what technicians actually need is a Crankshaft Position Variation Relearn (CASE Relearn) or another calibration procedure rather than a knock sensor relearn itself.
Understanding the difference can save you hours of unnecessary troubleshooting, prevent repeat repairs, and avoid replacing perfectly good components. Whether you’re working on a Chevrolet Silverado, GMC Sierra, Tahoe, Yukon, Escalade, or another GM vehicle equipped with LS or Vortec engines, following the correct diagnostic process is essential for restoring engine performance and preventing recurring fault codes.
This comprehensive guide explains everything you need to know about GM Knock Sensor Relearn, including when it is actually required, how the PCM learns knock sensor data, the tools you may need, a complete step by step procedure, common diagnostic trouble codes, troubleshooting techniques, and expert tips to help you complete the repair correctly the first time.
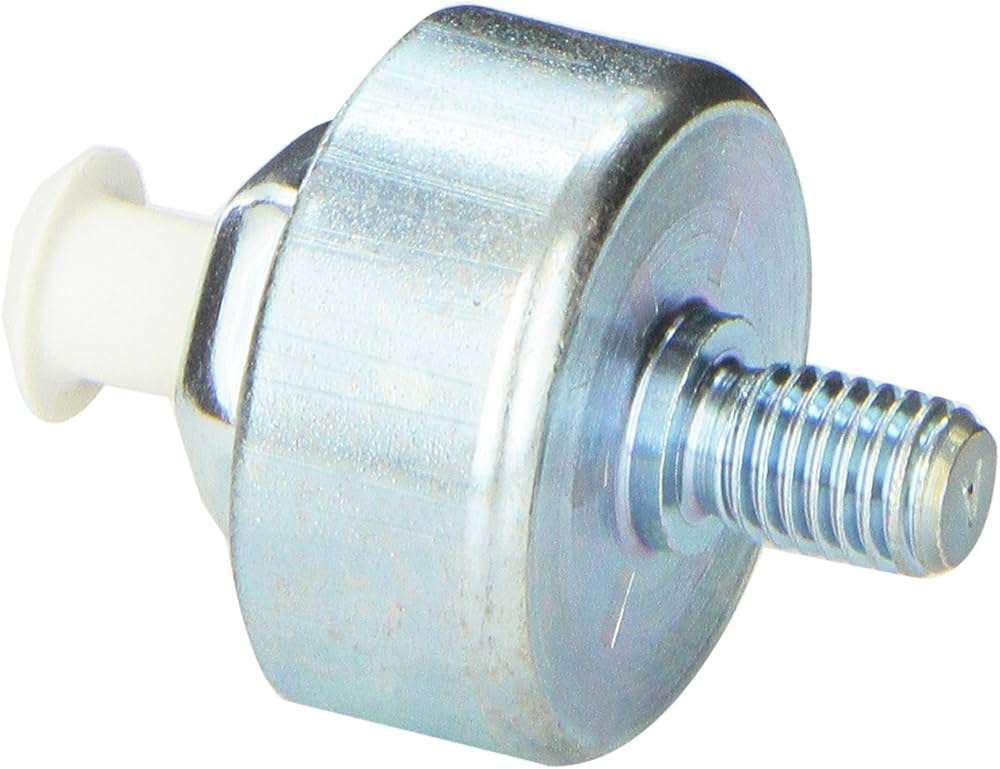
What Is a GM Knock Sensor?
A knock sensor is a critical component of your GM vehicle’s engine management system. Its primary purpose is to detect abnormal combustion, commonly known as engine knock, spark knock, or detonation. These conditions occur when the air-fuel mixture ignites too early or burns unevenly inside the combustion chamber, creating pressure waves that can damage pistons, connecting rods, cylinder heads, and other internal engine components.
GM engines typically use one or two knock sensors mounted directly on the engine block or beneath the intake manifold, depending on the engine family. Popular LS and Vortec V8 engines, such as the 4.8L, 5.3L, 6.0L, and 6.2L, often feature dual knock sensors located in the engine valley, while some newer engines position the sensors externally for improved reliability and easier access.
The knock sensor operates using a piezoelectric crystal that converts engine vibrations into electrical signals. Under normal operating conditions, the sensor continuously monitors vibration frequencies produced by the engine. When it detects the unique frequency associated with detonation, it immediately sends a voltage signal to the Powertrain Control Module (PCM).
The PCM analyzes this information in real time and adjusts ignition timing to protect the engine. Rather than allowing combustion to continue under damaging conditions, the PCM temporarily retards spark timing until knocking stops. Once normal combustion resumes, the PCM gradually advances ignition timing again to maximize power, fuel efficiency, and emissions performance.
Because this process occurs hundreds of times every second, the knock sensor plays an essential role in maintaining optimal engine performance. A properly functioning knock sensor allows the engine to operate safely under varying fuel quality, heavy loads, steep inclines, high temperatures, and rapid acceleration without causing internal damage.
When a knock sensor fails or its circuit develops a problem, the PCM can no longer accurately detect engine knock. As a result, the computer often switches to a conservative ignition timing strategy to protect the engine. While this prevents severe damage, it usually causes noticeable symptoms such as reduced engine power, sluggish acceleration, poor fuel economy, increased emissions, and illumination of the Check Engine Light.
Understanding how the knock sensor works is the first step toward correctly diagnosing engine performance problems and determining whether further calibration or diagnostic procedures are actually necessary after a repair.
What Is GM Knock Sensor Relearn?
One of the most misunderstood topics among GM vehicle owners is the term GM Knock Sensor Relearn. Many online forums and videos suggest that replacing a knock sensor always requires a special relearn procedure. In reality, this statement is only partially true.
Unlike certain engine components that require a dedicated calibration routine, most GM vehicles do not include an official service procedure called “Knock Sensor Relearn.” Instead, the PCM continuously learns and adapts engine operating conditions while the vehicle is being driven. This adaptive strategy allows the engine control system to optimize ignition timing based on information received from multiple sensors, including the knock sensors.
When a new knock sensor is installed, the PCM immediately begins receiving data from the replacement component. If the installation is correct and no diagnostic trouble codes remain active, the PCM gradually updates its adaptive memory during normal driving. This process happens automatically without requiring technician intervention on most GM models.
Confusion often arises because several different relearn procedures exist within the GM diagnostic system. These include:
Knock Sensor Adaptation
This is an automatic process performed by the PCM during everyday driving. There is typically no button to press or scan tool function to initiate it.
CASE Relearn (Crankshaft Position Variation Relearn)
This is an official GM service procedure used after replacing components such as the crankshaft position sensor, PCM, engine assembly, or harmonic balancer. Although unrelated to the knock sensor itself, many technicians mistakenly refer to it as a knock sensor relearn because both procedures may be performed after major engine repairs.
Idle Relearn
This procedure allows the PCM to relearn throttle position and idle airflow characteristics after replacing the throttle body, cleaning carbon deposits, or disconnecting the battery.
Transmission Adaptive Relearn
Certain GM automatic transmissions also use adaptive learning to optimize shift quality after repairs or software updates.
Because these procedures are often performed during the same repair session, many repair guides incorrectly combine them under the general term “GM Knock Sensor Relearn.”
Another important distinction is the difference between clearing adaptive memory and performing a relearn. Clearing adaptive memory simply erases stored operating data from the PCM. It does not program or calibrate the knock sensor. After memory is cleared, the PCM must rebuild its adaptive values by monitoring engine operation over multiple driving cycles.
Professional technicians usually verify successful adaptation by monitoring live data such as Knock Retard, Spark Advance, Engine Load, Fuel Trims, and Misfire Counters with a professional scan tool. Stable values indicate that the PCM is receiving accurate information from the knock sensors and adjusting ignition timing as intended.
In short, replacing a knock sensor does not automatically mean you need a dedicated relearn procedure. What matters most is ensuring that the sensor is installed correctly, wiring and connectors are in good condition, all diagnostic trouble codes have been repaired, and the PCM is allowed sufficient time to rebuild its adaptive data during normal driving.
When Is a GM Knock Sensor Relearn Required?
The answer depends largely on the type of repair performed. Contrary to popular belief, replacing a knock sensor alone does not automatically require a manual relearn procedure on most GM vehicles. However, there are several situations where the PCM may need to rebuild adaptive data or where another calibration procedure becomes necessary.
After Replacing the Knock Sensor
In most cases, no dedicated relearn is required after installing a new knock sensor. Once the faulty sensor has been replaced, diagnostic trouble codes are cleared, and the engine operates normally, the PCM will begin adapting to the new sensor during regular driving.
However, if the Check Engine Light returns immediately after replacement, the problem is usually related to improper installation, damaged wiring, connector corrosion, incorrect sensor torque, or the use of a low-quality aftermarket sensor rather than a missing relearn procedure.
After Replacing the Engine
Engine replacement is one of the most common situations where additional calibration procedures become necessary. Since a new or rebuilt engine may have different mechanical characteristics, the PCM must rebuild its adaptive memory. Depending on the vehicle and engine family, GM service information may also require a Crankshaft Position Variation Relearn (CASE Relearn) before normal operation can be restored.
After PCM or ECM Replacement
When the Powertrain Control Module is replaced, all previously learned adaptive values are erased. The replacement module must be programmed with the correct calibration software and then allowed to learn engine operating characteristics through normal driving. Some models may also require additional setup procedures using a factory-level scan tool.
After PCM Reprogramming
Software updates released by GM occasionally reset adaptive memory. Although a dedicated knock sensor relearn is generally unnecessary, the PCM must collect fresh operating data during several drive cycles before fuel trims, ignition timing, and knock control become fully optimized.
After Disconnecting the Battery
Disconnecting the battery usually clears some adaptive memory, although the amount varies by vehicle model and model year. Most vehicles simply relearn these values automatically during everyday driving. Temporary idle fluctuations or slightly different throttle response may occur until the learning process is complete.
After Major Engine Repairs
Repairs involving cylinder heads, camshafts, timing components, pistons, connecting rods, or intake manifolds can alter combustion characteristics. In these situations, the PCM gradually adapts to the repaired engine after all diagnostic issues have been resolved.
After Wiring or Connector Repairs
If corrosion, broken wires, water intrusion, or damaged connectors caused the original fault, repairing the electrical circuit is usually all that is required. Once the circuit functions correctly and fault codes are cleared, the PCM resumes normal knock monitoring without requiring a dedicated relearn.
The following table summarizes the most common repair scenarios.
| Repair Scenario | Dedicated Knock Sensor Relearn Required? | Additional Notes |
|---|---|---|
| Replace knock sensor | Usually No | PCM adapts automatically during driving |
| Replace engine | Sometimes | CASE Relearn may be required |
| Replace PCM or ECM | Yes, adaptive learning required | Module programming may also be necessary |
| PCM software update | Usually Yes | Adaptive values rebuild automatically |
| Disconnect battery | Usually No | Temporary adaptation occurs during normal driving |
| Major engine repair | Depends on repair | Follow GM service procedures |
| Repair wiring or connectors | No | Clear DTCs and verify proper operation |
Understanding when calibration is actually required prevents unnecessary repairs and helps avoid one of the most common mistakes in GM diagnostics: performing relearn procedures to solve problems that are actually caused by faulty wiring, improper sensor installation, or unresolved engine faults.
Symptoms That Indicate Relearn or Calibration May Be Needed
After replacing a knock sensor or performing major engine repairs, many drivers wonder whether their GM vehicle requires additional calibration. While a dedicated GM Knock Sensor Relearn is rarely necessary, certain symptoms can indicate that the PCM has not yet adapted to the repair or that another underlying problem still exists. Recognizing these warning signs can help you determine whether further diagnosis is required before replacing additional parts.
Check Engine Light Remains On
The most obvious symptom is an illuminated Check Engine Light after replacing the knock sensor. If the warning light stays on or returns shortly after clearing the codes, the issue is often unrelated to the relearn process. Instead, it may be caused by damaged wiring, corroded connectors, incorrect sensor torque, moisture inside the sensor cavity, or a defective replacement sensor.
Always perform a complete diagnostic scan before assuming the sensor itself is faulty. Reading both active and pending Diagnostic Trouble Codes (DTCs) provides valuable clues that can significantly reduce troubleshooting time.
Engine Knock or Spark Pinging
One of the primary responsibilities of the knock sensor is detecting abnormal combustion. If you continue hearing metallic pinging sounds during acceleration, climbing hills, or towing heavy loads after replacing the sensor, the PCM may not be receiving accurate data.
However, persistent engine knock is not always caused by the sensor. Low-octane fuel, excessive carbon buildup, incorrect ignition timing, vacuum leaks, lean air-fuel mixtures, or mechanical engine problems can all produce similar symptoms.
Reduced Engine Performance
Many GM vehicles enter a protective operating mode when knock sensor faults are detected. The PCM intentionally retards ignition timing to prevent engine damage, resulting in noticeable power loss. Drivers often report sluggish acceleration, poor throttle response, and reduced towing capability.
If performance does not improve after replacing the knock sensor, verify that all DTCs have been cleared and confirm that live data shows normal knock activity during a road test.
Poor Fuel Economy
Excessively retarded ignition timing prevents the engine from operating at peak efficiency. Although this strategy protects internal components, it can also increase fuel consumption.
If your vehicle suddenly begins using more fuel after knock sensor replacement, the PCM may still be operating with conservative ignition timing due to unresolved sensor faults or incomplete adaptive learning.
Hesitation During Acceleration
Engine hesitation is another common complaint. Instead of delivering smooth power, the engine may hesitate briefly before accelerating or feel inconsistent under moderate load.
This symptom can occur if the PCM receives inaccurate knock information, but it may also indicate ignition coil failures, fuel delivery problems, dirty injectors, or airflow sensor issues. A complete diagnostic inspection is always recommended before focusing solely on the knock sensor.
Rough Idle or Unstable Operation
Although knock sensors are not directly responsible for idle quality, poor combustion caused by incorrect ignition timing can occasionally create an unstable idle. If rough idle develops immediately after repair, inspect all electrical connectors, vacuum hoses, intake manifold seals, and ground connections that may have been disturbed during the installation.
Recurring Diagnostic Trouble Codes
Repeated fault codes are usually the strongest indication that another problem still exists. Common knock sensor related DTCs include:
| DTC | Description |
|---|---|
| P0325 | Knock Sensor 1 Circuit Malfunction |
| P0326 | Knock Sensor Performance Problem |
| P0327 | Knock Sensor Low Input |
| P0328 | Knock Sensor High Input |
| P0330 | Knock Sensor 2 Circuit Malfunction |
| P0332 | Knock Sensor 2 Low Input |
| P0333 | Knock Sensor 2 High Input |
If these codes return immediately after clearing them, performing another relearn procedure is unlikely to solve the problem. Instead, inspect the sensor installation, wiring harness, connectors, PCM inputs, and engine mechanical condition.
In most situations, successful repairs are confirmed when the engine operates smoothly, no DTCs return after multiple drive cycles, and live data shows normal Knock Retard and Spark Advance values.
Tools You’ll Need
Performing an accurate diagnosis is far more important than replacing parts. Whether you are simply replacing a knock sensor or investigating persistent fault codes, having the right tools can make the difference between a successful repair and hours of unnecessary troubleshooting.
Fortunately, many inspections can be completed using basic automotive tools, while more advanced diagnostic procedures may require professional scan equipment.
OBD-II Scan Tool
An OBD-II scanner is the minimum tool every DIY mechanic should own. Even an entry-level scanner can read and clear Diagnostic Trouble Codes, helping identify whether the knock sensor circuit is actually responsible for the Check Engine Light.
More advanced scan tools provide access to freeze frame data, pending codes, live sensor values, and readiness monitors. These features are invaluable when diagnosing intermittent problems that may not immediately trigger a fault code.
Professional GM Scan Tools
Factory-level diagnostic tools offer capabilities that basic code readers cannot provide.
Common GM diagnostic platforms include:
- Tech 2
- GDS2
- MDI
- MDI 2
These systems allow technicians to perform module programming, monitor high-speed data streams, initiate special functions, reset adaptive values, and complete procedures such as the Crankshaft Position Variation Relearn when required.
If your vehicle has recently received a replacement PCM or extensive engine repairs, professional diagnostic equipment may be necessary to complete the repair correctly.
Digital Multimeter
A quality digital multimeter is essential for checking wiring integrity.
It can be used to verify:
- Sensor voltage
- Circuit continuity
- Ground quality
- Connector resistance
- Battery voltage
- Charging system performance
Many knock sensor problems are ultimately traced to damaged wiring rather than failed sensors.
Torque Wrench
Knock sensors are extremely sensitive to installation torque.
Overtightening can damage the sensor housing and alter vibration characteristics.
Undertightening may prevent the sensor from accurately detecting engine knock.
Always tighten the sensor according to the factory torque specification listed in the service manual for your specific engine.
Battery Charger or Power Supply
Maintaining stable battery voltage is particularly important when programming a PCM or performing diagnostic procedures.
Low voltage during programming can interrupt communication and potentially damage control modules.
Professional repair facilities typically connect a regulated battery maintainer before any programming session.
Service Information
Accurate service information is one of the most valuable tools available.
Factory repair manuals provide:
- Wiring diagrams
- Sensor locations
- Connector pinouts
- Torque specifications
- Diagnostic flow charts
- PCM programming requirements
- CASE Relearn procedures
- Vehicle-specific repair instructions
Following manufacturer procedures greatly reduces the risk of misdiagnosis.
Live Data Monitoring
The ability to monitor live engine data separates professional diagnostics from simple code reading.
Important parameters include:
- Knock Retard
- Spark Advance
- Engine Load
- Short Term Fuel Trim
- Long Term Fuel Trim
- Engine Coolant Temperature
- Misfire Counters
- RPM
- Intake Air Temperature
These values allow technicians to confirm that the PCM is actively receiving and responding to knock sensor input during real-world driving conditions.
Step by Step GM Knock Sensor Relearn Procedure
Although most GM vehicles do not require a dedicated GM Knock Sensor Relearn, following a systematic procedure after replacing the sensor ensures the PCM receives accurate information and rebuilds its adaptive memory correctly. Skipping diagnostic steps can lead to recurring fault codes, unnecessary part replacements, and continued engine performance issues.
Step 1: Verify Proper Knock Sensor Installation
Before attempting any diagnostic procedure, carefully inspect the newly installed knock sensor.
Confirm that:
- The correct sensor part number has been installed.
- The sensor is tightened to the manufacturer’s specified torque.
- Electrical connectors are fully seated.
- Wiring harnesses are free from damage.
- There is no corrosion or moisture inside the connector.
- The engine valley is clean and dry on LS-based engines.
Water intrusion beneath the intake manifold is a well-known cause of repeated knock sensor failures on many older GM V8 engines.
Step 2: Scan the PCM for Diagnostic Trouble Codes
Connect an OBD-II scan tool and perform a complete system scan.
Record:
- Active DTCs
- Pending DTCs
- Freeze frame data
- Engine operating conditions when the fault occurred
Do not clear codes immediately. The stored information can provide valuable clues about the root cause of the problem.
Step 3: Repair Any Remaining Faults
A relearn process should never be attempted while active electrical faults remain.
If additional problems are found, repair them first.
Typical issues include:
- Broken wiring
- Poor ground connections
- Damaged connectors
- Intake manifold leaks
- Ignition misfires
- Fuel delivery problems
- Charging system faults
Only continue once all active DTCs have been resolved.
Step 4: Clear Diagnostic Trouble Codes
After repairs have been completed, erase all stored and pending fault codes using the scan tool.
Some professional scan tools also allow adaptive memory to be reset, although this feature varies by vehicle and scan tool manufacturer.
Once memory has been cleared, the PCM begins rebuilding adaptive values during normal engine operation.
Step 5: Warm the Engine to Operating Temperature
Start the engine and allow it to reach normal operating temperature.
Before driving, verify that:
- Coolant temperature is within the normal range.
- Idle speed is stable.
- The engine has entered closed-loop fuel control.
- No warning lights are illuminated.
- No abnormal noises are present.
Proper operating temperature allows the PCM to collect accurate sensor information under normal combustion conditions.
Step 6: Perform the Recommended Drive Cycle
Once the engine has reached normal operating temperature, the next step is allowing the PCM to collect new operating data. This process is commonly referred to as the drive cycle. Although many GM owners search for a manual GM Knock Sensor Relearn procedure, most vehicles simply require several normal driving conditions so the PCM can adapt to the new sensor.
Begin by allowing the engine to idle for several minutes with all accessories turned off. This gives the PCM time to stabilize idle speed and establish baseline sensor readings.
Next, drive the vehicle on city streets where frequent acceleration and deceleration occur. Accelerate smoothly from a complete stop to approximately 35 mph, then allow the vehicle to coast naturally whenever traffic conditions permit. Repeat this process several times.
Continue driving on a highway at a steady cruising speed between 55 and 65 mph for at least 10 to 15 minutes. Maintaining a constant engine load allows the PCM to evaluate combustion characteristics under stable operating conditions.
After highway driving, perform several moderate accelerations without using full throttle. Heavy acceleration can generate natural engine knock, allowing the PCM to verify that both knock sensors are accurately detecting combustion events and responding appropriately.
If safe to do so, include several periods of engine braking by releasing the accelerator while the vehicle remains in gear. This helps the PCM evaluate additional operating conditions across different engine loads.
Most adaptive learning occurs over multiple ignition cycles rather than during a single trip. For the best results, drive the vehicle normally over the next several days while exposing it to a variety of driving conditions, including stop-and-go traffic, highway cruising, light acceleration, and moderate engine loads.
Step 7: Monitor Live Data
Professional technicians rarely rely solely on the absence of diagnostic trouble codes to confirm a successful repair. Instead, they use a scan tool to monitor live engine data while the vehicle is operating.
One of the most important parameters is Knock Retard. Under normal driving conditions, Knock Retard should remain low or fluctuate only briefly during periods of heavy engine load. Excessive or constantly changing values may indicate unresolved mechanical problems or inaccurate sensor readings.
Spark Advance is another critical value. The PCM continuously adjusts ignition timing based on engine speed, load, coolant temperature, fuel quality, and knock sensor feedback. Smooth and stable spark advance values generally indicate that the knock control system is functioning correctly.
Fuel Trim values should also be monitored. Short Term Fuel Trim (STFT) and Long Term Fuel Trim (LTFT) help determine whether the engine is operating with a proper air-fuel mixture. Significant positive or negative fuel trims may indicate vacuum leaks, fuel delivery problems, or airflow issues that could indirectly affect combustion and knock sensor performance.
Engine Load provides additional insight into operating conditions during testing. Reviewing this value helps determine whether abnormal knock activity occurs only under heavy acceleration or throughout the entire operating range.
Misfire Counters should remain at zero during normal operation. Persistent misfires can produce vibrations that resemble engine knock, potentially confusing the diagnostic process and triggering false knock sensor codes.
Other useful live data parameters include:
- Engine RPM
- Coolant Temperature
- Intake Air Temperature
- Oxygen Sensor Activity
- Mass Air Flow Sensor Readings
- Throttle Position
- Battery Voltage
Monitoring these values together provides a complete picture of engine performance and helps identify issues that may not immediately generate a fault code.
Step 8: Verify the Repair
The final step is confirming that the repair has been completed successfully. This verification process is often overlooked, yet it is essential for ensuring long-term reliability.
Begin by performing another complete system scan after the drive cycle has been completed. Verify that no active, pending, or history DTCs related to the knock sensor have returned.
Next, conduct a thorough road test under various operating conditions. Observe engine performance during idle, light acceleration, highway cruising, moderate acceleration, and hill climbing if possible.
The engine should deliver smooth acceleration without hesitation, pinging, or abnormal noises. Throttle response should feel consistent, and engine power should return to normal levels.
Continue monitoring Knock Retard and Spark Advance using the scan tool. Small adjustments are completely normal because the PCM continuously optimizes ignition timing. However, large or erratic timing corrections may indicate that further diagnosis is necessary.
If the Check Engine Light remains off after multiple drive cycles and all live data appears normal, the adaptive learning process can generally be considered complete.
For vehicles that have undergone PCM replacement, engine replacement, or extensive internal engine repairs, consult the factory service information to determine whether additional procedures such as a Crankshaft Position Variation Relearn (CASE Relearn) are required before returning the vehicle to service.
Successfully completing these verification steps ensures that the new knock sensor is functioning correctly, the PCM has adapted to the repair, and the engine is operating with maximum performance, efficiency, and reliability.
Common Mistakes During a GM Knock Sensor Repair
Many recurring knock sensor problems are not caused by defective sensors but by installation errors or incomplete diagnostics. Avoiding these common mistakes can save both time and money.
Assuming Every GM Vehicle Requires a Knock Sensor Relearn
One of the biggest misconceptions is believing that every GM vehicle requires a manual knock sensor relearn after replacement. In reality, most GM models automatically adapt to a new sensor during normal driving. Performing unnecessary procedures rarely fixes persistent fault codes because the root cause usually lies elsewhere.
Using Low-Quality Aftermarket Sensors
Not all replacement sensors meet original equipment specifications. Poor-quality aftermarket knock sensors may produce inaccurate voltage signals, causing the PCM to misinterpret engine vibration. Whenever possible, use OEM or high-quality aftermarket components from reputable manufacturers.
Ignoring Water Intrusion
Many older GM LS and Vortec V8 engines locate the knock sensors beneath the intake manifold. Water entering the engine valley can corrode the sensor terminals and wiring connectors, leading to repeated failures. Always inspect the sensor cavity for moisture before installing new components.
Incorrect Torque Specifications
Knock sensors detect engine vibration through direct contact with the engine block. Installing the sensor too loosely can reduce sensitivity, while overtightening may damage the internal piezoelectric element or alter its response. Always follow the manufacturer’s torque specification.
Overlooking Wiring Problems
Broken wires, damaged insulation, poor grounds, and corroded connectors are responsible for many knock sensor fault codes. Replacing the sensor without inspecting the electrical circuit often results in the same DTC returning shortly after the repair.
Clearing Codes Before Reading Freeze Frame Data
Freeze frame information records the exact operating conditions present when a fault code was stored. Erasing codes before reviewing this data removes valuable diagnostic information that could quickly identify the root cause.
Replacing Parts Without Diagnosis
Some vehicle owners replace multiple components, including knock sensors, ignition coils, spark plugs, and even the PCM, without confirming which part actually failed. Following a systematic diagnostic process is almost always faster and significantly less expensive than replacing parts based on guesswork.
Confusing CASE Relearn With Knock Sensor Relearn
Another frequent mistake is assuming that a Crankshaft Position Variation Relearn and a knock sensor relearn are the same procedure. They serve entirely different purposes. Understanding this distinction prevents unnecessary diagnostic confusion and ensures the correct service procedure is performed for the repair at hand.
Common GM Knock Sensor Error Codes Explained
When the Check Engine Light illuminates, the first step is identifying the Diagnostic Trouble Code (DTC) stored in the PCM. While a GM Knock Sensor Relearn is often blamed for these codes, most knock sensor-related DTCs are actually caused by electrical faults, poor sensor installation, wiring damage, or engine operating problems rather than the need for a relearn procedure.
Below are the most common GM knock sensor codes and what they typically indicate.
P0325 – Knock Sensor 1 Circuit Malfunction
P0325 is one of the most common knock sensor codes found on GM vehicles. It indicates that the PCM has detected an electrical problem in the circuit for Knock Sensor 1.
Possible causes include:
- Failed knock sensor
- Open or shorted wiring
- Loose electrical connector
- Corroded terminals
- Damaged PCM wiring
- Internal PCM fault (rare)
Symptoms may include:
- Check Engine Light
- Reduced engine power
- Poor acceleration
- Increased fuel consumption
- Conservative ignition timing
Recommended diagnosis:
Begin by inspecting the wiring harness and connector. Verify that the sensor is installed correctly and tightened to specification. Measure circuit continuity with a digital multimeter and compare sensor readings with factory specifications before replacing any components.
P0326 – Knock Sensor Performance
Unlike P0325, this code usually indicates that the sensor is functioning electrically but the signal being received falls outside the expected operating range.
Common causes include:
- Excessive engine vibration
- Engine mechanical noise
- Incorrect sensor installation
- Low-quality replacement sensor
- Excessive carbon deposits
- Internal engine damage
Diagnostic tip:
Compare Knock Retard values with Spark Advance while monitoring live data during a road test. Sudden timing changes without actual engine knock may indicate inaccurate sensor output.
P0327 – Knock Sensor Low Input
This code indicates that the PCM is receiving a lower-than-expected voltage signal from Knock Sensor 1.
Possible causes include:
- Open circuit
- Water intrusion
- Corroded connector
- Loose sensor
- Failed sensor
- Damaged wiring
A sensor producing consistently low voltage cannot accurately detect detonation, causing the PCM to rely on protective ignition timing strategies.
P0328 – Knock Sensor High Input
P0328 indicates that the PCM is receiving an abnormally high voltage signal.
Potential causes include:
- Short to voltage
- Damaged wiring insulation
- Internal sensor failure
- Incorrect sensor installation
- Electrical interference
Although less common than P0327, this code should be diagnosed carefully before replacing parts.
P0330 – Knock Sensor 2 Circuit Malfunction
Vehicles equipped with dual knock sensors use P0330 to indicate a circuit malfunction affecting Knock Sensor 2.
This code shares many of the same causes as P0325, including:
- Failed rear knock sensor
- Damaged wiring
- Connector corrosion
- Water contamination
- Poor ground connection
On many LS engines, Knock Sensor 2 is located toward the rear of the engine valley beneath the intake manifold, making water intrusion a common issue.
P0332 – Knock Sensor 2 Low Input
P0332 indicates insufficient voltage from Knock Sensor 2.
Typical causes include:
- Moisture inside the connector
- Broken wiring
- Loose electrical terminals
- Faulty sensor
- Poor engine grounding
Because this code often develops gradually, intermittent symptoms may appear long before the Check Engine Light remains on continuously.
P0333 – Knock Sensor 2 High Input
This code indicates excessive voltage from Knock Sensor 2.
Possible causes include:
- Wiring shorted to power
- Sensor failure
- Electrical interference
- Connector damage
- PCM input fault
Always inspect the complete electrical circuit before replacing the sensor.
Should You Perform a Relearn After These Codes?
In most cases, no.
Simply clearing the fault codes and allowing the PCM to adapt during normal driving is sufficient once the underlying problem has been repaired.
If the same DTC returns immediately after clearing it, another relearn procedure is unlikely to solve the issue. Instead, continue diagnosing the electrical circuit, sensor installation, engine condition, or PCM operation.
GM Vehicles That Commonly Use Knock Sensors
Knock sensors are found in nearly every modern GM gasoline engine, although sensor location, wiring configuration, and diagnostic procedures vary significantly between engine families.
The following vehicles are among the most common models requiring knock sensor diagnosis.
Chevrolet Silverado
The Silverado remains one of the most frequently serviced GM trucks for knock sensor issues, particularly models equipped with the 4.8L, 5.3L, and 6.0L Vortec engines.
Older generations place two knock sensors beneath the intake manifold, making them vulnerable to water intrusion and connector corrosion.
GMC Sierra
Mechanically similar to the Silverado, the Sierra uses nearly identical knock sensor systems across most V8 engine options.
Repeated P0332 codes on older Sierra models are commonly caused by moisture entering the engine valley through deteriorated intake seals.
Chevrolet Tahoe
Tahoe owners often encounter knock sensor problems after high mileage or prolonged exposure to wet environments.
Replacing both sensors and the wiring harness simultaneously is often recommended when servicing older engines.
Chevrolet Suburban
Because the Suburban frequently operates under heavy loads, towing conditions, and extended highway driving, accurate knock detection is essential for protecting the engine against detonation.
GMC Yukon
The Yukon shares most of its engine architecture with the Tahoe and follows nearly identical diagnostic procedures.
Many repairs involve replacing both knock sensors while the intake manifold is removed to reduce future labor costs.
Cadillac Escalade
High-performance V8 engines found in the Escalade depend heavily on precise ignition timing.
Faulty knock sensors may trigger reduced power mode and noticeably decrease vehicle performance.
Chevrolet Avalanche
Avalanche models equipped with LS-based V8 engines commonly experience the same moisture-related knock sensor failures seen in Silverado trucks.
Chevrolet Express and GMC Savana
Commercial vans often accumulate high mileage under demanding operating conditions.
Routine inspection of knock sensor wiring becomes increasingly important as vehicles age.
Common GM Engine Families
Although vehicle models differ, the diagnostic principles remain similar across these popular engines:
- 4.8L Vortec V8
- 5.3L Vortec V8
- 6.0L Vortec V8
- 6.2L V8
- LS-based engines
- Gen III Small Block
- Gen IV Small Block
Always consult the factory service manual for your exact model year because sensor locations, torque specifications, connector designs, and diagnostic procedures may vary.
Frequently Asked Questions About GM Knock Sensor Relearn
Does every GM vehicle require a knock sensor relearn?
No. Most GM vehicles do not have a dedicated knock sensor relearn procedure. After replacing a faulty sensor and clearing any diagnostic trouble codes, the PCM automatically adapts during normal driving.
Can I perform a GM Knock Sensor Relearn without a scan tool?
In most situations, yes. If the repair only involves replacing a knock sensor and no additional calibration is required, the PCM will learn the new sensor during several normal drive cycles.
However, a scan tool is strongly recommended to clear fault codes, monitor live data, and verify that the repair has been completed successfully.
How long does the PCM take to relearn?
Adaptive learning usually begins immediately after the repair.
Most vehicles complete the majority of the learning process within several drive cycles, although complete optimization may take 50 to 100 miles of mixed driving depending on operating conditions.
Will disconnecting the battery reset knock sensor values?
Disconnecting the battery may erase certain adaptive memory values stored in the PCM, but it does not perform a dedicated knock sensor relearn.
After reconnecting the battery, the PCM simply begins rebuilding its adaptive data during normal operation.
Is CASE Relearn the same as a knock sensor relearn?
No.
A Crankshaft Position Variation Relearn (CASE Relearn) calibrates the relationship between the crankshaft position sensor and the PCM. It is commonly required after replacing the crankshaft sensor, PCM, engine assembly, or harmonic balancer.
A knock sensor relearn, on the other hand, generally refers to the PCM’s automatic adaptation of knock sensor data during everyday driving.
Why does the Check Engine Light stay on after replacing the knock sensor?
Several issues can cause the warning light to remain illuminated:
- Damaged wiring
- Corroded connectors
- Water intrusion
- Incorrect sensor torque
- Defective replacement sensor
- Active engine mechanical problems
- Faulty PCM input circuit
The presence of a Check Engine Light after replacement does not necessarily mean another relearn procedure is required.
Can a bad knock sensor damage the engine?
Indirectly, yes.
A failed knock sensor prevents the PCM from accurately detecting detonation. While the PCM usually compensates by reducing ignition timing to protect the engine, severe or prolonged uncontrolled engine knock can eventually contribute to internal engine damage if left unresolved.
Can I continue driving with a knock sensor code?
Although many vehicles remain drivable, it is not recommended to ignore knock sensor faults for extended periods.
Reduced engine performance, increased fuel consumption, and improper ignition timing can develop over time. More importantly, unresolved engine knock can place unnecessary stress on pistons, bearings, valves, and cylinder heads.
Diagnosing and repairing the underlying problem as soon as possible is always the safest approach.
Conclusion
Understanding the truth about GM Knock Sensor Relearn can save you from unnecessary repairs, wasted time, and costly misdiagnoses. While the phrase is widely used across online forums and repair videos, the reality is that most GM vehicles do not require a dedicated knock sensor relearn procedure after replacing a faulty sensor. Instead, the Powertrain Control Module (PCM) continuously adapts to engine operating conditions and learns from the new sensor during normal driving.
The key to a successful repair is not performing an unnecessary relearn but ensuring that the entire knock sensor system is functioning correctly. This means installing the correct sensor, following the proper torque specification, inspecting the wiring harness and connectors, eliminating corrosion or water intrusion, and repairing any active diagnostic trouble codes before expecting the PCM to adapt.
If the Check Engine Light remains on after replacing the sensor, avoid immediately replacing additional components. Begin with a complete diagnostic scan, review freeze frame data, inspect the electrical circuit, and monitor live data such as Knock Retard, Spark Advance, and Fuel Trim values. These steps often reveal the true cause of the problem far more effectively than repeatedly clearing codes or attempting another relearn procedure.
It is also important to distinguish between a GM Knock Sensor Relearn and other calibration procedures such as the Crankshaft Position Variation Relearn (CASE Relearn). Although both may be required after certain engine repairs, they serve completely different purposes. Understanding this distinction helps prevent one of the most common diagnostic mistakes made by both DIY mechanics and inexperienced technicians.
Whether you own a Chevrolet Silverado, GMC Sierra, Tahoe, Yukon, Escalade, Suburban, or another GM vehicle equipped with an LS or Vortec engine, following a structured diagnostic process is the best way to ensure a lasting repair. Taking the time to verify installation, inspect wiring, use quality replacement parts, and confirm proper PCM operation will restore engine performance, improve fuel efficiency, and reduce the likelihood of recurring fault codes.
Finally, remember that repair procedures can vary by model year, engine family, and PCM calibration. Before performing any advanced diagnostic or programming procedures, always consult the factory service manual or manufacturer-approved service information for your specific vehicle. Combining accurate technical information with a systematic diagnostic approach is the most reliable way to resolve knock sensor issues and keep your GM engine running at peak performance for years to come.