Finding the Dodge Charger blend door actuator location is the first step to fixing common HVAC problems. A faulty actuator can cause uneven cabin temperatures, clicking noises behind the dashboard, or airflow that does not match the selected climate setting. Locating the correct actuator also prevents unnecessary repairs and helps you replace the right component the first time.
The blend door actuator controls the position of the blend door inside the HVAC housing. As the door moves, it changes how much air passes through the heater core or the evaporator. This process allows the climate control system to deliver the temperature you select. When the actuator fails, the door may stop moving or become stuck in one position.
The actuator location is not the same on every Dodge Charger. Dodge changed the HVAC layout across different generations and climate control systems. Some models place the actuator behind the glove box, while others position it near the driver’s side or deeper inside the HVAC housing. The exact location also depends on whether the vehicle uses a single zone or dual zone system.
This guide explains the blend door actuator location for each major Dodge Charger model year. It also shows you how to identify the correct actuator, recognize failure symptoms, replace the unit safely, and complete the HVAC calibration after installation. By the end of this guide, you will know where to look and how to avoid replacing the wrong HVAC actuator.
Where Is the Blend Door Actuator Located on a Dodge Charger?
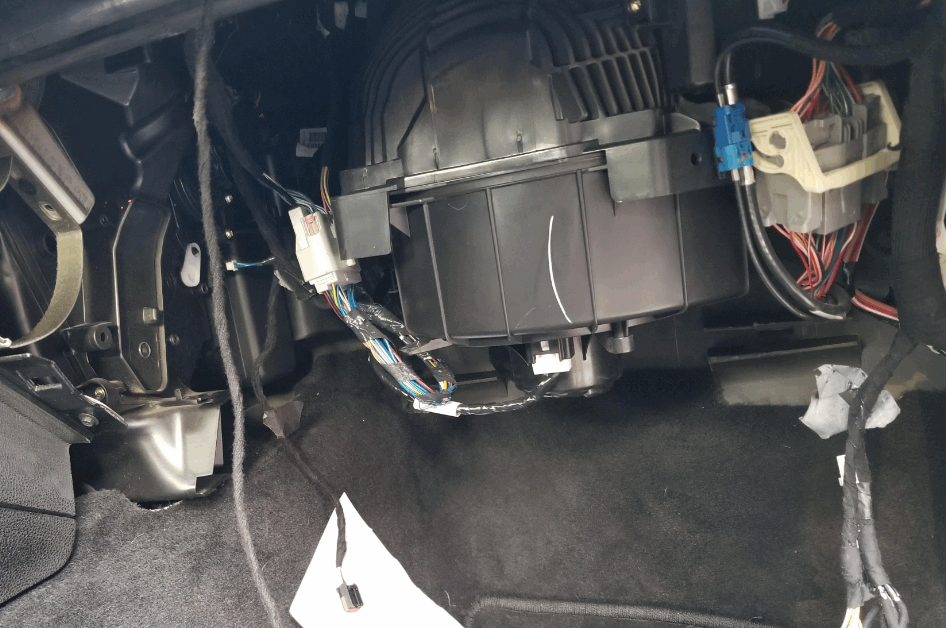
The blend door actuator is usually mounted directly on the HVAC housing behind the dashboard. Its exact position depends on the Dodge Charger model year and climate control system. On most vehicles, you can find the actuator near the heater box on either the driver side or the passenger side. Some models include more than one actuator because each unit controls a different HVAC function.
The blend door actuator sits close to the blend door inside the HVAC case. When you adjust the cabin temperature, the climate control module sends an electrical signal to the actuator. The actuator rotates a small gear that moves the blend door. This movement determines how much air flows through the heater core or the evaporator before entering the cabin. A damaged gear or failed motor prevents the door from reaching the correct position, which often causes uneven temperatures or constant clicking noises.
Most Dodge Charger models with a single zone climate control system use one temperature blend door actuator. Models equipped with dual zone automatic climate control usually have separate actuators for the driver and passenger sides. Additional actuators may also control the mode door and the recirculation door. Identifying the correct actuator before starting the repair reduces unnecessary disassembly and prevents replacing the wrong component.
You can usually access the blend door actuator by removing the lower dash trim, the glove box, or the driver’s side knee panel. Some model years provide enough working space without removing the entire dashboard. However, tighter engine bay packaging on certain vehicles may require extra trim removal to reach the mounting screws safely. Checking the actuator location before purchasing replacement parts also helps you choose the correct OEM or aftermarket unit for your specific Dodge Charger.
How Does the Blend Door Actuator Location Change by Model Year?
The blend door actuator location changes across Dodge Charger generations because Dodge redesigned the dashboard, HVAC housing, and climate control system over the years. Although the actuator always mounts to the HVAC case, its accessibility varies from one generation to another. Knowing your vehicle’s model year helps you locate the correct actuator faster and reduces unnecessary disassembly.
The 2006 to 2010 Dodge Charger places the blend door actuator behind the dashboard near the center of the HVAC housing. Most repairs require removing the glove box or the lower dashboard trim to gain enough working space. Vehicles with dual zone automatic climate control may include separate temperature actuators for the driver and passenger sides, so identifying the faulty unit before removal is essential.
The 2011 to 2014 Dodge Charger features a revised dashboard layout that improves access to several HVAC components. On many models, technicians can reach the blend door actuator by removing the lower passenger side trim panel and the glove box. However, some actuator mounting screws remain difficult to access because they face the HVAC housing rather than the cabin. Using a small ratchet and a universal joint often makes the job easier.
The 2015 to 2023 Dodge Charger continues to use an updated HVAC design, but the actuator location depends on the climate control configuration. Single zone systems usually provide easier access because they use fewer actuators. Dual zone systems contain additional temperature control actuators that sit deeper inside the HVAC housing. Verifying the actuator position before ordering replacement parts helps prevent installation errors and avoids replacing the wrong motor.
If you own a newer Dodge Charger, always compare the replacement actuator with the original component before installation. Minor design updates, connector changes, and different mounting brackets may exist even within the same generation. Checking the VIN, production year, and HVAC option ensures you purchase the correct actuator and complete the repair without unexpected delays.
How Can You Identify a Faulty Blend Door Actuator?
A faulty blend door actuator usually produces clear symptoms before it stops working completely. The most common sign is a repetitive clicking noise from behind the dashboard when you start the engine or change the temperature setting. This sound occurs because worn plastic gears continue to rotate after they lose proper engagement with the blend door mechanism.
Temperature problems also indicate a failing actuator. One side of the cabin may blow warm air while the other side delivers cold air, even when both sides use the same climate setting. In other cases, the air temperature never changes regardless of the selected controls. These issues occur because the actuator can no longer move the blend door through its full range of motion.
Airflow behavior provides another useful clue. The blower motor may operate normally, yet the air never reaches the desired temperature. Drivers often suspect a faulty heater core or air conditioning system, but the actual problem is the blend door remaining in the wrong position. If the airflow volume stays normal while the temperature remains incorrect, the actuator becomes a primary component to inspect.
You can also diagnose the actuator by observing its movement during HVAC operation. Remove the lower trim panel or glove box if the actuator is accessible. Then switch between the hottest and coldest temperature settings while watching the actuator. A healthy actuator rotates smoothly without hesitation or unusual sounds. A failed unit may stop moving, move only part of the way, or produce repeated clicking as the internal gears slip.
Modern Dodge Charger models may also store HVAC diagnostic trouble codes when an actuator fails. A compatible scan tool can identify actuator position errors or communication faults within the climate control system. Reading these codes before replacing parts improves diagnostic accuracy and helps confirm whether the blend door actuator, wiring, or HVAC control module is responsible for the problem.
How Do You Replace the Blend Door Actuator?
Replacing the blend door actuator is a straightforward repair when you can access the mounting location. Most Dodge Charger models do not require complete dashboard removal, although the amount of trim you must remove depends on the model year and HVAC configuration. Before starting the repair, park the vehicle on a level surface, switch off the ignition, and disconnect the negative battery cable to protect the climate control system and prevent accidental electrical shorts.
Begin by removing the lower dashboard panel, glove box, or driver’s side knee panel, depending on the actuator location. After exposing the HVAC housing, locate the blend door actuator and disconnect its electrical connector. Remove the mounting screws with the correct socket or screwdriver, then pull the actuator straight away from the housing. Compare the old actuator with the replacement unit to confirm that the connector, mounting points, and output shaft match before installation.
Install the new actuator by aligning the output shaft with the blend door. Avoid forcing the actuator into place because excessive pressure can damage the plastic gears or misalign the door. Tighten the mounting screws evenly until the actuator sits securely against the HVAC housing. Reconnect the electrical connector and inspect the surrounding wiring to ensure nothing becomes pinched during reassembly.
Reinstall the trim panels in the reverse order and reconnect the negative battery cable. Start the engine and operate the climate control system through the full temperature range. Listen for unusual noises and verify that the air changes smoothly from cold to hot. If the system still produces incorrect temperatures or repeated clicking sounds, perform the HVAC calibration before assuming the new actuator is defective. Completing this final step allows the climate control module to learn the actuator’s new position and restore normal operation.
How Do You Calibrate the Blend Door Actuator After Replacement?
Calibrating the blend door actuator is an essential step after installing a new unit. The HVAC control module must learn the actuator’s operating range before it can position the blend door accurately. Skipping this procedure may cause incorrect temperature output, repeated clicking noises, or poor airflow control even when the new actuator functions correctly.
Many Dodge Charger models perform an automatic calibration after you reconnect the battery and switch the ignition to the ON position. Leave the climate control system untouched for several minutes while the HVAC module cycles each actuator through its full range of motion. During this process, you may hear quiet motor movements as the system records the fully open and fully closed positions of each door.
Some model years require a manual relearn procedure. Turn the ignition off, disconnect the battery for several minutes, and reconnect it. Then switch the ignition to the ON position without starting the engine. Wait until the calibration finishes before operating any HVAC controls. The exact procedure may vary by model year, so checking the factory service information is always a good practice.
A professional scan tool provides the most reliable calibration method on Dodge Charger models equipped with advanced automatic climate control. The scan tool communicates directly with the HVAC control module and starts the relearn process electronically. It can also clear stored fault codes and verify that every actuator reaches its commanded position without interruption.
After calibration, test the climate control system under different settings. Change the temperature from the coldest setting to the warmest setting and verify that the airflow responds smoothly. Switch between the floor, panel, and defrost modes if your vehicle uses multiple HVAC actuators. If the temperature changes correctly and no clicking noises return, the calibration was successful and the new blend door actuator is operating as intended.
What Causes a Blend Door Actuator to Fail?
Blend door actuators fail because their internal mechanical and electrical components wear out over time. The most common failure involves worn plastic gears that can no longer transfer the motor’s movement to the blend door. As the gears lose their teeth, the actuator slips under load and produces the clicking noise that many Dodge Charger owners hear when starting the vehicle or changing the cabin temperature.
The electric motor inside the actuator can also fail after years of repeated operation. Every temperature adjustment requires the motor to rotate the blend door to a new position. Thousands of operating cycles gradually reduce motor performance and increase internal resistance. Once the motor loses enough torque, it cannot move the blend door through its full range, causing inconsistent heating and cooling performance.
Electrical problems may also prevent the actuator from working correctly. A damaged wiring harness, loose connector, blown fuse, or faulty HVAC control module can interrupt communication between the climate control system and the actuator. In these situations, replacing the actuator alone will not solve the problem. Inspecting the electrical circuit before purchasing replacement parts helps eliminate unnecessary repair costs and improves diagnostic accuracy.
Environmental conditions also contribute to actuator failure. High cabin temperatures, moisture, and continuous vibration place additional stress on the actuator housing and internal electronics. Dust and debris inside the HVAC housing can increase resistance as the blend door moves, forcing the actuator to work harder during normal operation. This extra load accelerates gear wear and shortens the service life of the motor.
Regular inspection of the HVAC system can reduce the risk of unexpected actuator failure. If you notice clicking noises, delayed temperature changes, or uneven airflow, diagnose the problem as soon as possible. Replacing a worn actuator before it fails completely helps protect the blend door mechanism and prevents additional damage to other HVAC components.
How Much Does It Cost to Replace a Dodge Charger Blend Door Actuator?
The cost to replace a Dodge Charger blend door actuator depends on the model year, HVAC configuration, and whether you choose an OEM or aftermarket part. In most cases, the replacement actuator is relatively affordable, but labor costs can vary because some model years provide easier access than others. A simple repair may take less than one hour, while a more complex job can require additional trim removal and increase the total service cost.
An aftermarket blend door actuator typically costs between $20 and $80. An OEM actuator usually ranges from $60 to $150, depending on the vehicle specification and dealership pricing. OEM components often provide the best fit and long term reliability because they match the original factory design. High quality aftermarket brands can also perform well when they meet the correct specifications for your Dodge Charger.
Labor charges usually range from $80 to $300. The final amount depends on the hourly labor rate and the time required to reach the actuator. Models with dual zone climate control may require additional diagnosis because several actuators perform different functions inside the HVAC housing. Confirming the failed actuator before starting the repair helps reduce labor time and prevents unnecessary part replacement.
A do it yourself repair offers the lowest overall cost if you have basic hand tools and enough working space. Many Dodge Charger owners complete the replacement at home by following a service manual and allowing enough time to remove interior trim carefully. However, vehicles with limited access or advanced climate control systems may benefit from professional service, especially if HVAC calibration requires a factory level scan tool.
Before purchasing a replacement actuator, verify your vehicle’s model year, engine, and climate control configuration. Comparing the original part number with the replacement component helps ensure proper fitment and reduces the risk of installation problems. Spending a few extra minutes on verification can prevent delays and eliminate the cost of ordering the wrong part.
Conclusion
Finding the correct Dodge Charger blend door actuator location makes diagnosis and repair much easier. Although the actuator always mounts to the HVAC housing, its exact position changes with the model year and climate control system. Identifying the correct actuator before removing interior panels saves time and reduces the risk of replacing the wrong component.
A failed blend door actuator often reveals itself through clicking noises, uneven cabin temperatures, or airflow that no longer responds to climate control settings. Inspecting these symptoms early allows you to confirm the fault before purchasing replacement parts. Installing the correct actuator and completing the HVAC calibration afterward restores normal temperature control and helps the system operate as designed.
If HVAC problems continue after replacing the actuator, inspect related components such as the HVAC control module, wiring harness, blend door, and electrical connectors. A complete diagnosis ensures that every part of the climate control system functions correctly. Following the procedures in this guide will help you complete the repair with confidence and maintain reliable heating and cooling performance in your Dodge Charger.