Cloudy, yellow, or faded headlights reduce the appearance of a vehicle and can affect nighttime visibility. Over time, plastic headlight lenses become damaged by UV exposure, oxidation, road debris, and environmental conditions. These surface changes create a hazy layer that reduces light transmission and makes headlights look older than the actual condition of the vehicle.
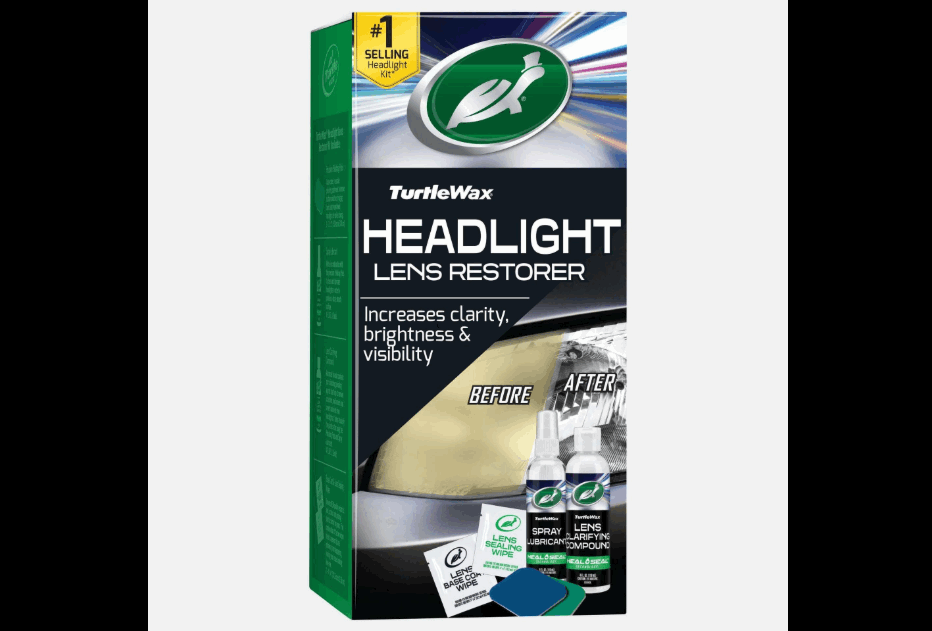
Turtle Wax Headlight Lens Restorer is a DIY automotive product designed to remove surface oxidation and improve the clarity of plastic headlight lenses. The product helps vehicle owners restore faded headlights without replacing the entire headlight assembly, making it a practical solution for minor to moderate lens damage.
Using Turtle Wax Headlight Lens Restorer requires more than applying the compound directly to the lens. Proper preparation, correct application techniques, and post restoration protection determine the quality and durability of the result. A clean surface allows the restoration compound to work effectively, while UV protection helps prevent the headlights from becoming cloudy again.
This guide explains how to use Turtle Wax Headlight Lens Restorer step by step, including preparation, application methods, expected results, common mistakes, and maintenance practices. By following the correct restoration process, vehicle owners can improve headlight clarity and maintain a cleaner exterior appearance.
How Do You Use Turtle Wax Headlight Lens Restorer Step by Step?
Turtle Wax Headlight Lens Restorer should be used through a structured restoration process that includes cleaning, surface preparation, polishing, and protection. The product works by removing the oxidized outer layer from plastic headlight lenses and improving surface clarity. Skipping preparation steps can reduce the effectiveness of the restoration because dirt, grease, and road contaminants prevent the polishing compound from making direct contact with the damaged lens surface.
Before applying the product, clean the headlight lens with water and automotive cleaning products to remove dust, insects, oil residue, and other contaminants. After cleaning, dry the surface completely and inspect the lens condition. Minor oxidation, yellowing, and cloudiness are suitable for restoration, while deep cracks or internal damage inside the headlight assembly may require replacement instead of polishing.
Apply the Turtle Wax restoration compound according to the product instructions and work it evenly across the affected area. The polishing process removes the damaged surface layer caused by UV exposure and oxidation. Use consistent pressure during application because uneven polishing can create inconsistent clarity across the lens surface.
After completing the polishing process, remove any remaining residue with a clean microfiber towel. The final step is applying a protective coating if included in the restoration kit or using a suitable UV protection product. This protective layer helps slow down future oxidation and extends the restored appearance of the headlights.
A complete restoration process focuses on improving both appearance and function. Properly restored headlights provide a clearer lens surface, allowing more light to pass through compared with heavily oxidized headlights.
What Should You Do Before Using Turtle Wax Headlight Lens Restorer?
Proper preparation is the first step to achieving effective results when using Turtle Wax Headlight Lens Restorer. Headlight restoration depends on the condition of the lens surface, and contaminants such as dirt, grease, and road debris can prevent the restoration compound from working evenly. A clean and properly prepared headlight allows the polishing process to focus on removing oxidation instead of treating surface contamination.
Start by washing the headlight lens with clean water and a suitable automotive cleaner to remove visible dirt and residue. Drying the lens completely is important because moisture can reduce the effectiveness of the polishing compound and make it harder to evaluate the actual condition of the plastic surface. A microfiber towel is recommended because it reduces the risk of adding new scratches during preparation.
The surrounding area of the headlight should also be protected before applying the product. Covering nearby painted surfaces with masking tape prevents accidental contact between the restoration compound and the vehicle’s paintwork. This step is especially important because polishing products are designed to remove surface imperfections and may affect delicate exterior finishes.
Inspect the headlight lens carefully before starting the restoration process. Surface problems such as yellowing, light oxidation, and cloudy appearance are common signs that a headlight restoration product can address. However, deep cracks, moisture inside the headlight housing, or severe structural damage usually require professional repair or replacement.
A complete inspection and preparation process improves restoration consistency because the product can work directly on the damaged plastic surface. Taking extra time before application helps create a clearer finish and reduces the chance of uneven results after polishing.
How Does Turtle Wax Headlight Lens Restorer Restore Cloudy Headlights?
Turtle Wax Headlight Lens Restorer removes the oxidized surface layer that causes cloudy headlights. Modern vehicles often use polycarbonate plastic for headlight lenses. This material provides durability and impact resistance. However, UV exposure and environmental damage can reduce its clarity over time.
Sunlight is the main cause of headlight oxidation. UV rays damage the protective layer on the plastic surface. This damage creates small imperfections that scatter light. As a result, headlights become yellow, cloudy, and less transparent.
Road debris, chemicals, and harsh weather can speed up this process. These factors gradually wear down the lens surface. Regular cleaning and proper protection help slow this damage.
Turtle Wax Headlight Lens Restorer uses polishing compounds to remove surface oxidation. The compound smooths damaged areas and improves lens clarity. As the surface becomes cleaner and more even, the headlight allows more light to pass through.
The product works best on surface problems such as yellowing, haze, and light oxidation. It does not repair deep cracks or internal damage inside the headlight housing. For example, a faded lens with surface oxidation can often improve after restoration. A cracked lens usually needs replacement.
Understanding the restoration process helps users apply the product correctly. The best results come from using the product on headlights with suitable surface damage.
How Long Does Turtle Wax Headlight Lens Restorer Last After Application?
Turtle Wax Headlight Lens Restorer can improve headlight clarity, but the durability of the result depends on maintenance, weather conditions, and UV exposure. A restored headlight remains clearer when drivers protect the lens surface after treatment. Without protection, sunlight and environmental damage can gradually create new oxidation.
The condition of the original headlight affects how long the restoration lasts. Lenses with light oxidation usually maintain better results because the damage only affects the outer surface. Heavily faded headlights may require additional restoration steps because deeper surface damage can return sooner.
UV exposure is one of the biggest factors that affects restoration durability. Vehicles parked outdoors for long periods receive continuous sunlight, which accelerates plastic degradation. Using a UV protection coating and parking in shaded areas can help slow future oxidation.
Regular maintenance also improves the lifespan of restored headlights. Cleaning the lenses with automotive safe products prevents dirt and chemicals from building up on the surface. Drivers should avoid harsh cleaners because aggressive chemicals can damage the protective layer.
Turtle Wax Headlight Lens Restorer provides a practical solution for improving faded headlights, but it does not create permanent protection against environmental damage. The restoration process should be combined with proper headlight care to maintain clarity for a longer period.
The best approach is to inspect headlights regularly and restore them when early signs of oxidation appear. Treating minor cloudiness early requires less effort and helps maintain better lighting performance.
What Mistakes Should You Avoid When Using Turtle Wax Headlight Lens Restorer?
Avoiding common mistakes helps Turtle Wax Headlight Lens Restorer deliver better and more consistent restoration results. Many unsuccessful headlight restoration attempts happen because users skip preparation steps, apply the product incorrectly, or expect the product to fix damage beyond surface oxidation.
The first common mistake is applying the product to a dirty headlight lens. Dust, grease, and road contaminants create a barrier between the restoration compound and the plastic surface. Cleaning the lens before application allows the polishing compound to work directly on the oxidized area.
Another mistake is using too much pressure during polishing. The restoration process requires controlled and even application. Excessive force does not always improve results and may create uneven polishing marks on the lens surface.
Some users also skip the protection step after restoring their headlights. Removing oxidation improves clarity, but the plastic surface remains exposed to future UV damage. Applying a suitable UV protection product helps maintain the restored appearance and slows down new oxidation.
Expecting a restoration product to repair every type of headlight damage is another common error. Turtle Wax Headlight Lens Restorer works best for surface issues such as yellowing, haze, and oxidation. It cannot repair deep cracks, broken lens covers, or internal damage inside the headlight assembly.
Following the correct process helps users avoid wasted effort and achieve better results. Proper cleaning, careful application, and regular maintenance create a more durable headlight restoration outcome.
How Do You Maintain Headlights After Using Turtle Wax Lens Restorer?
Maintaining headlights after using Turtle Wax Lens Restorer helps preserve clarity and slows down future oxidation. Headlight restoration improves the condition of the plastic lens, but the surface remains exposed to sunlight, weather, and road contaminants. Regular care protects the restored surface and extends the time before another restoration becomes necessary.
The first maintenance step is regular cleaning. Dirt, insects, and road film can build up on the lens surface and reduce clarity over time. Use automotive safe cleaning products and a soft microfiber towel to remove contaminants without creating additional scratches.
UV protection is another important part of long term headlight care. Sunlight breaks down plastic surfaces and causes oxidation to return. Applying a UV protective coating after restoration creates an additional barrier against environmental damage. Vehicles that stay outdoors for long periods need more frequent protection because they receive more direct sunlight exposure.
Drivers should also inspect headlights regularly for early signs of damage. Small changes such as light haze, yellowing, or reduced transparency indicate that the protective layer may need attention. Addressing these problems early makes future restoration easier because the oxidation has not progressed deeply.
Proper maintenance also includes avoiding harmful cleaning methods. Strong chemicals, rough materials, and abrasive cleaners can damage the lens surface and reduce the effectiveness of previous restoration work.
Turtle Wax Lens Restorer works best as part of a complete headlight care routine. Combining restoration with cleaning and UV protection helps maintain clearer headlights and supports better vehicle appearance over time.
Is Turtle Wax Headlight Lens Restorer Worth Using for Cloudy Headlights?
Turtle Wax Headlight Lens Restorer is a practical solution for drivers who want to improve cloudy, yellow, and oxidized headlights without replacing the entire headlight assembly. The product works best when the damage affects the outer plastic surface and appears as haze, discoloration, or light oxidation.
The restoration process requires proper preparation, correct application, and regular maintenance. Cleaning the lens before use helps the compound work effectively. Applying UV protection after restoration helps maintain the improved clarity and reduces the return of oxidation.
However, Turtle Wax Headlight Lens Restorer has limits. It cannot fix deep cracks, severe structural damage, or internal problems inside the headlight housing. These conditions require professional repair or replacement.
For vehicles with surface level headlight damage, this product provides an affordable DIY option that improves appearance and restores lens transparency. Following the correct steps allows drivers to achieve better results and maintain clearer headlights for a longer period.
A successful headlight restoration does not depend only on the product itself. The quality of preparation, application technique, and ongoing care determine the final outcome.