Ceramic coating can be safely removed from a car, and polishing is the most reliable method when the coating is still firmly bonded to the paint. Unlike wax or traditional paint sealants, a ceramic coating forms a durable protective layer over the vehicle’s clear coat. Regular washing may reduce surface contamination and hydrophobic performance, but it does not reliably remove an intact ceramic coating.
There are 4 main reasons to remove ceramic coating: coating degradation, application defects, paint correction, and preparation for a new coating. The removal method depends on the condition of the existing coating. A heavily degraded coating may require less correction, while an intact coating generally requires abrasive polishing to remove it completely. High spots and localized defects may only require treatment of the affected area rather than stripping the coating from the entire vehicle.
Safe removal requires controlling how much abrasion reaches the paint. Polishing can remove both ceramic coating and a small amount of automotive clear coat, so the process should begin with the least aggressive combination that produces the required result. Proper washing, decontamination, test polishing, surface inspection, and removal verification help protect the paint throughout the process. This guide explains each stage and shows how to prepare the surface for paint correction or a new protective coating.
Can You Remove Ceramic Coating From a Car?
Yes, you can remove ceramic coating from a car. The amount of work depends on the coating’s condition and durability. A fresh ceramic coating bonds firmly to the painted surface and creates a durable protective layer. Over time, sunlight, road contaminants, washing chemicals, and regular wear can weaken this protection.
An intact ceramic coating usually requires mechanical abrasion for complete removal. Polishing gradually removes the coating from the surface and gives you control over the process. A degraded coating may require less polishing because environmental exposure has already weakened it. However, weak water beading does not always mean the coating has disappeared. Dirt, mineral deposits, and other contaminants can cover the coating and reduce its hydrophobic performance.
Regular car washing will not reliably remove a durable ceramic coating. Washing removes dirt, road grime, and loose contaminants from the surface. Chemical decontamination can remove materials that normal washing leaves behind. Clay treatment can also remove bonded surface contamination. However, neither process guarantees complete removal of an intact ceramic coating.
Check the coating’s condition before choosing a removal method. Localized problems may only require correction on one panel or a small section. Complete removal makes more sense when the car needs extensive paint correction or a new ceramic coating. Start with the least aggressive method that produces the required result. This approach limits unnecessary abrasion and helps preserve the automotive clear coat.
When Should You Remove Ceramic Coating?
You should remove ceramic coating in 4 main situations: coating failure, application defects, paint correction, and preparation for a new coating. Each situation requires a different level of removal. Check the coating and paint condition first to avoid unnecessary polishing.
Coating failure provides the first reason for removal. An old coating may lose its water repellency, gloss, or protective performance as it wears. However, poor water beading does not always confirm coating failure. Mineral deposits, road film, and other contaminants can reduce hydrophobic performance. Thorough cleaning and decontamination help determine whether contamination or coating degradation caused the problem.
Application defects provide the second reason. High spots can appear when excess coating remains on the paint during application. These areas may look darker, streaky, or uneven under proper lighting. A small defect usually requires localized correction rather than complete removal from the entire car.
Paint correction creates the third situation. Scratches, oxidation, water spots, and other paint defects may require polishing. This process can also remove the ceramic coating from the corrected area. Removing the coating gives the polishing process direct access to the paint surface.
Preparation for a new coating is the fourth reason. A new ceramic coating needs a clean and properly prepared surface. Old or inconsistent protection can interfere with surface preparation and produce uneven results. Remove the existing coating when its condition prevents proper correction or recoating. This creates a consistent surface for the next detailing process.
What Do You Need to Remove Ceramic Coating Safely?
You need cleaning products, decontamination products, polishing equipment, and inspection tools to remove ceramic coating safely. The exact equipment depends on the coating condition and the amount of correction required. Start with less aggressive products and increase the cutting power only when the coating resists removal.
Begin with car shampoo, a clean wash mitt, microfiber towels, and suitable drying towels. These products remove dirt before you touch the paint with polishing equipment. Dirt left on the surface can increase friction and create scratches during later steps. Chemical decontamination products can remove embedded contaminants that regular shampoo leaves behind. Clay bars or synthetic clay media can also remove bonded contamination when the paint needs further decontamination.
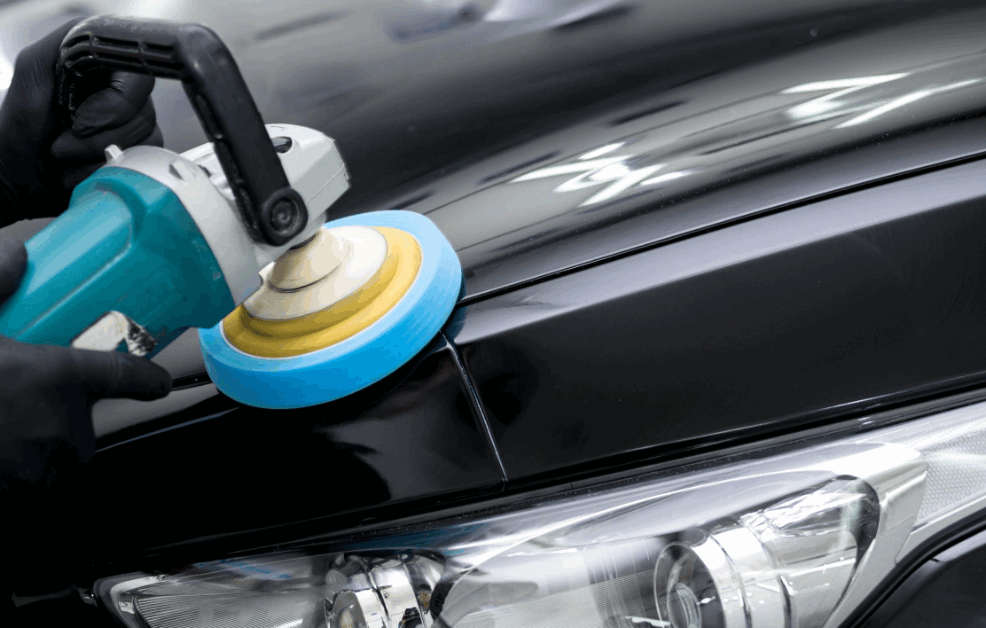
For mechanical removal, use a machine polisher with a suitable polishing pad and abrasive polish. A polishing compound offers more cutting power when a mild polish cannot remove the coating. Do not start with the most aggressive combination by default. Test a mild combination on a small area first. Inspect the result, then increase the cutting power only when necessary.
Good inspection tools also make the removal process safer. Bright inspection lighting helps reveal high spots, polishing defects, and inconsistent areas. Clean microfiber towels remove polishing residue so you can examine the surface clearly. A suitable panel preparation product can help clean remaining residue before the final inspection. Together, these tools let you remove the ceramic coating in a controlled way while limiting unnecessary abrasion of the clear coat.
What Is the Best Way to Remove Ceramic Coating?
Polishing is the most reliable way to remove an intact ceramic coating from a car. The abrasive action cuts through the coating and exposes the surface underneath. You can control this process by choosing the right polish, pad, machine speed, and number of passes. Start with the least aggressive combination that can remove the coating.
A mild polish should be the first option when the coating requires only light correction. Test it on a small section and inspect the result. If the coating remains, use a more aggressive pad or compound. This gradual approach gives you more control and reduces unnecessary abrasion of the clear coat.
Chemical decontamination serves a different purpose. It removes contaminants that bond to or collect on top of the coating. These contaminants include iron particles, mineral deposits, and road grime. Removing them can restore surface performance when contamination causes poor water behavior. However, chemical decontamination does not guarantee complete removal of an intact ceramic coating.
Clay treatment also focuses on bonded contamination rather than controlled coating removal. A clay bar or synthetic clay media can clean material that washing leaves behind. Regular washing has an even more limited role because it mainly removes loose dirt and surface grime.
Choose the removal method according to the condition of the coating. Use washing and decontamination to clean and assess the surface first. Use polishing when you need complete removal of a coating that still bonds firmly to the paint. This sequence removes the coating while limiting unnecessary clear coat abrasion.
How Do You Remove Ceramic Coating From a Car Step by Step?
To remove ceramic coating safely, wash and decontaminate the car first, test a small area, polish the coating with controlled abrasion, and inspect the paint before moving to the next panel. This process gives you better control over coating removal and reduces unnecessary wear on the clear coat. Work on a cool surface and keep the paint clean throughout the process.
How Do You Prepare the Paint for Ceramic Coating Removal?
Start by washing the car thoroughly to remove loose dirt, road grime, and other surface contamination. Rinse the vehicle first, then clean each panel with a suitable car shampoo and wash mitt. Rinse the panels again and dry them with clean microfiber towels. Avoid polishing dirty paint because trapped particles can increase friction and create new defects.
Next, inspect the paint and remove bonded contamination when necessary. Iron particles, mineral deposits, and road film can remain on the surface after a normal wash. Chemical decontamination can remove some of these materials. A clay bar or synthetic clay media can address bonded contamination that remains after chemical treatment. Inspect the paint again after decontamination and choose a small test area for polishing.
The test area helps you select the correct polishing combination before you work across the entire car. Start with a mild polish and suitable pad. Make several controlled passes, clean the area, and inspect the result under good lighting. Increase the cutting power only when the mild combination does not remove the coating effectively.
How Do You Polish the Paint to Remove Ceramic Coating?
Apply the selected polish with a machine polisher and work on small sections at a controlled pace. Keep the pad flat against the paint and use consistent passes across the test area. Remove the polishing residue after each section and inspect the surface before continuing. This approach helps you track coating removal and prevents unnecessary polishing.
If the first combination leaves visible coating or inconsistent surface behavior, increase the cutting ability gradually. You can change the pad, use a stronger compound, or add another controlled polishing pass. Do not increase abrasion simply to finish faster. The objective is complete coating removal with the least aggressive process that achieves the required result.
After you establish an effective combination, repeat the process across the required panels. Clean the pad regularly and replace it when it becomes saturated with polish or residue. Inspect difficult areas separately because edges, body lines, and curved sections can respond differently to polishing. Once the coating has been removed, clean the paint and perform a final inspection before moving to paint correction or surface preparation.
How Do You Know If Ceramic Coating Is Completely Removed?
You should inspect the paint after polishing to determine whether the ceramic coating remains on the surface. Do not rely on one sign alone. Water behavior, surface appearance, and panel consistency provide useful information when you evaluate the result.
Water beading can help you assess the coating. A surface with strong and consistent hydrophobic behavior may still contain ceramic coating. However, water behavior does not provide a definitive answer by itself. Mineral deposits, polishing residue, and other surface contamination can also change the way water interacts with the paint. Clean the surface before using water behavior as part of your inspection.
Surface appearance provides another useful check. Look for consistent gloss, uniform reflection, and areas that show different surface behavior from the surrounding paint. High spots, streaks, or inconsistent sections can indicate remaining coating or polishing residue. Use bright inspection lighting because some surface defects remain difficult to see under normal lighting.
Check every treated panel before you continue to the next detailing stage. Do not assume that one successful test area represents the entire vehicle. Different panels may contain different amounts of coating or contamination. Curved areas, edges, and sections with previous repairs may also respond differently during polishing.
Once the surface looks consistent, clean the paint and perform a final inspection. A properly inspected surface gives you a reliable starting point for paint correction, surface preparation, or a new ceramic coating. This verification step prevents you from applying new protection over an inconsistent layer of old coating or polishing residue.
Can Removing Ceramic Coating Damage Car Paint?
Yes, ceramic coating removal can damage the clear coat when you use excessive abrasion or an overly aggressive polishing process. Polishing removes material from the surface, so the process needs careful control. The goal is to remove the ceramic coating without removing more clear coat than necessary.
Start with the least aggressive polishing combination that can remove the coating. A mild polish and pad may work when the coating has already degraded. A stronger compound and pad may become necessary when the coating remains firmly bonded. Test the combination on a small section before you polish the entire vehicle. This test shows how much cutting power the paint and coating require.
Control the polishing process throughout the removal. Keep the machine moving and use consistent pressure and passes. Inspect the surface after each section instead of repeating passes without checking the result. Excessive polishing can remove unnecessary clear coat and reduce the remaining paint thickness.
Previous paint correction also matters. A panel that has already received several polishing treatments may have less clear coat available for further correction. Scratches, oxidation, water spots, and other defects can also tempt you to polish more aggressively than necessary. Separate coating removal from paint correction and address each task according to the actual condition of the paint.
Professional help makes sense when you cannot assess the paint condition or control the polishing process confidently. It also makes sense when the vehicle has a history of extensive paint correction or previous refinishing. A controlled removal process protects the clear coat by using only the amount of abrasion required to remove the existing ceramic coating.
What Happens If You Use Oil Without VW 507 00 Approval?
Using oil without the required VW 507 00 approval can create a specification mismatch between the lubricant and the engine manufacturer’s requirements. The risk depends on the vehicle, engine, oil product, and duration of use. You should not assume that an oil works correctly simply because it has the same viscosity as the recommended product.
The first concern involves engine lubrication. Engine oil must provide the performance characteristics required by the engine design. A product with the wrong specification may not provide the intended level of protection under the conditions for which the manufacturer designed the engine. The correct viscosity does not remove this concern because viscosity and performance specification describe different properties.
The second concern involves the emissions system. Volkswagen uses diesel particulate filters on many diesel models. These systems require the correct lubricant specification for the relevant engine application. An unsuitable oil can therefore create compatibility concerns for vehicles with specific emissions equipment.
The third concern involves servicing requirements. Some Volkswagen engines use defined service intervals that depend on the approved oil specification. Using a different product can affect whether the oil remains suitable for the intended service schedule. Always follow the oil requirement in the owner’s manual and the manufacturer’s service information.
A short emergency top up does not represent the same situation as filling the engine with an unsuitable oil for a complete service interval. If you discover that you used the wrong specification, confirm the correct action with the vehicle manufacturer or a qualified technician. Do not continue using an unsuitable oil based only on its viscosity or brand.
What Should You Do After Removing Ceramic Coating?
Inspect the paint after removing ceramic coating, then correct and prepare the surface based on its condition and the protection you plan to apply next. Do not apply new protection immediately without checking the paint. The removal process can reveal scratches, water spots, oxidation, or other defects that the old coating previously covered.
Start with a detailed inspection under suitable lighting. Check each panel for remaining coating, polishing residue, surface defects, and inconsistent gloss. If the paint looks healthy and the surface meets your requirements, continue with the appropriate surface preparation. If defects remain, perform paint correction before applying new protection.
Clean the paint thoroughly after polishing and correction. Polishing can leave oils, residue, or fine particles on the surface. Remove these materials before the next protection stage. A clean surface gives the new coating a better foundation and helps you evaluate the final paint condition.
You can apply a new ceramic coating after removing the old one when the paint has the required level of correction and preparation. Follow the preparation and application requirements of the new coating because different products can have different instructions. Do not assume that removing the old coating alone makes the paint ready for immediate application.
The correct sequence is removal, inspection, correction when necessary, surface preparation, and new protection. This sequence keeps the process controlled and prevents old coating residue or paint defects from interfering with the next layer of protection.
Conclusion
The safest way to remove ceramic coating depends on the condition of the existing coating and the condition of the paint underneath it. Washing and decontamination should come first because they remove dirt and bonded contaminants that can affect surface inspection. A degraded coating may need less mechanical work, while an intact coating usually requires controlled polishing for complete removal.
Use the least aggressive polishing method that produces the required result. Start with a test area, inspect the paint, and increase cutting power only when necessary. This approach helps remove the coating while limiting unnecessary abrasion of the clear coat. Check every treated panel before you move to the next stage.
After removal, inspect the paint and correct defects when necessary. Clean the surface thoroughly before applying new protection. When the paint meets the required condition, you can prepare it for a new ceramic coating according to the product’s application requirements.
The complete process follows a clear sequence: clean the car, decontaminate the paint, test the removal method, polish when necessary, inspect the surface, correct defects, and prepare the paint for its next layer of protection.