Experiencing engine issues or seeing the check engine light on your Ford F150 can be stressful. Knowing the Ford F150 Oxygen Sensor Location is essential for maintaining engine performance and improving fuel efficiency. The oxygen sensor monitors the air-fuel mixture and sends accurate data to the engine control unit. This ensures the engine runs smoothly and efficiently. A faulty oxygen sensor can cause poor fuel economy, increased emissions, rough idling, and long-term engine damage if left unchecked.
This complete guide shows the exact locations of both upstream and downstream oxygen sensors for all Ford F150 models. It explains how to test them for proper function and provides practical tips for safe replacement. Whether you want to perform maintenance yourself or prepare for a service visit, understanding your oxygen sensors is the first step. Following this guide makes finding the Ford F150 Oxygen Sensor Location simple and stress-free while helping you take control of your vehicle’s performance and efficiency.
Contents
Understanding Oxygen Sensors in Ford F150
Understanding the oxygen sensors in your Ford F150 is crucial for keeping your engine running efficiently. Oxygen sensors, often called O2 sensors, measure the amount of oxygen in the exhaust gases and send this data to the engine control unit. The ECU then adjusts the air-fuel mixture to optimize combustion. There are typically two types of oxygen sensors in a Ford F150, upstream and downstream. The upstream sensor is located before the catalytic converter and monitors the oxygen level coming directly from the engine. The downstream sensor is located after the catalytic converter and monitors how effectively the converter is cleaning the exhaust gases. A properly functioning oxygen sensor ensures your engine performs well, maintains fuel efficiency, and produces lower emissions.
Symptoms of a failing oxygen sensor include poor fuel economy, rough idling, hesitation during acceleration, and a persistent check engine light. Understanding the role of each sensor helps you diagnose issues accurately and prevents unnecessary replacements. Whether you are performing maintenance yourself or preparing for a visit to a mechanic, knowing the location and function of your oxygen sensors is the first step toward keeping your Ford F150 in top condition. This knowledge allows you to detect problems early and maintain optimal performance throughout the life of your truck.
Ford F150 Oxygen Sensor Location by Year
The location of the oxygen sensors in a Ford F150 varies depending on the model year. For 2004 to 2008 models, the upstream sensor is located on the exhaust manifold, while the downstream sensor is found after the catalytic converter on the exhaust pipe. For 2009 to 2014 models, the upstream sensor remains on the exhaust manifold, but the downstream sensor is mounted closer to the catalytic converter for easier access. Upstream sensors monitor the oxygen levels directly from the engine, and downstream sensors measure the efficiency of the catalytic converter. Knowing these locations helps with testing, diagnosing, and replacing sensors accurately. Accessing the sensors usually requires basic hand tools, a socket set, and sometimes a swivel extension for tight spaces.
For 2015 to 2023 models, Ford moved the upstream sensor slightly higher on the exhaust manifold, and the downstream sensor is positioned near the exhaust pipe flange. Understanding these locations prevents damage to the sensors and wiring during maintenance. By knowing the exact location of each oxygen sensor on your Ford F150, you can save time during testing, avoid unnecessary replacements, and keep your truck running efficiently. Following these guidelines ensures that both upstream and downstream sensors function correctly, helping maintain fuel efficiency and engine performance across all Ford F150 models.
How to Test and Diagnose O2 Sensors
Testing and diagnosing the oxygen sensors in your Ford F150 is essential for identifying engine issues early. Start by locating both upstream and downstream sensors using the guide provided earlier. You will need a multimeter or an OBD-II scanner to check the sensor readings. When using a multimeter, measure the voltage output of the sensor while the engine is running at normal temperature. The voltage should fluctuate between 0.1 and 0.9 volts for a properly functioning sensor. A steady or irregular voltage reading can indicate a faulty sensor. Using an OBD-II scanner, check for codes related to oxygen sensor performance, such as P0130 to P0167. Recording these codes helps you determine which sensor requires attention and prevents unnecessary replacements.
Symptoms of a failing oxygen sensor include poor fuel economy, rough idling, hesitation during acceleration, and a persistent check engine light. Diagnosing the sensor accurately allows you to address these issues promptly. Always follow safety precautions by keeping the engine off when connecting tools and wearing gloves when handling hot components. Understanding how to test and diagnose your Ford F150 oxygen sensors ensures that your engine maintains optimal performance, reduces emissions, and saves fuel. By performing these checks regularly, you can detect problems early and extend the life of your sensors and catalytic converter.
Replacing the Ford F150 Oxygen Sensor
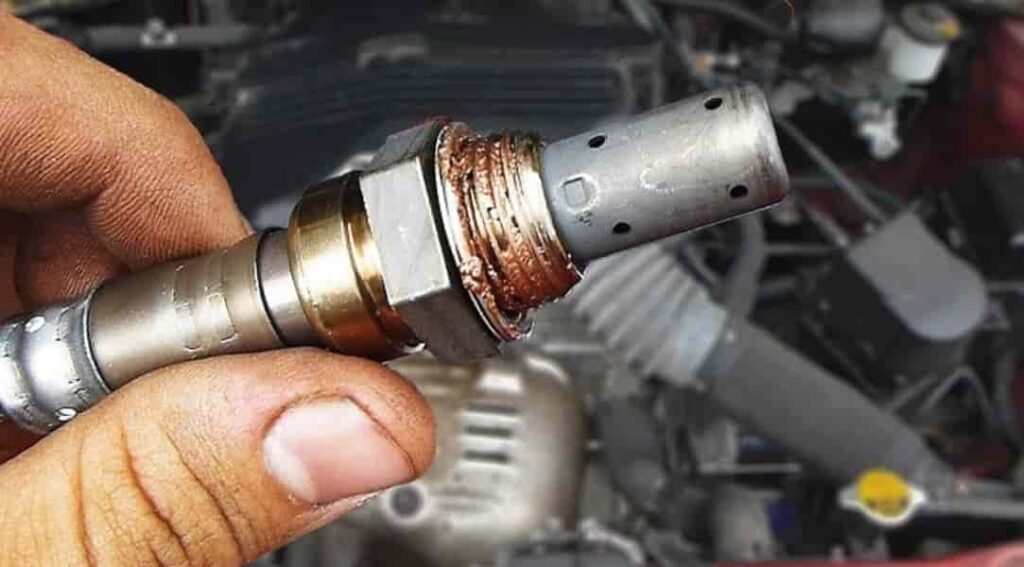
Replacing the oxygen sensors in your Ford F150 is straightforward if you follow the correct steps and safety precautions. First, locate the upstream and downstream sensors using the guide provided earlier. Ensure the engine is cool before starting the replacement. Gather the necessary tools, including a socket set, a swivel extension, and anti-seize compound. Start by disconnecting the sensor’s electrical connector and carefully removing it from the exhaust pipe or manifold. Apply a small amount of anti-seize compound to the threads of the new sensor to prevent future seizing. Install the new sensor by threading it carefully into place and tightening it to the manufacturer’s torque specifications. Reconnect the electrical connector securely to ensure proper communication with the engine control unit.
Choosing between OEM and aftermarket sensors depends on your budget and preference. OEM sensors offer guaranteed compatibility and longevity, while high-quality aftermarket options can provide similar performance at a lower cost. Avoid over-tightening, which can damage the sensor or threads, and ensure no wires are pinched during installation. After replacement, start the engine and check for proper operation and the absence of error codes. Regularly replacing faulty oxygen sensors helps maintain fuel efficiency, reduces emissions, and ensures your Ford F150 runs smoothly. Following these steps saves time, prevents unnecessary repairs, and keeps your truck performing at its best.
Common Mistakes and FAQs
One of the most common mistakes when dealing with Ford F150 oxygen sensors is confusing upstream and downstream sensors. Installing a sensor in the wrong location can lead to incorrect readings and poor engine performance. Over-tightening the sensor or cross-threading can damage both the sensor and the exhaust manifold. Another frequent error is ignoring error codes or warning signs from the check engine light. These mistakes can result in reduced fuel efficiency, higher emissions, and unnecessary repair costs. Always follow the manufacturer’s guidelines, use the correct tools, and handle sensors carefully to avoid these issues.
Many Ford F150 owners have common questions about oxygen sensors. How many sensors does a Ford F150 have? Most models have one upstream and one downstream sensor per bank, but this may vary depending on engine type. Can you replace the sensors yourself? Yes, with proper tools and safety precautions, DIY replacement is possible. What are the signs of a failing sensor? Poor fuel economy, rough idling, hesitation, and persistent check engine light are the most common indicators. Understanding these common mistakes and FAQs helps ensure proper maintenance, extends sensor life, and keeps your Ford F150 running efficiently. Following these guidelines reduces errors and improves vehicle performance.
Conclusion
Knowing the Ford F150 Oxygen Sensor Location is essential for keeping your engine running efficiently and maintaining fuel economy. Understanding the difference between upstream and downstream sensors helps you diagnose issues accurately and prevent unnecessary repairs. Regular testing of oxygen sensors ensures your truck runs smoothly, reduces emissions, and avoids long-term engine damage. Following proper procedures, using the correct tools, and paying attention to check engine codes keeps the sensors functioning correctly. Whether performing maintenance yourself or visiting a mechanic, knowing the sensor locations makes the process simpler and safer.
Replacing or maintaining faulty oxygen sensors on time can save money and extend the life of your Ford F150 engine. Well-maintained sensors improve overall vehicle performance, fuel efficiency, and emission control. Taking control of your Ford F150 oxygen sensors allows you to detect problems early, avoid costly repairs, and ensure a reliable driving experience. Keeping these sensors in top condition is a small effort that delivers long-term benefits for your truck’s engine and overall performance. By following this guide, finding the Ford F150 Oxygen Sensor Location becomes easy, practical, and stress-free.