A Dodge Check Engine Light flashing 10 times does not automatically indicate a single fault code. On many older Dodge vehicles equipped with the OBD-I diagnostic system, the Check Engine Light communicates stored Diagnostic Trouble Codes (DTCs) by flashing in a specific sequence. Each two-digit code is displayed as two groups of flashes separated by a short pause, and multiple codes are shown one after another before the sequence ends. Simply counting 10 flashes without recognizing where one group ends and the next begins can lead to an incorrect diagnosis.
Understanding how the flash code system works is the first step toward identifying the actual engine or emissions problem. Instead of replacing parts based on guesswork, you should determine whether the flashes represent the first digit of a fault code, the second digit, or part of a complete sequence. Once the correct code is identified, it becomes much easier to inspect the affected system, verify the root cause, and perform the appropriate repair.
This guide explains what a Dodge Check Engine Light flashing 10 times means, how the Dodge OBD-I flash code system operates, how to read the flashing sequence accurately, the most common fault codes and their causes, practical diagnostic procedures, and when a professional scan tool provides a more reliable diagnosis than the built-in flash code method. By following these steps, you can interpret the warning correctly and avoid unnecessary repairs.
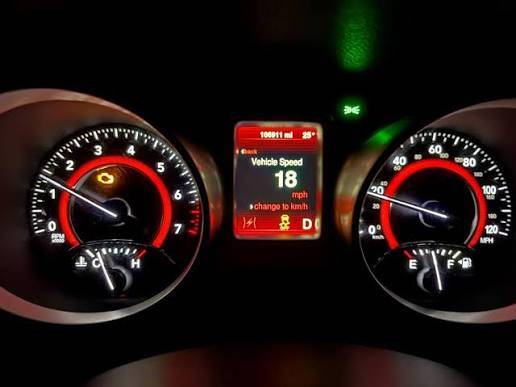
What Does a Dodge Check Engine Light Flashing 10 Times Mean?
A Dodge Check Engine Light flashing 10 times is not usually a complete diagnostic code. On Dodge vehicles equipped with the OBD-I diagnostic system, the Powertrain Control Module (PCM) communicates stored Diagnostic Trouble Codes (DTCs) through a sequence of long and short flashes. Each trouble code consists of two digits, and each digit is represented by a group of flashes separated by a brief pause. As a result, seeing exactly 10 flashes without identifying where the pause occurs does not provide enough information to determine the actual fault.
For example, a sequence that appears to flash ten times continuously may actually represent two separate groups, such as Code 12, Code 17, Code 21, or another stored diagnostic code. The short pause between the first and second digit is what determines the numerical value of the code. After one code is displayed, the PCM pauses briefly before transmitting the next stored code until the entire sequence is complete.
On most Dodge vehicles manufactured before full OBD-II adoption, the flash code system provides a simple way to retrieve stored faults without connecting a scan tool. By cycling the ignition key in a specific pattern, the PCM enters diagnostic mode and flashes the Check Engine Light to communicate the stored information. Although this method cannot display live sensor data or pending faults, it remains an effective way to identify many engine and emission-related problems on older Dodge models.
It is also important to recognize that the flashing sequence always follows a defined order. The PCM begins with the first stored fault code, continues through every additional code in memory, and finishes by displaying Code 55, which indicates that no more diagnostic codes remain. Many owners mistakenly believe the final flashes indicate another malfunction when they actually signal the end of the diagnostic sequence.
Instead of interpreting “10 flashes” as an independent error, you should observe the entire flashing pattern, identify the pauses between digits, write down every two-digit code, and compare those codes with the Dodge flash code reference. This approach provides a far more accurate diagnosis than counting flashes alone.
How Does the Dodge Flash Code System Work?
The Dodge OBD-I flash code system converts stored diagnostic trouble codes into groups of Check Engine Light flashes. Instead of displaying numeric codes on a digital screen, the PCM uses the Malfunction Indicator Lamp (MIL) to communicate faults that have been recorded during vehicle operation. Each code is transmitted repeatedly, allowing the driver to verify the sequence before beginning repairs.
To activate diagnostic mode, turn the ignition key from OFF to ON three times within approximately five seconds, leaving the key in the ON position after the final cycle. Do not start the engine during this procedure. If the vehicle supports the key dance method, the Check Engine Light will begin flashing after a short delay.
Each diagnostic code contains two digits. The PCM flashes the first digit, pauses briefly, flashes the second digit, and then pauses longer before transmitting the next stored code. For example, one flash followed by a pause and then two flashes represents Code 12, while five flashes followed by five additional flashes represent Code 55, which marks the end of the diagnostic sequence.
Drivers often make mistakes when reading flash codes because they ignore the timing of the pauses. A short pause separates the two digits within a single code, while a longer pause separates different codes. Missing these timing differences can combine multiple codes into one incorrect number, leading to unnecessary parts replacement and inaccurate troubleshooting.
The flash code system is designed for basic diagnostics rather than comprehensive fault analysis. It reports stored trouble codes that help identify the affected system, but it does not provide freeze-frame information, live sensor readings, or advanced manufacturer-specific data available through modern OBD-II scan tools. After identifying the stored code, the next step is to inspect the corresponding component, verify wiring integrity, perform electrical testing if necessary, and confirm the fault before replacing any parts.
How Do You Read Dodge Check Engine Flash Codes Correctly?
Reading Dodge flash codes correctly requires identifying the pauses between flash groups rather than counting every flash continuously. Each stored Diagnostic Trouble Code contains two digits. The Check Engine Light flashes the first digit, pauses briefly, flashes the second digit, and then pauses longer before displaying the next code. Recognizing these timing differences is essential because the pauses determine where one code ends and another begins.
To retrieve the codes, insert the ignition key and cycle it from OFF to ON three times within approximately five seconds, leaving the key in the ON position after the final cycle. The engine should remain off during this process. If your Dodge supports the built-in diagnostic function, the Check Engine Light will begin transmitting stored fault codes after a short delay.
When counting flashes, observe the sequence several times before recording the results. The PCM continuously repeats the stored codes until the ignition is switched off, allowing you to verify each number. For example, one flash followed by two flashes represents Code 12, while five flashes followed by another five flashes represent Code 55. Recording the sequence on paper or using your smartphone to capture a video in slow motion can reduce counting errors, especially when multiple codes are stored.
Many vehicle owners misinterpret the flashing sequence because they ignore the pauses or begin counting after the sequence has already started. Another common mistake is assuming every flash belongs to the same code. For example, a sequence displaying 12, 21, and 55 can appear as one long series of flashes if the pauses are missed, leading to an incorrect diagnosis and unnecessary parts replacement.
It is also important to understand that the Check Engine Light reports every stored fault before ending the sequence. Older faults may remain in memory even if they are no longer active, so each code should be verified through a visual inspection and component testing before replacing any sensors or engine parts. Treat the flash code as the starting point of the diagnostic process rather than the final confirmation of a failed component.
What Trouble Codes Can Begin with 10 Flashes?
A sequence that appears to begin with 10 flashes does not correspond to a standard Dodge flash code by itself. The OBD-I system displays diagnostic information as two-digit codes, meaning every group of flashes represents either the first digit or the second digit of a complete code. Without identifying the pauses between flash groups, it is impossible to determine the actual Diagnostic Trouble Code stored by the PCM.
For example, a driver may believe the Check Engine Light flashed ten times when the system actually displayed Code 12, Code 17, Code 21, or another two-digit code. The apparent count changes depending on where the observation begins and whether the short pause between digits is recognized. Watching the complete sequence several times is the only reliable way to identify the correct code.
Several Dodge OBD-I codes are commonly encountered during engine diagnostics. Code 12 usually indicates that battery power to the PCM has been disconnected recently, either because the battery was replaced or the control module memory was reset. Code 17 is commonly associated with engine temperature taking too long to reach operating range, often pointing to a thermostat that is stuck open or a cooling system issue. Code 21 frequently relates to the oxygen sensor circuit, which can affect fuel mixture control, engine performance, and emissions.
Other stored codes may identify problems involving the MAP sensor, throttle position sensor, crankshaft position sensor, ignition system, fuel injectors, or emission control components. Although the flash code identifies the affected system, it does not automatically confirm that the sensor itself has failed. Damaged wiring, loose electrical connectors, vacuum leaks, corrosion, or PCM communication issues can produce the same diagnostic code.
For this reason, every flash code should be followed by systematic testing. Begin with a visual inspection of the related component, check connector security and wiring condition, verify sensor voltage or resistance according to the service manual, and perform additional diagnostic procedures if the initial inspection does not reveal the cause. This step-by-step approach reduces unnecessary repairs and improves diagnostic accuracy, especially on older Dodge vehicles that rely on the OBD-I flash code system.
What Causes Dodge Check Engine Flash Codes?
A Dodge Check Engine flash code is triggered when the Powertrain Control Module (PCM) detects an abnormal signal or operating condition outside its programmed range. The PCM continuously monitors engine, ignition, fuel delivery, and emission control systems. When a sensor reading remains outside the expected range or an electrical circuit fails a self-check, the PCM stores a Diagnostic Trouble Code (DTC) and commands the Check Engine Light to illuminate or display the corresponding flash code.
Faulty Oxygen Sensor
A faulty oxygen sensor is one of the most common causes of Dodge Check Engine flash codes. The oxygen sensor measures the amount of oxygen remaining in the exhaust gases and helps the PCM adjust the air-fuel mixture. When the sensor responds slowly, produces incorrect voltage, or stops communicating altogether, the PCM can no longer maintain optimal fuel control.
A failing oxygen sensor may also cause rough idle, poor fuel economy, increased exhaust emissions, hesitation during acceleration, and reduced engine performance. However, wiring damage, exhaust leaks, or connector corrosion can trigger the same diagnostic code, so the sensor should always be tested before replacement.
MAP Sensor Problems
A malfunctioning Manifold Absolute Pressure (MAP) sensor can generate multiple Dodge flash codes because it directly affects engine load calculations. The PCM relies on the MAP sensor to determine intake manifold pressure, calculate fuel delivery, and adjust ignition timing under different driving conditions.
When the MAP sensor reports incorrect pressure values, the engine may experience hard starting, unstable idle, hesitation, excessive fuel consumption, black exhaust smoke, or reduced power. Vacuum leaks, damaged vacuum hoses, electrical faults, or carbon contamination can produce symptoms similar to a failed sensor.
TPS Sensor Failure
A defective Throttle Position Sensor (TPS) prevents the PCM from accurately determining throttle opening. Since throttle position influences fuel injection, transmission shifting, and ignition timing, incorrect TPS signals can affect several vehicle systems simultaneously.
Common symptoms include delayed acceleration, sudden surging, erratic idle speed, transmission shift abnormalities, and intermittent Check Engine Light activation. Before replacing the TPS, inspect the electrical connector, wiring harness, and sensor output voltage to confirm the diagnosis.
Crankshaft Position Sensor Issues
A faulty crankshaft position sensor can cause serious engine operating problems because it provides the PCM with crankshaft speed and position information. Without an accurate crankshaft signal, the PCM cannot synchronize ignition timing or fuel injector operation.
Typical symptoms include extended cranking, intermittent stalling, engine misfires, loss of spark, and a complete no-start condition. Heat-related sensor failures are especially common because the internal electronics may operate normally when cold but fail after reaching operating temperature.
Ignition System Faults
Problems within the ignition system frequently trigger Dodge Check Engine flash codes. The PCM continuously monitors combustion quality and can detect ignition faults that affect engine performance.
Worn spark plugs, damaged ignition wires, failing ignition coils, poor electrical grounds, and distributor-related problems on older Dodge models can all contribute to engine misfires. If left unrepaired, repeated misfires may increase fuel consumption, reduce catalytic converter efficiency, and eventually damage emission control components.
Fuel Injector Problems
Fuel injector faults can also cause stored diagnostic codes when the PCM detects abnormal injector operation. A clogged injector, internal electrical failure, sticking injector pintle, or damaged injector wiring may reduce fuel delivery or cause uneven combustion between cylinders.
Drivers often notice rough idle, engine vibration, hesitation during acceleration, increased emissions, or poor fuel economy. Electrical testing and injector balance testing provide more reliable confirmation than replacing injectors solely because a flash code is present.
Vacuum Leaks
Vacuum leaks are among the most overlooked causes of Dodge Check Engine flash codes. Unmetered air entering the intake manifold changes the air-fuel ratio and causes sensor readings that the PCM interprets as engine management faults.
Cracked vacuum hoses, deteriorated intake manifold gaskets, leaking PCV hoses, loose throttle body seals, and damaged brake booster hoses are common leak sources. A careful visual inspection combined with smoke testing often identifies vacuum leaks more quickly than replacing sensors based only on stored diagnostic codes.
How Can You Diagnose the Problem After Reading the Flash Code?
Reading the flash code identifies the affected system, but additional testing is required to determine the actual failed component. A Diagnostic Trouble Code points technicians toward the area requiring inspection rather than guaranteeing that a specific sensor has failed. Following a structured diagnostic process reduces unnecessary repairs and prevents replacing functional parts.
Inspect Visible Engine Components First
Begin with a visual inspection of the components associated with the stored code. Look for broken vacuum hoses, disconnected electrical connectors, damaged wiring insulation, fluid contamination, loose ground connections, cracked sensor housings, or obvious signs of mechanical damage. Many Check Engine Light problems originate from simple physical defects rather than failed electronic components.
Verify Electrical Connectors
Electrical connection problems are a frequent source of intermittent diagnostic codes. Disconnect each connector related to the stored code and inspect the terminals for corrosion, moisture, bent pins, oxidation, or loose locking tabs. Clean contaminated terminals with an appropriate electrical contact cleaner and ensure every connector is fully seated before continuing with further diagnosis.
Test Sensors with a Multimeter
After completing the visual inspection, verify sensor operation using a digital multimeter. Measure the sensor’s reference voltage, ground circuit, signal voltage, and resistance according to the factory service specifications for the specific Dodge model. Comparing actual readings with manufacturer specifications helps determine whether the sensor, wiring, or PCM is responsible for the fault.
Dynamic testing is often more effective than static resistance measurements because some sensors fail only while the engine is running or after reaching operating temperature. Monitoring voltage changes while moving the wiring harness can also reveal intermittent electrical faults that are difficult to detect during a stationary inspection.
Use an OBD Scanner for Additional Confirmation
Although the built-in flash code system provides valuable diagnostic information, an OBD scanner offers a more complete analysis of the problem. Modern scan tools display live sensor data, pending fault codes, freeze-frame information, and manufacturer-specific parameters that are unavailable through the Check Engine Light flash sequence.
Combining flash code retrieval with scan tool diagnostics, electrical testing, and a thorough visual inspection produces a much more accurate diagnosis than relying on any single method. This systematic approach minimizes unnecessary parts replacement, shortens repair time, and increases the likelihood of correcting the underlying fault during the first repair attempt.
How Do You Fix the Problem That Triggered the Check Engine Light?
The correct repair depends on the Diagnostic Trouble Code and the confirmed root cause rather than the flash code alone. A flash code identifies the system that requires attention, but replacing components without verification often leads to unnecessary expenses and recurring Check Engine Light warnings. The most effective repair process combines visual inspection, electrical testing, and component verification before any parts are replaced.
Replace Failed Sensors
Replace a sensor only after confirming that it no longer operates within the manufacturer’s specifications. Oxygen sensors, MAP sensors, throttle position sensors, coolant temperature sensors, and crankshaft position sensors commonly trigger Dodge flash codes when they produce inaccurate or unstable signals.
Before installing a new sensor, inspect its connector, wiring harness, and mounting location. A damaged connector or broken wire can generate the same diagnostic code as a failed sensor. After replacement, clear the stored Diagnostic Trouble Codes and verify that the Check Engine Light does not return during a road test.
Repair Damaged Wiring
Electrical wiring problems are responsible for many recurring Check Engine Light faults. Heat, vibration, moisture, and aging insulation can damage wiring harnesses throughout the engine compartment. Broken conductors, corroded terminals, poor ground connections, and loose connectors interrupt communication between sensors and the Powertrain Control Module (PCM).
Inspect the entire circuit associated with the stored code instead of focusing only on the sensor. Repair damaged wires using automotive-grade connectors, heat-shrink tubing, and properly sealed splices. Avoid temporary repairs that may fail under engine heat or vibration.
Correct Ignition System Problems
Ignition system faults should be repaired promptly to prevent engine performance issues and catalytic converter damage. A weak spark can cause incomplete combustion, allowing unburned fuel to enter the exhaust system. Over time, excessive heat generated inside the catalytic converter may shorten its service life.
Inspect spark plugs for excessive wear, carbon deposits, oil contamination, or incorrect electrode gaps. Examine ignition coils for cracks, overheating, or weak output, and verify that ignition wires or coil boots remain free from moisture and physical damage. Replacing worn ignition components as a complete maintenance set often produces more consistent engine performance than replacing a single part.
Repair Vacuum Leaks
Vacuum leaks should be eliminated before replacing engine management sensors. Air entering the intake system downstream of the airflow measurement point alters the air-fuel mixture and may trigger multiple diagnostic codes, even when every sensor functions correctly.
Inspect vacuum hoses for cracks, loose fittings, collapsed sections, and signs of aging. Check intake manifold gaskets, throttle body seals, PCV hoses, and brake booster vacuum lines for leakage. If no visible damage is found, perform a smoke test to locate small leaks that cannot be detected during a visual inspection.
Clear Stored Diagnostic Codes
Stored diagnostic codes should only be cleared after the underlying problem has been repaired. Clearing codes before completing repairs removes valuable diagnostic information and may make troubleshooting more difficult if the fault returns.
Most Dodge vehicles allow codes to be cleared with an OBD scan tool after repairs are completed. On some older models, disconnecting the battery may erase stored codes, but this procedure also resets adaptive memory and radio settings. Using a scan tool is generally the preferred method because it clears codes without affecting other vehicle systems.
After clearing the codes, start the engine, allow it to reach operating temperature, and perform a road test under different driving conditions. If the Check Engine Light remains off and no new codes are stored, the repair has likely resolved the original fault.
Should You Continue Driving If the Check Engine Light Keeps Flashing?
A continuously flashing Check Engine Light should never be ignored because it usually indicates a severe engine misfire capable of causing immediate catalytic converter damage. Unlike a steady Check Engine Light that often indicates a less urgent emissions or sensor-related issue, a flashing warning light signals an active fault that requires immediate attention.
When Is It Safe to Drive?
Driving may be acceptable only when the Check Engine Light remains steady and the vehicle continues operating normally. Even in this situation, the stored fault should be diagnosed as soon as possible because unresolved problems often become more expensive to repair over time.
If the engine starts easily, accelerates normally, maintains stable operating temperature, and shows no signs of abnormal noise or vibration, you may be able to drive a short distance to a repair facility. However, the vehicle should not be driven for an extended period without identifying the stored Diagnostic Trouble Code.
When Should You Stop Driving Immediately?
Stop driving immediately if the Check Engine Light flashes while the engine runs poorly or displays obvious mechanical symptoms. Continuing to operate the vehicle under these conditions increases the risk of severe engine and exhaust system damage.
Common warning signs include severe engine misfires, loss of power, violent shaking, loud knocking noises, repeated stalling, overheating, heavy fuel odor, or excessive exhaust smoke. If any of these symptoms occur together with a flashing Check Engine Light, reduce engine load, pull over safely, and switch off the engine as soon as conditions permit.
What Damage Can Occur If You Ignore the Warning?
Ignoring a flashing Check Engine Light can transform a relatively minor repair into a major mechanical failure. Repeated engine misfires allow unburned fuel to enter the exhaust system, where it can overheat and permanently damage the catalytic converter. Replacing a catalytic converter is typically far more expensive than repairing the original ignition or fuel system fault.
Persistent engine problems can also increase fuel consumption, accelerate spark plug wear, contaminate engine oil, reduce overall engine performance, and place additional stress on emission control components. Addressing the stored fault promptly minimizes repair costs and helps maintain long-term engine reliability.
For older Dodge vehicles that rely on the OBD-I flash code system, the safest approach is to retrieve the stored codes immediately, verify the affected system through proper testing, and complete the necessary repairs before the fault develops into a more serious mechanical issue.
What Is the Difference Between Dodge OBD-I Flash Codes and OBD-II Codes?
The primary difference between Dodge OBD-I flash codes and OBD-II diagnostic codes is the amount of information they provide and the method used to retrieve them. Dodge vehicles equipped with OBD-I rely on the Check Engine Light to communicate stored faults through flashing sequences, while OBD-II systems use standardized digital diagnostic codes that can be accessed with a compatible scan tool.
Differences in Diagnostic Methods
OBD-I retrieves fault codes through the Check Engine Light, whereas OBD-II requires an electronic scan tool connected to the diagnostic port. On many Dodge models produced before the implementation of OBD-II, drivers can activate diagnostic mode by cycling the ignition key. The Powertrain Control Module (PCM) then displays stored trouble codes by flashing the Check Engine Light.
OBD-II vehicles use a standardized 16-pin diagnostic connector. A scan tool communicates directly with the Engine Control Module (ECM) or PCM to retrieve stored codes, pending codes, freeze-frame data, sensor readings, and system status information. This process is faster, more accurate, and significantly more detailed than counting flash sequences.
Differences in Code Formats
OBD-I uses manufacturer-specific two-digit flash codes, while OBD-II follows an international five-character code format. A Dodge OBD-I vehicle may display codes such as 12, 21, 24, 43, or 55, each corresponding to a specific fault recognized by Dodge diagnostic documentation.
OBD-II uses standardized codes beginning with a letter followed by four numbers, such as P0300, P0171, or P0420. The first character identifies the system category, while the remaining digits provide increasingly specific diagnostic information. Because these codes follow an industry standard, they can be interpreted by virtually every modern diagnostic scanner.
Differences in Troubleshooting Accuracy
OBD-II provides a significantly higher level of diagnostic accuracy than the OBD-I flash code system. Flash codes identify only the stored fault category, requiring additional manual testing to determine the exact cause. OBD-II systems provide live sensor values, freeze-frame operating conditions, oxygen sensor performance, fuel trim data, readiness monitors, and pending faults that have not yet triggered the Check Engine Light.
This additional information allows technicians to diagnose intermittent faults, compare sensor performance under different operating conditions, and verify repairs more efficiently. While the OBD-I flash code system remains useful for basic diagnostics on older Dodge vehicles, it cannot match the diagnostic capabilities of modern scan tools.
When Should You Use an OBD-II Scanner Instead of Flash Codes?
An OBD-II scanner should be used whenever additional diagnostic information is required beyond the basic flash code sequence. Although the built-in flash code system is valuable for identifying stored faults, it cannot display the detailed operating data necessary to diagnose many intermittent or complex engine problems.
Benefits of Modern Scan Tools
Modern scan tools provide diagnostic information that is unavailable through the Check Engine Light alone. Depending on the scanner model, technicians can access live engine data, stored and pending Diagnostic Trouble Codes, freeze-frame information, oxygen sensor activity, fuel trim values, ignition timing, coolant temperature, throttle position, and manufacturer-specific diagnostic parameters.
These features reduce diagnostic time by allowing faults to be verified before parts are replaced. Instead of relying solely on a stored code, technicians can observe how sensors behave while the engine is idling, accelerating, or operating under load.
Live Data Versus Stored Codes
Live data provides real-time operating information, while flash codes only report previously detected faults. A stored Diagnostic Trouble Code identifies the system where a problem was detected, but it does not explain whether the fault remains active or under what operating conditions it occurred.
By monitoring live sensor values, technicians can compare expected readings with actual performance. For example, abnormal oxygen sensor switching, unstable manifold pressure, irregular throttle position signals, or inconsistent coolant temperature readings become immediately visible during engine operation. This information greatly improves diagnostic accuracy, particularly when troubleshooting intermittent faults.
When Flash Codes Are No Longer Sufficient
Flash codes become insufficient when multiple systems interact or when intermittent faults cannot be reproduced consistently. Electrical connection problems, wiring failures, vacuum leaks, and sensor performance issues often require real-time monitoring before the root cause can be confirmed.
An OBD-II scanner is also recommended after repairs have been completed. Reviewing live data, clearing stored Diagnostic Trouble Codes, verifying readiness monitors, and confirming that no new faults appear during a road test provide greater confidence that the original problem has been fully resolved.
Frequently Asked Questions
Is flashing 10 times always the same code?
No. Ten flashes alone do not represent a standard Dodge Diagnostic Trouble Code. The flashes must be interpreted as part of a complete two-digit sequence separated by timed pauses.
Why does Code 55 always appear?
Code 55 indicates the end of the diagnostic sequence. It confirms that the PCM has finished displaying every stored Diagnostic Trouble Code currently saved in memory.
Can disconnecting the battery clear flash codes?
Yes, on many older Dodge vehicles. Disconnecting the battery may erase stored diagnostic information from the PCM. However, this method also resets adaptive memory and may erase radio presets or other learned settings. Clearing codes with a scan tool is generally the preferred procedure.
Can a bad battery trigger a Check Engine Light?
Yes. Low battery voltage, unstable electrical supply, poor charging performance, or disconnected battery terminals can trigger certain diagnostic codes because the PCM depends on stable voltage to monitor engine systems correctly.
Does every Dodge vehicle support flash codes?
No. The flash code retrieval method is primarily available on older Dodge vehicles equipped with OBD-I systems. Most Dodge vehicles manufactured for the North American market from the 1996 model year onward use the standardized OBD-II diagnostic system, which requires a compatible scan tool to retrieve Diagnostic Trouble Codes.
What Should You Do After Reading a Dodge Check Engine Flash Code?
Reading the flash code is only the beginning of the diagnostic process. A stored Diagnostic Trouble Code identifies the system that requires investigation but does not automatically confirm which component has failed. Accurate repairs depend on verifying the underlying cause before replacing any parts.
A practical diagnostic workflow consists of six steps. First, retrieve every stored flash code and record the sequence accurately. Second, compare each code with the Dodge diagnostic reference to identify the affected system. Third, inspect related components, wiring harnesses, connectors, and vacuum lines for visible defects. Fourth, perform electrical or mechanical testing to confirm the suspected failure. Fifth, complete the necessary repair and clear the stored codes. Finally, perform a road test to ensure the Check Engine Light remains off and no new Diagnostic Trouble Codes are stored.
Following this systematic approach minimizes unnecessary parts replacement, reduces repair costs, and improves long-term vehicle reliability. Whether you use the built-in flash code system or a professional OBD-II scanner, combining accurate code interpretation with proper diagnostic testing is the most effective way to resolve Dodge Check Engine Light problems.