Is your Chevy making a knocking noise when you press the gas? Did the check engine light suddenly turn on without warning? These signs can feel alarming, especially when you are unsure what is causing the problem.
Many drivers immediately think about serious engine damage. In reality, the issue often comes from a small but critical component called the knock sensor. This tiny part plays a key role in protecting your engine and keeping it running efficiently.
When the knock sensor fails, your engine can lose power, burn more fuel, and perform poorly. If you ignore the issue for too long, the repair cost can increase quickly. This is exactly why many Chevy owners feel stressed. They do not know whether to fix it themselves or pay a mechanic a high fee.
In this Chevy Knock Sensor Replacement Guide, you will learn everything step by step. You will discover the most common symptoms, understand the real replacement cost, and follow a clear process to fix the problem yourself. Even if you are not an expert, you can still handle this repair with the right guidance.
By the end of this guide, you will feel more confident. You will know exactly what to do and how to avoid unnecessary expenses.
Contents
What Is a Knock Sensor and How It Works
A knock sensor is a small device that plays a big role in your Chevy engine. It detects unusual vibrations caused by improper combustion. These vibrations are often known as engine knock or pinging. If the engine keeps knocking, it can lead to serious damage over time.
The knock sensor sends signals directly to the engine control unit. The ECU then adjusts the ignition timing to prevent damage. This process happens in real time, which helps your engine run smoothly and efficiently under different driving conditions.
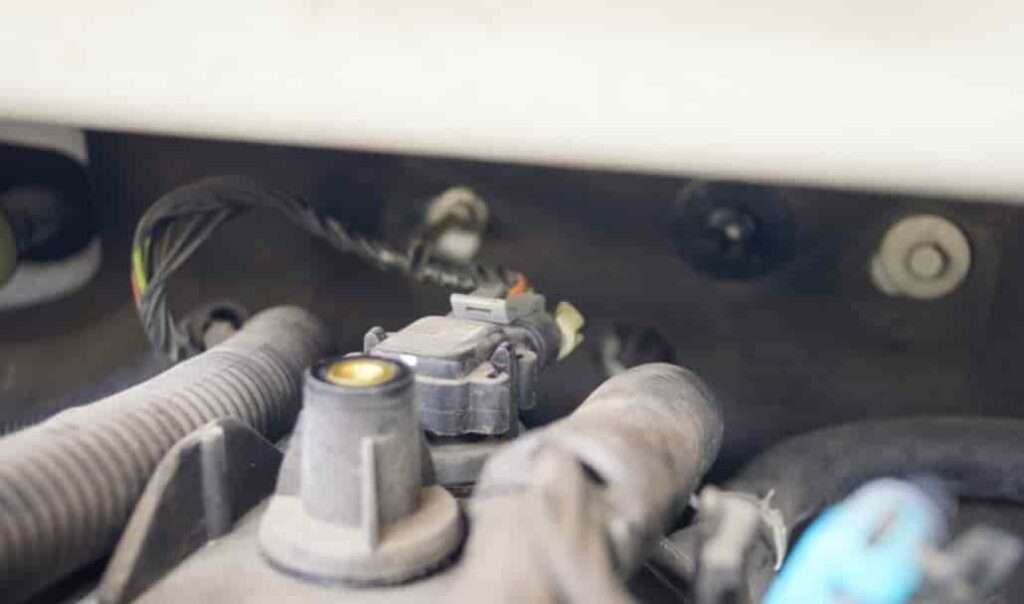
In most Chevy vehicles, the knock sensor sits on the engine block or under the intake manifold. Its location allows it to detect even the smallest vibrations inside the engine. Because of this position, replacing the sensor can sometimes require extra effort, especially on V8 engines.
When the knock sensor stops working, the ECU can no longer detect engine knock accurately. As a result, the engine may run with incorrect timing. This can reduce power, increase fuel consumption, and cause long term wear. In some cases, the ECU may switch to a safe mode, which limits performance to protect the engine.
Many drivers underestimate how important this small component is. They often focus on larger engine parts while ignoring the sensor. However, a faulty knock sensor can affect both performance and fuel efficiency at the same time. That is why understanding its function is the first step before doing a Chevy Knock Sensor Replacement.
Chevy Knock Sensor Replacement Cost (2026 Update)
Understanding the cost of a Chevy Knock Sensor Replacement helps you avoid overpaying and make the right decision. Many drivers feel confused when they receive different quotes from repair shops. The actual cost depends on several key factors.
The price of the knock sensor itself usually ranges from 30 to 150 dollars. OEM parts often cost more but provide better reliability and compatibility. Aftermarket options are cheaper, but their quality can vary. Choosing the wrong part may lead to repeated repairs.
Labor cost makes up the biggest portion of the total expense. Most mechanics charge between 150 and 400 dollars for the job. The final price depends on how difficult it is to access the sensor. In some Chevy engines, especially V8 models, the sensor sits under the intake manifold. This increases both time and labor cost.
If you decide to do it yourself, you can save a significant amount of money. A DIY replacement often costs under 150 dollars if you already have basic tools. However, you need to invest time and follow the correct steps. Mistakes during installation can lead to additional issues and extra cost later.
Several factors affect the total replacement cost. These include the vehicle model, engine type, and local labor rates. For example, replacing the sensor on a Chevy Silverado usually costs more than on a smaller sedan due to engine complexity.
Many car owners delay this repair to save money. In reality, ignoring a faulty knock sensor can increase fuel consumption and reduce engine efficiency. Over time, this can cost more than fixing the issue early. That is why replacing the sensor at the right time is both a smart and cost effective decision.
Tools and Parts You Need
Before you start a Chevy Knock Sensor Replacement, you need to prepare the right tools and parts. Good preparation helps you work faster and avoid mistakes during the process. Many DIY failures happen because drivers skip this step.
You will need a basic socket set with different sizes. This tool helps you remove bolts around the intake manifold and engine components. A torque wrench is also important because it ensures you tighten the new sensor correctly. If you apply too much or too little force, the sensor may not work properly.
Screwdrivers and pliers will help you handle smaller components and connectors. In some cases, you may also need an extension bar to reach bolts in tight spaces. If your Chevy engine layout is complex, these tools will make the job much easier.
For parts, the most important item is the new knock sensor. You can choose between OEM and aftermarket options. OEM sensors usually provide better durability and fit perfectly with your engine system. Aftermarket parts cost less, but you should choose a reliable brand to avoid future issues.
You should also inspect the wiring harness. In many Chevy models, corrosion or moisture can damage the wiring connected to the sensor. If the harness shows signs of wear, replacing it at the same time can prevent repeat problems.
Another important tip is to check for moisture or dirt around the sensor area. Some engines have a history of water entering the sensor cavity. Cleaning and sealing the area properly will help extend the life of your new sensor.
Taking time to prepare the right tools and parts will save you effort later. It also reduces the risk of making mistakes during your Chevy Knock Sensor Replacement.
Step by Step Chevy Knock Sensor Replacement
Replacing a knock sensor on a Chevy may sound complicated, but you can handle it with the right approach. Follow each step carefully and stay patient throughout the process. This helps you avoid mistakes and ensures the new sensor works correctly.
Start by disconnecting the battery. This step protects both you and the vehicle’s electrical system. It also prevents error codes from appearing during the repair.
Next, remove the intake manifold if your engine design requires it. Many Chevy V8 engines place the knock sensor underneath this component. Take your time and keep track of all bolts and connectors. Organizing parts during removal will make reassembly much easier.
Once you gain access, locate the knock sensor on the engine block. It usually sits in a central position where it can detect engine vibrations effectively. Check the area for dirt, moisture, or corrosion before removing the old sensor.
Remove the faulty sensor using the correct socket size. Turn it slowly to avoid damaging the threads. After removal, clean the mounting surface carefully. A clean surface ensures proper contact and accurate sensor readings.
Install the new knock sensor and tighten it using a torque wrench. Follow the recommended torque specification for your Chevy model. This step is critical because incorrect tightening can affect sensor performance.
After installing the sensor, reconnect any wiring and inspect the harness. Make sure all connections are secure and free from damage. If needed, apply sealant to protect the area from moisture.
Reassemble the intake manifold and reconnect all components in the correct order. Double check everything before reconnecting the battery.
Finally, start the engine and test the vehicle. Listen for unusual sounds and check if the engine runs smoothly. If possible, use an OBD2 scanner to clear old codes and confirm that no new errors appear.
Taking a careful and structured approach will make your Chevy Knock Sensor Replacement much easier and more reliable.
Common Mistakes to Avoid
Many Chevy owners try to replace the knock sensor themselves but run into problems because of simple mistakes. These errors can waste time and even force you to repeat the entire process. Understanding them early will help you complete your Chevy Knock Sensor Replacement more smoothly.
One common mistake is skipping the cleaning step. Dirt, oil, or corrosion on the mounting surface can affect how the sensor reads engine vibrations. If the surface is not clean, the new sensor may give inaccurate signals. This can keep the check engine light on even after replacement.
Another issue comes from incorrect tightening. Some people install the sensor too loosely, while others overtighten it. Both situations can cause problems. A loose sensor may not detect vibrations properly, while too much force can damage the sensor or threads. Always use a torque wrench and follow the correct specification.
Many drivers also ignore the wiring harness. In some Chevy engines, moisture builds up around the sensor area and damages the wiring. If you replace only the sensor and ignore a damaged harness, the problem will not go away. You may see the same error codes again shortly after the repair.
Forgetting to seal the area is another frequent mistake. Water can enter the sensor cavity and shorten the lifespan of the new part. Applying proper sealant helps protect the sensor and prevents repeat failures.
Some people rush through reassembly and miss small details. Loose connections or misplaced bolts can lead to new issues. Taking a few extra minutes to double check everything can save hours of troubleshooting later.
Finally, many drivers forget to reset the ECU or clear error codes. Even after a successful replacement, the system may still show old warnings. Using an OBD2 scanner to reset the codes ensures the repair reflects correctly.
Avoiding these mistakes will help you complete your Chevy Knock Sensor Replacement correctly the first time and prevent unnecessary frustration.
DIY vs Mechanic – Which Is Better?
When facing a Chevy Knock Sensor Replacement, many drivers hesitate between doing it themselves or hiring a mechanic. Each option has its own advantages, and the right choice depends on your experience, budget, and available time.
Doing it yourself can save a significant amount of money. You only need to pay for the parts and basic tools. For many Chevy owners, this means spending under 150 dollars instead of several hundred. DIY also gives you more control over the repair process. You can choose better quality parts and take your time to ensure everything is installed correctly.
However, DIY comes with challenges. If your Chevy engine places the knock sensor under the intake manifold, the job becomes more complex. You need patience, attention to detail, and some mechanical knowledge. A small mistake, such as incorrect torque or a missed connection, can lead to repeated issues.
Hiring a mechanic offers convenience and peace of mind. A professional can complete the job faster and reduce the risk of errors. This is especially helpful if you lack tools or experience. Most repair shops also provide a warranty, which adds extra security.
The downside is the cost. Labor charges can be high, especially for engines that require more disassembly. Some drivers also worry about overpaying or unnecessary repairs if they do not fully understand the issue.
If you have basic mechanical skills and the right tools, DIY is a good option for saving money. If the job looks too complex or you want a guaranteed result, choosing a mechanic is the safer path.
Making the right decision will help you complete your Chevy Knock Sensor Replacement efficiently without unnecessary stress or expense.
CONCLUSION
A faulty knock sensor may seem like a minor issue, but it can have a serious impact on your engine performance and fuel efficiency. Ignoring the early warning signs can lead to higher fuel costs, reduced power, and even long term engine damage. That is why understanding the problem and acting early is so important.
In this Chevy Knock Sensor Replacement Guide, you have learned how to identify the key symptoms, estimate the real replacement cost, and follow a clear step by step process to fix the issue. You also understand the common mistakes to avoid and how to decide between DIY and professional repair.
The biggest takeaway is simple. A small repair done at the right time can save you hundreds of dollars and prevent bigger problems later. Whether you choose to handle the replacement yourself or hire a mechanic, the key is to take action before the situation gets worse.
If your Chevy is showing any of the symptoms mentioned above, now is the time to check and fix the issue. Do not wait until the damage becomes more expensive and harder to repair.
Have you ever dealt with a knock sensor problem before? Share your experience or questions in the comments. Your insight might help other Chevy owners make the right decision.