If you have ever pushed your vehicle beyond factory limits, you already know the frustration of transmission failure. Many GM owners experience slipping gears, overheating, or complete breakdown when using the 4L60E under high torque conditions. This problem becomes even more serious when towing heavy loads or upgrading engine performance.
That is exactly why the 4L60E to 4L80E transmission swap has become one of the most popular upgrades in the automotive world. The 4L80E is built for strength, durability, and reliability, making it a preferred choice for performance builds, LS swaps, and heavy duty applications.
However, this upgrade is not as simple as swapping one part for another. It involves compatibility considerations, wiring adjustments, cost planning, and potential installation challenges. Many people start this project without proper knowledge and end up spending more time and money than expected.
In this complete guide, you will learn everything about the 4L60E to 4L80E transmission swap. We will break down the cost, list all required parts, explain the installation process, and highlight common problems you must avoid. By the end of this guide, you will have a clear understanding of whether this upgrade is the right decision for your vehicle.
Contents
- What Is a 4L60E to 4L80E Transmission Swap
- 4L60E vs 4L80E: Key Differences
- Benefits of Upgrading to 4L80E
- Cost Breakdown of 4L60E to 4L80E Swap (2025)
- Complete Parts List for the Swap
- Step by Step 4L60E to 4L80E Transmission Swap Guide
- Wiring and ECU Tuning Explained
- Common Problems and How to Fix Them
- Is the 4L60E to 4L80E Swap Worth It
- Conclusion
What Is a 4L60E to 4L80E Transmission Swap
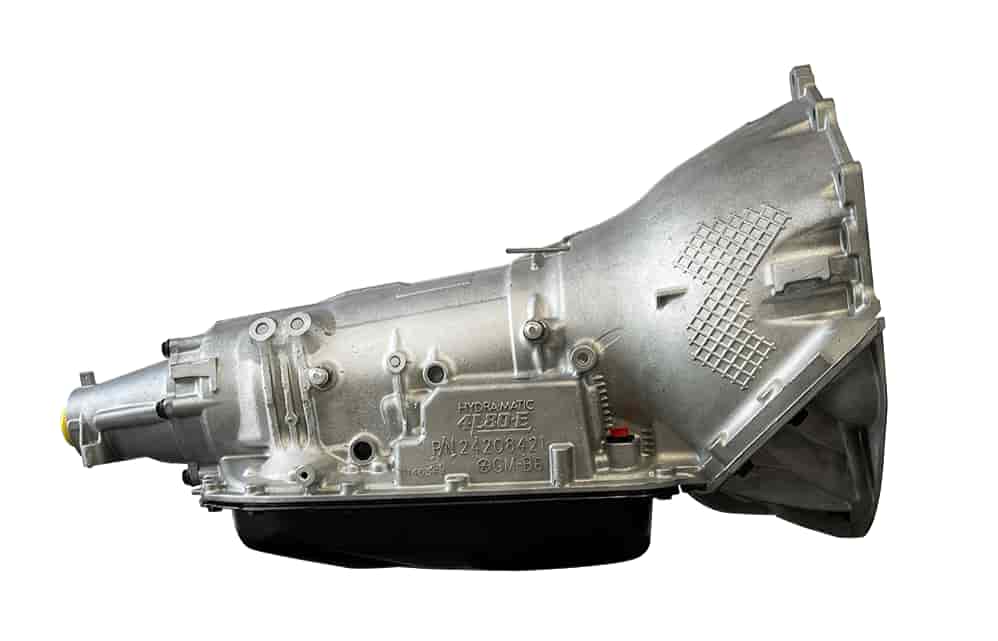
A 4L60E to 4L80E transmission swap means you replace your existing 4L60E with a stronger 4L80E transmission. Most GM owners choose this upgrade when the original transmission can no longer handle higher power or heavy loads.
The 4L60E works well in daily driving conditions. It handles moderate power without issues. However, problems start when you increase horsepower or torque. Many drivers notice slipping, overheating, or early failure after engine upgrades or towing heavy loads.
The 4L80E solves these problems. It uses a stronger internal design based on the TH400. This structure allows it to handle much higher torque. As a result, it performs better in trucks, performance builds, and LS swap projects.
This upgrade is not just a simple part replacement. You need to adjust several components to make everything work properly. The 4L80E is larger and heavier, so you must modify parts like the driveshaft and crossmember. You also need to handle wiring and electronic control changes.
Many GM vehicles support this upgrade. Popular examples include Silverado, Sierra, Tahoe, and Camaro. These models often receive performance upgrades or heavy duty use, which makes the swap more valuable.
Before starting, you should understand the full scope of the project. Proper planning helps you avoid extra costs, delays, and installation mistakes.
4L60E vs 4L80E: Key Differences
Choosing between the 4L60E and 4L80E depends on your performance goals, driving conditions, and budget. Many drivers upgrade only after facing repeated failures, but understanding the core differences early can save time and money.
The 4L60E focuses on efficiency and lighter applications. It suits daily driving and mild performance setups. In contrast, the 4L80E delivers strength and durability. It handles high torque and heavy loads with much greater reliability.
One of the biggest differences lies in torque capacity. The 4L60E can typically handle around 360 lb ft of torque. Once you exceed that limit, failure becomes more likely. The 4L80E can handle over 440 lb ft in stock form, making it a better choice for modified engines.
Gear ratios also affect performance. The 4L60E offers slightly better acceleration due to its gearing. However, the 4L80E provides more consistent power delivery under stress. This makes it ideal for towing and high performance builds.
Size and weight create another key difference. The 4L80E is larger and heavier. This increases durability but also requires modifications during installation. You may need to adjust the driveshaft and crossmember to ensure proper fitment.
Below is a quick comparison to help you understand the differences more clearly:
| Feature | 4L60E | 4L80E |
|---|---|---|
| Torque Capacity | ~360 lb ft | 440+ lb ft |
| Strength | Moderate | High |
| Weight | Lighter | Heavier |
| Ideal Use | Daily driving | Towing, performance |
| Durability | متوسط | Excellent |
If you plan to increase power or tow heavy loads, the 4L80E becomes the better long term choice. If your vehicle stays close to stock, the 4L60E may still be enough.
Understanding these differences helps you make the right decision before investing in a full 4L60E to 4L80E transmission swap.
Benefits of Upgrading to 4L80E
Upgrading to a 4L80E transmission gives you a major advantage in strength and reliability. Many drivers choose this upgrade after facing repeated issues with the 4L60E. If your transmission fails under pressure, this upgrade can completely change your driving experience.
The biggest benefit comes from higher torque capacity. The 4L80E handles significantly more power without breaking down. This makes it perfect for modified engines, turbo setups, or LS swaps. You no longer need to worry about pushing your vehicle too hard.
Durability is another key advantage. The 4L80E uses stronger internal components, which allows it to last much longer under stress. While the 4L60E may require frequent repairs, the 4L80E offers a more stable and long term solution. This helps you save money over time.
Towing performance also improves. If you use your truck for hauling or heavy loads, the 4L80E delivers smoother and more reliable power. It reduces overheating and performs better under constant strain. This makes it a popular choice for trucks and SUVs.
Another important benefit is consistency. The 4L80E maintains performance even under extreme conditions. Whether you drive aggressively or carry heavy loads, it continues to operate without sudden failures.
However, this upgrade also comes with trade offs. The 4L80E is heavier and requires more modifications. Installation takes more time and effort compared to replacing a stock transmission. Despite that, most drivers find the upgrade worth it because of the long term reliability.
If you are tired of transmission problems or planning to increase engine power, the 4L80E offers a solid and dependable upgrade path.
Cost Breakdown of 4L60E to 4L80E Swap (2025)
Before starting a 4L60E to 4L80E transmission swap, you need a clear understanding of the total cost. Many people underestimate the budget and end up spending far more than expected. Planning ahead helps you avoid delays and financial stress.
The transmission itself is the biggest expense. A used 4L80E typically costs between 800 and 1500 USD depending on condition. A rebuilt unit ranges from 1500 to 2500 USD. If you choose a performance built version, the price can exceed 3500 USD.
You also need supporting parts to complete the swap. These components ensure proper fitment and functionality.
Here is a typical parts cost breakdown:
- Adapter or flexplate: 100 to 300 USD
- Crossmember modification or replacement: 150 to 400 USD
- Driveshaft modification: 150 to 300 USD
- Torque converter: 200 to 600 USD
- Wiring harness or standalone controller: 300 to 900 USD
- Transmission mount and fluids: 100 to 250 USD
Labor cost depends on your approach. If you choose a professional shop, expect to pay between 800 and 2000 USD for installation. The final price varies based on complexity and location.
If you go the DIY route, you can save a significant amount of money. However, you need proper tools, knowledge, and time. Mistakes during installation can increase costs quickly, especially when dealing with wiring or fitment issues.
In total, a typical 4L60E to 4L80E transmission swap costs between 2000 and 5000 USD. High performance builds can go beyond that range.
Understanding this cost breakdown helps you plan your budget and avoid unexpected expenses. It also allows you to decide whether the upgrade fits your goals and financial situation.
Complete Parts List for the Swap
To complete a successful 4L60E to 4L80E transmission swap, you need more than just the transmission. Many people fail because they miss small but critical components. A complete parts list helps you avoid delays and repeated disassembly.
The most important component is the 4L80E transmission itself. You should choose a unit that matches your power goals. A stock version works for moderate builds, while a built transmission suits high performance setups.
Next, you need a compatible torque converter. This part affects how power transfers from the engine to the transmission. Choosing the wrong converter can reduce performance or cause overheating.
The crossmember often requires modification or replacement. Since the 4L80E is larger, the original mounting position may not fit. You need to adjust it to ensure proper alignment and stability.
The driveshaft also requires attention. In most cases, you must shorten or modify it to match the new transmission length. Incorrect measurements can lead to vibration or damage.
Wiring and electronic control are critical for proper operation. You will need a wiring harness or a standalone transmission controller. This allows the vehicle to communicate with the 4L80E correctly.
You should also prepare a flexplate or adapter to match the transmission with your engine. Compatibility here is essential to avoid installation issues.
Additional supporting parts include a transmission mount, cooling lines, and fluid. These components may seem minor, but they play an important role in long term reliability.
Here is a quick checklist to keep everything organized:
- 4L80E transmission
- Torque converter
- Crossmember or mount solution
- Driveshaft modification
- Wiring harness or controller
- Flexplate or adapter
- Transmission mount
- Cooling system components
- Transmission fluid
Having all parts ready before starting will save time and prevent frustration. It also ensures a smoother and more efficient installation process.
Step by Step 4L60E to 4L80E Transmission Swap Guide
A successful 4L60E to 4L80E transmission swap requires careful preparation and precise execution. Skipping steps or rushing the process can lead to costly mistakes. Follow each step closely to ensure a smooth installation.
Step 1: Remove the 4L60E Transmission
Start by disconnecting the battery to ensure safety. Drain the transmission fluid to avoid spills. Remove the driveshaft, wiring connections, and cooling lines.
Next, support the transmission with a jack. Unbolt the crossmember and transmission mount. Then remove the bellhousing bolts and carefully lower the 4L60E.
Take your time during this step. Damaging connectors or bolts can create problems later.
Step 2: Prepare the 4L80E Transmission
Before installation, inspect the 4L80E thoroughly. Check seals, sensors, and connectors. Replace worn parts if needed.
Install the correct torque converter and ensure it seats properly. This step is critical. Incorrect installation can damage the transmission immediately after startup.
You should also confirm compatibility with your engine. Make sure the flexplate and bolt pattern match.
Step 3: Modify Crossmember and Fitment
The 4L80E is larger than the 4L60E, so fitment adjustments are necessary. Test fit the transmission first to identify alignment issues.
You may need to move or modify the crossmember. Ensure the transmission sits at the correct angle. Poor alignment can cause vibration and drivetrain stress.
This step often takes extra time, but proper fitment prevents long term problems.
Step 4: Install the 4L80E Transmission
Lift the 4L80E into position using a transmission jack. Align it carefully with the engine. Secure the bellhousing bolts evenly.
Reinstall the crossmember and transmission mount. Make sure everything is tight and properly aligned.
Avoid forcing parts into place. If something does not fit, recheck alignment before continuing.
Step 5: Driveshaft and Connections
Modify or install the correct driveshaft length. This step is essential for smooth operation. A wrong length can cause vibration or damage.
Reconnect cooling lines and ensure proper routing. Then connect all wiring components, including sensors and harnesses.
Double check every connection before moving forward.
Step 6: Wiring and ECU Setup
The 4L80E requires proper electronic control. Install a wiring harness or standalone controller depending on your setup.
Configure the ECU or transmission controller to match the new transmission. Incorrect settings can lead to shifting problems or error codes.
Take time to verify all connections and settings.
Step 7: Testing and Calibration
Fill the transmission with the correct fluid. Start the engine and check for leaks. Let the system warm up before testing.
Perform a short test drive. Monitor shifting behavior, temperature, and performance. If you notice issues, stop and inspect immediately.
Fine tuning may be required to achieve optimal performance.
Completing these steps correctly ensures a reliable and long lasting upgrade. Proper installation reduces the risk of failure and helps you get the full benefit of your 4L60E to 4L80E transmission swap.
Wiring and ECU Tuning Explained
Wiring and ECU tuning play a critical role in a successful 4L60E to 4L80E transmission swap. Many swaps fail not because of mechanical issues, but because of incorrect electronic setup. If the system cannot communicate properly, the transmission will not shift as expected.
The 4L60E and 4L80E use different control strategies. This means your factory ECU may not work correctly without adjustments. You must ensure that your setup supports the 4L80E before completing the installation.
One common solution is to use a standalone transmission controller. This device allows you to control shift points, line pressure, and overall behavior. It gives you flexibility and makes tuning much easier, especially for modified vehicles.
Another option is to reprogram your factory ECU. Some GM ECUs can support the 4L80E with proper tuning. This approach can reduce cost, but it requires technical knowledge and compatible software.
Wiring differences also create challenges. The connectors and pin layouts between the two transmissions are not the same. You will need a conversion harness or a custom wiring solution. Using the wrong wiring setup can cause shifting issues or complete transmission failure.
Common wiring problems include incorrect sensor signals, poor grounding, and loose connections. These issues often lead to erratic shifting or error codes. Careful installation and inspection can prevent most of these problems.
You should also pay attention to speed sensors and calibration. The 4L80E may require different settings to provide accurate speed readings. Without proper calibration, your speedometer and shifting behavior may become inconsistent.
Taking time to set up wiring and ECU tuning correctly will save you from major headaches later. It ensures smooth shifting, reliable performance, and long term durability.
Common Problems and How to Fix Them
Even with careful planning, many people face issues during a 4L60E to 4L80E transmission swap. Most problems come from fitment, wiring, or incorrect setup. Understanding these issues early helps you avoid costly mistakes.
One common problem involves driveshaft length. The 4L80E is longer than the 4L60E, so the original driveshaft often does not fit. If the driveshaft is too long or too short, it can cause vibration or damage. The best solution is to measure carefully and modify the driveshaft to the correct length.
Crossmember alignment also creates challenges. The mounting point for the 4L80E does not match the original position. If you install it incorrectly, the transmission may sit at the wrong angle. This can lead to drivetrain stress and premature wear. You should always test fit and adjust before final installation.
Wiring issues are another major source of problems. Incorrect connections can cause harsh shifting, delayed engagement, or no shifting at all. Many users overlook grounding or sensor connections. You should double check all wiring and use a proper conversion harness if possible.
Speedometer errors often appear after the swap. The 4L80E may send different signals compared to the 4L60E. Without proper calibration, your speed readings may become inaccurate. Reprogramming the ECU or using a compatible controller can fix this issue.
Cooling problems can also occur, especially in heavy duty use. If the transmission overheats, it can reduce lifespan quickly. Installing a proper transmission cooler helps maintain safe operating temperatures.
Another issue comes from torque converter installation. If the converter is not seated correctly, it can damage the transmission during startup. Always confirm proper installation before tightening bolts.
Most of these problems can be avoided with proper preparation and attention to detail. Taking extra time during installation will save you from expensive repairs later.
Is the 4L60E to 4L80E Swap Worth It
Deciding whether a 4L60E to 4L80E transmission swap is worth it depends on your goals, budget, and how you use your vehicle. Many drivers hesitate because of cost and complexity, but the long term benefits can outweigh the initial investment.
If you run a stock engine and use your vehicle for daily driving, the 4L60E may still be enough. In this case, upgrading might not bring significant value. You may spend more money without fully using the benefits of the 4L80E.
However, the situation changes when you increase power or demand more from your vehicle. If you have an LS swap, added boost, or frequently tow heavy loads, the 4L60E often becomes a weak point. Repeated failures can cost more over time than a single upgrade.
The 4L80E provides a stronger and more reliable solution. It handles higher torque and performs better under stress. This makes it ideal for performance builds, trucks, and heavy duty applications. Instead of worrying about breakdowns, you gain confidence in your drivetrain.
Cost is still an important factor. The swap requires parts, labor, and time. If your budget is limited, you need to plan carefully before starting. A poorly planned swap can lead to unexpected expenses.
You should also consider your long term plans. If you intend to keep your vehicle and continue upgrading it, the 4L80E becomes a smart investment. It supports future power increases without requiring another major upgrade.
In the end, this swap is worth it for drivers who need strength, durability, and reliability. If your current transmission struggles to keep up, upgrading to a 4L80E can solve that problem and improve overall performance.
Conclusion
The 4L60E to 4L80E transmission swap is one of the most effective upgrades for drivers who need more strength and reliability. While the 4L60E works well for basic driving, it often fails under high torque or heavy load conditions. This limitation pushes many owners to look for a stronger solution.
The 4L80E stands out as a durable and long term upgrade. It handles more power, performs better under stress, and reduces the risk of repeated failures. For performance builds, LS swaps, and towing applications, it offers a clear advantage.
However, this upgrade requires careful planning. You need to understand the cost, prepare all necessary parts, and complete the installation correctly. Skipping steps or ignoring details can lead to problems that increase both time and expense.
If you approach the swap with the right knowledge, the results can be highly rewarding. You gain a more reliable drivetrain, better performance, and peace of mind when pushing your vehicle to its limits.
Before starting your 4L60E to 4L80E transmission swap, take time to evaluate your needs and budget. Choose quality parts, follow the correct process, and ensure proper tuning. A well executed swap will not only improve your vehicle but also save you from future headaches.