A do it yourself ceramic coating can protect your car’s paint when you prepare and apply it correctly. The coating creates a protective layer over the clear coat. It can also improve water beading and make routine cleaning easier. Car owners can apply consumer grade products at home without professional equipment. However, good results depend on careful preparation and proper application.
Start by preparing the paint instead of applying the coating after a basic wash. Road grime, bonded contaminants, and polishing oils can remain on the surface. Swirl marks and scratches can also stay visible under the transparent coating. A proper preparation process removes contamination and creates a clean surface for application. You should also correct visible paint defects when necessary.
Next, apply the ceramic coating in small, controlled sections. Use a thin layer and follow the product’s specified flash time. Then, level the coating with a clean microfiber towel. Careful leveling helps prevent high spots and an uneven finish. Good lighting makes these problems easier to identify before the coating cures.
Finally, follow the manufacturer’s curing instructions before exposing the car to water or washing it. This guide explains each stage of the process. It covers paint preparation, ceramic coating application, curing, common mistakes, durability, and long term maintenance.
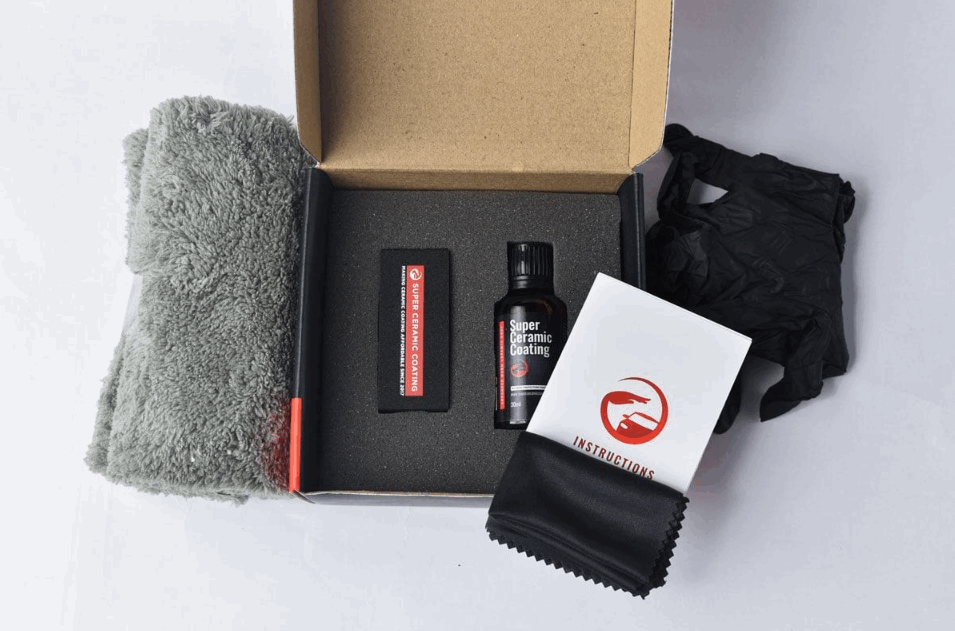
What Is a Do It Yourself Ceramic Coating?
A do it yourself ceramic coating is a liquid paint protection product that you apply to your vehicle at home. The coating covers the automotive clear coat and creates a protective surface. Many consumer ceramic coatings use silicon dioxide, also called SiO₂, as a key part of their formulas.
Ceramic coating changes how the paint surface interacts with water and contamination. A cured coating creates strong hydrophobic properties. Water forms beads and moves across the surface more easily. This behavior can also help reduce the amount of dirt that sticks to the paint. As a result, routine washing can become easier.
Ceramic coating does not replace the clear coat or repair damaged paint. It also cannot remove scratches, stone chips, or swirl marks. The transparent coating follows the existing condition of the paint. For this reason, defects can remain visible after application. Proper paint preparation becomes important when the vehicle has noticeable imperfections.
Ceramic coating also differs from car wax and synthetic paint sealant. Wax creates a temporary protective layer and usually requires more frequent application. Paint sealants use synthetic formulas to provide longer protection than many traditional waxes. Ceramic coatings focus on stronger surface bonding and longer lasting protection. However, actual durability depends on the product, preparation, application, driving conditions, and maintenance.
Can You Apply Ceramic Coating Yourself?
Yes, you can apply a consumer grade ceramic coating yourself if you prepare the paint and follow the product instructions. The application itself does not require professional detailing equipment in every case. However, the condition of the vehicle can make the overall process simple or difficult.
Four factors determine whether DIY application makes sense. First, inspect the paint condition. A vehicle with clean and well maintained paint requires less correction. Deep scratches, oxidation, and extensive swirl marks require more preparation. Ceramic coating will not hide these defects.
Second, consider your detailing experience. Beginners can work with consumer products that provide manageable application times. You still need to apply the coating evenly and level it before it cures. Good lighting helps you identify excess product and high spots.
Third, choose a suitable workspace. A clean and shaded area gives you greater control over the application. Direct sunlight and unsuitable surface temperatures can affect how quickly a product flashes. Always follow the environmental limits specified by its manufacturer.
Finally, allow enough time for preparation and curing. Washing, decontamination, paint correction, and application can require far more time than coating alone. Professional detailing makes more sense when the paint needs extensive correction. It is also a practical choice when you cannot provide suitable working or curing conditions.
What Do You Need to Apply Ceramic Coating Yourself?
You need cleaning products, paint preparation supplies, and coating application tools to apply ceramic coating yourself. Each group supports a different stage of the process. Using the right supplies helps you create a clean surface and apply the coating evenly.
Start with products for washing and decontamination. Use automotive shampoo, a clean wash mitt, and microfiber drying towels for the initial wash. An iron remover can dissolve embedded iron particles when the paint has this type of contamination. A clay bar or clay mitt can remove bonded contaminants that remain after washing. Use clay lubricant to reduce friction during this process.
Next, choose supplies based on the condition of the paint. A vehicle with swirl marks or light defects may need polishing before coating. You may need automotive polish, polishing pads, and a machine polisher for this step. After polishing, use a suitable panel preparation product. It removes oils and residue that could remain on the surface.
Finally, prepare the ceramic coating and application tools. You will need the coating itself, an applicator pad, clean microfiber towels, and suitable gloves. Good lighting also helps you inspect each coated area. It makes excess product and uneven sections easier to see.
You do not need every detailing tool for every vehicle. Inspect the paint first and select products that match its condition. This approach avoids unnecessary work while keeping each preparation stage focused on a clear purpose.
How Should You Prepare a Car for Ceramic Coating?
Prepare a car for ceramic coating by washing, decontaminating, inspecting, correcting, and cleaning the paint before application. Each step removes a problem that could affect the coating or the appearance of the finished surface.
Begin with a thorough wash. Remove loose dirt, road grime, and other surface contamination with automotive shampoo. Rinse the vehicle carefully and dry it with clean microfiber towels. Then inspect the paint for contamination that normal washing did not remove.
Use chemical decontamination when the surface contains embedded iron or similar deposits. Use mechanical decontamination when bonded material still feels attached to the paint. A clay bar or clay mitt can remove these contaminants. However, clay treatment can introduce light marring in some situations. Inspect the surface again after decontamination.
Paint correction comes next when the clear coat has visible defects. Swirl marks, oxidation, and scratches do not disappear when you add a transparent ceramic coating. Correcting suitable defects before application creates a cleaner final appearance.
Finish the preparation with a panel wipe. This step removes polishing oils and other residue from the surface. It also gives you a clean surface for the coating application. Once you complete this stage, avoid touching the prepared paint with bare hands.
Do You Need to Polish a Car Before Ceramic Coating?
You do not need to polish every car before ceramic coating, but you should polish when correctable paint defects affect the desired finish. Polishing can reduce swirl marks, light oxidation, and other suitable clear coat imperfections.
Inspect the paint under good lighting before making this decision. Clean paint with an acceptable finish may not require correction. In contrast, coating visibly damaged paint can preserve the appearance of those defects beneath the transparent layer. Ceramic coating protects the prepared surface. It does not perform the same function as paint correction.
How Do You Apply a Do It Yourself Ceramic Coating?
Apply a do it yourself ceramic coating in small sections, allow it to flash, and level each section before moving forward. Start only after you have cleaned and prepared the paint. The surface should also feel cool enough to meet the product instructions.
Choose a clean and shaded workspace with good lighting. Avoid direct sunlight unless the manufacturer specifically allows outdoor application. Temperature and humidity can affect how a coating behaves. For this reason, always follow the working conditions listed for your specific product.
Add a controlled amount of coating to the applicator. Then spread it across a manageable section of paint. Use overlapping passes to create even coverage across the area. Work systematically so you can track every section that receives coating.
Next, watch the surface for the product’s specified flash behavior. Flash time varies between ceramic coating formulas. Temperature and humidity can also change the working time. Follow the manufacturer’s instructions instead of relying on one universal waiting period.
Level the section with a clean microfiber towel at the correct time. Use another clean towel when necessary to check the finish. Inspect the paint from several angles under good lighting. This inspection helps you find excess product before it becomes difficult to correct.
Continue the same process around the vehicle. Apply, flash, level, and inspect each section before starting the next one. This controlled sequence reduces application errors and creates a more consistent finish.
How Much Ceramic Coating Should You Apply?
Apply enough ceramic coating to cover the surface evenly without leaving excessive product behind. A thicker layer does not automatically create better protection. Excess coating can make leveling harder and increase the risk of an uneven finish.
The correct amount depends on the coating formula, applicator, and size of the working area. Follow the manufacturer’s coverage instructions for the specific product. Add more coating to the applicator when it no longer spreads the product evenly.
How Do You Prevent High Spots When Applying Ceramic Coating?
Prevent ceramic coating high spots by controlling the amount of product, working in small sections, and leveling each area at the correct time. High spots occur when excess coating remains on the surface and begins to cure unevenly.
Good lighting provides one of the simplest ways to identify these areas. Inspect each completed section from different viewing angles before moving forward. Replace saturated microfiber towels when they stop leveling effectively. Correcting excess product during the working period is easier than dealing with it after the coating has cured.
The exact correction method for a cured high spot depends on the coating and its cure stage. Follow the product manufacturer’s correction procedure rather than using one method for every ceramic coating.
How Long Does Ceramic Coating Need to Cure?
Ceramic coating needs enough time to cure before you expose the vehicle to water, washing, or normal environmental conditions. The exact cure time depends on the coating formula. Temperature and humidity can also affect the process. Always follow the manufacturer’s instructions for your specific product.
The curing process starts after you apply and level the coating. During this period, the coating develops its intended surface properties. Initial curing happens first, while full curing can take longer. These two stages do not always have the same time requirement.
Protect the vehicle from water during the initial cure period when the product instructions require it. Rain, sprinklers, and other water sources can contact the paint before the coating reaches the required cure stage. A clean and covered location gives you more control during this period.
You should also avoid washing the vehicle too soon. Do not assume that a coating is ready for washing because the surface feels dry. Follow the waiting period specified by the manufacturer before using shampoo, wash mitts, or other cleaning products.
Curing requirements vary between ceramic coating products. For this reason, one waiting period cannot apply to every coating. Check the instructions for water exposure, first washing, and full curing before application. Planning for these restrictions helps protect the coating during its most important early stage.
What Are the Most Common DIY Ceramic Coating Mistakes?
There are 7 common DIY ceramic coating mistakes that can reduce coating performance or create an uneven finish. Most occur during paint preparation, application, leveling, or early curing.
The first mistake is coating contaminated paint. Dirt and bonded contaminants prevent you from starting with a properly prepared surface. The second is skipping necessary decontamination. Washing can remove loose grime, but it may leave embedded or bonded contamination behind.
The third mistake is coating over paint defects that should receive correction first. Ceramic coating does not remove swirl marks, oxidation, or scratches. The fourth mistake is applying too much product. Excess coating makes leveling more difficult and increases the chance of visible high spots.
The fifth mistake is working on an area that is too large. A large working section can make it harder to control flashing and leveling. The sixth mistake is failing to level the coating correctly. Excess product can remain on the paint and cure into an uneven area.
The seventh mistake is exposing the coating to water or washing it before the required cure stage. Follow the manufacturer’s curing instructions before normal washing or unnecessary water exposure.
You can prevent most of these mistakes with a controlled process. Prepare the paint first, work in manageable sections, inspect each area, and respect the required cure period. This sequence addresses the main causes of DIY application problems instead of trying to correct them after the coating cures.
How Long Does a DIY Ceramic Coating Last?
A DIY ceramic coating can last from several months to several years, depending on the product, preparation, application, environment, and maintenance. Manufacturer durability claims provide a useful reference. However, they do not guarantee the same lifespan on every vehicle.
The coating formula has a direct effect on expected durability. Consumer products use different formulations and application systems. For this reason, compare the stated lifespan of the specific coating rather than applying one estimate to every product.
Surface preparation also affects the result. Clean and properly prepared paint gives the coating a suitable surface for application. Poor preparation can leave oils, residue, or contamination on the paint. These problems can reduce the quality of the finished coating.
Application quality creates another variable. Uneven coverage, missed areas, and incorrect leveling can affect the finished surface. Following the required curing process also matters. Early exposure to water or washing can interfere with products that require protection during their initial cure period.
Driving conditions and maintenance affect durability after curing. Frequent exposure to road grime, mineral deposits, harsh weather, and environmental contamination places more demand on the coated surface. Washing methods also matter. Proper maintenance helps preserve the coating, while abrasive cleaning can shorten its useful life.
Judge coating performance by its actual condition instead of relying only on the original durability claim. Water behavior, surface contamination, cleaning performance, and visual inspection can help you monitor the coating over time.
How Do You Maintain a Ceramic Coated Car?
Maintain a ceramic coated car with regular washing, safe cleaning methods, prompt contaminant removal, and products that suit the coating. Ceramic coating reduces some maintenance demands, but it does not make the vehicle maintenance free.
Wash the car regularly enough to prevent heavy contamination from building up. Use an automotive shampoo that suits the coating and a clean wash mitt. Rinse away loose dirt before making physical contact with the paint. This reduces the chance of dragging abrasive particles across the surface.
Dry the vehicle after washing with clean microfiber towels or another paint safe drying method. Do not rely on water beading alone to keep the surface clean. Water can leave mineral deposits when droplets evaporate on the paint. Removing water before it dries can reduce this problem.
Deal with bird droppings, bug residue, tree sap, and similar contamination promptly. These substances can remain on top of a ceramic coating and affect its appearance. Use a suitable cleaning method instead of aggressive scrubbing.
Inspect the coating during routine washes. Changes in water behavior do not always prove that the coating has failed. Surface contamination can reduce hydrophobic performance. Cleaning or decontamination may restore the expected behavior when contamination causes the problem.
Can You Wax a Ceramic Coated Car?
You can apply some wax products over a ceramic coating, but a properly maintained coating does not automatically need traditional wax. Adding wax can also change the surface behavior of the coating.
Check the coating manufacturer’s maintenance recommendations before adding another protection product. Some systems use dedicated maintenance products or compatible toppers. Following the intended maintenance system gives you a clearer way to preserve the coating without adding unnecessary layers.
Is DIY Ceramic Coating Better Than Professional Ceramic Coating?
DIY ceramic coating is better for reducing installation costs, while professional coating is better when the paint needs skilled correction or application. The right option depends on your budget, paint condition, experience, workspace, and expected finish.
Cost creates one of the clearest differences. DIY installation removes professional labor from the total expense. However, the coating itself is not your only potential cost. You may also need washing supplies, decontamination products, polishing equipment, applicators, and microfiber towels. The savings become greater when you already own these detailing supplies.
Paint condition also affects the decision. A clean vehicle with minor defects can make DIY preparation easier. In contrast, paint with extensive swirl marks, oxidation, or scratches may need correction first. Professional detailers have the equipment and experience to handle more demanding paint correction.
Application skill matters as well. A careful beginner can apply many consumer grade coatings by following the product instructions. However, you must control coverage, flash time, leveling, and curing. Mistakes can leave high spots or an inconsistent finish.
Your workspace can make professional installation more practical. DIY application works best when you have a clean area with suitable lighting and controlled exposure to weather. You also need enough time to complete the preparation and protect the vehicle during curing.
Choose DIY when you have suitable paint, enough preparation time, and a workable application space. Choose professional installation when the paint needs extensive correction or you cannot provide suitable conditions. The best choice is the method that produces the required finish without creating unnecessary cost or application risk.
Is Do It Yourself Ceramic Coating Worth It?
A do it yourself ceramic coating is worth it when you can prepare the paint correctly and follow the required application process. It can reduce installation costs while giving your vehicle a durable layer of paint protection. However, the value of DIY application depends on your vehicle and working conditions.
Start with the condition of the paint. Clean paint with few defects makes the process easier for a beginner. Paint with heavy swirl marks, oxidation, or scratches requires more preparation. You may need paint correction before you apply the coating.
Your skill and available time also matter. Ceramic coating requires controlled application, careful leveling, and proper inspection. You should feel comfortable completing each stage without rushing. You also need enough time for washing, decontamination, correction when necessary, application, and curing.
A suitable workspace gives you greater control over the result. Good lighting helps you identify uneven coverage and high spots. Protection from unsuitable weather also helps during application and curing.
The complete process follows four main stages: preparation, application, curing, and maintenance. Each stage affects the performance and appearance of the coating. Choose DIY when your paint condition, skills, workspace, and expected finish support the process. Choose professional detailing when extensive paint correction or application risk makes professional experience more valuable.