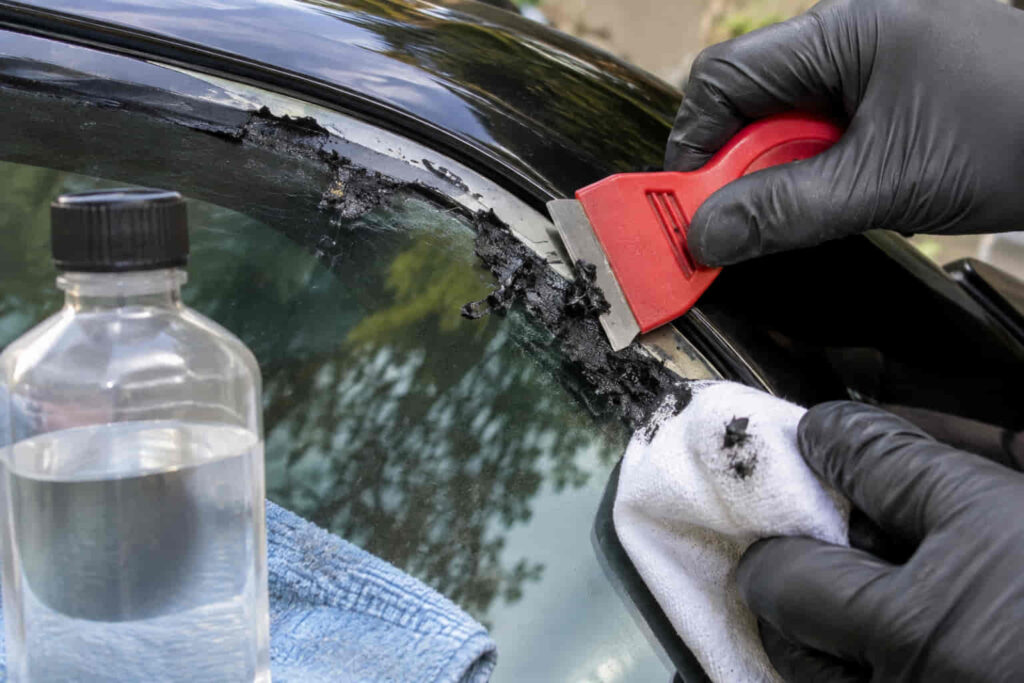
Learning how to remove car window adhesive starts with identifying the adhesive type and the surface it is attached to. Sticker residue, decal glue, and leftover window tint adhesive require different cleaning methods, especially when the glass has a protective coating, aftermarket tint film, or rear defroster lines. For ordinary adhesive residue on uncoated automotive glass, the safest approach is to clean away loose dirt, soften the adhesive with a compatible remover, gently lift the residue using a plastic scraper or microfiber cloth, and finish with an automotive glass cleaner.
Car window adhesive becomes difficult to remove when heat, sunlight, and prolonged exposure cause its bonding agents to harden or spread across the glass. Aggressive scraping and incompatible solvents can create additional problems, including scratched surfaces, damaged window tint, weakened adhesive layers, or broken rear defroster connections. The removal method must therefore match both the adhesive’s properties and the window’s construction.
This guide explains how to remove sticker glue, decal residue, and window tint adhesive from car glass without unnecessary surface damage. It also covers suitable cleaning products, stubborn adhesive removal, safe scraper use, and precautions for tinted windows and rear defroster lines. Structural windshield urethane is addressed separately because removing adhesive that bonds a windshield to the vehicle requires specialized procedures.
How Do You Remove Adhesive From a Car Window Safely?
The safest way to remove adhesive from a car window is to identify the glass surface, soften the adhesive with a compatible cleaning product, gently lift the residue, and clean the glass without damaging its coatings or surrounding components. This method works for common sticker glue and decal residue on bare automotive glass. However, windows with aftermarket tint, rear defroster lines, or specialized coatings require additional precautions because scraping and chemical exposure can damage these surfaces.
Begin by examining the adhesive and determining whether it is attached directly to the glass or to a window tint film. Most aftermarket tint films are installed on the interior surface of the window, while stickers and decals may be attached to either side. Check for visible film edges, defroster lines, printed markings, or protective coatings before selecting a removal method. If the surface is uncertain, avoid metal scrapers and strong solvents until its compatibility has been established. This initial inspection prevents a routine cleaning task from turning into an expensive glass or tint repair.
Clean the surrounding area with an automotive glass cleaner and a soft microfiber cloth to remove dust, sand, and loose particles. Contaminants trapped between the cleaning tool and glass can create scratches when pressure is applied. Next, apply a small amount of adhesive remover approved for the specific surface to a microfiber cloth rather than spraying it directly toward window seals, painted trim, or electrical components. Test the product on a small, inconspicuous area and follow the manufacturer’s instructions for application and contact time. The objective is to soften the adhesive sufficiently for removal without exposing nearby materials to unnecessary chemicals.
Once the adhesive begins to soften, gently work the residue away using a clean microfiber cloth or a plastic scraper designed for automotive detailing. Keep the scraper at a shallow angle and apply controlled pressure instead of forcing its edge against the surface. If the adhesive resists removal, apply the compatible cleaning product again and allow additional time for it to work. Repeated softening is preferable to aggressive scraping because excessive force can damage tint film, coatings, and nearby trim. On verified bare glass, a glass-specific razor scraper may be suitable under controlled conditions, but it should not be used on tinted, coated, or defroster-equipped surfaces.
After removing the visible adhesive, wipe the treated area with a fresh microfiber cloth and an automotive glass cleaner compatible with the surface. Inspect the window from different angles under good lighting because thin adhesive films can remain even when the glass initially appears clean. A sticky or hazy patch indicates that additional residue remains and should be treated again using the same compatible method. Avoid allowing adhesive remover to dry on rubber seals, plastic trim, or painted surfaces, and remove any remaining product according to its instructions.
Successful adhesive removal leaves the window clean, smooth, and free of visible residue without affecting the glass, tint film, or surrounding components. If the adhesive is located on a sensitive surface or cannot be removed without increasing pressure or chemical strength, stop and reassess the material rather than continuing with a potentially damaging method.
What Type of Adhesive Is Stuck to Your Car Window?
Car window adhesive generally falls into four categories: sticker adhesive, decal adhesive, window tint adhesive, and structural windshield urethane. Identifying the correct category determines which cleaning products and removal techniques are appropriate. Although these materials may appear similar when viewed as sticky residue, they differ in chemical composition, bonding strength, location, and intended function. A method suitable for removing a parking sticker may be ineffective or unsafe for adhesive associated with window tint or windshield installation.
Sticker adhesive is commonly left behind after removing parking permits, inspection labels, dealership stickers, or temporary identification decals. These products typically use pressure-sensitive adhesives designed to bond when pressed against a surface. After the sticker is peeled away, part of the adhesive may remain attached to the glass as a thin, tacky layer. Heat and prolonged sunlight exposure can make the residue more difficult to remove by changing its consistency and increasing its resistance to ordinary cleaning. On verified bare glass, compatible adhesive removers and gentle mechanical cleaning are generally effective for this type of residue.
Decal adhesive is associated with decorative graphics, promotional lettering, and other vinyl materials applied to vehicle windows. Unlike small paper stickers, vinyl decals may cover larger areas and leave uneven adhesive deposits after removal. The remaining glue can form patches, streaks, or a continuous film depending on the decal material and how long it has been installed. Aged decals may also separate into brittle fragments, making removal more difficult. The appropriate procedure involves softening the adhesive and lifting it gradually rather than attempting to remove the entire residue layer through forceful scraping.
Window tint adhesive is the bonding layer that attaches automotive tint film to the interior glass surface. When the film is removed, some adhesive may remain on the glass as a cloudy, sticky coating. This residue can cover a substantial portion of the window and may require repeated treatment with products suitable for automotive glass. The main concern is the surface beneath the adhesive. Side windows and rear windows have different features, and rear glass commonly contains electrically conductive defroster lines. Scraping across these lines can damage them and interrupt the heating circuit. Residue on an intact tint film requires a different approach because solvents and scraping tools may damage the film itself.
Windshield urethane is fundamentally different from sticker or tint adhesive. It is a structural bonding material used to secure the windshield to the vehicle’s body opening. The urethane bead forms part of the windshield installation system and contributes to the glass’s retention during vehicle operation and certain collision conditions. It is not intended to be removed using ordinary adhesive removers or detailing scrapers. Cutting or replacing structural urethane requires the appropriate automotive glass procedures, including surface preparation, compatible bonding materials, and specified curing conditions.
The location and appearance of the residue provide useful identification clues. A small sticky patch where a parking permit was removed usually indicates sticker adhesive, while a broad translucent layer left after peeling off tint film suggests window tint adhesive. A thick black bonding bead around the windshield perimeter is more consistent with structural urethane. However, appearance alone cannot confirm chemical composition, especially when previous repairs or aftermarket products are involved.
Correct adhesive identification prevents the use of an unsuitable removal method and reduces the risk of damaging the window. Sticker and decal residue on bare glass can generally be addressed through controlled cleaning, while tint adhesive requires attention to film surfaces and defroster lines. Structural windshield urethane should be handled as part of a specialized automotive glass repair rather than routine adhesive removal.
Read more: how to fix small car dents
What Tools and Products Do You Need to Remove Car Window Adhesive?
Removing car window adhesive safely requires a clean microfiber cloth, a plastic scraper, an automotive glass cleaner, and an adhesive remover compatible with the window surface. These tools work together to soften adhesive residue, separate it from the glass, and remove remaining contaminants without unnecessary abrasion. The appropriate products depend on whether the adhesive is attached to bare automotive glass, aftermarket window tint, or a surface containing protective coatings or electrical defroster lines.
Microfiber cloths are essential because their soft fibers collect loosened adhesive and cleaning residue without the abrasive contact associated with rough household towels. Use separate cloths for applying adhesive remover and cleaning the glass afterward. A cloth saturated with dissolved glue can spread sticky residue across the window instead of removing it. Before wiping, inspect the cloth for trapped grit because sand and other hard particles can scratch glass or damage window film when dragged across the surface.
A plastic scraper provides controlled mechanical removal for softened sticker and decal adhesive. Its edge helps lift residue without the concentrated cutting action of a metal blade. However, plastic scrapers are not completely risk-free. A damaged scraper edge, excessive pressure, or abrasive debris can still mark sensitive coatings and window tint. For this reason, the scraper should be clean, smooth, and used at a shallow angle. Metal razor scrapers should be reserved for situations where the surface has been positively identified as suitable bare glass, and they must never be used on tint film or rear defroster lines.
Automotive adhesive removers dissolve or soften the bonding agents found in certain sticker and decal adhesives. Their effectiveness depends on the adhesive formulation, so a product designed for pressure-sensitive sticker residue may not work on cured sealants or structural windshield urethane. Select a product whose manufacturer specifically permits use on the intended surface. Some adhesive removers contain solvents that can damage window tint, rubber seals, painted trim, or plastic components. Applying the product to a cloth rather than directly onto the window helps control contact with surrounding materials.
Isopropyl alcohol is another option for removing certain light adhesive residues from compatible bare glass. It can help loosen some pressure-sensitive adhesives and remove oily contamination left after cleaning. However, alcohol does not dissolve every adhesive formulation, and its compatibility with aftermarket tint films and specialty coatings should not be assumed. Test the product on a small, inconspicuous area before treating a larger section. Work in a ventilated location, keep alcohol and solvent-based removers away from ignition sources, and never mix cleaning chemicals.
An automotive glass cleaner completes the process by removing residual cleaning products, fingerprints, and streaks. Choose a formulation compatible with the window’s coating or tint film. For tinted windows, follow the film manufacturer’s cleaning recommendations rather than assuming every automotive glass cleaner is suitable. A clean, dry microfiber cloth can then be used to inspect the surface for remaining adhesive.
The correct adhesive removal tools are those that loosen and lift the residue without changing the condition of the underlying window. A microfiber cloth, compatible cleaner, and plastic scraper are appropriate starting points for ordinary adhesive residue. Stronger chemicals or specialized scraping tools should only be considered after the adhesive type and surface compatibility have been established.
How Do You Remove Sticker and Decal Adhesive From Car Glass?
Sticker and decal adhesive can be removed from bare car glass by cleaning the surface, softening the remaining glue, gently lifting the residue, and wiping away the dissolved adhesive with a compatible glass cleaner. This procedure is suitable for common pressure-sensitive adhesive left behind by parking permits, dealership decals, temporary labels, and decorative window graphics. The process works because softening the adhesive reduces its resistance to removal, allowing the residue to separate from the glass without excessive scraping pressure.
Begin by inspecting the window to confirm that the adhesive is attached directly to bare glass rather than window tint film or a specialized coating. Many aftermarket tint films are installed on the interior side of the window, where parking permits and other stickers may also be applied. If the sticker was attached to the tint film, use only products and methods approved by the film manufacturer. Removing the adhesive with an incompatible solvent or scraper can damage the film’s surface or cause it to separate from the glass.
Clean the area surrounding the adhesive using an automotive glass cleaner and a fresh microfiber cloth. This removes dust, sand, and loose debris that could become trapped beneath a scraper. If part of the original sticker remains, gently lift an accessible edge with a fingernail or plastic scraper. Avoid pulling brittle decal material aggressively because it may break into smaller fragments and leave additional adhesive behind. Gradual removal helps preserve control over the process and reduces the amount of residue requiring chemical treatment.
Apply a small amount of compatible adhesive remover to a microfiber cloth and dab it onto the sticky area. Allow the product to remain in contact with the adhesive for the time specified by its manufacturer. During this period, the cleaning agent can penetrate or soften the adhesive layer, making it easier to separate from the glass. Do not allow the product to run into window seals, door trim, or painted surfaces. If the adhesive remains firmly attached, repeat the application rather than immediately increasing scraping pressure.
Once the adhesive has softened, use a clean microfiber cloth or plastic scraper to lift it from the glass. Work from the outer edge toward the center of the residue, using gentle, controlled movements. This approach helps prevent softened glue from spreading across a larger area. Wipe the scraper frequently to remove accumulated adhesive, and replace the cleaning cloth when it becomes saturated. For example, a dealership decal that has remained on a rear side window for several years may require multiple applications because prolonged heat exposure can make its adhesive more resistant to removal.
A glass-specific razor scraper may be appropriate for stubborn residue on verified bare, uncoated glass, but it requires additional precautions. The glass and blade must be clean, the surface must remain suitably lubricated, and the blade should be held at a shallow angle without excessive pressure. Never use a metal blade on aftermarket window tint, rear defroster lines, printed conductive elements, or glass with an incompatible coating. When the glass construction is uncertain, continue with a plastic scraper or seek professional assistance instead of risking permanent damage.
After removing the visible adhesive, clean the treated area with an automotive glass cleaner and a fresh microfiber cloth. Inspect the window from several angles under bright light to identify remaining haze or sticky patches. A thin adhesive film may be difficult to see directly but can become visible as streaking when the glass is wiped. If residue remains, repeat the compatible softening and wiping process until the surface is clean. Finish by removing any cleaning product from nearby seals and trim according to the manufacturer’s instructions.
Sticker adhesive removal is complete when the glass is free of sticky residue, visible haze, and cleaning-product streaks without scratches or damage to surrounding materials. The most important factor is allowing the adhesive remover to work before applying mechanical pressure. Repeated gentle treatment is safer than aggressive scraping, particularly when removing aged decals or adhesive close to window seals and sensitive surfaces.
How Do You Remove Window Tint Adhesive From Car Glass?
The safest way to remove window tint adhesive from car glass is to soften the remaining glue with a glass-compatible adhesive remover, gently wipe away the residue, and clean the surface without damaging defroster lines or other window components. This procedure applies to adhesive left on the glass after aftermarket tint film has been removed. If the tint film is still installed, the cleaning method must follow the film manufacturer’s recommendations because products suitable for bare glass may damage the film itself.
Automotive window tint film is typically bonded to the interior glass surface using a pressure-sensitive adhesive. When the film is removed, the adhesive may separate unevenly, leaving a transparent, cloudy, or sticky layer across the window. The amount of residue depends on the film’s construction, adhesive formulation, age, and removal conditions. Older tint installations can be especially difficult to clean because prolonged exposure to heat and sunlight may change the adhesive’s properties, making it less responsive to ordinary glass cleaners.
Begin by confirming that the tint film has been completely removed and identifying any sensitive components on the exposed glass. Side windows generally provide a simpler cleaning surface than rear windows, which commonly contain printed electrical defroster lines. Some windows also have integrated antennas or other conductive elements. These features must remain intact during adhesive removal. Avoid using metal razor blades on rear defroster lines, and do not assume that a window is safe to scrape simply because the tint film is no longer present.
Apply a compatible adhesive remover to a clean microfiber cloth and gently distribute it over a small section of the remaining glue. Select a product whose manufacturer permits use on the specific glass surface, and protect nearby seals, interior trim, and painted components from contact. Allow the product to work for its recommended contact time. The cleaning agent should soften the adhesive sufficiently for removal without requiring excessive force. If the glue covers an entire side window, working in smaller sections helps maintain control over product application and prevents loosened residue from spreading across the glass.
After the adhesive softens, wipe it away with a fresh microfiber cloth using gentle, controlled movements. On suitable side-window glass without sensitive coatings or conductive elements, a clean plastic scraper may help lift thicker deposits. However, plastic scrapers should not be treated as automatically safe for every surface. They can still damage delicate coatings or printed components if excessive pressure is applied. If the adhesive remains firmly attached, repeat the softening process rather than forcing the scraper beneath the residue.
Rear-window adhesive removal requires additional care because the defroster grid is often printed directly onto the interior glass. These thin conductive lines generate heat when electrical current passes through them, helping clear condensation and frost. Aggressive scraping can remove sections of the conductive material and interrupt the circuit. When cleaning near defroster lines, use a manufacturer-approved product and minimal pressure with a soft cloth. If the adhesive cannot be removed without substantial rubbing or scraping, professional tint removal is the safer option.
Once the visible adhesive has been removed, clean the glass with an automotive glass cleaner compatible with its surface. Use a fresh microfiber cloth to remove dissolved residue and inspect the window under good lighting. Remaining haze may indicate a thin adhesive film that requires additional treatment. Do not reinstall window tint until the glass is clean and any remaining cleaning chemicals have been removed according to the product instructions, since contamination can interfere with the new film’s adhesion.
Window tint adhesive removal is successful when the exposed glass is clean without damage to its coatings, defroster lines, or surrounding components. The correct method depends on the window’s construction rather than adhesive strength alone. Side-window residue may be manageable with controlled cleaning, while extensive adhesive deposits on rear defroster glass warrant a more conservative approach.
How Do You Remove Stubborn Adhesive Residue From Car Windows?
Stubborn adhesive residue should be removed through repeated softening and controlled cleaning rather than stronger scraping pressure or increasingly aggressive solvents. Adhesive becomes difficult to remove when its bonding properties change over time or when the original sticker, decal, or tint film separates from the glue unevenly. The safest treatment is to identify the adhesive and underlying surface, select a compatible remover, allow sufficient contact time, and gradually lift the residue without damaging the window.
One reason car window adhesive becomes resistant to removal is prolonged exposure to sunlight and temperature changes. Vehicle windows experience repeated heating and cooling, particularly when parked outdoors. These conditions can accelerate changes in some pressure-sensitive adhesive formulations, including hardening, oxidation, and reduced flexibility. As the adhesive ages, it may stop behaving like a soft, sticky substance and form a thin, persistent layer that resists ordinary wiping. This explains why fresh sticker residue may come off with a microfiber cloth while an older decal leaves a stubborn film.
Adhesive thickness also affects removal difficulty. A thick deposit may prevent a cleaning agent from reaching the layer closest to the glass, where the bond must be weakened for complete removal. Applying excessive solvent does not necessarily solve this problem and may expose surrounding materials to unnecessary chemicals. Instead, treat a small area with the recommended amount of compatible remover and allow it to work for the manufacturer’s specified time. Gently remove the softened outer layer, then repeat the process on the remaining adhesive. This gradual approach improves access to the underlying residue without requiring aggressive mechanical force.
For stubborn sticker or decal adhesive on verified bare glass, a plastic scraper can help separate softened deposits from the surface. Keep the scraper clean and use a shallow working angle to reduce concentrated pressure. If the residue forms a thin, hardened film, additional softening may be more effective than repeated dry scraping. A metal glass scraper should only be considered when the glass is confirmed to be compatible and free from tint film, sensitive coatings, and printed conductive elements. Never use metal blades on rear defroster lines or assume that all automotive glass surfaces tolerate scraping equally.
Different adhesive formulations also respond differently to cleaning products. Some pressure-sensitive adhesives soften with isopropyl alcohol, while others require a purpose-made automotive adhesive remover. A product that works on sticker residue may have little effect on aged tint adhesive or cured sealant. This difference does not justify using stronger industrial solvents without checking material compatibility. Products such as acetone or lacquer thinner can damage painted trim, plastics, rubber components, and certain coatings. They should not be treated as universal solutions for automotive glass adhesive removal.
When a cleaning product appears ineffective, verify that the residue is actually adhesive rather than another form of surface contamination. Mineral deposits, degraded film remnants, silicone contamination, and damaged coatings can produce haze or patches that resemble leftover glue. Adhesive residue generally has a tacky or drag-producing feel when contacted with a clean cloth, while mineral deposits may appear as hard, cloudy marks. However, appearance and texture are not definitive diagnostic tests. If repeated treatment with an appropriate adhesive remover produces no improvement, reassess the material instead of continuing to scrub.
The removal process should stop when additional treatment creates a greater risk of surface damage than the remaining adhesive itself. Warning signs include increasing resistance to scraping, visible coating changes, disturbed tint edges, or damage to printed rear-window elements. A professional automotive glass or window tint specialist can evaluate whether the residue requires specialized products or whether the underlying surface has already been affected.
The key to removing stubborn car window adhesive is controlled repetition, not increased force. Softening and lifting the residue in stages reduces unnecessary abrasion and chemical exposure. When the adhesive cannot be removed using products compatible with the window, professional treatment is preferable to risking permanent damage.
How Do You Clean Car Glass After Removing Adhesive?
The best way to clean car glass after removing adhesive is to eliminate the remaining glue, remove traces of adhesive remover, and finish with a glass cleaner compatible with the window surface. Removing the visible adhesive does not always leave the glass completely clean. Thin layers of dissolved glue, oily solvent residue, and loosened contaminants can remain on the surface, creating streaks, haze, or sticky patches. A separate cleaning stage restores clarity and helps confirm that the adhesive removal process is complete.
Begin by wiping the treated area with a fresh microfiber cloth to collect loosened adhesive and excess cleaning product. Do not reuse a cloth heavily contaminated with glue because the residue can transfer back onto the glass. When adhesive remover has been applied near rubber seals, painted trim, or plastic components, remove any product that contacted those materials according to the manufacturer’s instructions. This prevents unnecessary chemical exposure and reduces the possibility of residue collecting along window edges.
Next, apply an automotive glass cleaner approved for the specific surface. For bare glass, a suitable glass cleaner removes fingerprints, light oils, and residual contamination left by the adhesive removal process. For windows with aftermarket tint, select a product recommended by the tint manufacturer. A cleaner suitable for exterior glass should not automatically be considered safe for interior tint film or specialized coatings. Apply the cleaner to a microfiber cloth when working near electrical components, window seals, or interior trim to minimize overspray.
Wipe the glass using overlapping movements that cover the entire treated area. A clean microfiber cloth absorbs the loosened contamination, while a separate dry cloth can remove remaining moisture and reduce streaking. Avoid pressing aggressively against rear defroster lines or other printed conductive elements. These components are bonded to the glass surface and can be damaged by excessive rubbing, scraping, or abrasive cleaning materials.
Inspect the window from multiple angles under natural light or a bright inspection lamp. Adhesive residue can be difficult to detect when viewed directly but may become visible as cloudy patches when light passes across the surface. A sticky area that continues to attract lint generally indicates remaining contamination. If the residue is still present, repeat the adhesive removal treatment using a compatible product rather than attempting to eliminate it through stronger polishing pressure.
It is also important to distinguish leftover adhesive from other forms of glass contamination. Water spots, mineral deposits, damaged tint film, and degraded surface coatings can create marks that resemble adhesive haze. These problems require different treatment methods. For example, a cloudy area that remains unchanged after repeated applications of a suitable adhesive remover may not be glue at all. Continuing to apply solvents without identifying the contamination can increase the risk of surface damage without improving visibility.
Car glass is properly cleaned after adhesive removal when the treated area is free of sticky residue, visible haze, cleaning-product deposits, and streaks. The final inspection should also confirm that nearby seals, trim, tint film, and defroster lines remain undamaged. This finishing process restores a clear surface and prepares the glass for normal use or a compatible new window film installation.
Can You Use Rubbing Alcohol to Remove Car Window Adhesive?
Yes, rubbing alcohol can remove certain types of car window adhesive, particularly light sticker residue and some pressure-sensitive glues on compatible bare glass. Isopropyl alcohol works as a solvent for specific adhesive components and can help loosen sticky deposits that resist ordinary glass cleaner. However, its effectiveness depends on the adhesive formulation, and it should not be treated as a universal remover for window tint glue, cured sealants, or structural windshield urethane.
Rubbing alcohol contains isopropyl alcohol mixed with water, with common consumer formulations containing 70% or 91% isopropyl alcohol. These concentrations differ in solvent strength, water content, and evaporation behavior. A higher concentration does not automatically provide better adhesive removal because the result depends on the glue’s chemical composition and the time the solvent remains in contact with it. Some adhesive residues soften after brief exposure, while others show little response regardless of alcohol concentration.
Before applying rubbing alcohol, confirm that the adhesive is attached to a surface compatible with the product. Bare automotive glass generally tolerates limited contact with isopropyl alcohol, but aftermarket window tint, specialty coatings, and nearby plastic or painted components may have different chemical resistance. Follow the surface manufacturer’s recommendations and test the product on a small, inconspicuous area. Do not apply alcohol to an unknown coating or tint film simply because it is safe for ordinary glass.
To treat a small adhesive patch on compatible bare glass, apply a modest amount of rubbing alcohol to a clean microfiber cloth and gently dab the residue. Allow brief contact while following the product’s handling instructions, then wipe the softened adhesive away using controlled pressure. If the residue remains, repeat the treatment rather than saturating the entire window. For thicker deposits, a plastic scraper may assist with removal after the adhesive has softened, provided the underlying surface is suitable for scraping.
For example, a parking permit removed from an untreated side window may leave a thin layer of pressure-sensitive adhesive. Rubbing alcohol may loosen this residue sufficiently for removal with a microfiber cloth. In contrast, adhesive left across an entire rear window after tint removal may require a different product and a more cautious procedure because the glass contains defroster lines. The same solvent should not be assumed appropriate for both situations.
Isopropyl alcohol is flammable, and its vapors can create a fire hazard near ignition sources. Use it in a well-ventilated area, keep it away from flames, sparks, and hot equipment, and follow the product label. Avoid mixing alcohol with other cleaning chemicals. Apply it to a cloth instead of spraying it freely inside the vehicle, where liquid may contact electrical switches, interior trim, or other sensitive materials.
After removing the adhesive, clean the treated glass with a compatible automotive glass cleaner and a fresh microfiber cloth. This removes remaining contamination and helps reveal whether the residue has been completely eliminated. If repeated alcohol treatment produces little improvement, switch only to an adhesive remover confirmed to be compatible with the surface rather than using increasingly aggressive solvents.
Rubbing alcohol is a useful option for light adhesive residue on compatible bare car glass, but it is not the correct solution for every automotive window. Its suitability depends on the adhesive type, glass coating, tint condition, and nearby materials. Confirming those conditions before application is more important than selecting the strongest available alcohol concentration.
Can You Use a Razor Blade to Remove Adhesive From Car Glass?
A razor blade can remove stubborn adhesive from certain bare automotive glass surfaces, but it should never be used on window tint film, rear defroster lines, or glass with coatings that are not approved for blade scraping. A metal blade removes adhesive through mechanical separation rather than chemical dissolution. Although this method can be effective for hardened sticker residue, improper use can permanently scratch the glass, damage printed components, or remove protective surface treatments.
The main advantage of a razor scraper is its ability to separate a thin adhesive layer from a smooth glass surface. When a blade is held at a shallow angle, its edge can slide beneath softened residue and lift it away. However, the blade also concentrates pressure along a narrow contact area. If sand, hardened debris, or other abrasive particles become trapped beneath the edge, they can scratch the surface. A damaged or uneven blade creates additional risk because its corners may dig into the glass instead of moving smoothly across it.
Before considering a razor blade, confirm that the window is bare glass and that its manufacturer permits this cleaning method. Automotive windows can contain aftermarket tint, factory-applied coatings, printed ceramic borders, antenna elements, and defroster circuits. These features are not always obvious during a quick inspection. In particular, a rear window with exposed defroster lines should not be scraped with a metal blade because the conductive material can be cut or detached from the glass.
For suitable bare glass, begin by removing loose dirt with a compatible glass cleaner and microfiber cloth. Apply an approved adhesive remover and allow it to soften the residue according to the product instructions. If blade scraping is permitted for that specific surface, use a clean, undamaged glass scraper at a shallow angle with appropriate lubrication. Move the blade carefully across the softened adhesive without excessive pressure. Stop immediately if the blade catches, skips, or encounters unexpected resistance.
A razor blade should not be used as the first response to adhesive that resists removal. For example, an old parking sticker may leave a hardened patch on an untreated side window. Repeated applications of a compatible adhesive remover may soften the residue enough for removal with a plastic scraper, eliminating the need for a metal blade. If the adhesive remains attached, the decision to use a razor should depend on confirmed glass compatibility rather than the amount of force required.
Razor blades are especially unsuitable for removing adhesive from aftermarket window tint. Tint film is a thin polymer layer bonded to the interior glass surface, and a sharp metal edge can cut through it even with light pressure. The same restriction applies to exposed rear defroster lines, which rely on continuous conductive paths to generate heat. Damage to these components can create permanent marks or electrical interruptions that require specialized repair.
A razor blade is an optional tool for verified, compatible bare glass, not a universal solution for car window adhesive removal. When the window contains tint film, sensitive coatings, or conductive elements, use an approved nonabrasive method instead. If the surface construction cannot be confirmed, avoiding metal scraping is the safest decision.
How Do You Remove Adhesive Without Damaging Window Tint?
Removing adhesive from a tinted car window requires a cleaning method approved for the tint film, minimal mechanical pressure, and careful control of chemical exposure. Unlike bare automotive glass, aftermarket window tint consists of thin polymer layers that can be scratched, discolored, separated, or chemically damaged. The correct procedure depends on whether the unwanted adhesive is sitting on top of an intact tint film or remains on the glass after the film has been removed.
When sticker glue is attached directly to an intact tint film, the film itself becomes the surface that must be protected. This situation commonly occurs when a parking permit, temporary label, or other sticker is applied to the inside of a tinted window. Removing the sticker may leave adhesive on the film’s exposed surface. Because the tint is considerably more vulnerable to scratching than bare glass, metal razor blades, abrasive pads, and aggressive scraping should be avoided.
Start by checking the tint manufacturer’s cleaning recommendations. Use a soft, clean microfiber cloth and a cleaning product explicitly approved for the film. Apply a small amount of the product to the cloth and gently work on the adhesive without saturating the window. If the residue does not soften, do not automatically switch to rubbing alcohol, acetone, or a stronger adhesive remover. Chemical compatibility varies among tint products, and a solvent that is harmless to bare glass may damage the film’s protective layers or affect its appearance.
Mechanical pressure is another important consideration. A plastic scraper may appear safer than a metal blade, but its edge can still scratch or lift tint film, particularly near existing cuts, bubbles, or peeling edges. For this reason, gentle wiping with a microfiber cloth is preferable when treating adhesive on an intact film. Avoid picking at the residue with fingernails or sharp objects, as concentrated pressure can leave permanent marks or initiate film separation.
For example, a parking permit attached to an aftermarket-tinted side window may leave a small adhesive patch after removal. A tint-approved cleaner and soft microfiber cloth may remove the residue without affecting the film. However, if the adhesive has bonded strongly to the film or the sticker has damaged its surface, complete removal may not be possible without visible changes. Continuing to rub aggressively can create a larger damaged area than the original adhesive patch.
The cleaning approach changes when the tint film has already been removed and only adhesive remains on the glass. In that situation, the exposed glass becomes the primary cleaning surface, although its coatings and printed components still need protection. On a suitable side window, a compatible adhesive remover may be used to soften the remaining glue. Rear windows require additional caution because defroster lines and integrated antenna elements may be exposed. Removing tint film does not eliminate the risk of damaging these components.
Heat should also be used cautiously around window tint. Excessive temperatures can affect film layers, adhesives, and nearby interior materials. Although controlled heat is used in some professional tint removal procedures, an uncontrolled heat gun can overheat the film or surrounding components. Do not apply concentrated heat to an installed tint film unless the procedure is specifically supported by the film manufacturer.
After treating the adhesive, gently clean the surface with a tint-compatible product and inspect it under natural light. Look for scratches, cloudy patches, discoloration, lifted edges, or new bubbles. These changes can indicate film damage rather than remaining adhesive. If the residue cannot be removed using approved cleaning methods, a professional window tint installer can determine whether the film can be preserved or requires replacement.
The safest way to remove adhesive without damaging window tint is to prioritize film compatibility over adhesive removal speed. Approved cleaning products, soft microfiber cloths, and minimal pressure reduce the risk of damage. When adhesive is firmly bonded to the film, professional evaluation is preferable to using aggressive solvents or scraping tools.
How Do You Protect Rear Window Defroster Lines When Removing Adhesive?
The safest way to protect rear window defroster lines during adhesive removal is to avoid scraping the conductive grid, use a cleaning product compatible with the glass and printed electrical components, and remove softened residue with minimal pressure. Rear defroster lines are more vulnerable to mechanical damage than ordinary glass because they contain thin conductive material bonded to the interior surface. Removing adhesive without identifying these components can interrupt the defroster circuit and reduce the window’s ability to clear condensation or frost.
Most rear window defroster systems use a series of horizontal conductive lines connected to electrical terminals near the sides of the glass. When the system is activated, electrical current passes through the grid and generates heat through electrical resistance. This heat helps remove moisture and frost from the rear window. Each conductive path must remain sufficiently intact to operate correctly. Scratching, cutting, or removing part of a line can create an electrical break that prevents the affected section from heating.
Adhesive removal becomes particularly challenging when old window tint film has been removed from the rear glass. The tint adhesive may remain directly over the defroster grid, forming a sticky layer that is difficult to clean without touching the conductive lines. Unlike ordinary sticker residue on an untreated side window, this adhesive cannot be approached with aggressive scraping. A metal razor blade can cut through the conductive material, while excessive rubbing with a plastic scraper or abrasive cloth can also damage the grid.
Before cleaning, inspect the rear window from inside the vehicle and identify the location of the defroster lines, electrical connections, and any integrated antenna elements. Turn off the rear defroster and allow the glass to return to a comfortable working temperature. Remove loose dirt using a clean microfiber cloth without pressing heavily against the printed grid. If the adhesive covers a large area, work on a small section first to confirm that the selected cleaning method does not disturb the conductive material.
Choose an adhesive remover whose manufacturer confirms compatibility with the relevant surface and components. Apply a controlled amount to a microfiber cloth rather than spraying liquid across the rear window. This reduces the chance of cleaning chemicals reaching electrical connections, interior trim, or window seals. Allow the product to soften the adhesive according to its instructions, then gently lift the loosened residue with the cloth. Avoid concentrated rubbing directly across individual defroster lines, especially when the adhesive remains firmly attached.
For example, removing deteriorated tint film from a rear windshield may leave a cloudy adhesive layer over several horizontal defroster lines. Attempting to scrape the entire area with a razor blade can damage multiple conductive paths in a single cleaning session. A safer approach is to treat small sections with a compatible product and remove the softened residue gradually. If the adhesive cannot be lifted without significant pressure, stop and consult a professional window tint or automotive glass specialist.
After cleaning, inspect the defroster grid for visible scratches, missing conductive sections, or disturbed electrical connections. A visually intact grid does not guarantee electrical continuity, but visible damage is a reason to avoid further mechanical cleaning. If the rear defroster later develops a section that does not clear condensation or frost, the grid may require electrical testing. Some localized breaks can be repaired using specialized conductive repair materials, while more extensive damage may require professional assessment.
Protecting rear defroster lines is more important than removing every trace of adhesive in a single treatment. Gentle cleaning, verified chemical compatibility, and repeated softening reduce the likelihood of damaging the conductive grid. When residue is strongly bonded to the printed lines, professional removal is preferable to aggressive scraping or prolonged rubbing.
Can You Remove Windshield Urethane Adhesive Yourself?
Structural windshield urethane should not be removed as a routine DIY adhesive-cleaning task because it forms part of the system that secures the windshield to the vehicle. Unlike sticker glue, decal residue, or window tint adhesive, automotive windshield urethane is a structural bonding material. Removing or replacing it incorrectly can compromise windshield retention, create water leaks, and interfere with vehicle safety systems that depend on proper glass installation.
Windshield urethane is typically applied as a continuous adhesive bead between the windshield and the vehicle’s prepared body opening. Once cured, the material forms a strong, flexible bond designed to withstand vibration, temperature changes, and forces encountered during vehicle operation. The windshield installation also contributes to the vehicle’s designed occupant-protection system. For this reason, the adhesive’s composition, bead geometry, bonding surfaces, and curing requirements are controlled parts of the installation process rather than ordinary detailing considerations.
A common source of confusion is the difference between removing excess urethane from an exposed surface and removing the structural adhesive bead during windshield replacement. A small amount of cured sealant visible outside the intended bond area may be a cosmetic issue, but the material’s location must be confirmed before attempting removal. Urethane at the windshield perimeter may be part of the active bond or sealing system. Cutting into that area without understanding the installation can damage the adhesive joint, surrounding paint, or glass.
Professional windshield replacement commonly involves specialized cutting tools, inspection of the vehicle’s bonding flange, preparation of the bonding surfaces, and application of an approved automotive glazing system. The procedure must follow the vehicle manufacturer’s requirements and the adhesive manufacturer’s instructions. These requirements can include compatible primers, surface preparation methods, adhesive application conditions, and a specified minimum safe drive-away time. That time depends on the particular adhesive system and environmental conditions; it should not be estimated from appearance or assumed to be the same for every installation.
Improper removal can also damage the painted metal surrounding the windshield. If cutting tools expose bare metal or damage protective coatings, corrosion may develop beneath the adhesive joint. Corrosion can interfere with future bonding and create additional repair requirements. Applying new urethane over contaminated, damaged, or improperly prepared surfaces can prevent the adhesive from achieving the performance required by its manufacturer.
Modern vehicles introduce another consideration because many windshields support cameras, sensors, or other advanced driver assistance system components. Windshield replacement may require inspection, calibration, or other manufacturer-specified procedures to restore proper system operation. Adhesive removal and glass installation should therefore be considered part of the complete windshield replacement process, not isolated cleaning steps.
For example, a driver who notices a thick black adhesive bead along the edge of a recently replaced windshield should not attempt to trim it with a utility knife. The visible material may be connected to the structural bond, and cutting it could affect the installation. The appropriate response is to have the installer inspect the area and determine whether any cosmetic correction is safe.
DIY cleaning methods are appropriate for compatible surface adhesive residue, not for removing the structural urethane that bonds a windshield to the vehicle. If the adhesive is part of the windshield installation, a qualified automotive glass technician should evaluate and perform the work using the specified materials and procedures.
When Should You Get Professional Help Removing Car Window Adhesive?
You should seek professional help removing car window adhesive when the residue cannot be removed with surface-compatible cleaning methods, when the glass contains sensitive components, or when further treatment could cause permanent damage. Ordinary sticker and decal adhesive on bare automotive glass can generally be handled with appropriate cleaning products and controlled wiping. However, adhesive bonded to rear defroster lines, damaged window tint, specialized glass coatings, or structural windshield components requires a different level of care.
Persistent adhesive on rear windows is one of the clearest reasons to consult a professional. Rear defroster lines and integrated antenna elements are often printed directly onto the interior glass surface. If old tint adhesive covers these components, aggressive scraping can remove conductive material and interrupt electrical continuity. A qualified window tint specialist can assess the adhesive and determine whether it can be removed without damaging the grid. Professional assistance is particularly appropriate when the residue covers a large area or remains firmly attached after gentle treatment.
Window tint damage also changes the appropriate removal strategy. If adhesive is attached to an intact tint film and cannot be removed using manufacturer-approved products, continued rubbing or solvent application may cause scratches, discoloration, bubbling, or peeling. In these cases, a professional installer can evaluate whether the film can be cleaned or whether replacement is necessary. Attempting to preserve severely damaged tint through aggressive cleaning may increase the final repair cost.
Specialized automotive glass coatings create another situation where professional evaluation is advisable. Some windows have surface treatments or printed components that are not compatible with ordinary scraping tools or chemical removers. If the glass manufacturer does not confirm compatibility with a proposed cleaning method, the safer choice is to avoid experimenting with stronger products. A professional automotive glass technician can help identify the surface and recommend an appropriate treatment.
Structural windshield urethane requires professional handling because it is part of the windshield bonding system. Adhesive located around the windshield perimeter should not be cut or removed without determining whether it contributes to the structural joint. Incorrect removal can damage the bonding surface, compromise the seal, or interfere with the windshield installation. A qualified automotive glass technician should inspect these situations and follow the applicable vehicle and adhesive manufacturer procedures.
Professional help is also appropriate when repeated cleaning fails to improve the affected area. Persistent haze may result from degraded window film, mineral deposits, damaged coatings, or another form of contamination rather than adhesive residue. Continuing to apply solvents without identifying the material can create additional damage. A professional inspection helps distinguish removable contamination from surface deterioration that requires a different solution.
The decision to seek professional adhesive removal should be based on surface sensitivity, adhesive location, and the risk of damage rather than the size of the residue alone. A small adhesive patch on a defroster line may require greater caution than a large sticker mark on untreated side glass. When safe cleaning methods are ineffective or the window’s construction is uncertain, professional assessment protects the glass and its associated components from unnecessary damage.