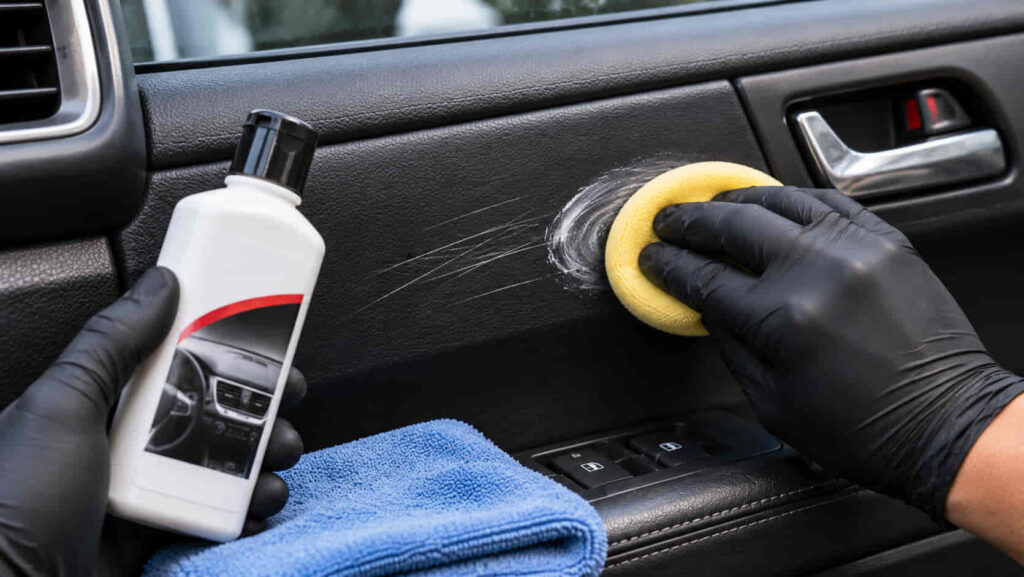
How to Remove Scratches From a Car Interior Safely
Removing scratches from a car interior starts with identifying the surface material and the depth of the damage. Light scuff marks on plastic trim may be transferred residue that comes off with a suitable interior cleaner and a microfiber cloth. Shallow scratches on certain smooth finishes can be reduced with a compatible polish, while deep gouges, damaged coatings, and torn leather generally require surface repair rather than simple cleaning. No single method safely removes every type of car interior scratch.
Car interiors contain several materials, including textured plastic, soft-touch dashboards, glossy piano black trim, vinyl door panels, and leather upholstery. Each material responds differently to cleaning products, abrasive compounds, and heat. For example, polishing may reduce fine scratches on compatible glossy trim but permanently damage the grain pattern of textured plastic. Using an unsuitable repair method can also cause discoloration, uneven finishes, or additional surface damage.
Effective interior scratch removal requires matching the repair technique to the affected material and the severity of the scratch. This guide explains how to identify different types of interior scratches, remove superficial marks, repair deeper damage, and restore commonly affected surfaces such as dashboards, door panels, center consoles, and leather seats. It also covers repair methods to avoid and practical ways to prevent future scratches.
Can You Remove Scratches From a Car Interior?
Yes, scratches on a car interior can be removed, reduced, or repaired depending on their depth and the material of the affected surface. Light scuff marks caused by transferred rubber, dirt, or other surface deposits can often be removed with an appropriate interior cleaner and a microfiber cloth. Shallow scratches on certain smooth plastic finishes may respond to polishing, while deep gouges that remove material generally require filling, refinishing, or component replacement. Identifying the type of damage is essential because cleaning products cannot restore plastic, leather, or surface coatings that have been physically removed.
The effectiveness of scratch removal varies across interior materials. Hard plastic door panels and center console trim may develop visible abrasions from shoes, keys, and everyday contact. Smooth, glossy surfaces can sometimes be polished to reduce fine scratches, provided their protective coatings are compatible with the treatment. Textured plastics require a different approach because abrasive polishing removes part of the molded surface grain and can create permanent glossy patches. Similarly, scratches on leather upholstery may involve damage to the protective color coating rather than the leather itself, requiring specialized restoration products.
Car interior scratch removers and trim restorers also serve different purposes. Some products temporarily improve the appearance of light scratches by altering surface reflectivity or restoring a darker finish, but they do not eliminate grooves or replace missing material. For example, a white shoe scuff on a black plastic door panel may disappear after cleaning, while a deep scratch exposing lighter plastic underneath will remain visible without further repair. The correct method depends on whether the damage is surface contamination, a shallow abrasion, or permanent material loss.
How Do You Tell if a Car Interior Scratch Is Deep?
To determine whether a car interior scratch is deep, clean the affected surface, inspect the mark under good lighting, and check whether it forms a noticeable groove or exposes underlying material. Light scratches generally affect the outer finish without creating significant surface deformation, whereas deeper scratches penetrate the coating or remove part of the plastic, vinyl, or leather. Assessing the damage before applying repair products prevents unnecessary abrasion and reduces the risk of making the affected area more visible.
Begin by wiping the damaged area with a clean microfiber cloth and a mild interior cleaner approved for the surface. This removes dust, oils, and transferred material that may resemble scratches. Inspect the cleaned area from different angles using indirect lighting. A mark that disappears after cleaning was likely surface contamination rather than a permanent scratch. A line that remains visible, changes the surface texture, or reveals a different underlying color indicates physical damage that cleaning alone cannot remove.
A gentle fingernail test can provide additional information about scratch depth. Move a clean fingernail lightly across the mark without applying pressure. If the nail moves smoothly across the surface, the scratch may be confined to the upper finish. If the nail catches in a groove, the damage likely extends deeper into the material or coating. However, this test is only an approximate assessment because raised edges, textured plastic, and damaged coatings can also catch a fingernail without indicating the exact depth.
The surrounding surface finish must also be considered when evaluating the damage. A shallow scratch on glossy piano black trim may appear highly visible because it interrupts the reflection of light, while a deeper abrasion on textured plastic may blend into the original grain pattern. For example, a fine line on a center console may be suitable for careful correction if the finish permits polishing, whereas a gouge on a door panel that cuts through the molded texture requires a different repair process. Scratch depth, material type, and surface finish together determine whether cleaning, polishing, or structural repair is appropriate.
Read more: how to rid spiders from car
What Tools Do You Need to Remove Paint Transfer From a Car?
Removing paint transfer from a car requires automotive shampoo, clean microfiber towels, a soft applicator, and a paint-safe removal product suited to the severity of the mark. These materials help clean the affected surface and remove foreign paint while minimizing unnecessary abrasion. For light surface contamination, automotive shampoo and a microfiber wash mitt provide the initial cleaning treatment. More persistent marks may require detailing clay, a dedicated scratch remover, or a suitable polishing compound. The appropriate product depends on the condition of the original paint and whether the transferred material is bonded to the clear coat.
A clean microfiber towel is essential because its soft fibers collect dirt and product residue without the aggressive abrasion associated with rough cleaning materials. A foam applicator distributes polishing products across a controlled working area, while detailing clay requires a compatible lubricant to glide across the paint. Clay treatment removes certain bonded contaminants from the surface, whereas scratch removers and polishing compounds use controlled abrasion to correct suitable paint defects. For example, a raised deposit may respond to lubricated clay treatment, while a stubborn scuff on intact glossy clear coat may require a mild polishing product.
Product compatibility is equally important. Conventional glossy clear coat, matte finishes, and paint protection film have different maintenance requirements. Abrasive compounds intended for standard glossy automotive paint may damage matte surfaces or certain protective films. Car owners should check manufacturer instructions, use clean applicators, and test the selected product on a small inconspicuous area before treating the entire mark.
Can Car Wash Soap Remove Light Paint Transfer?
Car wash soap can remove loose surface residue associated with paint transfer, but it generally cannot remove firmly bonded paint deposits or repair scratches in the clear coat. Automotive shampoo is designed to lift dirt, road grime, and other washable contaminants while providing lubrication during cleaning. Unlike scratch removers and polishing compounds, ordinary car wash soap does not intentionally abrade the paint surface. Its primary role is to prepare the affected area for inspection and determine whether additional correction is necessary.
To clean light paint transfer, rinse the affected panel with water and apply a properly diluted automotive shampoo using a clean microfiber wash mitt. Gently wash the marked area without concentrating excessive pressure on the scuff, then rinse thoroughly and dry it with a soft microfiber towel. Inspect the surface under adequate lighting to determine whether the visible deposit has disappeared, become less noticeable, or remained unchanged. For example, loose colored residue left after contact with a painted object may wash away, while a firmly adhered streak of transferred paint will generally remain.
If the mark persists after a thorough wash, repeated scrubbing with shampoo is unlikely to provide a safer or more effective solution. Excessive friction can introduce fine scratches, particularly when dirt particles remain between the cleaning material and the paint. A suitable detailing clay or automotive scratch remover may be necessary after assessing the remaining deposit. Washing should therefore be treated as the first stage of safe paint transfer removal rather than a guaranteed solution for every type of surface mark.
Can a Clay Bar Remove Paint Transfer From Car Paint?
A clay bar can remove certain types of paint transfer from a car when the transferred material remains bonded to the surface rather than embedded in or mixed with the original paint. Automotive detailing clay is designed to lift above-surface contaminants, including paint overspray, industrial fallout, and other deposits that ordinary washing cannot remove. However, it cannot repair scratches or restore damaged clear coat. Its effectiveness depends on the thickness, adhesion, and condition of the transferred material. For example, fine paint overspray from a nearby painting project may respond to clay treatment, while a heavy scuff caused by scraping against another vehicle may require a dedicated scratch remover.
To use a clay bar for paint transfer removal, thoroughly wash and dry the affected panel before applying a compatible clay lubricant. Flatten a clean piece of detailing clay into a small pad and gently move it across the lubricated surface using light, controlled motions. The lubricant reduces friction between the clay and clear coat, allowing the material to collect bonded contaminants without unnecessary dragging. Meguiar’s Smooth Surface Clay Kit, for example, combines detailing clay with a lubricating spray specifically designed for removing surface contaminants. The clay should glide smoothly across the treated area, and the surface must remain adequately lubricated throughout the process.
Inspect the paint after several gentle passes to determine whether the transferred material is disappearing. Fold the clay to expose a clean surface as it accumulates contamination, and discard it if it falls onto the ground or collects abrasive debris. Continued rubbing with contaminated clay can introduce fine scratches or surface marring. If the paint transfer remains firmly attached after appropriate clay treatment, stop rather than increasing pressure. A clear-coat-safe scratch remover may be more suitable for persistent marks on an otherwise intact glossy finish.
How Do You Use a Scratch Remover to Remove Paint Transfer?
To remove paint transfer with a scratch remover, apply a small amount of clear-coat-safe automotive scratch remover to a clean foam applicator and work it gently over the affected area. Scratch removers containing fine abrasives can eliminate certain transferred paint marks and minor surface defects through controlled polishing. Unlike detailing clay, which primarily removes bonded surface contamination, an abrasive scratch remover works by refining the outer paint surface. This makes it appropriate for certain stubborn scuffs, provided the original clear coat remains intact and the product is compatible with the vehicle’s finish.
Begin with a clean, dry, cool painted surface and choose a scratch remover formulated for glossy automotive paint. Meguiar’s ScratchX 2.0, for example, uses micro-abrasive technology designed to correct light scratches, parking scuffs, and paint transfer. Apply a small quantity to a clean foam applicator and work it into a limited section using even pressure and controlled overlapping motions, following the product’s instructions. Avoid concentrating pressure through the fingertips or repeatedly rubbing one spot, as uneven abrasion can create localized paint defects. Keep the product away from incompatible rubber, vinyl, and unpainted trim surfaces.
After working the product into the affected area, remove the remaining residue with a clean microfiber towel and inspect the paint under adequate lighting. Successful correction should reduce or eliminate the foreign paint without producing noticeable haze, discoloration, or additional scratches. If the transferred material has partially disappeared, another limited application may be appropriate when permitted by the product instructions and the finish remains sound. However, repeated aggressive polishing can progressively reduce clear-coat thickness. Stop if the original paint appears damaged or if further correction would require excessive abrasion.
Once the paint transfer is removed, inspect the treated section for remaining defects and determine whether additional finishing is necessary. Some scratch removers leave a satisfactory gloss, while others may require a separate finishing polish to restore consistent surface clarity. A compatible wax or paint sealant can then be applied when appropriate to maintain protection. Scratch removers do not replace missing paint, so defects extending through the clear coat into the color coat or primer require another repair method rather than continued polishing.
When Should You Use Rubbing Compound to Remove Paint Transfer?
Rubbing compound should be used to remove stubborn paint transfer when washing, clay treatment, and mild scratch removers cannot eliminate the marks from an otherwise intact clear coat. Automotive rubbing compounds contain abrasives designed to correct surface defects by removing a controlled amount of the outer paint layer. They are more aggressive than many finishing polishes, making them suitable for certain persistent paint scuffs, oxidation, and light-to-moderate clear coat imperfections. However, rubbing compound cannot restore missing paint or repair scratches that penetrate the clear coat. Its effectiveness depends on the severity of the damage, the product’s abrasive strength, and the condition of the original finish.
Before applying rubbing compound, wash and dry the affected area to eliminate dirt that could scratch the paint during correction. Choose a compound specifically formulated for automotive clear coats and test it on a small, inconspicuous section. Turtle Wax Rubbing Compound, for example, is designed to remove paint transfer, scratches, and oxidation from compatible automotive finishes. For hand application, the manufacturer recommends placing a small amount on a clean microfiber cloth, working it into the affected area, and wiping away the residue with a separate clean cloth. Apply controlled pressure and inspect the finish after each treatment rather than repeatedly rubbing the same area without checking the results.
The correction process works by gradually leveling microscopic irregularities in the clear coat and removing foreign material attached to the painted surface. For example, a white paint scuff transferred onto a black car during a parking collision may disappear after careful compounding if the underlying finish remains intact. However, the same treatment cannot eliminate a deep groove that extends into the black base coat. Excessive compounding can also produce haze, polishing marks, or clear coat thinning, particularly around panel edges where paint thickness may be uneven.
Once the transferred paint has been removed, wipe away the remaining compound and examine the corrected area under adequate lighting. A finishing polish may be required if the compound leaves minor haze or reduces surface clarity. Stop immediately if the original paint color appears on the applicator unexpectedly, the surface becomes visibly dull, or the defect remains despite cautious treatment. Persistent damage is better evaluated by a professional detailer or body repair specialist than subjected to repeated aggressive abrasion.
How Can You Avoid Damaging the Clear Coat While Removing Paint Transfer?
To avoid damaging the clear coat while removing paint transfer, use the least aggressive effective treatment, work on a clean and cool surface, and minimize unnecessary abrasion. The clear coat is the transparent protective layer applied over the vehicle’s colored base coat. It contributes to surface gloss and protects the underlying finish from environmental exposure. Abrasive correction products remove a small amount of this layer to eliminate certain defects, meaning repeated or excessive treatment can permanently reduce its thickness. According to 3M’s automotive scratch removal guidance, scratches extending through the clear coat cannot be completely repaired through ordinary polishing and may require professional refinishing.
Surface preparation is essential because contaminants trapped between an applicator and the paint can introduce new scratches. Wash the vehicle with automotive shampoo, rinse thoroughly, and dry the affected panel using clean microfiber materials. Perform correction in a shaded location after allowing the surface to cool, since heat can affect product behavior and make controlled application more difficult. Use separate, clean applicators for different products and follow the manufacturer’s specified working method. For example, a microfiber cloth that has collected abrasive grit should be replaced rather than reused on the surrounding paint.
The amount of pressure and the duration of treatment directly affect the risk of clear coat damage. Begin with a mild, compatible product and inspect the results before considering a stronger compound. Avoid concentrating force on sharp body lines, panel edges, or areas with existing paint damage. These locations deserve additional caution because the coating may be thinner or more vulnerable to aggressive polishing. Machine polishing also requires suitable equipment, compatible pads, and proper technique, as excessive pressure or heat can damage the finish. Vehicle owners without paint correction experience should avoid using aggressive machine compounds for isolated paint-transfer marks.
Recognizing when to stop is equally important. A dull patch, unexpected discoloration, exposed primer, or visible deterioration of the original finish indicates that further abrasion may cause additional damage. Repeated polishing cannot replace clear coat that has already been removed. Matte and satin finishes, repainted panels, and paint protection film also require product-specific treatment rather than conventional glossy-paint correction techniques. The safest approach is to preserve as much of the original coating as possible and seek professional assessment when the remaining defect cannot be corrected without aggressive material removal.
How Do You Remove Paint Transfer From a Plastic Car Bumper?
To remove paint transfer from a plastic car bumper, first determine whether the affected surface is painted or unpainted, then use a cleaning method compatible with its finish. Painted plastic bumpers generally have a color coat and protective clear coat similar to those found on metal body panels, while unpainted bumpers often feature textured plastic that requires different treatment. Light paint transfer on a clear-coated bumper may respond to automotive shampoo, a suitable scratch remover, or careful polishing. However, abrasive products designed for glossy paint can discolor textured plastic or alter its original appearance.
For a painted plastic bumper, begin by washing the affected area with automotive shampoo and drying it with a clean microfiber towel. Inspect the mark to determine whether the transferred paint is resting on the surface or whether the collision has damaged the original coating. Apply a compatible automotive scratch remover to a small test area using a soft foam applicator and controlled pressure. Work gradually and inspect the results between applications to avoid unnecessary clear coat removal. For example, a white paint streak left on a black bumper after contact with a parking barrier may disappear through gentle polishing if the underlying finish remains intact.
Unpainted plastic bumpers require a less abrasive approach because their textured surfaces can trap foreign paint within small grooves. Start with an automotive plastic cleaner approved for the material and gently work it into the affected area using a clean microfiber cloth or a suitable soft detailing brush. Avoid rubbing compound, aggressive polishing pads, and strong solvents unless the product manufacturer specifically approves their use on that surface. These treatments can flatten the texture, create shiny patches, or cause discoloration that becomes more noticeable than the original paint transfer.
If the bumper has deep scratches, peeling paint, exposed plastic, or cracked areas, surface cleaning alone will not restore its original appearance. Damaged painted bumpers may require localized paint correction or refinishing, while deep gouges in flexible plastic can require specialized repair materials. Professional inspection is particularly important when damage extends beyond a cosmetic scuff. The objective is to remove foreign paint while preserving the bumper’s existing coating and surface texture rather than attempting to eliminate every visible mark through repeated abrasion.
Can Rubbing Alcohol or Household Cleaners Remove Paint Transfer Safely?
Rubbing alcohol can remove certain surface residues from automotive paint, but it is not a reliable universal solution for removing paint transfer from a car. Isopropyl alcohol is used in automotive detailing to remove oils, wax residue, and other contaminants during surface preparation. Its effectiveness against transferred paint depends on the material, adhesion, and condition of the affected finish. On fully cured automotive clear coats, limited use of an appropriately prepared alcohol solution may be acceptable, but repeated applications, excessive concentrations, and prolonged contact can affect protective waxes, sealants, or sensitive surfaces. Automotive paint-safe cleaning products remain the preferred starting point for paint-transfer removal.
When using isopropyl alcohol for an approved cleaning application, follow the instructions of the paint or product manufacturer and test a small, inconspicuous area before treating a visible panel. Apply the appropriate solution using a clean microfiber towel, avoid excessive pressure, and remove the residue as instructed. Kelley Blue Book notes that occasional use of appropriately diluted rubbing alcohol is generally compatible with healthy automotive paint, while stronger applications require greater caution. Alcohol should not be treated as an abrasive scratch remover because dissolving surface oils is fundamentally different from correcting scratches or removing firmly adhered paint deposits.
Household solvents such as acetone, nail polish remover, and paint thinner present greater risks because they can interact with automotive coatings, plastics, adhesives, and protective finishes. Acetone-based nail polish remover, for example, is formulated to dissolve certain coatings and should not be applied indiscriminately to a vehicle’s painted surface. Abrasive household cleaning powders, scouring pads, and melamine foam sponges can also damage the finish through mechanical abrasion. Even when these products appear to remove a transferred paint mark, they may leave dull patches, fine scratches, or altered surface texture. Their ability to dissolve or abrade a contaminant does not establish that they are safe for the underlying vehicle finish.
The safer approach is to identify the surface material and choose an automotive cleaning or correction product approved for that application. A clear-coated painted panel may require a mild scratch remover, while textured plastic generally needs a compatible plastic cleaner and gentle mechanical action. If an unfamiliar solvent has already caused discoloration, softening, or loss of gloss, stop cleaning and seek professional assessment. Removing paint transfer successfully means eliminating the foreign material without creating damage that requires a more expensive repair.
Is It Safe to Use a Heat Gun on Car Interior Plastic?
Using a heat gun on car interior plastic is risky because excessive heat can permanently melt, warp, discolor, or alter the original surface texture. Although trained technicians sometimes use controlled heat during specialized plastic and vinyl repairs, a heat gun is not a universal solution for removing interior scratches. Its suitability depends on the plastic composition, surface coating, component construction, and repair procedure.
Heat affects thermoplastic materials by increasing their flexibility as the temperature rises. On certain uncoated plastics, controlled heating may reduce the visibility of shallow surface abrasions by softening the damaged outer layer. However, this process does not replace missing material or restore a deeply scratched surface to its original condition. Uneven heating can flatten molded grain patterns, create glossy patches, and distort surrounding plastic. For example, attempting to eliminate a white scratch on a textured dashboard may leave a smooth, shiny area that is more noticeable than the original damage.
The risk increases when heat is applied to painted plastic, soft-touch coatings, vinyl-covered panels, or components containing adhesives and electronics. These materials may react differently to elevated temperatures, and the outer finish can deteriorate before visible damage appears. Heat guns should never be directed toward airbag covers, deployment seams, instrument displays, electrical switches, or other safety-sensitive components. Even experienced repair technicians must follow material-specific procedures to avoid compromising the original construction.
For most car owners, cleaning, compatible trim restoration products, and professional refinishing are safer alternatives to uncontrolled heat treatment. A superficial scuff should first be evaluated for transferred material, while deeper damage may require filling and texture restoration. When the material cannot be identified or the manufacturer does not approve heat-based repair, avoid using a heat gun. Preserving the factory finish and structural integrity of interior components should take priority over attempting a quick cosmetic correction.
How Do You Prevent Scratches on Car Interior Surfaces?
To prevent scratches on car interior surfaces, remove abrasive debris before cleaning, minimize contact with hard objects, use material-compatible cleaning products, and protect frequently contacted trim areas. Interior scratches commonly result from friction involving keys, shoes, bags, cleaning equipment, and particles trapped against plastic or leather surfaces. Preventive maintenance reduces unnecessary abrasion and helps preserve the original appearance of dashboards, door panels, center consoles, and seats.
Proper cleaning techniques are essential because dust and fine sand particles can scratch delicate interior finishes when rubbed across the surface. Remove loose debris with a soft detailing brush, vacuum attachment, or manufacturer-approved dust removal method before wiping. Use a clean microfiber cloth and apply only the amount of cleaning solution recommended for the material. Avoid abrasive pads, stiff brushes, and household cleaning products that may damage protective coatings. Glossy piano black trim requires particular care because even fine cleaning marks can become visible under direct lighting.
Reducing contact with sharp or rigid objects also helps protect vulnerable interior components. Store keys, coins, and metal accessories in designated compartments instead of placing them directly on the center console or dashboard. Avoid dragging luggage, tools, or shopping bags across door panels and seat surfaces. Lower door trim is especially vulnerable to footwear contact when passengers enter and exit the vehicle. Careful handling of personal belongings and regular cleaning of these frequently contacted areas can reduce repeated scuffing.
Interior protection products should match the surface material and the vehicle manufacturer’s recommendations. Compatible protectants may help maintain certain plastic, vinyl, and leather finishes, but they do not make these materials scratch-proof. Avoid products that leave the dashboard excessively glossy because reflected light can interfere with forward visibility. Protective films may reduce wear on suitable smooth trim surfaces, while properly fitted interior accessories can help limit everyday contact damage. Any protective accessory must remain clear of airbag deployment areas, controls, and other safety-related components.
Environmental conditions also influence interior material preservation. Extended exposure to sunlight and high temperatures can accelerate the deterioration of certain plastics, leather finishes, and protective coatings. Parking in shaded locations and using an appropriate windshield sunshade may help limit heat and ultraviolet exposure. However, sun protection does not prevent mechanical scratches caused by sharp objects or abrasive particles. Combining careful cleaning, responsible interior use, and material-specific protection provides the most practical approach to maintaining scratch-free car interior surfaces.
When Should You Get Professional Car Interior Scratch Repair?
You should get professional car interior scratch repair when scratches penetrate the original surface, require precise texture or color matching, or affect components that cannot be safely repaired at home. Deep gouges, damaged soft-touch coatings, torn leather, and scratches on sensitive electronic displays often require specialized equipment and restoration materials. Professional repair is also appropriate when previous DIY treatments have caused discoloration, uneven gloss, or additional surface damage.
Automotive interior repair specialists can restore damaged plastic, vinyl, and decorative trim using material-specific repair techniques. Depending on the damage, these procedures may involve filling missing material, recreating molded grain patterns, and applying color-matched coatings. For example, a deep scratch across a textured door panel may require surface reconstruction to blend with the surrounding plastic. An automotive detailer is generally more suitable for cleaning-related scuffs and minor cosmetic imperfections, while extensive material damage requires an experienced interior restoration technician.
Leather upholstery requires specialized attention when scratches penetrate the protective coating, expose underlying fibers, or develop into cuts. A professional leather repair technician can assess whether localized filling and refinishing will restore the damaged section or whether partial reupholstery is necessary. Similarly, scratches affecting airbag covers, deployment seams, or safety-related trim require evaluation by an authorized repair facility rather than cosmetic modification. I-CAR advises against repairing damaged airbag covers because their original construction is essential to proper airbag deployment.
Before choosing a repair service, compare the expected restoration quality, replacement cost, and availability of matching materials. Minor scratches on inexpensive removable trim may be more economical to address through component replacement, while restoration can preserve complex or difficult-to-source interior parts. Professional repair is the preferred solution when achieving a durable, factory-matched appearance requires specialized skills or when cosmetic treatment could compromise vehicle safety.