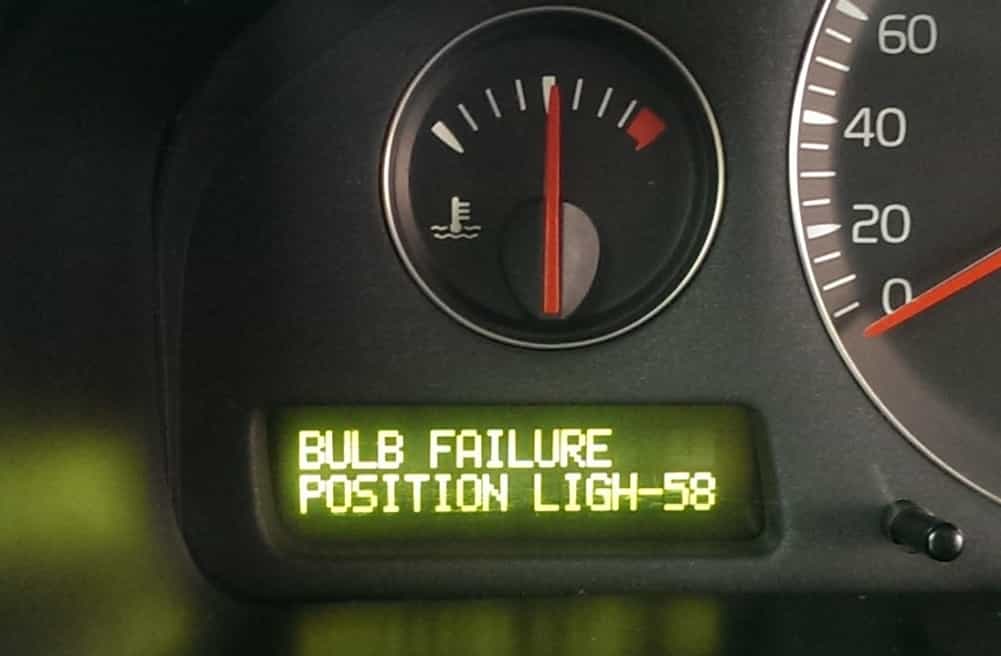
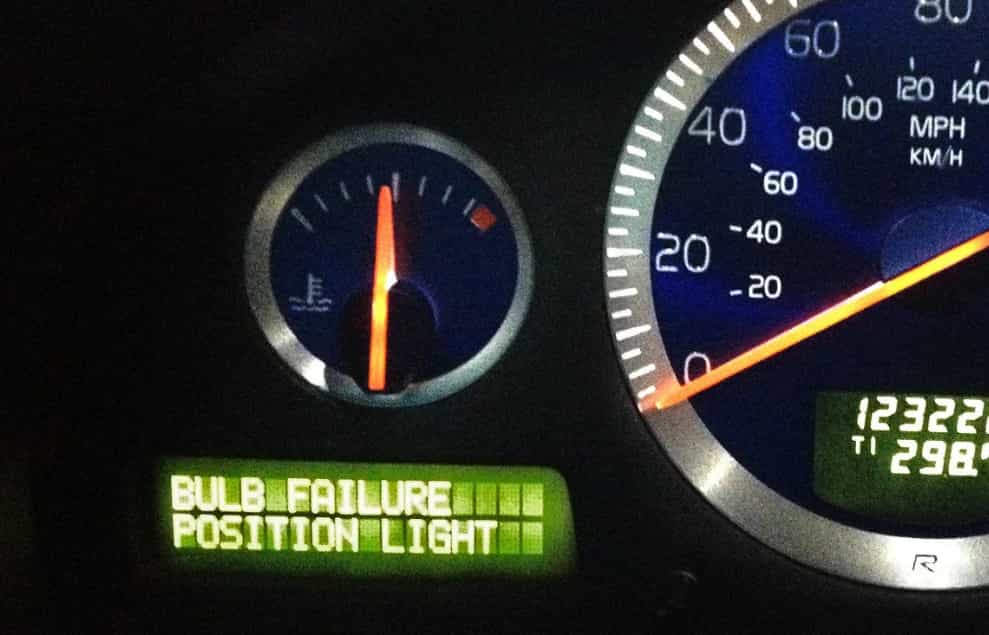
Are you wondering about a bulb failure position light issue?
Now, you may notice that there is a message showing on your instrument cluster regarding a bulb failure. And so, this leaves you confused and you wonder what may have gone wrong.
When you notice a message showing up on the dashboard that displays a problem with your bulb, then it is important to do something about it – and fast. This is why today, we will explain more about the bulb failure position light – why this happens and what you need to do to get this issue straightened out.
Let’s dive right into it.
Bulb Failure Position Light Key Facts
Basically, the position light shows the portion or position of your vehicle in a manner that alerts another motorist of your presence. Any vehicle has this light, as well as tall buildings, planes, and ships. Now, the position light also marks an object’s outer extremities. As a result, others are able to see it clearly.
With the evolution and improvements made on automotive lighting, this also includes the technologies incorporated to the position light. This is why there are so many complications added into the functionality and design. What’s more, position lights have also been referred to as running lights, repeaters, side markers, identification lights, and fog lights, to name a few.
But whatever name this light comes with, one thing is for certain – this is a safety component designed to boost the vehicle’s visibility, so others can see it better. ‘
Now that you know the basics of a position light, let us talk about a bulb failure position light. This basically shows a message when there is a failure in one or several of the position lights. Perhaps the light has failed because of a wiring problem, connection issue, blown bulb, or even something such as a computer issue.
Therefore, whenever you turn the lights on, as in the case of turning lights at home, electrical current typically flows from the source. This happens through the switch, the wiring, and your device and then the end of your circuit, also known as ground.
As your vehicle detects that there is a break in the current flow, so does the bulb failure position light switches on.
If you experience this problem, there are ways to deal with it and address it appropriately. First, you need to park your car in a safe and stable location. You need to have an unobstructed view of the car before you start. It is more ideal to do this in a low-light place, although it is not absolutely a necessity since your lights are designed to be visible during daytime.
1. Place your vehicle in the accessory mode. This is the power-position before the engine runs. Once done, you can start an inspection of the exterior. If you have a physical key in your car, the accessory mode is basically in the second position of the ignition. But if you are using a smartkey and a push-button start mode, put your smartkey in your center console without stepping on the brake as you push the start button.
These steps will not cause your car to start but merely to turn the accessories on including the lights, windows, and radio.
2. Do a visual inspection of your vehicle. Take note of the bumper corners, front fenders, fog lights, tail lights, door handle lights, and license plate lights. Your vehicle needs to be symmetrical with the lights positioned on the similar area on either side of your car.
Thus, if you have seen that your light is on – and it is on on one side alone – you need to check the other side to identify any fault with the bulb.
3. Use your OBD II scanner. This handheld tool allows you to check the faulty light’s physical location. Even if it is only a basic scanner, you should be able to locate the faulty light easily.
4. Take the damaged bulb out. At this point, you now know which bulb is faulty, and you can take it out. Inspect your wiring and sockets to make sure they are all still intact. You may need basic tools or sometimes you can do it easily by hand, depending on the faulty bulb. Moreover, there are bulbs that are embedded in your fenders and without easy access. In this case, you may have to get a professional’s help.
If only one side is problematic, you may want to change both of the bulbs anyway. Then, be sure to use some di-electric automotive grease to contacts as this provides protection for all weather and also for rust.
When you have changed all of the bulbs, you can turn off the car and then put it back on the accessory mode. This should help to clear the bulb failure position light issue on its own.
But what if the problem persists, you may ask.
If so, you need to repeat the first step – be sure not to miss any of the bulbs. Check if they are properly installed and that the bulbs used are correct. This should be able to clear away the fault message.
But then, if you continue to see the fault, you need to check other areas such as the connection, wiring, and even the socket. This would involve electrical repairs, which you can do by yourself or with the help of a professional. It is possible that there is loose wiring, a burnt socket, a frayed wire, or one of the contact points is broken.
Read More: Auxiliary Not Working In Car? Common Reasons You Should Know
Conclusion
Your position light serves numerous benefits and functions to you. However, if you are encountering issues with it, you may consider trying out the steps we have outlined for you. Otherwise, you can also take your vehicle to a specialist for professional repair work that will resolve this issue once and for all.