To remove an air pocket from a car cooling system, bleed the trapped air through the manufacturer’s designated bleed valve or coolant filling point, or use a vacuum coolant filler when required. Start with a completely cool engine, use the correct coolant, and follow the vehicle-specific bleeding procedure. Once the process is complete, verify that the engine maintains a stable operating temperature and the coolant level remains correct.
Air pockets form when air becomes trapped inside the cooling system, particularly after coolant replacement, radiator repairs, or thermostat replacement. Trapped air can interrupt coolant circulation through the engine, radiator, and heater core. This disruption may cause engine overheating, fluctuating temperature readings, gurgling noises, or inconsistent cabin heating.
The correct air removal method depends on the vehicle’s cooling system design. Some vehicles have dedicated bleed screws, while others require a spill-free funnel, vacuum filling equipment, or a manufacturer-specific bleeding sequence. Using the wrong procedure can leave air trapped or introduce additional cooling problems.
This guide explains how to identify trapped air, remove it using the appropriate bleeding method, confirm successful air removal, and prevent air pockets from returning.
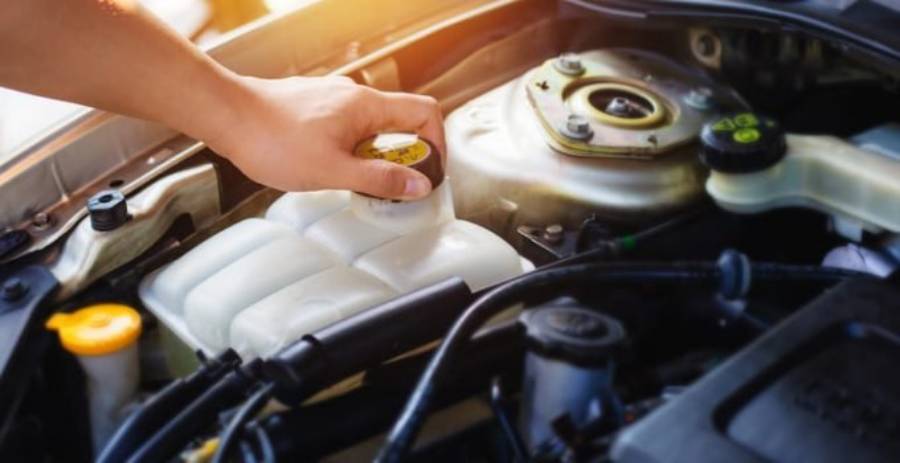
How Do You Remove an Air Pocket From a Car Cooling System?
To remove an air pocket from a car cooling system, allow the engine to cool, fill the system with the correct coolant, release trapped air using the manufacturer’s specified bleeding method, and verify normal coolant circulation. The procedure varies between vehicles because cooling systems use different radiator designs, expansion tanks, bleed valves, and coolant filling points.
Follow these eight steps to remove trapped air from a compatible cooling system.
- Let the engine cool completely. Park the vehicle on a level surface, turn off the engine, and wait until the cooling system is fully cooled and depressurized. Never remove a radiator cap, expansion tank cap, or bleed screw while the system is hot and pressurized. Escaping coolant can cause severe burns.
- Locate the coolant filling point. Identify the radiator cap, pressurized expansion tank, or designated filling connection specified in the owner’s manual. Some vehicles have a dedicated coolant bleed screw near the thermostat housing or upper coolant passages, while others require a specialized filling procedure.
- Check the coolant level and inspect for leaks. Examine the coolant reservoir, radiator hoses, hose connections, and accessible cooling system components. Low coolant levels can allow air to accumulate, while unresolved leaks can cause air pockets to return after bleeding.
- Prepare the correct coolant and bleeding equipment. Use coolant that meets the vehicle manufacturer’s specifications. Prepare a compatible spill-free funnel, suitable hand tools, or a vacuum filling device if required. Mixing incompatible coolant formulations can create cooling system problems unrelated to trapped air.
- Release trapped air through the designated bleeding points. On vehicles equipped with bleed screws, follow the manufacturer’s instructions for opening them and adding coolant until the specified bleeding condition is reached. Vehicles without bleed screws may require a designated fill-and-purge procedure or vacuum filling equipment.
- Complete the required coolant circulation procedure. Follow the manufacturer’s instructions for engine operation, heater settings, coolant pump activation, and thermostat operation. Some vehicles require the engine to run during bleeding, while others use electronically controlled pumps or automated bleeding routines. Monitor the temperature gauge throughout any engine-running procedure and stop immediately if overheating occurs.
- Finish the bleeding procedure and allow the engine to cool. Secure the bleed screws and pressure cap according to the service instructions. Allow the cooling system to return to the specified checking temperature before inspecting the coolant level. Do not open the system while it remains hot or pressurized.
- Verify that the cooling system operates normally. Check that the coolant level remains within the manufacturer’s specified range, the engine maintains a stable operating temperature, and the cabin heater produces consistent heat when requested. Inspect for leaks and monitor for recurring gurgling noises or overheating.
A properly bled cooling system should maintain stable engine temperatures without recurring coolant loss or air-related symptoms. However, normal temperature readings alone do not confirm that every air pocket has been removed. Some vehicles require additional bleeding cycles or diagnostic verification before the cooling system can be considered fully serviced.
If the engine continues overheating, the coolant level repeatedly drops, or air bubbles return after bleeding, further diagnosis is necessary. Coolant leaks, a defective pressure cap, thermostat failure, or combustion gases entering the cooling system can produce symptoms that resemble trapped air. Repeating the bleeding procedure without identifying the underlying fault may not resolve the problem.
How Can You Tell if There Is Air Trapped in the Cooling System?
You can tell if air is trapped in a car cooling system by checking for five common symptoms: fluctuating engine temperature, overheating, inconsistent cabin heating, gurgling noises, and unexpected coolant level changes. These symptoms occur because trapped air can interfere with coolant circulation, reduce heat transfer, and disrupt normal cooling system operation. However, each symptom can also indicate a different mechanical problem.
Fluctuating engine temperature is a common sign of trapped air. The temperature gauge may rise above its normal position and then drop as coolant circulation changes. Air collecting around the thermostat housing or temperature sensor can affect local coolant flow and temperature readings. Similar fluctuations can result from a sticking thermostat, low coolant, or a faulty temperature sensor, so the gauge alone cannot confirm an air pocket.
Engine overheating can occur when trapped air prevents coolant from circulating effectively through critical engine passages. Liquid coolant absorbs heat from the engine and transfers it to the radiator, where the heat is released. An air pocket can interrupt this process and create localized hot spots, particularly around the cylinder head. Continued overheating can damage engine components, including the cylinder head and head gasket. Stop the engine safely if the temperature gauge enters the overheating range or a temperature warning appears.
Inconsistent cabin heating is another indicator of air trapped in the cooling system. The heater core uses hot engine coolant to warm the air entering the passenger compartment. When air accumulates inside the heater core or its coolant passages, coolant flow may decrease, causing the vents to blow cool air despite the engine reaching operating temperature. For example, a heater that alternates between warm and cold air after a coolant replacement may indicate incomplete bleeding. A restricted heater core or malfunctioning heater control system can produce similar symptoms.
Gurgling or bubbling noises may indicate air moving through the heater core, radiator, or coolant passages. These sounds can become noticeable behind the dashboard or near the engine compartment, especially after the cooling system has been drained and refilled. As the coolant pump circulates fluid, trapped air can move through narrow passages and create audible bubbling. Persistent gurgling accompanied by coolant loss or overheating requires further inspection because combustion gases entering the cooling system can also create bubbles.
Unexpected coolant level changes can occur when trapped air escapes and coolant moves into previously air-filled passages. After bleeding, the coolant level may decrease as remaining air is displaced. A small level adjustment during the manufacturer-specified cool-down and recheck process can be expected. However, repeated coolant loss, visible leaks, or continuous bubbling after proper bleeding indicates that the system needs additional diagnosis.
The most reliable way to identify a cooling system air pocket is to evaluate these symptoms together with recent maintenance history and appropriate diagnostic checks. Air-related symptoms appearing immediately after radiator replacement, thermostat replacement, or coolant flushing provide a stronger reason to inspect the bleeding procedure. Persistent symptoms without recent cooling system service may require pressure testing, thermostat inspection, or combustion gas testing before trapped air can be confirmed.
What Tools Do You Need to Bleed Air From a Cooling System?
The tools needed to bleed air from a car cooling system include manufacturer-approved engine coolant, a compatible filling tool, appropriate hand tools, a coolant collection container, and protective equipment. Vehicles with conventional bleed valves may require only basic tools, while cooling systems with complex coolant passages or electronically controlled pumps may require vacuum filling equipment or diagnostic software.
The following six tools and supplies cover the main requirements for common cooling system bleeding procedures.
- Manufacturer-approved engine coolant: Use the coolant formulation and mixture specified for the vehicle. Engine coolants differ in corrosion inhibitors, chemical composition, and compatibility with cooling system materials. Using the wrong coolant can contribute to corrosion, deposits, or component damage. Premixed coolant is convenient because it already contains the intended water-to-coolant ratio.
- Spill-free coolant funnel: A spill-free funnel attaches to a compatible radiator neck or designated coolant filling point. It holds additional coolant above the fill opening, helping prevent the system from drawing air back in as coolant moves through the passages. This tool is useful for vehicles designed to be bled through an accessible fill point, but it is not suitable for every pressurized cooling system.
- Bleed screw tools: A screwdriver, socket, or wrench may be required to operate a dedicated coolant bleed valve. The correct tool depends on the valve design. Some bleed screws are made of plastic and can crack when excessive force is applied. Use the manufacturer’s specified opening and tightening instructions to avoid damaging the valve or its sealing surfaces.
- Vacuum coolant filling kit: A vacuum filler uses compressed air or another vacuum source to evacuate air from the cooling system before drawing coolant into the passages. This method is particularly useful for vehicles with multiple coolant circuits, complex hose routing, or filling procedures that specify vacuum equipment. The tool must be compatible with the vehicle’s cooling system and pressure specifications.
- Coolant drain pan and cleaning supplies: A coolant collection container captures fluid released during bleeding, topping off, or disconnecting filling equipment. Coolant spills should be cleaned immediately because automotive antifreeze can be toxic when swallowed. Store used coolant in a sealed, labeled container and dispose of it through an approved collection facility.
- Protective gloves and safety glasses: Chemical-resistant gloves reduce direct contact with coolant, while safety glasses protect against accidental splashes. These precautions are especially important when handling bleed screws, filling adapters, and coolant hoses. Protective equipment does not make opening a hot, pressurized cooling system safe.
Some vehicles also require a scan tool to activate an electric coolant pump or initiate an automated bleeding sequence. These procedures are common in certain modern vehicles with electronically controlled thermal management systems. The vehicle’s service manual identifies whether this equipment is necessary.
The correct bleeding equipment depends on the cooling system design, not simply the presence of an air pocket. A vehicle with a conventional bleed screw may be serviced using basic hand tools and coolant, while another vehicle may require a vacuum filler or electronic bleeding routine. Selecting the manufacturer-approved method reduces the risk of incomplete air removal, coolant spills, and unnecessary engine overheating.
How Do You Bleed a Cooling System With a Bleeder Valve?
To bleed a cooling system with a bleeder valve, open the designated bleed screw on a completely cool, depressurized engine, add the correct coolant through the manufacturer’s specified filling point, and release trapped air until the required bleeding condition is reached. Close the valve according to the service instructions and complete any required coolant circulation and verification procedures.
A coolant bleeder valve provides an escape point for air trapped in elevated sections of the cooling system. Air tends to accumulate in high points because it is less dense than liquid coolant. When coolant enters the system, it displaces trapped air toward the bleed opening. Releasing this air helps restore liquid coolant flow through the engine and associated cooling passages.
For vehicles equipped with a conventional manual bleed screw, the procedure generally involves five stages:
- Prepare the cooling system. Park the vehicle as specified by the manufacturer, switch off the engine, and allow it to cool completely. Locate the approved coolant filling point and bleed valve. Check the coolant specification and inspect the system for visible leaks before beginning.
- Open the designated bleed valve. Use the correct screwdriver or wrench to loosen the valve according to the service instructions. Some valves require only a small adjustment, while others have specific opening positions. Do not completely remove the screw unless the manufacturer explicitly requires it.
- Add coolant through the specified filling point. Slowly introduce the correct coolant mixture while observing the bleed opening. Air may escape before coolant reaches the valve. Maintain the required coolant level during filling to prevent additional air from entering the system.
- Close the bleed valve at the specified condition. On many conventional systems, a continuous stream of coolant without visible air bubbles indicates that air has been displaced from that bleed point. Close the valve using the manufacturer’s tightening instructions. Avoid excessive force, particularly with plastic bleed screws.
- Complete the remaining bleeding procedure. Follow the manufacturer’s instructions for any additional bleed points, engine warm-up, coolant pump operation, and cooling cycles. Once the system has cooled to the specified checking temperature, verify the coolant level and inspect for leaks.
Releasing air from one bleed valve does not guarantee that the entire cooling system is free of trapped air. Vehicles with multiple coolant circuits or elevated heater cores may require additional bleeding stages. Some systems also use electronically controlled coolant pumps that must be activated through a specific service procedure.
Where Is the Coolant Bleeder Valve Located?
The coolant bleeder valve is commonly located near the thermostat housing, upper radiator hose connection, cylinder head coolant outlet, or another elevated coolant passage. Its exact position depends on the engine layout and cooling system design.
Manufacturers place bleed valves at locations where air is likely to collect during coolant filling. For example, a thermostat housing positioned above surrounding coolant passages may contain a bleed screw that allows air to escape as coolant rises through the system. Other vehicles use a dedicated bleed fitting connected to a heater hose or coolant distribution pipe.
A bleed valve may resemble a small screw, plastic plug, or metal fitting installed in a coolant passage. It should not be confused with an ordinary mounting bolt or coolant drain plug. Loosening the wrong fastener can cause coolant leakage or damage a component.
Not every vehicle has a manual coolant bleeder valve. Some cooling systems remove air through designated filling passages, automatic degassing lines, or vacuum filling procedures. Consult the vehicle’s service documentation to identify the correct location before opening any cooling system component.
How Do You Know When to Close the Coolant Bleeder Valve?
Close the coolant bleeder valve when the manufacturer’s specified bleeding condition has been reached. For many conventional manual bleed valves, this means coolant flows continuously from the opening without visible air bubbles.
When coolant first reaches a bleed valve, the discharge may contain air, intermittent coolant flow, or a mixture of both. As additional coolant enters the system, trapped air is displaced and the flow becomes more consistent. A steady coolant stream indicates that the local passage has filled with liquid, although air may remain elsewhere in the cooling system.
The absence of bubbles at one valve is not sufficient proof that bleeding is complete. Some manufacturers specify additional steps, including opening multiple bleed points in sequence, running the coolant pump, or repeating the procedure after a cooling cycle.
Tighten the valve to the manufacturer’s specified torque or closing position. Overtightening can damage plastic threads, deform sealing surfaces, or cause leaks. After completing the procedure, inspect the valve for coolant seepage and confirm that the engine maintains a stable operating temperature.
How Do You Remove Air From a Cooling System Without a Bleeder Valve?
To remove air from a cooling system without a bleeder valve, use the manufacturer’s designated coolant filling and air-purging procedure. Depending on the vehicle, this may involve a spill-free funnel attached to an approved fill point, a vacuum coolant filler, or an electronically controlled bleeding routine.
A cooling system does not necessarily need a manual bleed screw to release trapped air. Some vehicles have coolant passages designed to move air toward an expansion tank or designated filling connection. Others require specialized equipment because the radiator, heater core, and engine coolant passages cannot be reliably filled using a conventional open-funnel procedure.
For vehicles that support manual bleeding through an accessible filling point, the process generally includes the following steps:
- Identify the approved coolant filling connection. Allow the engine to cool completely and locate the filling point specified in the service manual. Determine whether the vehicle supports a spill-free funnel or requires a different filling method.
- Install a compatible filling adapter. Attach the funnel securely to the designated opening. The connection must fit correctly to prevent leaks and maintain the coolant level required by the procedure.
- Fill the system with the specified coolant. Add coolant according to the manufacturer’s instructions. A compatible elevated funnel provides additional coolant above the filling connection, helping replace fluid as trapped air escapes.
- Perform the required air-purging sequence. Follow the specified procedure for coolant circulation, heater settings, engine operation, or pump activation. On compatible systems, escaping air may appear as bubbles rising through the coolant in the funnel.
- Finish the procedure and verify coolant level. Complete the required cooling cycle, remove the filling equipment at the specified stage, and secure the pressure cap. Check the coolant level under the manufacturer’s recommended conditions.
Some cooling systems require more than one filling or circulation cycle to remove residual air. However, repeatedly running an overheating engine is not an acceptable bleeding method. Stop the procedure if the temperature rises abnormally, coolant escapes uncontrollably, or the system behaves differently from the service instructions.
Gently compressing accessible coolant hoses during an approved cold-engine filling procedure may help move small amounts of trapped air toward the filling point. This technique is only supplementary and must not replace the manufacturer’s bleeding method. Never squeeze hoses near moving components or manipulate hot, pressurized coolant hoses.
How Do You Use a Spill-Free Funnel to Remove Air From the Cooling System?
A spill-free funnel removes air from compatible cooling systems by maintaining a supply of coolant above the designated filling point while trapped air escapes through the same opening. This helps prevent the system from drawing additional air into the coolant passages during filling and circulation.
The funnel typically includes a reservoir, interchangeable adapters, and a plug used to retain coolant during removal. A properly fitted adapter creates a secure connection between the funnel and the vehicle’s approved filling neck. The elevated coolant reservoir allows displaced air to rise through the liquid and escape into the funnel.
Start with a completely cool engine and install the correct adapter at the manufacturer-approved fill point. Add the specified coolant mixture to the level required by the service procedure. The funnel should contain enough coolant to maintain the necessary liquid supply without being overfilled.
Next, perform the vehicle’s prescribed bleeding sequence. On systems designed for open-funnel bleeding, this may involve operating the engine under specified conditions while monitoring coolant movement and temperature. Air escaping from the system may produce visible bubbles in the funnel. As air is displaced, the coolant level can change because liquid moves into previously air-filled passages.
Continue only for the duration and operating conditions specified by the manufacturer. Do not assume that every vehicle requires the thermostat to open while the filling cap is removed. Some pressurized systems must remain sealed during warm-up, and opening them can cause coolant discharge or introduce additional air.
Once the prescribed bleeding sequence is complete, follow the tool and vehicle instructions for safely plugging and removing the funnel. Secure the cooling system cap and allow the engine to reach the specified temperature for the final coolant level check.
A spill-free funnel is effective only when the cooling system is designed to support that filling method. Vehicles requiring vacuum filling, automated pump activation, or a sealed bleeding procedure should be serviced using the specified equipment instead. Persistent overheating, coolant loss, or recurring bubbles after bleeding requires further diagnosis rather than repeated funnel bleeding.
How Do You Remove Air From a Cooling System With a Vacuum Filler?
To remove air from a car cooling system with a vacuum filler, connect the tool to the designated coolant filling point, evacuate air from the system, check that the vacuum holds, and draw the correct coolant mixture into the evacuated passages. This method reduces the likelihood of trapped air because it removes air before introducing coolant, rather than relying on coolant circulation to displace it afterward.
A vacuum coolant filler typically uses compressed air and a Venturi mechanism to create negative pressure inside the cooling system. As the pressure decreases, air is extracted from the radiator, engine coolant passages, heater core, and connected hoses. When the system reaches the vacuum level specified by the equipment manufacturer, coolant can be drawn into the evacuated passages through the tool’s filling hose.
The vacuum filling process generally involves six steps:
- Allow the engine to cool completely. Park the vehicle on a level surface, switch off the engine, and confirm that the cooling system is depressurized. Identify the approved filling connection and check that the vacuum filling equipment is compatible with the vehicle.
- Inspect the cooling system. Examine accessible hoses, connections, the radiator, and the coolant reservoir for visible damage or leaks. A vacuum filler cannot repair damaged components, and existing leaks may prevent the system from maintaining the required vacuum.
- Connect the vacuum filling equipment. Install the appropriate adapter at the manufacturer’s designated filling point. Attach the compressed air supply or vacuum source according to the tool instructions. Ensure that all connections are secure before beginning evacuation.
- Evacuate air from the cooling system. Operate the vacuum filler until the gauge reaches the level specified for the tool and vehicle. The required vacuum varies with equipment and cooling system design. Avoid applying an unspecified vacuum level because certain components may have operating limitations.
- Check vacuum retention. Isolate the vacuum source and observe the gauge for the prescribed testing period. A significant loss of vacuum may indicate a leaking connection or cooling system fault. However, holding vacuum does not conclusively prove that the system is free from leaks under normal operating pressure.
- Draw coolant into the system. Place the filling hose into a container holding sufficient manufacturer-approved coolant. Open the filling valve according to the tool instructions, allowing the pressure difference to draw coolant into the cooling passages. Keep the hose submerged to prevent air from entering during filling.
After filling, disconnect the equipment using the prescribed procedure and secure the cooling system cap. Complete any additional bleeding, pump activation, or warm-up steps required by the vehicle manufacturer. Check the coolant level at the specified temperature and inspect the system for leaks.
Vacuum filling is particularly useful for cooling systems with complex coolant routing, elevated heater cores, or multiple cooling circuits. These configurations can retain air in passages that are difficult to purge through conventional gravity filling. However, vacuum filling does not eliminate the need to follow vehicle-specific service instructions, especially when electric coolant pumps or electronically controlled valves require a separate bleeding routine.
How Do You Know When All the Air Is Out of the Cooling System?
You can determine whether air has been successfully removed from a car cooling system by checking five operating conditions: stable engine temperature, consistent cabin heating, correct coolant level, absence of recurring air-related noises, and normal cooling system operation without leaks. These indicators help confirm that coolant is circulating correctly, although no single observation guarantees that every trapped air pocket has been eliminated.
Stable engine temperature is one of the strongest indicators of successful bleeding. Once the engine reaches its normal operating range, the temperature should remain consistent under the conditions specified by the manufacturer. An engine that repeatedly overheats or displays abnormal temperature fluctuations may still have restricted coolant circulation. A malfunctioning thermostat, defective water pump, or radiator problem can produce similar symptoms, so additional diagnosis may be necessary.
Consistent cabin heating indicates that hot coolant is reaching the heater core when heating is requested. Air trapped in the heater core can interrupt coolant flow and cause the vents to alternate between warm and cold air. After successful bleeding, the heater should provide consistent heat under comparable engine operating and climate control conditions. However, heater performance also depends on blend doors, heater control valves, and other components unrelated to trapped air.
Correct coolant level after cooling provides another useful verification point. As the engine cools, coolant contracts and the system returns toward its cold operating condition. The coolant level should be checked at the manufacturer-specified temperature and compared with the appropriate reservoir markings or filling instructions. A level that repeatedly falls below the specified range may indicate remaining air displacement, an external coolant leak, or an internal engine problem.
The absence of recurring gurgling noises suggests that large amounts of trapped air are no longer moving through the heater core or coolant passages. During bleeding, intermittent bubbling can occur as air escapes through the designated filling point. Once the procedure is complete, persistent gurgling accompanied by overheating, coolant loss, or unstable heater performance requires further investigation. The absence of audible bubbles alone does not prove that the cooling system is completely free of air.
Normal cooling system operation without leaks provides additional confirmation. Inspect accessible hoses, the radiator, coolant connections, and the bleed valve after completing the procedure. The system should maintain the specified coolant level and operating temperature without visible coolant leakage. Where appropriate, a cooling system pressure test can help identify leaks that are not visible during a basic inspection.
If the engine continues to overheat after bleeding, stop operating the vehicle and investigate the underlying cooling system fault before driving again. Remaining air is one possible explanation, but overheating can also result from a stuck thermostat, restricted radiator, failing coolant pump, or insufficient coolant.
Repeated air bubbles or coolant loss after a correctly performed bleeding procedure may indicate a more serious problem. For example, a damaged head gasket can allow combustion gases to enter the cooling system, creating bubbles that resemble trapped air. A combustion gas test, cooling system pressure test, or additional manufacturer-approved diagnostic procedure can help distinguish these faults.
Successful bleeding is confirmed through the combination of correct service procedure, stable operating conditions, and appropriate post-service checks. If the vehicle requires an electronic bleeding routine or specialized diagnostic verification, those steps must be completed even when the temperature gauge and cabin heater appear normal.
What Causes Air Pockets in a Car Cooling System?
Air pockets in a car cooling system are primarily caused by incomplete coolant bleeding, improper coolant filling, coolant leaks, and combustion gases entering the cooling system. These conditions introduce or retain gas inside passages that should contain liquid coolant. As gas accumulates, it can interfere with coolant circulation and reduce the cooling system’s ability to transfer heat away from the engine.
Incomplete bleeding after coolant replacement is a common cause of trapped air. Draining a cooling system removes coolant from the radiator, engine block, hoses, and other connected components. During refilling, air can remain inside elevated passages or sections that do not fill completely through gravity alone. For example, replacing a thermostat can introduce air near the thermostat housing, especially when the housing sits above surrounding coolant passages. The manufacturer-approved bleeding procedure is necessary to remove this remaining air.
Improper coolant filling can also leave air inside the system. Adding coolant without following the specified filling sequence may prevent liquid from reaching certain passages. Some vehicles require multiple bleed points to be opened in a particular order, while others use vacuum filling equipment or electronically controlled coolant pumps. Filling these systems through an incorrect connection or skipping a required bleeding stage can leave air trapped even when the coolant reservoir appears full.
External coolant leaks can contribute to air accumulation by allowing coolant to escape and, under certain pressure conditions, permitting air to enter. Common leak locations include radiator hose connections, water pump seals, radiator end tanks, and damaged coolant reservoirs. A defective pressure cap or coolant recovery connection can also interfere with normal coolant movement as the engine heats and cools. When coolant is lost and not properly replaced, air may occupy the space left inside the cooling passages.
Combustion gas intrusion is another cause of gas accumulation in the cooling system. A damaged head gasket, cracked cylinder head, or engine block defect can allow combustion gases to enter coolant passages. Unlike air remaining after maintenance, combustion gases may continue entering the system while the engine operates. This can produce recurring bubbles, abnormal cooling system pressure, coolant displacement, and overheating.
The timing of the symptoms helps identify the likely cause. Air-related problems appearing immediately after coolant flushing or component replacement suggest an incomplete filling or bleeding procedure. Air bubbles that repeatedly return despite correct bleeding require investigation for coolant leaks, pressure regulation problems, or internal engine faults.
Why Does Air Keep Getting Into the Cooling System After Bleeding?
Air or gas keeps accumulating in a cooling system after bleeding because the initial procedure did not remove all trapped air, coolant is escaping through a leak, the coolant recovery system is malfunctioning, or combustion gases are entering the coolant. A correctly filled and sealed cooling system should not continuously develop significant gas pockets during normal operation.
Incomplete air removal is the first condition to investigate when symptoms return immediately after maintenance. Some cooling systems contain elevated coolant passages, heater cores, or separate cooling circuits that require additional bleeding stages. If the specified procedure is interrupted or a required electric coolant pump activation is skipped, air can remain inside the system. As coolant circulates, the remaining gas may move toward the reservoir or another high point, causing gurgling noises, coolant level changes, or inconsistent heater performance.
Coolant leakage can cause recurring air-related symptoms when the system loses fluid during operation or fails to recover coolant correctly as it cools. A small leak may not leave an obvious puddle because coolant can evaporate after contacting hot engine components. Cooling system pressure testing helps identify external leaks that are difficult to detect through visual inspection. Repeatedly adding coolant without repairing the leak does not resolve the underlying problem.
A malfunctioning coolant recovery system can also contribute to recurring air accumulation. In systems that use a nonpressurized overflow reservoir, coolant normally moves into the reservoir as it expands and returns to the radiator as the engine cools. A defective radiator cap, damaged recovery hose, or leaking connection can prevent this return flow. Instead of drawing coolant back into the radiator, the system may draw air through a faulty connection.
Persistent gas accumulation accompanied by rapid pressure buildup, coolant being forced out of the reservoir, or unexplained coolant loss raises concern about combustion gas intrusion. These symptoms require further testing because repeatedly bleeding the system will not correct an internal engine sealing failure.
Can a Bad Head Gasket Cause Air Bubbles in the Cooling System?
Yes, a damaged head gasket can cause continuous gas bubbles in the cooling system by allowing combustion gases to escape from an engine cylinder into adjacent coolant passages. This occurs when the gasket no longer maintains an effective seal between the combustion chamber and the cooling jacket.
During engine operation, combustion pressure can exceed cooling system pressure by a substantial margin. If the head gasket develops a leak between a cylinder and a coolant passage, combustion gases can enter the coolant whenever the pressure conditions permit. These gases may travel through the engine and collect in the radiator, expansion tank, or elevated cooling passages.
A head gasket leak can produce several warning signs, including persistent bubbling in the coolant reservoir, unexplained coolant loss, engine overheating, and abnormal cooling system pressurization. Some vehicles may also experience white exhaust vapor, rough engine operation, or coolant contamination, depending on the location and severity of the failure. However, none of these symptoms individually confirms a damaged head gasket.
A combustion gas test can help identify exhaust gases entering the cooling system. This test commonly uses a chemical indicator that changes color when exposed to certain combustion gases drawn from the cooling system. Technicians may also perform a cooling system pressure test, cylinder leak-down test, or other engine diagnostics to investigate the source of the problem.
Not every head gasket failure produces visible oil and coolant mixing. A leak between a combustion chamber and coolant passage can occur without creating the milky engine oil commonly associated with certain internal engine failures.
If combustion gas intrusion is confirmed, bleeding the cooling system will only remove accumulated gas temporarily. The underlying sealing problem must be repaired to prevent recurring pressure buildup, coolant displacement, and overheating.
Can a Faulty Radiator Cap Cause Air to Enter the Cooling System?
Yes, a faulty radiator cap can contribute to air entering certain cooling systems by disrupting pressure regulation and preventing proper coolant recovery during cooling cycles. The effect depends on whether the vehicle uses a conventional radiator cap and overflow reservoir or a pressurized expansion tank system.
A conventional radiator pressure cap typically contains two valve functions. The pressure valve allows coolant to move toward the overflow reservoir when system pressure exceeds the cap’s rated limit. The vacuum or return valve allows coolant to flow back into the radiator as the engine cools and the coolant contracts.
If the return valve sticks, the cap seal fails, or the coolant recovery hose develops a leak, the radiator may not recover coolant correctly. Under these conditions, air can enter through a defective connection or remain in the space that should have been refilled with coolant. Repeated heating and cooling cycles may gradually increase the amount of air inside the system.
A damaged pressure seal can also allow coolant to escape before the system reaches its intended operating pressure. Reduced pressure lowers the coolant’s boiling margin, increasing the risk of localized boiling under demanding operating conditions. Vapor generated by boiling can create gas pockets and cooling problems that resemble trapped air.
Radiator cap problems may produce coolant loss, an unexpectedly low radiator level after cooling, overflow reservoir irregularities, or repeated air-related symptoms. However, these signs can also result from leaks elsewhere in the system.
A technician can evaluate the cap using a compatible pressure cap tester and inspect the sealing surfaces and recovery connections. The replacement cap must match the vehicle manufacturer’s pressure rating and design requirements.
Vehicles equipped with pressurized expansion tanks may use a pressure cap mounted on the tank rather than the radiator. Their coolant recovery and air separation arrangements differ from conventional overflow systems, so the appropriate diagnostic procedure must match the vehicle design.
Replacing a defective cap can restore proper pressure regulation and coolant recovery, but it will not remove air already trapped in the cooling passages. After repairing the fault, the cooling system must be refilled and bled according to the manufacturer’s instructions.
Read more: How to Avoid Paying Sales Tax on a Used Car Legally
How Can You Prevent Air Pockets After Replacing Engine Coolant?
To prevent air pockets after replacing engine coolant, follow the manufacturer’s coolant filling and bleeding procedure, use the correct coolant mixture, inspect the system for leaks, and verify the coolant level after the required cooling cycle. Proper filling is essential because draining the cooling system introduces air into passages that may not refill completely without a dedicated bleeding procedure.
Using the correct coolant filling method is the most important preventive measure. Some vehicles require coolant to be introduced through a specific radiator or expansion tank connection, while others use vacuum filling equipment or multiple bleed valves. Following the prescribed sequence allows coolant to displace air from elevated passages, heater cores, and engine cooling channels. For example, vehicles with electronically controlled coolant pumps may require a diagnostic bleeding routine to circulate coolant through sections that remain closed during conventional filling.
Maintaining the correct coolant level also helps prevent air accumulation. After replacing coolant, the fluid level may change as remaining air escapes and the system completes its heating and cooling cycles. Check the level when the engine reaches the manufacturer-specified checking temperature and refill only as instructed. Overfilling the reservoir can interfere with normal coolant expansion, while insufficient coolant can expose cooling passages to air.
Inspecting cooling system components for leaks prevents coolant loss that can contribute to recurring air pockets. Examine radiator hoses, hose clamps, thermostat housings, water pump connections, and accessible coolant fittings after maintenance. Even a small leak can gradually reduce coolant volume and interfere with proper system operation. Repair damaged seals or connections before completing the final bleeding procedure.
Following the correct bleeding procedure after component replacement is equally important. Replacing a radiator, thermostat, water pump, heater core, or coolant hose can introduce air even when the entire cooling system has not been drained. The amount of air introduced depends on the component location and the volume of coolant removed during the repair.
After completing the service, verify that the engine maintains its normal operating temperature, the cabin heater functions consistently, and the coolant level remains within the specified range. Recheck the system according to the manufacturer’s post-service instructions. These checks help identify incomplete bleeding or coolant loss before they develop into overheating problems.
Can You Drive With an Air Pocket in the Cooling System?
Driving with an air pocket in the cooling system is unsafe when trapped air causes overheating, coolant circulation problems, or unstable engine temperatures. An air pocket can interfere with heat transfer from the engine to the radiator, allowing certain engine components to reach damaging temperatures even when the cooling system still contains coolant.
Liquid coolant absorbs heat from the cylinder head, engine block, and other heated components before transferring that energy to the radiator. When air occupies part of a coolant passage, it can reduce contact between the liquid coolant and the surrounding metal surfaces. This creates the possibility of localized overheating, particularly in areas exposed to high combustion temperatures.
Continued overheating can damage the cylinder head, head gasket, and other engine components. Excessive heat can cause metal parts to expand unevenly, potentially distorting sealing surfaces or weakening gaskets. Severe overheating may also lead to coolant boiling, pressure buildup, and further coolant loss. The extent of damage depends on engine design, operating temperature, load, and how long the overheating condition continues.
A vehicle may initially show only minor symptoms, such as inconsistent cabin heating or occasional temperature fluctuations. However, these symptoms do not establish that the vehicle is safe to drive. Air can move through the cooling system as coolant circulates, and a pocket that initially causes limited disruption may later interfere with flow through a critical passage.
Stop driving as soon as it is safe if the temperature gauge indicates overheating, a coolant temperature warning appears, or steam escapes from the engine compartment. Pull over safely, switch off the engine, and allow the cooling system to cool completely. Never remove a radiator cap or pressurized coolant reservoir cap while the system is hot, because escaping coolant and steam can cause serious burns.
Do not continue driving simply because the temperature gauge returns to its normal position after the engine cools. The underlying cooling problem may still be present and can cause the engine to overheat again. Arrange professional inspection or towing when overheating, coolant loss, or unstable temperatures persist.
If trapped air is suspected after recent cooling system maintenance, complete the manufacturer-approved bleeding procedure and verify normal operation before returning the vehicle to regular use. Stable engine temperature, consistent heater performance, and a correct coolant level after cooling are important verification indicators, but they must be considered together with the required service checks.
Driving should resume only after the cooling system fault has been resolved and the vehicle has passed the appropriate operating checks. This prevents a temporary air pocket or an undiagnosed coolant leak from developing into a more expensive engine repair.