A cracked coolant reservoir can cause coolant leaks, engine overheating, and serious engine damage if the cooling system loses too much fluid. The reservoir stores excess engine coolant as temperatures change and helps maintain the correct coolant level during operation. A crack can disrupt this process, allowing coolant to escape and reducing the cooling system’s ability to regulate engine temperature.
The most common signs of a cracked coolant reservoir include visible cracks in the plastic tank, coolant puddles beneath the vehicle, a consistently low coolant level, and a sweet smell from leaking antifreeze. In more severe cases, the engine temperature gauge may rise above its normal operating range, indicating that coolant loss is affecting engine cooling.
Replacing a cracked coolant reservoir is generally the safest permanent solution, particularly when the tank is pressurized or actively leaking. Continuing to drive with a damaged reservoir increases the risk of overheating, although the immediate danger depends on the crack’s location, the amount of coolant lost, and the vehicle’s cooling system design.
This guide explains the symptoms and causes of a cracked coolant reservoir, how to diagnose the damage, whether driving is safe, and how to repair or replace the tank. It also covers replacement costs and preventive maintenance.
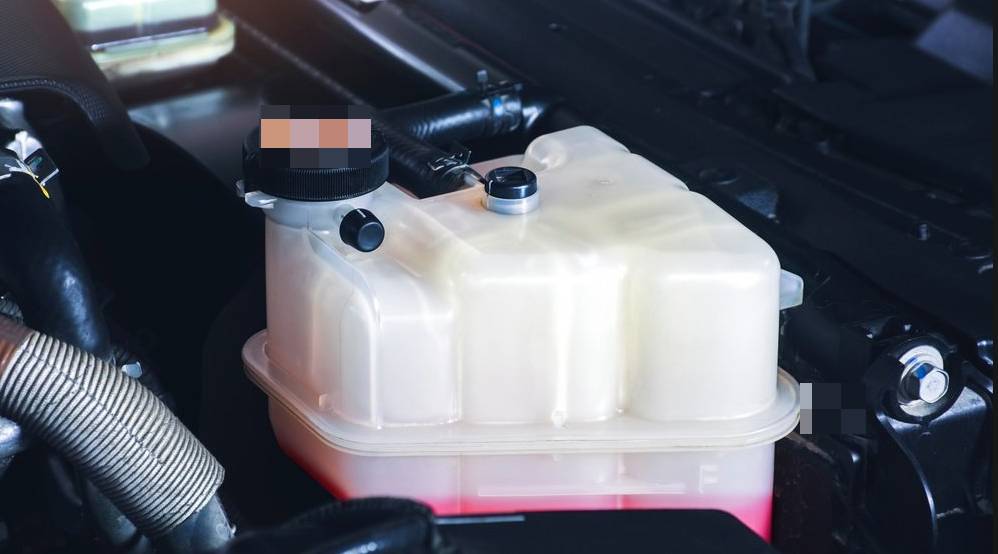
What Happens When a Coolant Reservoir Cracks?
A cracked coolant reservoir allows engine coolant to escape, potentially reducing cooling system efficiency and causing engine overheating. The severity depends on the size and location of the crack, the amount of coolant lost, and whether the vehicle uses a pressurized expansion tank or a non-pressurized overflow reservoir. A leaking pressurized tank can also prevent the cooling system from maintaining its designed operating pressure.
The coolant reservoir accommodates changes in coolant volume as the engine heats up and cools down. In a pressurized expansion tank system, the reservoir forms part of the sealed cooling circuit and helps manage coolant expansion and system pressure. In a conventional overflow system, excess coolant flows from the radiator into a separate reservoir and returns as the engine cools. Cracks in either design can disrupt coolant recovery or retention, although their immediate effects differ.
Coolant loss becomes dangerous when the remaining fluid cannot absorb and transfer enough heat from the engine to the radiator. As coolant levels fall, air may enter the cooling system, reducing circulation efficiency and creating localized hot spots. Continued operation under these conditions can damage cylinder head gaskets, warp cylinder heads, or cause other expensive engine failures.
A small crack may initially produce only minor seepage, especially when the engine is cold. However, thermal expansion, vibration, and pressure changes during operation can increase leakage. A cracked coolant reservoir should be inspected and replaced before coolant loss compromises engine cooling.
What Are the Symptoms of a Cracked Coolant Reservoir?
The main symptoms of a cracked coolant reservoir are visible plastic fractures, coolant leaks, recurring low coolant levels, a sweet antifreeze odor, and engine overheating. These signs vary according to the crack’s location, reservoir design, and operating temperature. Identifying them early helps prevent coolant loss from developing into a more serious cooling system failure.
Visible cracks and coolant residue are direct indicators of reservoir damage. Cracks commonly develop around molded seams, hose connections, mounting points, and areas exposed to repeated thermal stress. Small fractures may appear as thin lines in the plastic, while larger splits can produce visible coolant seepage. Dried coolant often leaves white, pink, orange, or colored crystalline deposits, depending on the coolant formulation.
Coolant puddles beneath the vehicle indicate an external leak that may originate from the reservoir. Coolant can drip from a cracked tank, run along nearby components, and collect beneath the engine compartment. Because leaking hoses, radiator connections, and water pumps can produce similar puddles, the actual source must be identified before replacing the reservoir.
A consistently low coolant level is another warning sign. A functioning cooling system should not require frequent coolant top-ups under normal conditions. If the reservoir level repeatedly falls below the MIN marking when the engine is cold, coolant may be escaping through a crack or another leak. Inspecting the tank and surrounding connections helps determine where the fluid is being lost.
A sweet smell from the engine compartment can indicate leaking antifreeze. Many conventional engine coolants contain ethylene glycol, which has a characteristic sweet odor. Coolant contacting hot engine components may produce vapor and make the smell more noticeable after driving. However, odor alone cannot confirm that the reservoir is cracked because other cooling system leaks can produce the same symptom.
Engine overheating is the most serious warning sign associated with substantial coolant loss. A rising temperature gauge, high-temperature warning light, or steam from the engine compartment indicates that the cooling system may no longer be controlling engine temperature effectively. Stop driving safely and shut off the engine if it is overheating. Never remove the coolant reservoir cap or radiator cap while the system is hot, because pressurized coolant can cause severe burns.
Can You Drive With a Cracked Coolant Reservoir?
Driving with a cracked coolant reservoir is not recommended because coolant loss can cause engine overheating and permanent engine damage. The immediate risk depends on the reservoir design, crack size, leak rate, and remaining coolant level. A cracked pressurized expansion tank presents a greater immediate concern because it can release coolant and prevent the cooling system from maintaining its specified pressure.
A small crack does not always cause immediate overheating, particularly in a non-pressurized overflow reservoir. However, coolant can escape as the engine warms up, and the cooling system may fail to recover coolant when it cools down. Repeated coolant loss can eventually reduce the amount of fluid available for engine cooling. A temperature gauge that initially appears normal does not guarantee that the vehicle is safe to continue driving.
There is no universally safe driving distance with a cracked coolant reservoir. A severe leak can cause overheating within minutes, while a minor crack may produce slower coolant loss. Vehicle design, outside temperature, engine load, and traffic conditions also affect how quickly overheating develops. Driving uphill, towing, or operating in heavy traffic can increase cooling demands and accelerate temperature problems when coolant levels are insufficient.
Continuing to operate an overheating engine can damage the cylinder head gasket, distort aluminum cylinder heads, and cause internal engine components to overheat. These repairs are substantially more complex than replacing a damaged plastic reservoir. The safest approach is to repair the leak before driving again, especially when coolant is actively escaping or the engine temperature is rising.
What Should You Do if the Coolant Reservoir Cracks While Driving?
Pull over safely, shut off the engine if it is overheating, and allow the cooling system to cool before inspecting the reservoir. Continuing to drive with a temperature warning or visible steam increases the risk of engine damage and personal injury.
Turn off the air conditioning, move to a safe stopping location, and switch off the engine. Do not open the radiator cap or pressurized coolant reservoir cap while the engine is hot. Cooling systems operate under pressure, and removing a hot cap can release boiling coolant or steam capable of causing severe burns.
Once the engine has cooled completely, inspect the coolant level and look for visible cracks, wet areas, or coolant deposits around the reservoir. Avoid touching leaking coolant directly, and keep it away from children and animals because antifreeze can be toxic. If the reservoir is leaking, the coolant level is low, or the engine has overheated, arrange towing or professional roadside assistance rather than attempting to continue driving.
What Causes a Coolant Reservoir to Crack?
The five main causes of a cracked coolant reservoir are plastic aging, repeated thermal cycling, excessive cooling system pressure, physical damage, and improper installation. These factors weaken the reservoir material or create mechanical stress that eventually produces fractures. Identifying the underlying cause is important because replacing the tank without correcting an existing cooling system problem can lead to another failure.
Plastic aging gradually reduces the reservoir’s resistance to mechanical stress. Most modern coolant reservoirs are manufactured from heat-resistant automotive plastics designed to withstand engine compartment temperatures and coolant exposure. However, prolonged exposure to heat, oxygen, and chemical conditions can change the material’s properties. Older reservoirs may become brittle, discolored, or develop small fractures around molded seams and fittings.
Repeated thermal cycling creates expansion and contraction stresses as the engine heats up during operation and cools after shutdown. These temperature changes affect the reservoir walls, hose connections, and mounting points. Over thousands of heating and cooling cycles, stress can accumulate in vulnerable areas, particularly where the plastic has already deteriorated. Cracks may develop around corners, seams, or fittings that concentrate mechanical stress.
Excessive cooling system pressure can place additional force on the reservoir walls, especially in vehicles equipped with pressurized expansion tanks. Cooling systems use pressure-control caps to maintain a specified operating pressure and release excess pressure when necessary. A malfunctioning cap that fails to relieve pressure can contribute to reservoir damage. Abnormal combustion gas intrusion caused by certain head gasket failures can also increase cooling system pressure. However, a cracked reservoir alone does not establish that either problem is present.
Physical damage can fracture a coolant reservoir through direct impact, engine compartment contact, or excessive vibration. A minor collision, dropped tool, or contact with a moving component can create cracks that are not immediately visible. Broken mounting brackets may also allow the tank to move during driving, placing repeated stress on its plastic connections.
Improper installation can cause premature reservoir failure when mounting bolts are overtightened, hoses are misaligned, or the wrong replacement component is installed. Excessive clamping force around plastic fittings can create localized stress, while incorrectly positioned hoses may pull against the reservoir as the engine moves. Using the correct replacement part and following manufacturer installation specifications helps prevent these failures.
A reservoir that cracks repeatedly should be investigated for underlying cooling system faults rather than treated as an isolated plastic component failure. Checking the pressure cap, mounting arrangement, operating temperature, and system pressure can help identify the conditions responsible for recurring damage.
How Do You Diagnose a Cracked Coolant Reservoir?
Diagnosing a cracked coolant reservoir requires a visual inspection, checking for coolant loss, and performing a cooling system pressure test when the leak source is not obvious. These methods help distinguish cracks in the reservoir from leaks around the cap, hoses, radiator, or other cooling system components. All inspections involving the reservoir cap should begin only after the engine has cooled completely.
Start by examining the reservoir’s exterior for visible fractures, wet surfaces, dried coolant deposits, and damaged mounting points. Pay particular attention to molded seams, hose connections, and the bottom of the tank, where small cracks can be difficult to see. A flashlight can help reveal hairline fractures in translucent plastic. White or colored deposits around a seam may indicate coolant escaping through a small opening and drying on the surface.
Next, check the coolant level against the MIN and MAX markings while the engine is cold and the vehicle is parked on level ground. A level below the specified minimum can indicate coolant loss, but it does not identify the source. Inspect the hoses, clamps, reservoir cap, and surrounding components for leakage. Coolant running down from a loose hose connection can resemble a crack in the reservoir wall.
Some reservoir cracks become more noticeable when the cooling system warms up because thermal expansion and pressure increase leakage. However, inspecting a hot pressurized cooling system directly is unsafe. A controlled pressure test provides a safer diagnostic method for identifying leaks without operating the engine at normal running temperature.
How Does a Cooling System Pressure Test Detect Reservoir Leaks?
A cooling system pressure test detects reservoir leaks by applying controlled pressure to the cooling system and checking for escaping coolant or pressure loss. This procedure helps reveal small cracks that may not leak visibly when the engine is cold and the system is unpressurized.
A mechanic connects a compatible pressure tester to the radiator filler neck or pressurized expansion tank, depending on the vehicle’s cooling system design. The tester gradually raises system pressure to the manufacturer’s specified test value without exceeding the permitted limit. The technician then monitors the pressure gauge and inspects the reservoir, hose fittings, radiator, and other accessible components for leakage.
A falling pressure reading indicates that the system may not be holding pressure, but it does not automatically confirm a cracked reservoir. Leaking hoses, faulty seals, radiator damage, and internal engine leaks can produce similar results. Visible coolant escaping from the reservoir wall or seam provides stronger evidence that the tank itself is damaged.
Pressure testing should be performed with the engine cool and the correct equipment. Applying excessive pressure can damage otherwise functional cooling system components. If the system loses pressure without an identifiable external leak, additional diagnosis may be required to investigate internal coolant loss.
How Do You Fix a Cracked Coolant Reservoir?
Replacing the damaged coolant reservoir is the most reliable permanent repair for a cracked tank. Epoxy, sealants, and plastic welding are sometimes considered temporary solutions, but their effectiveness depends on the reservoir material, operating temperature, system pressure, and crack location. A replacement tank restores the component’s intended structural integrity and coolant containment function.
Before replacing the reservoir, confirm that the tank is the actual source of the leak. Inspect nearby hoses, fittings, and pressure-control components because a leaking connection can resemble a cracked reservoir. If abnormal cooling system pressure contributed to the failure, that problem must also be corrected to prevent damage to the replacement tank.
Can You Repair a Cracked Coolant Reservoir With Epoxy or Sealant?
Epoxy and sealant repairs are not dependable permanent solutions for a cracked coolant reservoir, especially when the tank operates under pressure. Automotive coolant reservoirs experience repeated heating, cooling, vibration, and exposure to coolant chemicals. These conditions can weaken adhesive bonds and cause repaired cracks to reopen.
Many coolant reservoirs are manufactured from polypropylene or polyethylene-based plastics, which are difficult to bond using conventional adhesives because of their low surface energy. Even products advertised for plastic repair may not maintain a reliable seal under the reservoir’s operating conditions. A patch that appears successful while the engine is cold can fail when the plastic expands and the system becomes pressurized.
Plastic welding can join certain thermoplastic materials when the correct equipment and compatible filler material are used. However, successful bonding does not guarantee that the repaired reservoir will withstand repeated pressure and temperature cycles. Repairs near seams, mounting points, and hose fittings are particularly vulnerable because these areas experience concentrated mechanical stress.
For these reasons, adhesive patches and plastic welding should not be relied upon to keep a leaking vehicle in service. Replacing the cracked reservoir is the recommended solution, particularly for pressurized expansion tanks. If the vehicle is losing coolant or overheating, arrange professional repair or towing rather than attempting to drive with a temporary patch.
How Do You Replace a Cracked Coolant Reservoir?
Replacing a cracked coolant reservoir involves draining or recovering the necessary coolant, disconnecting the damaged tank, installing a compatible replacement, refilling the cooling system, and checking for leaks. The exact procedure varies by vehicle because reservoir mounting arrangements, hose connections, and coolant bleeding requirements differ between cooling system designs.
Step 1: Allow the engine to cool completely. Park the vehicle on a level surface, switch off the engine, and wait until the cooling system is fully cooled. Never remove a pressurized reservoir cap while the engine is hot. Consult the vehicle’s service instructions before opening or draining the system.
Step 2: Remove the necessary coolant. Place a suitable drain container beneath the appropriate drain point and recover enough coolant to prevent uncontrolled spillage when the reservoir hoses are disconnected. Some overflow reservoirs can be removed with minimal coolant loss, while pressurized expansion tanks may require partial system draining. Collect used coolant for proper disposal because antifreeze is toxic to people and animals.
Step 3: Disconnect the reservoir hoses and mounting hardware. Release the hose clamps using appropriate tools, carefully detach the hoses, and remove the bolts or clips securing the tank. Inspect the hoses for cracking, swelling, or damaged ends. Avoid pulling forcefully on plastic fittings because aged components can break during removal.
Step 4: Install the replacement coolant reservoir. Position the new tank in its original mounting location and reconnect the hoses according to the manufacturer’s specifications. Use a replacement reservoir designed for the vehicle’s exact make, model, engine, and cooling system configuration. Secure the mounting hardware without overtightening plastic attachment points. Inspect the reservoir cap and replace it if testing or visible damage indicates a fault.
Step 5: Refill and bleed the cooling system. Add coolant that meets the vehicle manufacturer’s specifications and use the required mixture or approved premixed product. Remove trapped air using the vehicle-specific bleeding procedure. Some vehicles use dedicated bleed screws, while others require vacuum filling equipment or electronic bleeding procedures. Incorrect bleeding can leave air pockets that interfere with coolant circulation and cause overheating.
Step 6: Check for leaks and verify engine temperature. After completing the required filling and bleeding procedure, inspect the reservoir and hose connections for leaks. Monitor engine temperature according to the service procedure and confirm that the cooling system operates normally. Once the engine has cooled completely, recheck the coolant level and adjust it to the specified cold-fill mark if necessary.
A professional mechanic should perform the replacement when the vehicle has experienced severe overheating, requires specialized coolant bleeding equipment, or shows signs of abnormal cooling system pressure. These conditions may indicate additional problems involving the thermostat, pressure cap, water pump, or engine head gasket. Addressing the underlying fault is necessary to prevent repeated reservoir damage.
How Much Does It Cost to Replace a Cracked Coolant Reservoir?
Replacing a cracked coolant reservoir typically costs approximately $150 to $450 at a professional repair shop in the United States, including parts and labor for many common passenger vehicles. Costs can exceed $500 for luxury vehicles, complicated reservoir assemblies, or models requiring additional cooling system service. The final price depends on vehicle make and model, reservoir design, parts availability, and local labor rates.
The replacement reservoir itself generally costs around $30 to $150 for common aftermarket applications, while original equipment manufacturer (OEM) parts and specialized expansion tanks can cost more. Labor charges often range from $80 to $200, depending on accessibility and the time required to remove the old tank, install the replacement, and refill the cooling system. Additional expenses may include coolant, pressure testing, and system bleeding.
| Replacement expense | Estimated US cost |
|---|---|
| Aftermarket coolant reservoir | $30–$150 |
| Professional labor | $80–$200 |
| Coolant and supplies | $15–$50 |
| Typical professional replacement total | $150–$450 |
These figures are general budgeting estimates rather than verified quotes for a specific vehicle. Individual charges may overlap, and the listed ranges should not be added together to calculate a universal repair price.
Replacement costs increase when the damaged reservoir is difficult to access or when additional components require attention. For example, a faulty pressure cap, deteriorated coolant hose, or abnormal cooling system pressure may require separate diagnosis and repair. Vehicles that have already overheated may also need further inspection to determine whether coolant loss caused engine damage.
Is It Cheaper to Replace a Coolant Reservoir Yourself?
Replacing a cracked coolant reservoir yourself is generally cheaper than professional replacement because it eliminates labor charges. For a straightforward replacement, DIY expenses may range from approximately $45 to $200 for the reservoir, coolant, and basic supplies, excluding tools. Actual savings depend on the vehicle’s cooling system design and whether specialized equipment is required.
DIY replacement is most practical when the reservoir is easily accessible, the hose connections are straightforward, and the manufacturer provides a manageable coolant filling procedure. A basic overflow reservoir may require only a few hand tools, while a pressurized expansion tank can involve additional hoses, sensors, and specific bleeding requirements.
Professional replacement is preferable when the cooling system requires vacuum filling, electronic bleeding, or diagnosis of recurring pressure problems. Incorrect coolant filling can trap air in the system and cause overheating even after the cracked reservoir has been replaced. The lowest repair cost is not necessarily the safest option if the replacement procedure exceeds the owner’s mechanical experience or available equipment.
How Can You Prevent a Coolant Reservoir From Cracking?
Preventing a coolant reservoir from cracking requires maintaining the cooling system, using the correct coolant, inspecting the reservoir regularly, and addressing abnormal pressure or overheating. These practices reduce the thermal, chemical, and mechanical stresses that contribute to plastic deterioration. Although routine maintenance cannot completely prevent age-related reservoir failure, it can help identify damage before a major coolant leak develops.
Maintain the correct coolant type and concentration according to the vehicle manufacturer’s specifications. Engine coolant contains corrosion inhibitors and other additives designed to protect cooling system components under normal operating conditions. Using incompatible coolant or an incorrect mixture can contribute to corrosion, deposits, and cooling system problems. Follow the manufacturer’s coolant replacement interval rather than relying on coolant color to determine compatibility or service life.
Inspect the coolant reservoir during routine vehicle maintenance, particularly around molded seams, hose connections, and mounting brackets. Look for hairline cracks, discoloration, dried coolant deposits, and wet surfaces. Check the coolant level when the engine is cold and compare it with the specified markings. A recurring decrease in coolant level requires investigation because a properly functioning sealed cooling system should not experience continuous unexplained coolant loss.
Maintain the cooling system’s correct operating pressure by ensuring the pressure-control cap functions according to manufacturer specifications. A defective cap that fails to release excess pressure can place additional stress on a pressurized expansion tank. Persistent overheating or unusually high cooling system pressure also requires diagnosis because faults involving the thermostat, radiator, cooling fans, or combustion gas leakage can contribute to abnormal operating conditions.
Prevent physical stress on the reservoir by keeping mounting brackets secure and ensuring hoses are correctly positioned. Loose mounts can allow vibration to damage plastic fittings, while misaligned hoses may pull against the tank during engine movement. Replace deteriorated hoses and damaged mounting components before they place additional strain on the reservoir.
Regular cooling system inspections are particularly valuable as a vehicle ages. Identifying a brittle reservoir, damaged fitting, or small coolant leak early allows the component to be replaced before coolant loss leads to overheating.
Read more: Coolant Reservoir Tank Replacement: Signs & Costs
How Long Does a Coolant Reservoir Usually Last?
A coolant reservoir can last 10 years or longer, but there is no universal replacement interval for all vehicles. Its service life depends on plastic material quality, engine compartment temperatures, cooling system pressure, environmental exposure, and maintenance history. Some reservoirs remain functional throughout much of a vehicle’s service life, while others develop cracks earlier because of repeated thermal stress or manufacturing differences.
Most modern coolant reservoirs are made from heat-resistant thermoplastics designed to tolerate repeated temperature changes. However, prolonged exposure to engine heat and cooling system operating conditions gradually affects the material’s mechanical properties. As the plastic ages, it may become more brittle and less resistant to vibration, pressure fluctuations, and stress around molded connections.
Visible deterioration is a more useful replacement indicator than vehicle age alone. Warning signs include hairline fractures, persistent coolant seepage, damaged mounting points, and brittle or weakened hose fittings. Yellowing or discoloration may indicate aging, but color changes alone do not prove that a reservoir has failed. A tank should be evaluated based on its physical condition and ability to retain coolant.
Vehicle operating conditions also influence reservoir lifespan. Frequent high-temperature operation, recurring engine overheating, excessive cooling system pressure, and poorly secured mounting brackets can accelerate deterioration. For example, a reservoir exposed to repeated overheating episodes may experience greater thermal stress than one operating consistently within the manufacturer’s specified temperature range.
Replace the coolant reservoir when cracks, structural damage, or confirmed leakage are present rather than waiting for a specific mileage or age. During routine maintenance, inspect the reservoir alongside the radiator, hoses, and pressure cap. This approach helps identify developing problems before the cooling system loses enough coolant to affect engine temperature.
How Can You Tell if the Coolant Reservoir or Radiator Is Leaking?
You can distinguish a leaking coolant reservoir from a leaking radiator by identifying the source of the coolant, inspecting the damaged component, and performing a cooling system pressure test. A cracked reservoir typically leaks around its plastic walls, molded seams, or hose fittings, while radiator leaks commonly develop around the radiator core, end tanks, or connections. Both problems can cause coolant loss and engine overheating, so locating the actual leak is essential before replacing parts.
A leaking coolant reservoir often shows visible cracks, wet plastic surfaces, or dried coolant deposits around the tank. Coolant may collect beneath the reservoir or run down nearby components before reaching the ground. On vehicles with pressurized expansion tanks, leakage may become more noticeable as the cooling system reaches operating pressure. Non-pressurized overflow reservoirs may leak primarily when the coolant level rises above the damaged area or when coolant moves during vehicle operation.
A leaking radiator generally produces coolant residue around the radiator core, plastic end tanks, or connections between the core and tanks. Corrosion, physical impact, deteriorated seals, and material fatigue can contribute to radiator leaks. Coolant may collect near the front of the vehicle, although airflow and surrounding components can carry the fluid away from its original source. A damaged radiator can also reduce cooling performance when coolant loss becomes substantial.
The following table compares the main diagnostic differences between these two cooling system problems.
| Diagnostic factor | Coolant reservoir leak | Radiator leak |
|---|---|---|
| Common leak location | Tank walls, seams, fittings | Core, end tanks, connections |
| Visible damage | Plastic cracks, split seams | Cracks, corrosion, damaged core |
| Coolant residue | Around reservoir exterior | Around radiator surfaces |
| Pressure-related leakage | Common in pressurized tanks | Common in pressurized radiators |
| Typical repair | Reservoir replacement | Radiator repair or replacement, depending on damage |
A cooling system pressure test is the most reliable way to confirm the leak source when visual inspection is inconclusive. The test applies controlled pressure to the cooling system while the engine is cool, allowing a technician to inspect the reservoir, radiator, hoses, and connections for escaping coolant. Pressure loss alone does not identify the damaged component; the leak must be located through direct observation or additional diagnostic testing.
Other cooling system components can produce similar symptoms. A loose hose clamp, deteriorated radiator hose, faulty pressure cap, or leaking water pump may cause coolant puddles and recurring low coolant levels without damage to either the reservoir or radiator. Inspecting these components helps prevent unnecessary replacement.
Replace the component confirmed to be leaking and investigate any underlying pressure or overheating problem before returning the vehicle to normal operation. Correct diagnosis prevents repeated coolant loss, reduces unnecessary repair expenses, and helps protect the engine from overheating.