An empty coolant reservoir with no visible leak usually indicates hidden coolant loss, a faulty radiator cap, trapped air in the cooling system, or an internal engine leak. Coolant can escape through small cracks, damaged hoses, or worn seals without leaving a puddle beneath the vehicle. In more serious cases, a damaged head gasket allows coolant to enter the engine’s combustion chambers, where it burns instead of leaking onto the ground.
The coolant reservoir stores excess coolant as the engine heats up and, depending on the cooling system design, supplies coolant back as the engine cools. A consistently empty reservoir indicates a problem that requires inspection, especially when the coolant level continues dropping after a refill. Insufficient coolant can reduce the cooling system’s ability to regulate engine temperature, increasing the risk of overheating, cylinder head damage, and costly engine repairs.
Identifying the cause requires checking the coolant level when the engine is cold, inspecting cooling system components, and testing for hidden or internal leaks. This guide explains why coolant disappears without visible leakage, how to locate the source of coolant loss, whether driving is safe, and which repairs can restore normal cooling system operation.
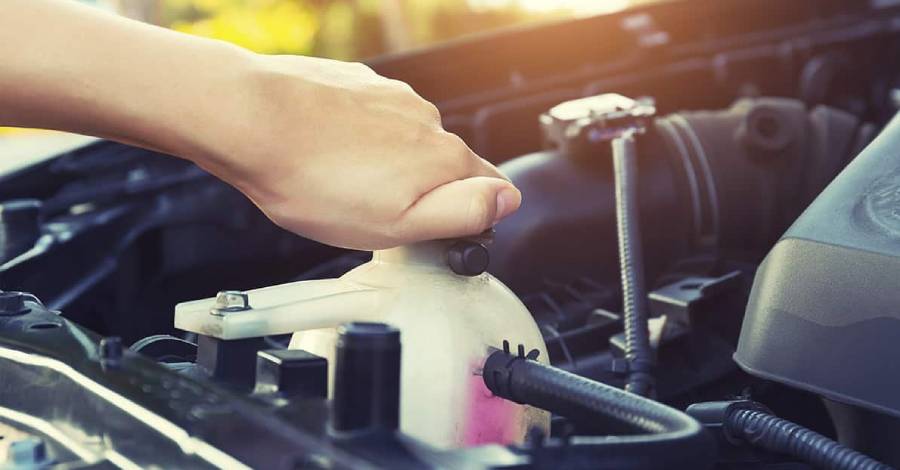
Why Is My Coolant Reservoir Empty but There Is No Visible Leak?
A coolant reservoir can become empty without a visible leak due to five main causes: a faulty radiator cap, a damaged head gasket, small external leaks, trapped air in the cooling system, or a cracked reservoir or overflow hose. These problems allow coolant to escape, enter the engine, or redistribute within the cooling system without forming a noticeable puddle beneath the vehicle.
Coolant loss is not always visible because some leaks occur only when the engine reaches operating temperature. Heat increases cooling system pressure, which can force coolant through small openings in hoses, seals, and radiator connections. Escaping coolant may evaporate on hot engine components or collect inside protective covers before reaching the ground.
A sudden drop in coolant level can also occur after a cooling system refill if trapped air escapes during subsequent heating and cooling cycles. However, coolant that continues disappearing after the system has been properly filled and bled indicates a problem requiring further diagnosis.
Can a Bad Radiator Cap Cause Coolant Loss?
A faulty radiator cap can cause coolant loss by failing to maintain the cooling system’s specified pressure or control coolant movement between the radiator and overflow reservoir. The cap contains pressure and vacuum valves that regulate coolant expansion and recovery in systems equipped with a conventional radiator cap.
When the pressure valve opens prematurely or the cap seal deteriorates, coolant can escape through the overflow system as the engine warms up. A damaged vacuum valve or blocked recovery hose can also prevent coolant from returning to the radiator during cooling. These failures may produce an empty reservoir, an abnormal coolant level, or repeated coolant loss without an obvious external leak.
For example, a vehicle may maintain a normal coolant level during short trips but lose coolant after extended highway driving. Higher operating temperatures and sustained cooling system pressure can expose a weak cap seal, allowing coolant to discharge through the overflow outlet. Inspecting the cap gasket, testing its pressure rating, and checking the recovery hose can help identify the fault.
Can a Blown Head Gasket Cause Coolant to Disappear?
A blown head gasket can cause coolant to disappear without an external leak by allowing it to enter the combustion chambers or engine oil passages. The head gasket seals the connection between the engine block and cylinder head, separating coolant passages, oil passages, and combustion chambers.
When the gasket fails between a coolant passage and a combustion chamber, coolant can enter the cylinder and leave through the exhaust system as water vapor. Depending on the severity of the failure, symptoms may include persistent white exhaust smoke after warm-up, unexplained coolant loss, rough engine operation, or overheating. A head gasket leak can also introduce combustion gases into the cooling system, increasing pressure and forcing coolant out through the overflow.
Coolant entering the engine oil may create a milky appearance, although this symptom is not present in every head gasket failure. Likewise, white exhaust vapor alone does not confirm a damaged gasket because condensation can produce similar exhaust during cold starts. A combustion gas test, cylinder leak-down test, or other diagnostic inspection is necessary to establish the cause.
Can Coolant Leak Only When the Engine Is Hot?
Coolant can leak only when the engine is hot because rising temperature and cooling system pressure expose small cracks, weakened seals, and loose connections. These leaks may close or become too small to detect once the engine cools, making the cooling system appear intact during a visual inspection.
Common locations include radiator seams, hose connections, thermostat housings, water pump seals, and heater hoses. A worn water pump seal, for example, may release coolant through its weep hole during operation. The escaping fluid can evaporate on nearby hot surfaces, leaving dried coolant residue rather than a visible puddle.
Temperature-dependent leaks can also occur in plastic cooling system components. Repeated heating and cooling cycles cause expansion and contraction, which can gradually weaken reservoir walls, radiator end tanks, and hose fittings. White, pink, green, or orange crusty deposits around these components may indicate dried coolant, depending on the coolant formulation.
Trapped air is another explanation for a reservoir that becomes empty after a coolant change or cooling system repair. Air pockets can remain inside the radiator, engine passages, or heater core when the system is not properly bled. As the engine reaches operating temperature, trapped air moves through the system and coolant replaces the displaced air, lowering the reservoir level. This initial drop may be expected after service, but repeated losses after proper bleeding require investigation.
A cracked coolant reservoir or damaged overflow hose can produce similar symptoms. Small cracks may release coolant only under pressure, while a disconnected or split recovery hose can interfere with coolant transfer between the radiator and reservoir. Inspecting these components for cracks, loose connections, moisture, and dried coolant deposits helps distinguish external coolant loss from internal engine problems.
How Can You Find Where Coolant Is Going Without a Visible Leak?
To find where coolant is going without a visible leak, check the coolant level when the engine is cold, inspect cooling system components, perform a pressure test, and check for internal engine leaks. These four diagnostic steps help determine whether coolant is escaping externally, entering the engine, or moving through the cooling system because of trapped air or a faulty pressure cap.
Start by parking the vehicle on level ground and allowing the engine to cool completely. Check the coolant reservoir against its MIN and MAX markings, following the vehicle manufacturer’s instructions. In systems with a separate non-pressurized overflow reservoir, the radiator coolant level may also require inspection. Never remove a radiator cap or pressurized reservoir cap while the engine is hot because escaping coolant and steam can cause severe burns.
Record the coolant level when the engine is cold and compare it under the same conditions over the following days. A consistently declining level indicates coolant loss rather than normal thermal expansion. If the reservoir is empty, do not assume the radiator or engine still contains enough coolant for safe operation.
Next, inspect the radiator, coolant hoses, hose clamps, thermostat housing, water pump, and reservoir connections. Look for wet surfaces, dried coolant deposits, corrosion, or a sweet chemical smell. Check beneath the vehicle after it has been parked, but remember that an engine splash shield can collect leaking coolant and prevent it from reaching the ground.
A UV dye inspection can help locate leaks that are difficult to see. Adding a cooling-system-compatible fluorescent dye allows escaping coolant to leave traces that become visible under an ultraviolet inspection light. This method is particularly useful for identifying small leaks around radiator seams, water pump seals, and concealed hose connections.
How Do You Perform a Cooling System Pressure Test?
A cooling system pressure test identifies coolant leaks by applying controlled pressure to the cooling system while the engine is off and cold. The test simulates operating pressure without requiring the engine to reach normal operating temperature, making it easier to inspect components safely.
A cooling system pressure tester connects to the radiator filler neck or pressurized expansion tank through a vehicle-specific adapter. The tester uses a hand pump and pressure gauge to introduce pressure into the system. The applied pressure must not exceed the vehicle manufacturer’s specified test pressure because excessive pressure can damage radiators, hoses, seals, and plastic components.
Once the system reaches the specified pressure, monitor the gauge according to the manufacturer’s test procedure. A pressure drop may indicate a leak, although temperature changes, tester connections, and trapped air can affect the reading. Inspect the radiator, water pump, hoses, heater core connections, and reservoir for escaping coolant while the system remains pressurized.
For example, a small crack in a radiator end tank may remain dry during a normal visual inspection but release coolant when pressure is applied. The resulting moisture or coolant residue helps identify the damaged component without replacing unrelated cooling system parts.
A pressure test can also reveal internal coolant loss when system pressure decreases without any visible external leakage. However, a pressure drop alone does not establish a head gasket failure. Further testing is necessary to determine whether coolant is entering a combustion chamber or another internal engine passage.
How Can You Tell if Coolant Is Leaking Into the Engine?
Internal coolant leakage can be identified through combustion gas testing, cylinder inspection, engine oil examination, and symptoms such as persistent white exhaust smoke or unexplained cooling system pressure. These findings help distinguish a damaged head gasket or cylinder head from external cooling system leaks.
A combustion gas test checks whether combustion gases are entering the cooling system. The procedure uses a chemical testing fluid or an exhaust gas analyzer to detect gases associated with combustion. A positive result supports the possibility of leakage between a combustion chamber and a coolant passage, although test limitations and engine conditions must be considered.
A cylinder leak-down test provides another diagnostic method. Compressed air is introduced into a cylinder positioned according to the test procedure, and the cooling system is monitored for bubbles or pressure changes. Air entering the coolant passages can indicate a sealing failure involving the head gasket, cylinder head, or engine block.
Engine oil inspection can reveal coolant contamination when a leak connects coolant and lubrication passages. Milky or foamy oil may indicate coolant mixing with engine oil, but condensation can produce a similar appearance. Conversely, normal-looking oil does not rule out a head gasket leak because coolant may enter the combustion chamber without mixing with the oil.
Persistent white exhaust smoke after the engine reaches operating temperature, repeated coolant loss, and unexplained overheating are additional warning signs. A mechanic may inspect spark plugs or use a borescope to look for abnormal coolant deposits or unusually clean piston surfaces. These observations must be evaluated together with pressure testing and other diagnostic results.
If the coolant reservoir continues emptying and external inspections reveal no leak, professional testing is necessary before replacing the head gasket or other major engine components. Confirming the failure location prevents unnecessary repairs and helps determine whether the problem involves a gasket, cracked cylinder head, or another cooling system component.
Is It Safe to Drive With an Empty Coolant Reservoir?
Driving with an empty coolant reservoir is not recommended until you confirm that the cooling system contains enough coolant and the engine is operating at a safe temperature. An empty reservoir does not always mean the radiator is empty, but it can indicate coolant loss that increases the risk of engine overheating and mechanical damage.
The level of risk depends on the cooling system design and the amount of coolant remaining. In vehicles with a non-pressurized overflow reservoir, the radiator may still contain coolant even when the reservoir is empty. However, an empty pressurized expansion tank can indicate that the cooling system has lost a significant amount of coolant. Both conditions require inspection because the reservoir level alone cannot confirm whether the engine has adequate cooling.
Insufficient coolant reduces the cooling system’s ability to transfer heat from the engine to the radiator. When coolant levels fall below critical passages, air pockets can form around hot engine components, creating localized overheating. Continued operation under these conditions can damage the cylinder head gasket, warp the cylinder head, or cause severe engine failure.
Stop driving immediately when the temperature gauge enters the overheating range, the engine temperature warning light activates, or steam appears beneath the hood. Pull over safely, turn off the engine, and allow it to cool. Do not open the radiator cap or pressurized coolant reservoir while the system is hot.
If the reservoir is empty but the engine temperature appears normal, avoid assuming the vehicle is safe for a short trip. Temperature gauges may not accurately reflect localized overheating when coolant is insufficient. Check the cooling system only after the engine has cooled completely. If the coolant level cannot be verified, the reservoir empties repeatedly, or overheating has occurred, arrange professional inspection or towing rather than continuing to drive.
How Do You Fix an Empty Coolant Reservoir When There Is No Visible Leak?
Fixing an empty coolant reservoir requires identifying the cause of coolant loss, repairing the affected component, refilling the cooling system, and removing trapped air when required. Repeatedly adding coolant without diagnosing the problem does not correct a leaking component, faulty pressure cap, or internal engine failure.
The appropriate repair depends on the results of the cooling system inspection and diagnostic tests. A damaged radiator cap may require a simple replacement, while a leaking water pump or failed head gasket involves more extensive mechanical work.
Refill the cooling system with the correct coolant. Start with a completely cool engine and check the vehicle manufacturer’s coolant specification. Use the recommended coolant formulation and concentration because incompatible coolant chemistry can reduce corrosion protection and affect cooling system components.
For a vehicle with a conventional overflow reservoir, fill the reservoir to the specified cold-level marking and check the radiator according to the manufacturer’s procedure. For a pressurized expansion tank, follow the vehicle-specific filling instructions. Avoid overfilling because coolant expands as its temperature increases.
Remove trapped air after refilling or repairing the cooling system. Air pockets can interfere with coolant circulation and produce fluctuating coolant levels, poor cabin heating, or engine overheating. Some vehicles have dedicated bleed screws, while others require a vacuum filling tool or an electronic bleeding procedure.
Follow the manufacturer’s bleeding instructions rather than assuming that running the engine with the radiator cap removed will work for every vehicle. Once the system has been properly filled and bled, allow the engine to cool completely and recheck the coolant level. A continuing drop indicates that further inspection is necessary.
Replace a faulty radiator cap or reservoir cap when testing confirms that it cannot maintain the specified pressure. A damaged seal, weakened pressure spring, or malfunctioning vacuum valve can interfere with coolant pressure regulation and recovery. Replacement caps must match the vehicle’s required pressure rating and design. Installing a cap with an incorrect pressure specification can cause coolant discharge or place unnecessary stress on cooling system components.
Repair hidden external leaks at their source. Damaged coolant hoses, cracked reservoirs, leaking radiator seams, and worn water pump seals require repairs appropriate to the failed component. For example, a split coolant hose generally requires replacement, while a water pump leaking through its shaft seal typically requires water pump replacement. Tightening a loose hose clamp may resolve leakage at a connection, provided the hose and fitting remain in good condition.
Avoid relying on cooling system stop-leak products as a permanent solution. These additives may temporarily reduce certain leaks, but they do not restore damaged seals or cracked components to their original condition. Some formulations can also leave deposits in narrow cooling passages or heater cores.
Repair internal coolant leaks only after confirming the failure location. A damaged head gasket may require cylinder head removal, gasket replacement, and inspection of the mating surfaces. If overheating has warped or cracked the cylinder head, additional machining or component replacement may be necessary.
Internal engine repairs should also address the original cause of overheating or coolant loss. Replacing a head gasket without correcting a malfunctioning thermostat, defective water pump, or other underlying cooling system fault can result in repeated engine damage.
After completing the repair, pressure-test the cooling system when appropriate, refill it with the specified coolant, and verify that the engine maintains its normal operating temperature. Monitor the coolant level through subsequent heating and cooling cycles to confirm that the reservoir no longer loses coolant unexpectedly.
Read more: Honda Cabin Air Filter Replacement: Step-by-Step Guide
Can the Coolant Reservoir Be Empty While the Radiator Is Full?
Yes, the coolant reservoir can be empty while the radiator remains full, particularly in vehicles equipped with a non-pressurized coolant overflow system. This happens because the radiator and overflow reservoir serve different functions, and a problem with coolant recovery can prevent coolant from returning to the radiator during engine cooling.
In a conventional overflow system, expanding coolant flows from the radiator into the reservoir as engine temperature rises. When the engine cools, the coolant contracts, creating a pressure difference that draws coolant back through the radiator cap’s vacuum valve and recovery hose. A damaged cap, disconnected hose, or empty reservoir can interrupt this process. The radiator may initially remain full, but repeated heating and cooling cycles can eventually reduce its coolant level.
A pressurized expansion tank operates differently because it forms part of the sealed cooling system. The tank provides space for coolant expansion and helps manage system pressure. An empty pressurized expansion tank may indicate insufficient coolant elsewhere in the system, even when the engine temperature gauge shows a normal reading.
Check the coolant reservoir and radiator according to the vehicle’s cooling system design. For vehicles with a conventional radiator cap, inspect the radiator level only when the engine is completely cold. Vehicles with pressurized expansion tanks generally require coolant level checks at the tank rather than a separate radiator opening.
For example, a vehicle with a full radiator and an empty overflow reservoir may have a damaged coolant recovery hose or a radiator cap with a faulty vacuum valve. In contrast, an empty pressurized expansion tank requires closer inspection because the missing coolant may affect circulation through the engine and radiator.
A full radiator does not establish that the cooling system is free of leaks. If the reservoir repeatedly empties, inspect the recovery system, test the pressure cap, and monitor coolant levels after the engine completes several heating and cooling cycles.
How Can You Prevent the Coolant Reservoir From Running Empty Again?
Prevent the coolant reservoir from running empty by monitoring coolant levels, maintaining cooling system components, using the correct coolant, and repairing leaks before they cause significant fluid loss. These maintenance practices help preserve coolant circulation, pressure regulation, and engine temperature control.
Check the coolant reservoir when the engine is cold and the vehicle is parked on level ground. The coolant should remain within the manufacturer’s specified cold-level range. Comparing measurements under consistent conditions helps distinguish normal thermal expansion from actual coolant loss. A reservoir that repeatedly drops below its minimum marking requires inspection, even when the engine has not overheated.
Inspect cooling system components during routine vehicle maintenance. Examine radiator hoses for cracks, swelling, soft spots, or coolant residue. Check hose connections, radiator seams, reservoir walls, and water pump areas for moisture or dried deposits. A damaged pressure cap should also be replaced when inspection or testing confirms that it no longer operates within the manufacturer’s specifications.
Coolant selection and replacement intervals also affect cooling system reliability. Engine coolant contains corrosion inhibitors that protect metal surfaces and cooling system components. These additives deteriorate over time, reducing protection against corrosion and deposits. Follow the vehicle manufacturer’s coolant specification and service interval rather than selecting coolant based only on its color. For example, two green coolants may use different additive technologies and may not be interchangeable.
Bleed the cooling system correctly after coolant replacement or component repairs. Trapped air can interfere with circulation and cause the reservoir level to drop as air escapes during subsequent operating cycles. Use the manufacturer’s specified bleeding procedure, which may involve bleed valves, vacuum filling equipment, or an electronically controlled coolant pump.
Monitor the reservoir after maintenance to confirm that the coolant level stabilizes. If the level continues falling after proper filling and bleeding, perform a cooling system pressure test and inspect for hidden external or internal leaks.
Maintaining the correct coolant level protects the engine only when the cooling system is functioning properly. A reservoir that repeatedly becomes empty is a symptom of an unresolved problem, not a normal maintenance condition. Identifying the cause early helps prevent overheating, coolant circulation problems, and expensive engine repairs.