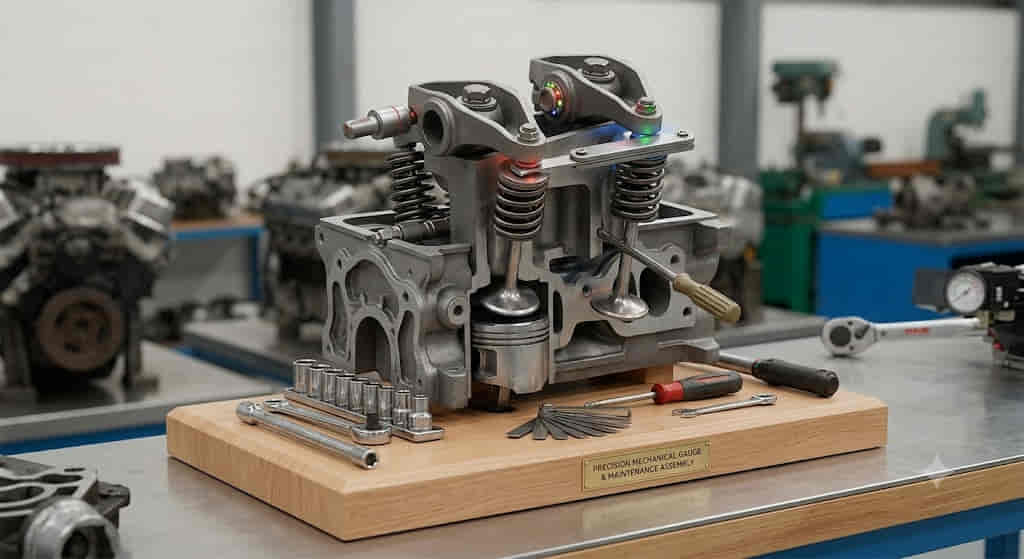
Honda GX390 valve adjustment is a maintenance procedure that ensures the intake and exhaust valves maintain the correct clearance between their valve stems and rocker arms. Proper valve clearance allows the valves to open and close at the correct points in the engine cycle, supporting reliable compression, efficient combustion, and consistent engine performance. Incorrect clearance can contribute to valve train noise, hard starting, reduced power, or poor engine operation.
The correct Honda GX390 valve clearance must be measured with the engine cold and the piston positioned at top dead center (TDC) on the compression stroke. For the GX390 UT2 service specification, the intake valve clearance is 0.15 ± 0.02 mm (0.006 ± 0.001 in), while the exhaust valve clearance is 0.20 ± 0.02 mm (0.008 ± 0.001 in). Always verify these figures against the service documentation for your exact engine version before making adjustments.
This guide explains how to prepare the engine, identify the correct piston position, measure valve clearance with a feeler gauge, adjust the rocker arms, and verify the final settings. It also covers common adjustment mistakes and symptoms of incorrect valve clearance so you can complete the procedure accurately and recognize when further engine diagnosis is necessary.
The correct Honda GX390 valve clearance depends on the engine specification, but the service specification for the Honda GX390 UT2 sets the intake valve clearance at 0.15 ± 0.02 mm (0.006 ± 0.001 in) and the exhaust valve clearance at 0.20 ± 0.02 mm (0.008 ± 0.001 in). These measurements represent the permitted gap between each valve stem and its rocker arm when the engine is cold and the piston is at top dead center on the compression stroke. Before adjusting your engine, check the service manual for its exact model and type designation to confirm the applicable specifications.
The intake and exhaust valves have different clearance requirements because they operate under different thermal conditions. The exhaust valve is exposed to hot combustion gases as they leave the cylinder, causing it to experience greater thermal loading than the intake valve. The specified exhaust clearance therefore differs from the intake clearance. Setting both valves to the same measurement can produce an incorrect adjustment, even if the difference appears small.
A feeler gauge is the primary tool for measuring valve clearance accurately. Select a blade corresponding to the specified clearance, then insert it between the rocker arm and valve stem contact point. The blade should move with slight, consistent resistance rather than sliding freely or becoming tightly trapped. If the clearance falls outside the permitted range, adjust it according to the manufacturer’s procedure and measure it again after tightening the lock nut. Tightening can change the final clearance, so the measurement taken before locking the adjustment is not sufficient to confirm the result.
Correct valve clearance helps the valves close properly and allows the valve train to operate within its designed mechanical tolerances. Excessive clearance can increase mechanical noise and affect valve operation, while insufficient clearance can prevent a valve from seating fully as the engine heats up. Because these conditions can also produce symptoms associated with other engine faults, accurate measurement against the correct Honda specification is more reliable than diagnosing valve clearance by sound or engine performance alone.
Read more: Chevy Small Block Firing Order
Adjusting the valves on a Honda GX390 requires a feeler gauge, suitable wrenches, and the tools needed to access the rocker arms. The feeler gauge measures the clearance between each rocker arm and valve stem, while the wrenches allow you to loosen the lock nut and turn the adjustment screw. Using the correct tools helps prevent inaccurate measurements, damaged fasteners, and changes to the clearance during tightening.
A feeler gauge with blades that cover the specified intake and exhaust clearances is essential for this procedure. For the Honda GX390 UT2 service specification, the target measurements are 0.15 mm for the intake valve and 0.20 mm for the exhaust valve, with the manufacturer’s stated tolerances. Metric blades are convenient because the specifications are expressed in millimeters. The selected blade should fit between the rocker arm and valve stem with slight resistance, allowing you to distinguish a correctly adjusted gap from one that is too loose or too tight.
You will also need the appropriate wrench or socket to remove the valve cover and expose the rocker arms. A correctly sized wrench is necessary for loosening and tightening the rocker arm lock nuts, while a suitable adjustment tool may be needed to turn the adjustment screws. The exact tool sizes can vary with the engine configuration, so consult the service documentation rather than forcing a tool that does not fit securely. Inspect the valve cover gasket before reassembly and replace it if it is damaged or no longer seals properly.
Before starting, place the engine on a stable surface, allow it to cool completely, and disconnect the spark plug cap to reduce the risk of accidental starting. Keep the exposed valve train clean throughout the procedure because dirt entering the engine can cause unnecessary wear. Preparing the correct measuring and adjustment tools in advance makes the work more controlled and helps ensure that the final clearance remains within the specified range after the lock nuts are tightened.
Preparing the Honda GX390 correctly is essential for measuring valve clearance accurately and preventing accidental engine starting during maintenance. The engine must be completely cold because temperature changes affect the clearance between the valve components. Allow the engine to cool fully after operation, place the equipment on a stable, level surface, stop the engine, and disconnect the spark plug cap before removing any covers or working near the valve train.
Once the engine is cool, clean the area around the valve cover to prevent dirt and debris from entering the cylinder head. Remove any surrounding components that obstruct access, following the instructions for the particular equipment using the GX390 engine. Loosen the valve cover fasteners with the correct tool and carefully remove the cover. Inspect the gasket and sealing surfaces for damage, oil contamination, or deterioration that could cause leakage after reassembly.
With the rocker arms exposed, inspect the valve train before making adjustments. Check that the rocker arms, adjustment screws, lock nuts, and visible valve components are in place and show no obvious signs of damage. Excessive wear, loose components, or damaged threads should be investigated before continuing because an adjustment cannot correct an underlying mechanical problem.
The next preparation step is to position the piston at top dead center on the compression stroke. This is the reference position used to measure valve clearance according to the applicable Honda service procedure. Do not begin adjusting the rocker arms simply because a timing mark aligns; the piston can reach top dead center during different strokes of the four-stroke cycle. Confirm that the engine is on the compression stroke before measuring either valve.
Keep the work area clean and organize the measuring tools so the intake and exhaust clearances can be checked separately. Once the engine is cold, the ignition is disabled, the rocker arms are accessible, and the piston is correctly positioned, you can proceed to identify top dead center and measure the valve clearance under the proper conditions.
Finding top dead center (TDC) on the compression stroke is essential for accurate Honda GX390 valve adjustment. TDC is the position where the piston reaches the top of the cylinder, but the piston reaches this position twice during a complete four-stroke cycle. For valve adjustment, the correct reference is TDC on the compression stroke, when both the intake and exhaust valves are closed and the rocker arms are not being pushed open by the camshaft.
Begin by turning the engine crankshaft slowly in the direction specified by the Honda service manual for your engine configuration. Observe the valve movement as the crankshaft rotates. During the intake stroke, the intake valve opens to allow the air-fuel mixture into the cylinder. As the piston moves upward during the compression stroke, the intake valve closes. Continue turning the crankshaft carefully until the piston reaches the top of the cylinder, using the appropriate timing or flywheel reference marks where specified by the manufacturer.
The key distinction between compression-stroke TDC and exhaust-stroke TDC is the position of the valves. At compression-stroke TDC, both valves should be closed, allowing the cylinder to compress its charge. Near exhaust-stroke TDC, the exhaust valve is closing while the intake valve begins to open as the engine transitions between strokes. Observing the valve sequence helps prevent the common mistake of measuring clearance at the wrong crankshaft position.
Once you have confirmed compression-stroke TDC, avoid rotating the crankshaft before measuring the clearance. Insert the feeler gauge between the rocker arm and the valve stem contact point, then check the intake and exhaust valves separately against the specifications for your exact GX390 version. If the valve positions do not clearly confirm the compression stroke, rotate the crankshaft through another complete cycle and check again rather than guessing from the timing mark alone.
Adjusting the Honda GX390 valve clearance involves measuring each valve gap, correcting the adjustment screw position, and checking the final clearance after tightening the lock nut. Before starting, confirm that the engine is completely cold and the piston is at top dead center on the compression stroke. For the Honda GX390 UT2 service specification, the intake clearance is 0.15 ± 0.02 mm (0.006 ± 0.001 in), while the exhaust clearance is 0.20 ± 0.02 mm (0.008 ± 0.001 in). Verify these specifications against the service documentation for your exact engine type.
Insert the appropriate feeler gauge between the rocker arm and valve stem contact point. Move the gauge gently to assess the resistance. A correctly adjusted clearance allows the blade to slide through with slight, consistent resistance. If the blade moves freely, the gap may be too wide; if it cannot enter or becomes tightly trapped, the gap may be too narrow. Measure the intake and exhaust valves independently because their specified clearances are different.
To correct the clearance, loosen the relevant rocker arm adjustment lock nut using the correct wrench. Turn the adjustment screw gradually until the feeler gauge passes through the gap with the specified resistance. Make small changes and recheck the measurement rather than making large adjustments by estimation. Once the clearance is correct, hold the adjustment screw in position while tightening the lock nut to the torque specified in the service manual for your engine version. This prevents the screw from turning as the nut is secured.
After tightening the lock nut, measure the clearance again with the feeler gauge. The final measurement is the one that matters because tightening can shift the adjustment slightly. If the clearance has moved outside the specified tolerance, loosen the lock nut and repeat the adjustment. Check both valves using their respective specifications before reinstalling the valve cover.
When both measurements are correct, inspect the sealing surfaces and valve cover gasket, then reinstall the cover and surrounding components according to the manufacturer’s instructions. Reconnect the spark plug cap only after the engine has been reassembled and the work area is clear. A careful final inspection helps ensure that the adjustment is accurate, the cover seals properly, and no tools or loose components remain near the engine.
Incorrect valve clearance can affect Honda GX390 engine performance, mechanical noise, compression, and starting reliability. The consequences depend on whether the gap is too wide or too narrow, which valve is affected, and how the engine is operated. Measuring the clearance against the correct Honda specification is the most reliable way to identify an adjustment problem because symptoms such as hard starting or reduced power can also result from ignition, fuel, or compression faults unrelated to valve clearance.
Excessive valve clearance creates a larger gap between the rocker arm and valve stem than the manufacturer specifies. This additional clearance can cause the valve train to produce tapping or clicking noises as its components move and make contact during operation. It can also alter the effective movement of the valve, potentially affecting how efficiently the engine breathes. If a Honda GX390 develops unusual mechanical noise, checking the valve clearance is a reasonable diagnostic step, but worn rocker components and other mechanical issues should also be considered.
Insufficient valve clearance presents a different concern because the gap may become too small as the engine reaches operating temperature. If the clearance is inadequate, thermal expansion can prevent a valve from seating fully against its valve seat. A valve that does not close properly can allow combustion pressure to escape, reducing cylinder compression and contributing to difficult starting, unstable operation, or loss of power. Prolonged operation under these conditions can increase the risk of valve damage, making accurate adjustment important for engine reliability.
Valve clearance problems should not be diagnosed from a single symptom. For example, a GX390 that is difficult to start may also have a faulty spark plug, an obstructed fuel system, or another compression-related problem. Similarly, reduced power can result from a dirty air filter, incorrect fuel delivery, or excessive engine load. If the valve clearances are within specification but the symptoms remain, continue troubleshooting according to the Honda service manual rather than repeatedly changing the adjustment.
The appropriate response to suspected incorrect valve clearance is to stop unnecessary operation, allow the engine to cool completely, and measure both valves at the specified crankshaft position. Correct any clearance that falls outside the permitted range, then recheck the measurements after tightening the lock nuts. If the clearance cannot be adjusted consistently, the engine makes persistent abnormal mechanical noises, or compression remains poor, inspect the valve train and seek qualified service before returning the engine to regular use.
Verifying a Honda GX390 valve adjustment requires confirming that both valve clearances remain within the specified tolerances after the lock nuts have been tightened. A measurement taken before tightening is not sufficient because the adjustment screw can move slightly as the lock nut is secured. Rechecking both valves helps ensure that the final settings match the applicable Honda service specification and reduces the risk of operating the engine with excessive or insufficient clearance.
After adjusting the intake and exhaust valves, check each gap again with the feeler gauge while the engine remains cold and the piston is at top dead center on the compression stroke. The gauge should pass through each gap with slight, consistent resistance. For a GX390 UT2, the reference clearances are 0.15 ± 0.02 mm for the intake valve and 0.20 ± 0.02 mm for the exhaust valve. Confirm the correct specifications and tightening requirements in the service manual for your engine before accepting the measurements as final.
Once the clearances have been verified, inspect the valve cover gasket and sealing surfaces before reinstalling the cover. A damaged, displaced, or deteriorated gasket can cause oil leakage after reassembly. Tighten the cover fasteners according to the manufacturer’s instructions and reinstall any components removed to access the rocker arms. Before reconnecting the spark plug cap, check that all tools have been removed and that the valve cover and surrounding components are secure.
After reassembly, reconnect the spark plug cap and start the engine outdoors or in a well-ventilated area, away from flammable materials. Observe the engine for abnormal valve train noise, oil leakage, or irregular operation. A brief operational check can help identify an assembly issue, but it does not replace the clearance measurements. If the engine continues to run poorly, investigate other possible causes instead of assuming that valve clearance is responsible.
The frequency of future valve clearance inspections should follow the maintenance schedule in the owner’s manual for the specific Honda GX390 version. Operating conditions and accumulated running hours influence maintenance needs, so a schedule intended for one application should not automatically be applied to every GX390 installation. If the clearance repeatedly changes, the adjustment hardware is damaged, or the engine continues to show symptoms despite correct measurements, have the valve train inspected by a qualified technician.