Changing your own oil is worth it when the actual savings justify the time and effort. You mainly pay for engine oil and a new oil filter. You may also need to buy tools for your first oil change. These costs determine how much money you can actually save.
Drivers who already own the required tools have a clear financial advantage. They can reuse the same equipment for future oil changes. This lowers the effective tool cost with every service. Drivers who maintain several vehicles can recover their initial investment even faster.
However, cost alone does not determine whether a DIY oil change makes sense. You need a safe workspace and enough time to complete the job. You also need to dispose of used motor oil correctly. Mistakes can create extra expenses and reduce your expected savings.
This article compares DIY costs with professional oil change prices. It also examines tool costs, time, potential savings, common mistakes, warranty concerns, and oil disposal. These factors will help you decide whether changing your own oil provides better value than professional service.
Is It Worth Changing Your Own Oil?
Changing your own oil is worth it if the savings exceed your total costs and the value of your time. The financial benefit becomes stronger when you already own the required tools. It also improves when you service several vehicles or change oil several times each year.
Five main factors determine whether a DIY oil change provides good value. These are supplies, professional service prices, tools, service frequency, and time. Engine oil and an oil filter create the main recurring costs. Tools create a larger expense at the beginning. However, you can reuse most tools for future oil changes.
Professional service prices also affect the calculation. A higher service price creates more room for DIY savings. A low priced professional service reduces that difference. Therefore, the cheapest DIY supplies do not automatically make changing your own oil worthwhile.
Time also has value. You need to prepare the vehicle, drain the old oil, install the filter, and refill the engine. You must also clean the work area and handle the used oil. These tasks increase the real cost of doing the work yourself.
A simple calculation can help you make the decision. Subtract your total DIY expenses from the cost of professional service. Then consider the time and effort required. DIY provides better value when the remaining savings justify that additional responsibility.
How Much Does It Cost to Change Your Own Oil?
The cost of changing your own oil consists of recurring supplies and one time equipment expenses. Engine oil and an oil filter account for most recurring costs. Your vehicle may also require a new drain plug washer. Cleaning materials can add another small expense.
The exact supply cost depends on your vehicle. Engines require different amounts of oil. Manufacturers also specify particular viscosity grades and performance standards. Some engines require full synthetic oil. Filter prices also vary by vehicle and filter design. For this reason, one DIY price cannot represent every car.
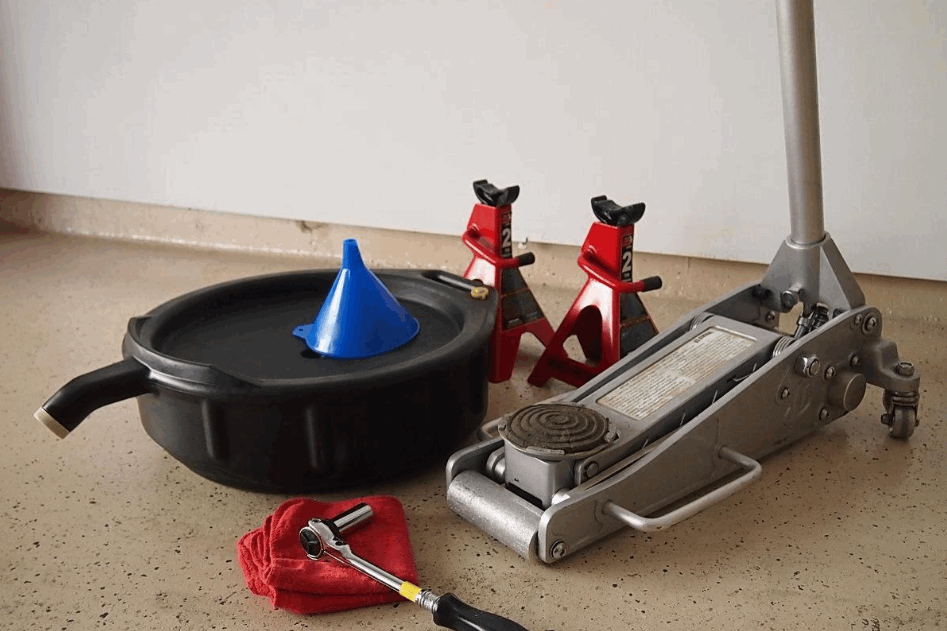
First time DIYers also need to consider equipment. Common tools include a drain pan, socket, filter wrench, and funnel. Some vehicles also require ramps or jack stands for safe access underneath the engine. These purchases can make the first oil change more expensive.
However, most equipment does not become a recurring expense. You can use a drain pan or wrench for many future services. The effective tool cost therefore falls after each successful oil change.
Separate these two cost groups when calculating your total expense. Recurring costs show what each future oil change costs. Initial equipment costs show how much you must invest before DIY savings become meaningful. This distinction provides a more accurate comparison with professional service.
How Much Money Can You Save by Changing Your Own Oil?
Your savings equal the professional service price minus your total DIY oil change cost. The exact amount varies by vehicle and service provider. Oil type, engine capacity, filter price, and local labor rates all affect the result.
Start by calculating your recurring DIY expenses. Add the cost of engine oil, the oil filter, and other replacement supplies. Next, compare that total with the price of professional service. The difference represents your gross savings for one oil change.
For example, assume a professional oil change costs $90. Your oil, filter, and other supplies cost $45. In this example, you save $45 before accounting for tools and time.
Annual savings depend on service frequency. Two identical oil changes would produce $90 in gross annual savings. Three would produce $135. Four would produce $180. This calculation becomes more important when you maintain several vehicles.
However, gross savings do not show the complete financial result. New DIYers must also account for their initial equipment investment. Those expenses reduce first year savings. They become less important as you reuse the equipment.
Calculate both gross and net savings before deciding whether changing your own oil is worthwhile. Gross savings show the difference in service costs. Net savings show how much money you actually keep after additional DIY expenses.
How Many Oil Changes Does It Take to Recover the Cost of DIY Tools?
Divide your initial tool cost by your savings per oil change to estimate your break even point. This calculation shows how many services you need before the equipment pays for itself.
Consider a driver who spends $90 on reusable tools. Assume each DIY oil change saves $45 compared with professional service. The calculation is simple:
$90 ÷ $45 = 2 oil changes
The driver recovers the initial tool investment after two oil changes. Savings from later services can then provide a stronger financial return. The result changes when tool costs or service savings change.
A $150 equipment investment requires five oil changes when each service saves $30. In contrast, $100 in tools requires only two oil changes when each service saves $50. These examples show why the first oil change alone does not determine long term value.
Drivers who already own suitable tools have an advantage. They do not need to recover a large initial equipment expense. Their savings can begin with the first oil change.
Service frequency also affects how quickly you reach the break even point. A household maintaining several vehicles can reuse the same equipment more often. Changing your own oil becomes financially stronger when you spread tool costs across more oil changes.
Is Changing Your Own Oil Cheaper Than Going to a Mechanic?
Changing your own oil is often cheaper when you compare recurring DIY supplies with the full price of professional service. However, the lowest price does not always provide the best overall value.
A DIY oil change requires engine oil, a filter, and any vehicle specific replacement items. You also need suitable tools. Once you own those tools, you can reuse them for later services. This reduces your average DIY cost over time.
A mechanic charges for more than oil and a filter. The service price also covers labor and the equipment required to perform the job. The shop also handles the used motor oil. Some services include basic vehicle checks as part of the visit.
Dealerships, independent mechanics, and quick service shops can also charge different prices. The difference affects how much DIY work can save. Promotions and prepaid maintenance can make professional service more competitive. In those cases, doing the work yourself may produce only a small financial advantage.
Convenience also has economic value. Professional service removes the need to prepare tools or clean the work area. You also avoid handling used oil yourself.
Compare the complete cost of both options before choosing one. Include supplies, tools, time, and convenience in that comparison. DIY offers better financial value when its repeat savings remain large enough to justify the extra work.
How Much Time Does Changing Your Own Oil Take?
A DIY oil change takes more time than the draining process alone. You must include preparation, maintenance, cleanup, and used oil handling in the total.
First, you need to gather the correct oil, filter, and tools. You must then position the vehicle safely. Some cars provide easy access to the drain plug and filter. Others require extra work before you can reach these components.
The service itself includes several steps. You drain the old oil and remove the old filter. You then install the replacement filter and close the drain plug correctly. Next, you add fresh oil and verify the oil level. You should also check the vehicle for leaks.
Cleanup adds more time. You need to store your tools and clean any spilled oil. You must also place the used oil in a suitable container. Recycling it can require a separate trip.
Professional service also consumes time. You may need to drive to the shop and wait for the service. Therefore, compare total time rather than workshop time alone.
One useful measure is money saved per hour of DIY work. Divide your actual savings by the total time you spend on the oil change. DIY becomes more worthwhile when the hourly savings justify the time you invest.
What Are the Pros and Cons of Changing Your Own Oil?
Changing your own oil offers five main benefits and five main disadvantages. The benefits focus on cost, control, flexibility, and maintenance knowledge. The disadvantages involve tools, time, cleanup, disposal, and the risk of mistakes.
What Are the Benefits of Changing Your Own Oil?
The first benefit is lower recurring service cost. You avoid paying professional labor when you perform the work yourself. This advantage becomes stronger after you recover your initial tool costs.
The second benefit is control over the engine oil. You can select oil that meets the specifications required by your vehicle. The third benefit is control over the oil filter. You choose the filter instead of relying on the product selected by a service provider.
The fourth benefit is scheduling flexibility. You can perform the service when your schedule allows it. You do not need to arrange an appointment or wait for a shop.
The fifth benefit is greater familiarity with your vehicle. Regular DIY maintenance helps you learn where key service components are located. It also makes you more familiar with the condition of those components.
What Are the Disadvantages of Changing Your Own Oil?
The first disadvantage is the initial tool investment. New DIYers may need several pieces of reusable equipment. The second disadvantage is time. Preparation and cleanup add to the service itself.
The third disadvantage is mess. Used motor oil requires careful handling. The fourth disadvantage is disposal responsibility. You must store and recycle the old oil correctly.
The fifth disadvantage is the risk of mistakes. An incorrect oil, loose filter, or damaged drain plug can create extra costs. DIY makes sense when its financial and practical benefits outweigh these five disadvantages.
What Mistakes Can Make Changing Your Own Oil More Expensive?
Seven common mistakes can reduce or eliminate the money saved by changing your own oil. These errors can increase costs through wasted supplies, leaks, damaged components, or engine problems.
Using the wrong engine oil is one potential mistake. Your vehicle requires oil that meets specific manufacturer requirements. Using an incorrect product can undermine proper lubrication or conflict with those requirements.
Installing the wrong oil filter creates another risk. The replacement filter must fit the vehicle and meet its requirements. Incorrect installation can also cause leaks.
Adding the wrong amount of oil creates additional problems. Too little oil can leave the engine without adequate lubrication. Too much oil can also interfere with normal engine operation.
Drain plug errors can become expensive. Excessive tightening can damage the plug or its threads. Insufficient tightening can allow oil to leak. A damaged sealing washer can create a similar problem.
Oil filter installation also requires care. A loose filter can leak. Incorrect sealing can produce the same result. Check for leaks after completing the service.
Unsafe lifting creates a more serious risk. Use appropriate lifting points and supporting equipment when you need access beneath the vehicle.
A single expensive mistake can erase the savings from several successful DIY oil changes. Correct parts, proper procedures, and safe working practices protect the financial value of DIY maintenance.
Does Changing Your Own Oil Affect Your Car Warranty?
Changing your own oil does not automatically mean that you fail to meet your vehicle’s warranty requirements. The important issue is whether you perform the required maintenance correctly. You should also keep records that show when you completed the service.
Start by following the maintenance requirements for your vehicle. Use engine oil with the correct viscosity and required specifications. Install a suitable oil filter and follow the recommended service interval. These details help show that you maintained the vehicle correctly.
Keep records for every DIY oil change. Record the date and vehicle mileage when you complete the service. Save receipts for the engine oil, filter, and other required parts. You can also keep a simple maintenance log with your vehicle records.
Documentation becomes important when a warranty claim involves a related engine problem. Service records can show what maintenance you performed and when you performed it. Receipts can also identify the products you purchased.
Warranty rules and consumer protections vary by location. Vehicle manufacturers can also set specific maintenance requirements. Check your warranty documents before relying on a general rule.
DIY oil changes require both correct maintenance and clear documentation. Following the required specifications protects the vehicle. Keeping records provides evidence of the maintenance you completed.
What Should You Do With Used Oil After Changing It?
Collect used motor oil in a secure container and take it to an appropriate recycling or collection facility. Disposal is part of the complete DIY oil change process. It also adds time and effort to the job.
Start with a suitable drain pan when removing the old oil. Transfer the used oil into a container that closes securely. This reduces the risk of spills during storage and transportation.
Keep other substances out of the used oil. Mixing it with unrelated fluids can complicate proper handling. Store the sealed container in a secure location until you can transport it.
Next, identify a facility that accepts used motor oil in your area. Available options depend on local recycling systems and regulations. Confirm the facility’s requirements before making the trip.
Oil disposal also affects the practical value of DIY maintenance. A convenient collection point makes the process easier. A distant facility adds travel time and transportation effort.
Include this responsibility when comparing DIY with professional service. A repair shop normally handles the used oil after completing an oil change. A DIY owner takes responsibility for that step.
The real DIY process includes draining, collecting, storing, transporting, and recycling the used oil. Your cost comparison should account for the entire process.
Who Should Change Their Own Oil?
Changing your own oil is best for drivers who can save money without creating extra safety or maintenance risks. Five factors make a driver a good candidate for a DIY oil change. These include workspace, tools, knowledge, service frequency, and access to oil recycling.
A safe workspace comes first. You need enough room to work around the vehicle. You also need a stable surface when the job requires vehicle ramps or lifting equipment. Safe access matters more than the potential savings.
Owning reusable tools also improves the financial value. Drivers who already have basic equipment avoid a large initial expense. New DIYers can still benefit when they plan to reuse their tools for future maintenance.
Basic maintenance knowledge reduces the risk of costly errors. You should know the correct oil specification and oil capacity for your vehicle. You should also identify the correct filter before starting the job. Following the vehicle manufacturer’s service information helps prevent mistakes.
Service frequency can make DIY more valuable. Drivers who maintain several vehicles can use the same tools more often. Frequent use spreads the original equipment cost across more oil changes.
Access to oil recycling completes the process. You need a practical way to handle used motor oil after each service. DIY provides the strongest value when you have the workspace, equipment, knowledge, and opportunity to repeat the process safely.
Who Should Pay for a Professional Oil Change?
Professional oil changes provide better value for drivers whose DIY savings do not justify the required time, equipment, or responsibility. The cheapest option is not always the most worthwhile option.
Drivers without a safe workspace should consider professional service. Changing oil may require access beneath the vehicle. Attempting the job without suitable space or support equipment creates unnecessary risk.
A professional service can also make sense when you lack the required tools. Buying several tools for one oil change increases your initial cost. That investment becomes harder to justify when you do not plan to perform future services yourself.
Limited maintenance experience is another factor. An oil change is a routine service, but mistakes can create expensive problems. Using incorrect oil or installing components improperly can reduce the financial advantage of DIY.
Your time also affects the decision. Professional service removes preparation, cleanup, and used oil handling from your workload. Paying for that convenience can provide better value when your available time matters more than the potential savings.
Some vehicles also make routine maintenance less convenient. Restricted access or additional service procedures can increase the work required.
Choose professional service when its convenience, equipment, and reduced personal workload provide more value than the money you would save at home. The right choice depends on total value rather than service price alone.
Is It Worth Changing Your Own Oil in the Long Run?
Changing your own oil is worth it when repeat savings justify the tools, time, effort, and responsibility involved. Drivers who already own the required equipment have the strongest financial advantage. They mainly need to pay for oil, a filter, and other replacement supplies.
First time DIYers need to consider the break even point. Buying tools can reduce or eliminate the savings from the first service. However, those tools become more valuable when you reuse them. Maintaining several vehicles can also help you recover the investment faster.
Cost should not be the only factor in your decision. Changing oil requires a safe workspace and basic maintenance knowledge. You also need time for preparation, cleanup, and used oil recycling. Professional service handles these responsibilities for you.
Compare the professional service price with your complete DIY cost before making a decision. Include recurring supplies and the effective cost of reusable tools. Then consider the value of your time.
Changing your own oil provides better value when the actual savings justify the additional work. Professional service provides better value when convenience, safety, and saved time matter more than the financial difference.