Keeping the air conditioning system properly charged is essential for maintaining consistent cooling performance in a Honda CR-V. An AC recharge restores the correct amount of refrigerant when the system becomes undercharged, allowing the compressor, condenser, and evaporator to operate within their designed pressure range. However, adding refrigerant is only effective when low refrigerant is the actual cause of poor cooling. If the system has a leak, a failing compressor, or an electrical fault, a recharge alone will not restore normal operation.
The recharge procedure also varies by Honda CR-V model year because different generations use different refrigerants and service specifications. Many earlier models were designed for R-134a, while newer models commonly use R-1234yf. Each refrigerant requires compatible service equipment, compressor oil, and charging procedures. Using the wrong refrigerant or adding more than the specified capacity can increase system pressure, reduce cooling efficiency, and shorten compressor life.
This guide explains the complete Honda CRV AC recharge process from diagnosis to final inspection. You will learn how to recognize the symptoms of low refrigerant, identify the correct refrigerant by model year, locate the low-pressure service port, understand normal pressure readings, and recharge the system safely. The guide also explains the most common charging mistakes, the reasons an AC system may remain warm after a recharge, and the situations where professional repair is the safer and more effective solution.
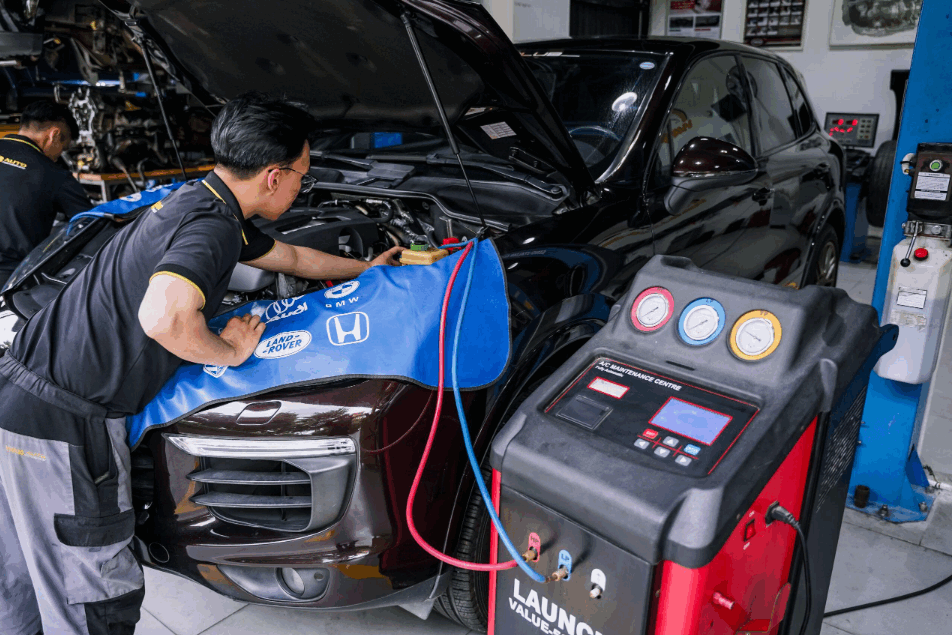
How Can You Tell If Your Honda CRV Needs an AC Recharge?
A Honda CRV AC recharge is necessary only when the air conditioning system has lost refrigerant. Low refrigerant reduces cooling efficiency and changes system pressure. However, warm air from the vents does not always mean the refrigerant level is low. A worn compressor, a faulty condenser fan, or a clogged cabin air filter can produce similar symptoms. For this reason, diagnosing the system first is always the best approach.
The first warning sign is weaker cooling performance. The air from the vents may feel cool during mild weather but struggle to stay cold on hot days. Many owners also notice that the AC performs better while driving than when the vehicle is idling. This happens because airflow through the condenser increases as the vehicle moves. Better airflow helps the system release heat more efficiently.
Another common symptom is rapid compressor cycling. The compressor clutch switches on and off because the refrigerant pressure drops below the normal operating range. As a result, the evaporator cannot absorb enough heat from the cabin. Cooling performance becomes inconsistent, especially during long trips or heavy traffic. Checking the low-side pressure with a gauge can confirm whether the refrigerant level is lower than expected for the current outdoor temperature.
A visual inspection can provide additional clues. Refrigerant carries compressor oil through the entire AC system. When a leak develops, small traces of oil often appear around hose connections, service ports, or the condenser. These oily spots usually indicate that refrigerant is escaping. Adding more refrigerant without repairing the leak only provides a temporary improvement because the new refrigerant will eventually leak out again.
Several other faults can also reduce cooling performance. A dirty cabin air filter limits airflow through the vents. A failed condenser fan prevents the system from removing heat at idle. Likewise, a damaged blend door actuator can mix warm and cold air inside the HVAC unit. None of these problems can be solved with a Honda CRV AC recharge. Therefore, confirming the real cause before recharging the system saves both time and money.
Which Refrigerant Does a Honda CRV Use by Model Year?
The refrigerant used in a Honda CR-V depends on its model year and factory specification. Earlier models were commonly filled with R-134a, while many newer models use R-1234yf. These refrigerants are not interchangeable. Each one requires specific service equipment, compressor oil, and charging procedures. Before performing a Honda CRV AC recharge, always check the refrigerant label under the hood.
Honda introduced R-1234yf to meet stricter environmental standards. This refrigerant has a much lower global warming potential than R-134a. As a result, it has become the standard choice for many modern vehicles. However, older Honda CR-V models were engineered for R-134a. Converting between the two refrigerants is not a simple refill. It requires compatible components and approved service procedures.
Although online refrigerant charts are helpful, they should only be used as a reference. Production year, trim level, and regional specifications can all affect the refrigerant used in a particular vehicle. Therefore, the under-hood information label remains the most reliable source. The owner’s manual and factory service information can also confirm the correct refrigerant and system capacity.
Using the wrong refrigerant can create serious problems. Different refrigerants operate with different oils and service fittings. Mixing R-134a with R-1234yf can contaminate the AC system and damage expensive components. In many cases, the entire refrigerant charge must be recovered before the system can be cleaned and refilled correctly. That repair is far more expensive than verifying the refrigerant type before starting the recharge.
The table below provides a general reference for Honda CR-V refrigerant applications by model year. Always compare this information with the label installed on your vehicle before adding refrigerant.
| Honda CR-V Model Year | Common Refrigerant | Verification Method |
|---|---|---|
| 1997–2016 | R-134a | Under-hood refrigerant label |
| 2017 and newer | R-1234yf | Under-hood refrigerant label |
| Transition or special-market models | Varies | Factory service information or vehicle label |
How Much Refrigerant Does a Honda CRV AC System Need?
The correct refrigerant capacity for a Honda CR-V depends on its model year and air conditioning system. There is no single amount that applies to every vehicle. Honda specifies the refrigerant charge by weight because even a small difference can affect cooling performance. Before performing a Honda CRV AC recharge, always verify the required capacity on the under-hood label or in the factory service manual.
Each Honda CR-V generation uses a different AC system design. The compressor, condenser, evaporator, and refrigerant lines may vary in size. Some models also include dual-zone climate control or hybrid-specific components. These design differences change the amount of refrigerant needed for proper operation. For this reason, two Honda CR-V models built only a few years apart may require different refrigerant capacities.
An undercharged AC system cannot circulate enough refrigerant through the evaporator. As a result, the cabin takes longer to cool, and the compressor may cycle on and off more frequently. Low refrigerant also reduces compressor lubrication because the oil travels with the refrigerant. If the problem is ignored for too long, internal compressor wear can increase and lead to costly repairs.
Overcharging the system can be just as harmful. Excess refrigerant raises system pressure and makes it harder for the condenser to release heat. The compressor must work harder to maintain normal operation, and cooling performance may actually decrease. In severe cases, excessive pressure can shorten compressor life or damage other AC components. Therefore, adding refrigerant until the gauge enters the green zone is not always the correct approach.
The safest method is to charge the system according to Honda’s specified weight. Pressure readings should only be used to support the diagnosis because they change with ambient temperature and operating conditions. Following the factory specification helps maintain stable cooling, protects the compressor, and ensures the Honda CR-V air conditioning system performs as designed.
What Tools Do You Need for a Honda CRV AC Recharge?
A Honda CRV AC recharge requires the correct tools to add refrigerant safely and monitor system performance. The equipment needed depends on the type of service being performed. A simple refrigerant top-off uses fewer tools. A complete AC service requires professional equipment for recovery, leak testing, vacuuming, and precise charging.
A basic DIY recharge usually requires a refrigerant container, a low-pressure charging hose, and a pressure gauge. These tools allow the owner to connect to the low-pressure service port and add refrigerant according to the product instructions. A thermometer is also useful because vent temperature provides a direct indication of cooling improvement. Safety glasses and gloves protect the user from accidental refrigerant exposure.
However, a basic recharge kit provides limited information. Most single-gauge recharge tools only measure low-side pressure. They cannot show high-side pressure or confirm the exact refrigerant weight inside the system. Therefore, these tools are suitable only for specific situations where the refrigerant type is known and the system still contains refrigerant.
A professional Honda CRV AC recharge requires additional equipment. A manifold gauge set measures both low-side and high-side pressure. This allows technicians to identify problems such as overcharging, compressor weakness, or airflow restrictions. A vacuum pump removes moisture and air from the system before charging. Moisture inside the AC system can create corrosion and reduce cooling performance.
Professional service also uses a refrigerant recovery machine and a digital refrigerant scale. The recovery machine removes old refrigerant without releasing it into the atmosphere. The scale measures the exact refrigerant amount added to match the factory specification. Electronic leak detectors and UV dye equipment can also help locate refrigerant leaks before completing the recharge.
One tool that should be avoided is a refrigerant can containing stop-leak additives. These chemicals may temporarily reduce small leaks, but they can contaminate the AC system. Stop-leak products can damage valves, restrict components, and create problems during future professional repairs. Using the correct tools and following the proper procedure helps maintain the Honda CR-V air conditioning system and prevents unnecessary repair costs.
Where Is the Low-Pressure AC Port on a Honda CRV?
The low-pressure AC port on a Honda CRV is the connection point used for adding refrigerant during an AC recharge. It is located on the low-pressure side of the air conditioning system. This side carries refrigerant from the evaporator back to the compressor. The correct port must be identified before connecting any recharge equipment because the high-pressure port operates at a much higher pressure.
The easiest way to identify the low-pressure port is by checking the refrigerant lines. The low-pressure line is usually the larger aluminum pipe in the AC system. It connects the evaporator outlet to the compressor inlet. The service port is installed on this larger line and often has a protective cap marked with the letter “L”. The high-pressure port is usually found on the smaller refrigerant line and may have an “H” marking.
Honda CR-V models place the low-pressure port in different areas depending on the generation and engine configuration. In many models, the port is located near the firewall area or close to the compressor side of the engine bay. The exact position can change between model years. Therefore, the under-hood refrigerant label, owner’s manual, or factory service information provides the most accurate location.
Before connecting a recharge hose, inspect the service port carefully. The cap should be removed only after cleaning the surrounding area. Dirt or debris near the fitting can enter the system and affect the seal. A damaged service valve can also cause refrigerant leaks after the recharge is completed.
Connecting equipment to the wrong port creates a serious safety risk. DIY recharge cans are designed for the low-pressure side only. The high-pressure side contains much greater pressure during AC operation. Attempting to charge through this port can damage the equipment and may cause refrigerant discharge.
After locating the correct port, confirm that the engine is running and the AC system is operating before checking pressure. A pressure reading without compressor operation may provide inaccurate information. Correct port identification is the first step toward a safe and effective Honda CRV AC recharge.
How Do You Recharge a Honda CRV AC Step by Step?
A Honda CRV AC recharge requires a controlled process to restore the correct refrigerant level. The first step is checking the refrigerant type and system condition. Honda CR-V models use different refrigerants depending on the model year. Check the label under the hood to confirm whether the system uses R-134a or R-1234yf.
Next, inspect the AC components before adding refrigerant. Check the compressor, condenser, refrigerant lines, and service ports for damage or oil residue. These signs may indicate a refrigerant leak. Adding refrigerant to a leaking system only provides temporary cooling and does not fix the underlying problem.
Start the engine and turn the AC to the lowest temperature setting. Set the blower fan to the highest speed and activate recirculation mode if available. Allow the system to run for several minutes so the compressor can circulate refrigerant and stabilize pressure.
Locate the low-pressure service port and connect the recharge hose. Check the pressure before adding refrigerant. Add refrigerant slowly in short intervals while monitoring the pressure gauge and vent temperature. Avoid adding refrigerant based only on gauge readings because pressure changes with temperature, humidity, and compressor operation.
Stop charging when the system reaches the correct refrigerant level. Use the factory specified refrigerant capacity as the main reference. After finishing the recharge, remove the hose, reinstall the service cap, and test the AC performance during idle and normal driving.
A proper Honda CRV AC recharge depends on correct diagnosis, the right refrigerant, and careful charging. Following the correct process helps protect the compressor and maintain reliable cooling performance.
What Pressure Should a Honda CRV AC System Have?
A Honda CRV AC system does not have one fixed pressure value that applies to every situation. The correct pressure depends on refrigerant type, outside temperature, humidity, engine speed, and compressor operation. For this reason, technicians check pressure together with vent temperature and system performance instead of relying on one number.
The low-side pressure provides important information about the refrigerant flow. A low reading may indicate insufficient refrigerant, an expansion valve restriction, or reduced airflow through the evaporator. When the system lacks enough refrigerant, the evaporator cannot absorb enough heat from the cabin. As a result, the AC produces weak cooling and the compressor may cycle frequently.
A high low-side pressure reading can also indicate a problem. Common causes include an overcharged system, a weak compressor, or poor condenser airflow. Excess refrigerant prevents the condenser from releasing heat effectively. The compressor then works harder, and the system may produce warmer air instead of colder air.
Ambient temperature plays an important role when reading AC pressure. A Honda CR-V operating on a hot day will show different pressure readings compared with the same vehicle in cooler weather. Technicians use refrigerant pressure charts that match the refrigerant type and outdoor temperature to evaluate system performance accurately.
A complete diagnosis requires both low-side and high-side pressure readings. A single low-pressure gauge from a basic recharge kit cannot show the full condition of the AC system. A manifold gauge set provides a clearer picture by showing how the compressor, condenser, evaporator, and refrigerant circuit work together.
Therefore, pressure readings should support the diagnosis, not replace it. The correct Honda CRV AC recharge process combines pressure measurement, temperature testing, refrigerant weight, and component inspection to achieve reliable cooling performance.
What Are the Most Common Honda CRV AC Recharge Mistakes?
A Honda CRV AC recharge can fail when drivers use the wrong procedure or ignore important system checks. Refrigerant charging requires accurate diagnosis because adding more refrigerant does not solve every AC problem. The most common mistakes involve incorrect refrigerant selection, poor pressure evaluation, and ignoring possible system damage.
The first mistake is using the wrong refrigerant. Honda CR-V models use different refrigerants depending on the production year. Many older models use R-134a, while newer models often use R-1234yf. Mixing these refrigerants can contaminate the AC system and damage components. Always check the vehicle label before starting the recharge.
The second mistake is adding refrigerant without confirming that the system actually needs it. Weak cooling may come from a failed compressor, a blocked cabin air filter, or a condenser fan problem. Adding refrigerant in these situations does not improve performance. It only increases the risk of overcharging.
Another common mistake is ignoring refrigerant leaks. A leaking AC system loses refrigerant because damaged seals, hoses, or components allow it to escape. A recharge may temporarily restore cooling, but the problem will return when the refrigerant leaves the system again.
Overcharging creates another serious problem. Too much refrigerant increases system pressure and reduces heat transfer through the condenser. The compressor must work harder, which can shorten its service life. Drivers should follow the factory refrigerant capacity instead of adding refrigerant until a gauge reaches a specific range.
Using stop leak products is also a common mistake. These additives may block small leaks temporarily, but they can contaminate valves and professional recovery equipment. They may also create additional repair costs later.
A successful Honda CRV AC recharge requires correct refrigerant, accurate diagnosis, and proper charging methods. Avoiding these mistakes helps maintain cooling performance and protects expensive AC components.
Why Is the Honda CRV AC Still Not Cold After a Recharge?
A Honda CRV AC system can remain warm after a recharge when another problem affects cooling performance. Adding refrigerant only solves low refrigerant conditions. It cannot repair damaged components, airflow problems, or electrical failures. If the AC still blows warm air after charging, the system needs further diagnosis.
A refrigerant leak is one of the most common reasons cooling returns for only a short time. The AC system works as a closed circuit, so refrigerant should not disappear during normal operation. Leaks often develop around hose connections, service ports, condenser coils, evaporator components, or compressor seals. When refrigerant escapes, the system loses pressure and cannot absorb enough heat from the cabin.
A weak or damaged compressor can also prevent proper cooling. The compressor creates the pressure difference that moves refrigerant through the AC system. When the compressor loses pumping ability, the refrigerant cannot complete the cooling cycle effectively. The system may show abnormal pressure readings even when it contains the correct amount of refrigerant.
A condenser airflow problem can create similar symptoms. The condenser removes heat from the refrigerant before it returns to the evaporator. A failed condenser fan or blocked condenser surface reduces heat transfer. As a result, the AC may feel colder while driving but become warm when the vehicle stops.
Other causes include a restricted cabin air filter, a faulty blend door actuator, and an expansion valve problem. A dirty cabin filter reduces airflow from the vents. A damaged blend door can allow warm air to mix with cooled air. A restricted expansion valve can prevent proper refrigerant flow.
Therefore, a Honda CRV AC recharge should not become a repeated solution. If the system loses cooling again after charging, inspect the complete AC system to identify the real cause.
When Should You Avoid Recharging a Honda CRV AC Yourself?
A Honda CRV AC recharge is not always suitable for a DIY approach. Some situations require professional diagnosis and specialized equipment. Adding refrigerant without understanding the system condition can create larger problems, especially when the AC system has leaks, component failures, or incorrect refrigerant levels.
Avoid a DIY recharge when the AC system is completely empty. A system without refrigerant may also contain air and moisture. These contaminants reduce cooling efficiency and can damage internal components. A professional technician must remove moisture with a vacuum pump before adding the correct refrigerant amount.
Avoid recharging the system when you do not know the refrigerant type. Honda CR-V models use different refrigerants depending on the model year. Using R-134a in a system designed for R-1234yf, or mixing both refrigerants, can contaminate the system and increase repair costs.
Professional service is also necessary when the compressor does not operate correctly. The compressor creates the pressure difference that moves refrigerant through the AC system. If the compressor clutch does not engage or the compressor produces unusual noise, adding refrigerant will not solve the problem.
You should also avoid DIY charging when you notice a visible refrigerant leak. Oil residue around hoses, fittings, or AC components often indicates refrigerant loss. A recharge without leak repair only provides temporary cooling.
Hybrid Honda CR-V models require extra attention because they may use electrically driven compressors and specific compressor oils. Incorrect oil or equipment can damage the high-voltage AC system.
A DIY Honda CRV AC recharge works best when the refrigerant type is confirmed, the compressor operates normally, and the system only needs a small refrigerant adjustment. In complex situations, professional diagnosis protects the AC system and prevents unnecessary repairs.
How Much Does a Honda CRV AC Recharge Cost?
A Honda CRV AC recharge cost depends on the refrigerant type, service method, system condition, and repair requirements. A simple refrigerant top-off usually costs less than a complete AC service because it requires fewer tools and less labor. However, a professional recharge may provide a more accurate result because technicians can test pressure, check for leaks, and measure the exact refrigerant amount.
A basic DIY recharge usually costs between $30 and $100. The price depends on the refrigerant type and the quality of the recharge kit. R-134a products are generally less expensive because they have been used in vehicles for many years. R-1234yf products usually cost more because the refrigerant requires specialized equipment and has a higher material cost.
A professional Honda CRV AC recharge often costs between $150 and $300. This service usually includes refrigerant recovery, system inspection, vacuum testing, and adding the correct refrigerant amount. The final price depends on the repair shop, location, refrigerant type, and the amount of refrigerant required by the vehicle.
The cost increases when the AC system has a leak or damaged components. A technician may need to replace seals, repair hoses, replace the condenser, or service the compressor before recharging the system. In these cases, the recharge becomes part of a larger AC repair process rather than a simple maintenance service.
R-1234yf systems usually cost more to service than R-134a systems. They require different recovery equipment, service procedures, and refrigerant handling practices. This difference increases both material costs and labor time.
The cheapest recharge option is not always the best solution. A low-cost refill may only provide temporary cooling if the system has an unresolved leak. A proper Honda CRV AC recharge should include diagnosis, correct refrigerant selection, and accurate charging to protect the AC system.
How Often Should a Honda CRV AC System Be Recharged?
A Honda CRV AC system does not need regular refrigerant recharging when the system works correctly. The air conditioning system uses a closed refrigerant circuit, which means the refrigerant should remain inside the system during normal operation. Unlike engine oil or fuel, refrigerant does not get consumed over time.
A Honda CRV AC recharge usually becomes necessary when the system loses refrigerant because of a leak or component failure. Common causes include damaged seals, worn service ports, cracked hoses, condenser damage, or compressor seal problems. If the refrigerant level drops repeatedly, the vehicle needs leak diagnosis instead of another recharge.
Many drivers assume that they should recharge the AC every year. However, annual recharging is not part of normal Honda CR-V maintenance. A properly sealed AC system can operate for many years without needing additional refrigerant. Regularly adding refrigerant without finding the cause can hide a larger problem.
Several signs indicate that the system may need inspection. These include weaker cooling performance, warm air from the vents, unusual compressor cycling, visible oil residue near AC components, or a noticeable decrease in cooling after a previous recharge. These symptoms suggest refrigerant loss or another AC system problem.
Proper maintenance helps reduce the chance of AC problems. Replace the cabin air filter according to the maintenance schedule. Keep the condenser area clean to support airflow. Run the AC system regularly to maintain compressor lubrication and monitor any unusual noises or changes in cooling performance.
A Honda CRV AC recharge should happen only when testing confirms that the refrigerant level is low. If the system requires frequent recharging, repair the cause of refrigerant loss instead of repeatedly adding more refrigerant.
What Is the Safest Way to Complete a Honda CRV AC Recharge?
The safest way to complete a Honda CRV AC recharge is to confirm the system condition before adding refrigerant. A proper recharge starts with diagnosis, not with connecting a refrigerant can. The correct process protects the compressor, prevents overcharging, and helps maintain reliable cooling performance.
First, confirm the correct refrigerant type and capacity. Check the under-hood label to identify whether the vehicle uses R-134a or R-1234yf. This step prevents refrigerant contamination and ensures that the AC system receives the correct charge. Each Honda CR-V model year may use different specifications, so vehicle-specific information matters.
Next, inspect the AC system for problems before recharging. Check the compressor, condenser, hoses, and service ports for damage or refrigerant leaks. A recharge cannot repair a leaking system. If refrigerant escapes after charging, the AC will lose cooling performance again and may require additional repairs.
Use the low-pressure service port when connecting recharge equipment. Monitor pressure readings, vent temperature, and compressor operation during the process. Avoid adding refrigerant only because a gauge shows a low reading. Proper diagnosis requires considering temperature conditions, refrigerant type, and overall system performance.
A DIY Honda CRV AC recharge works best when the system has a small refrigerant loss, the compressor operates normally, and no major leaks exist. Professional service becomes the safer option when the system is empty, repeatedly loses refrigerant, or requires leak testing and evacuation.
A successful recharge restores more than cold air. It protects the AC components and improves long-term reliability. By following the correct procedure, Honda CR-V owners can maintain efficient cooling while avoiding unnecessary repairs and repeated refrigerant loss.